
Virtual Camera software, commonly installed alongside video conferencing or streaming applications, sometimes remains on your system even after you no longer need it. Removing it can free up system resources, simplify your device management, and prevent unwanted camera options from cluttering your application settings. The following methods guide you through effectively removing Virtual Camera from Windows 11.
Method 1: Uninstall Virtual Camera via Settings App
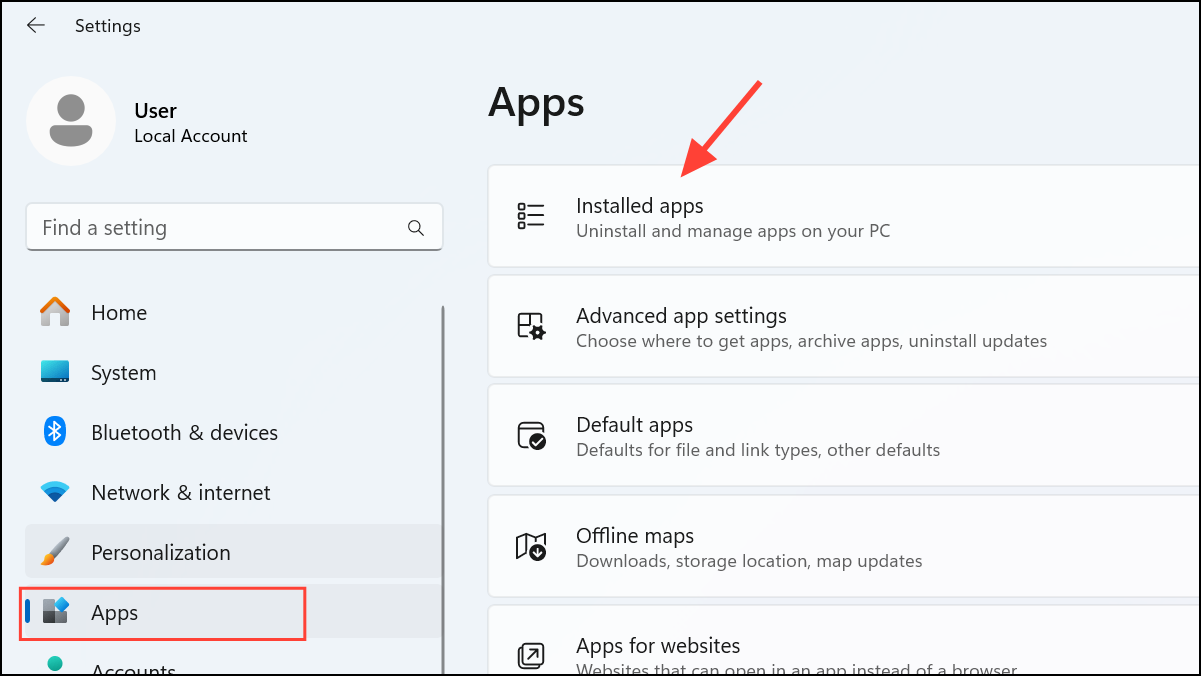
Step 1: Open the Settings app by clicking the Start menu and selecting the gear-shaped Settings icon. Alternatively, press Windows key + I.
Step 2: In the Settings window, select "Apps" from the left-hand menu, then click on "Installed apps" to view all installed software on your PC.
Step 3: Locate the Virtual Camera software from the list. You can use the search bar provided at the top to quickly find it by typing "Virtual Camera" or the exact name of the software.
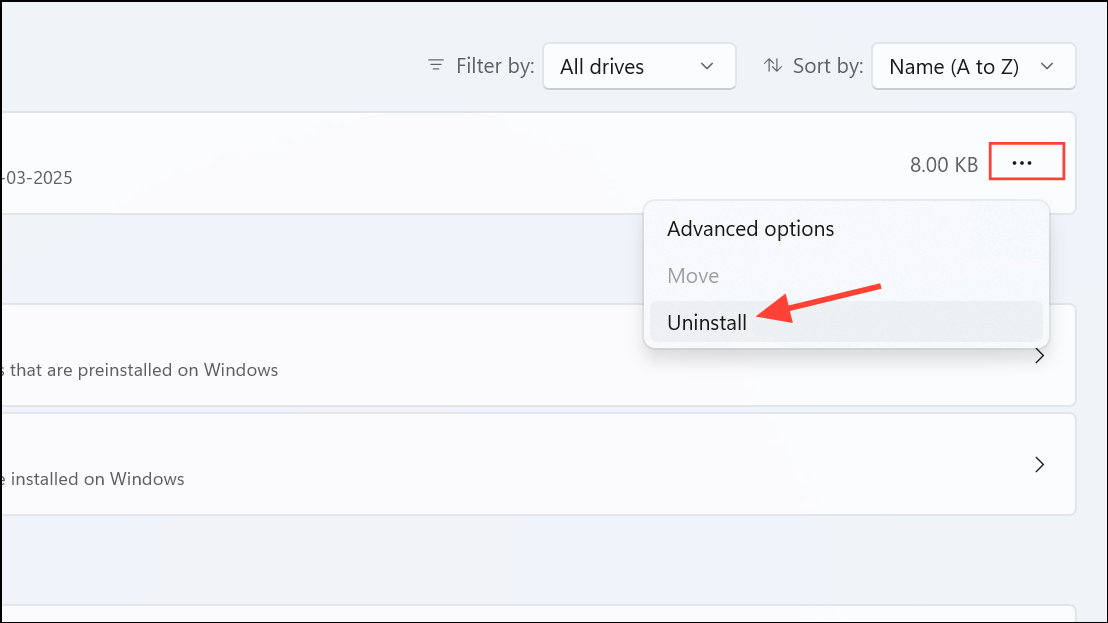
Step 4: Once you find the Virtual Camera app, click the three-dot menu icon next to it, then select "Uninstall." Confirm your choice when prompted by clicking "Uninstall" again.
Step 5: After the uninstallation completes, restart your computer to make sure all related files and settings are fully removed.
Method 2: Remove Virtual Camera via Device Manager
If the Virtual Camera device remains listed in your system even after uninstalling the software, you can remove it directly using Device Manager.
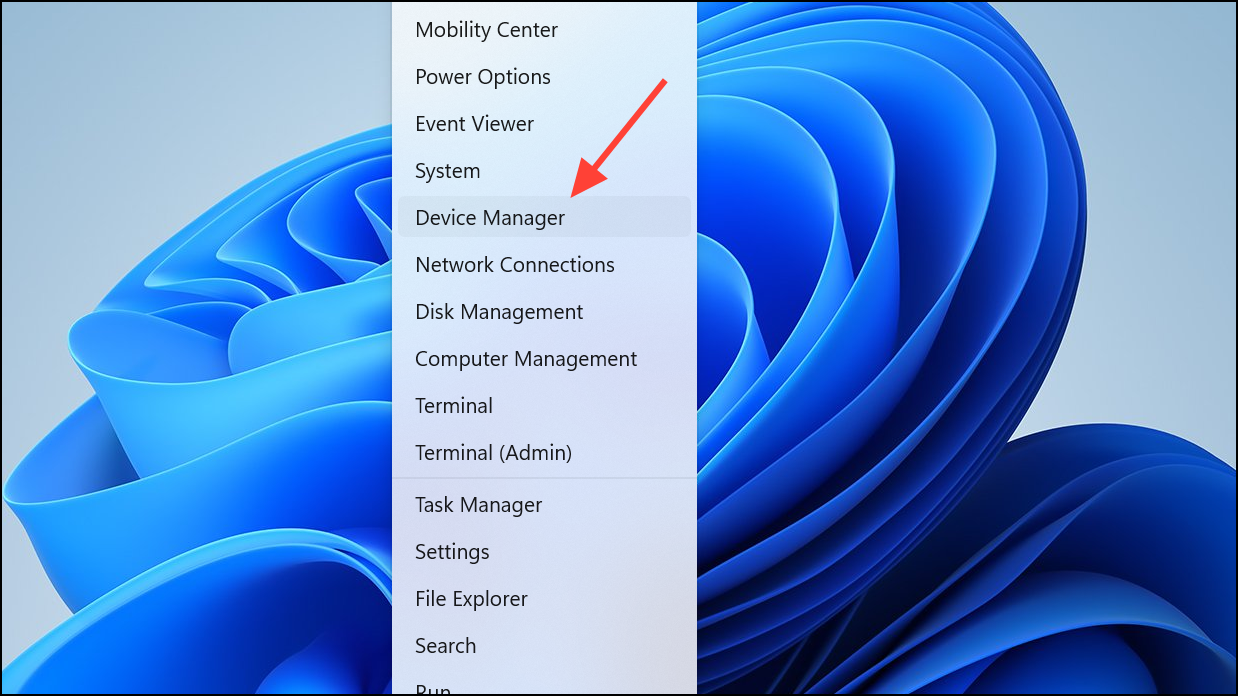
Step 1: Right-click on the Start button and select "Device Manager" from the context menu.
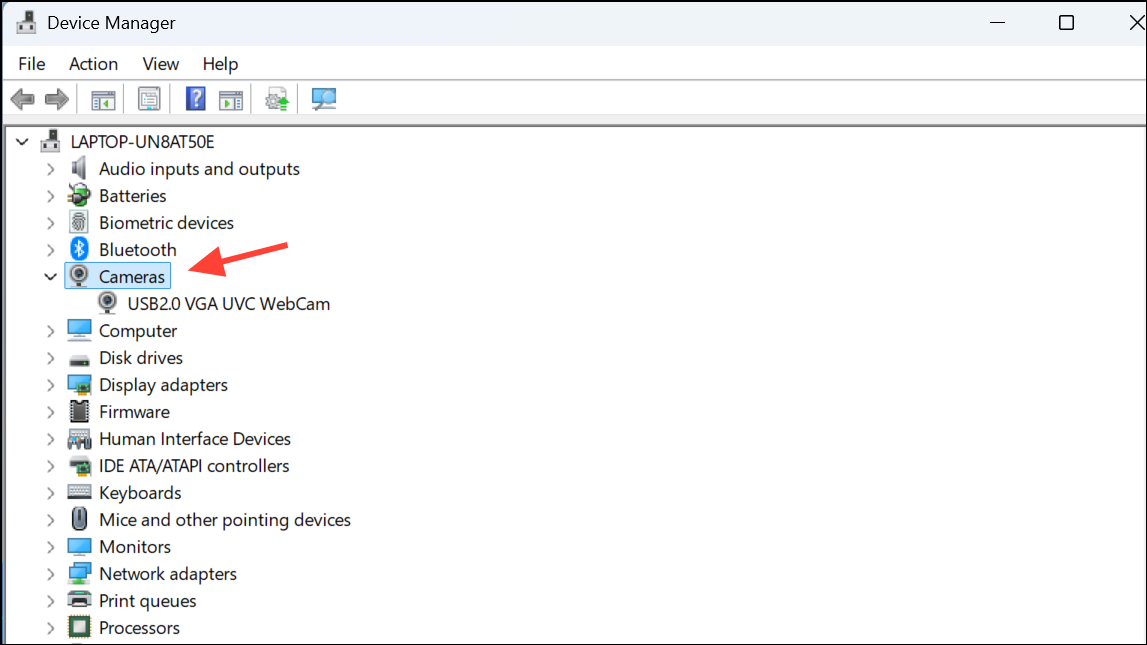
Step 2: Once the Device Manager window opens, expand the "Imaging devices" or "Cameras" category by clicking the arrow next to it.
Step 3: Locate the Virtual Camera entry, right-click on it, and select "Uninstall device."
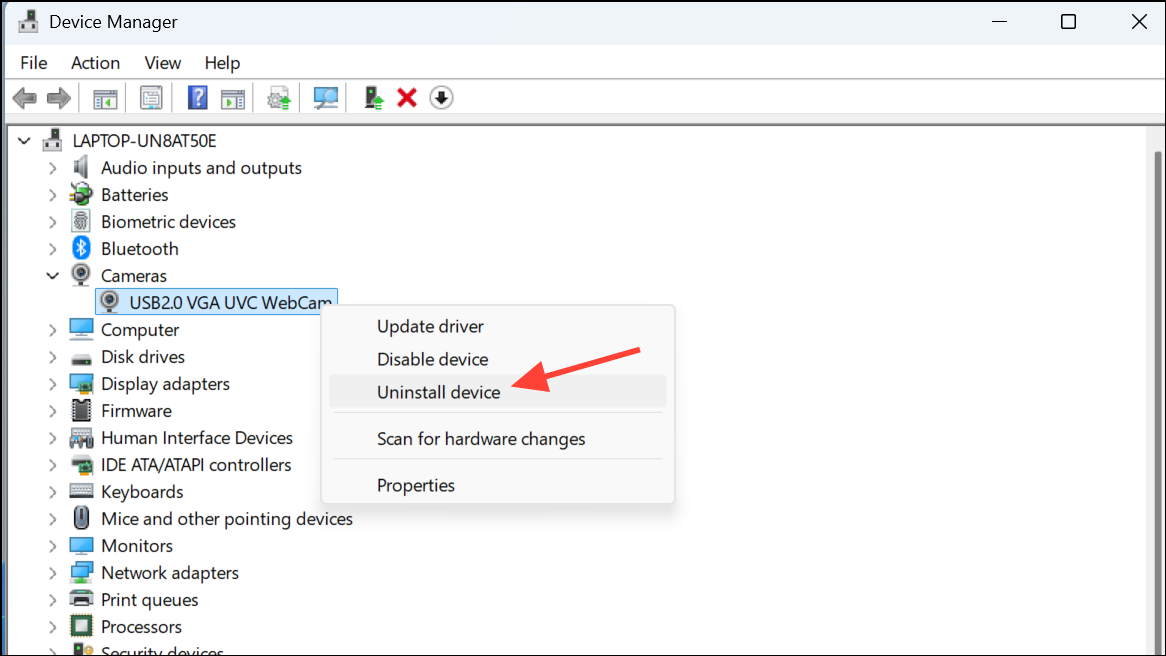
Step 4: When prompted, check the box labeled "Attempt to remove the driver for this device," then click "Uninstall."
Step 5: Restart your computer to finalize the removal process and clear any residual driver files.
Method 3: Use Control Panel to Uninstall Virtual Camera
For users preferring the traditional Control Panel approach, the following steps will help you uninstall the Virtual Camera software.
Step 1: Open Control Panel by searching for it in the Start menu search bar and clicking on the result.
Step 2: In the Control Panel window, under the "Programs" section, click "Uninstall a program."
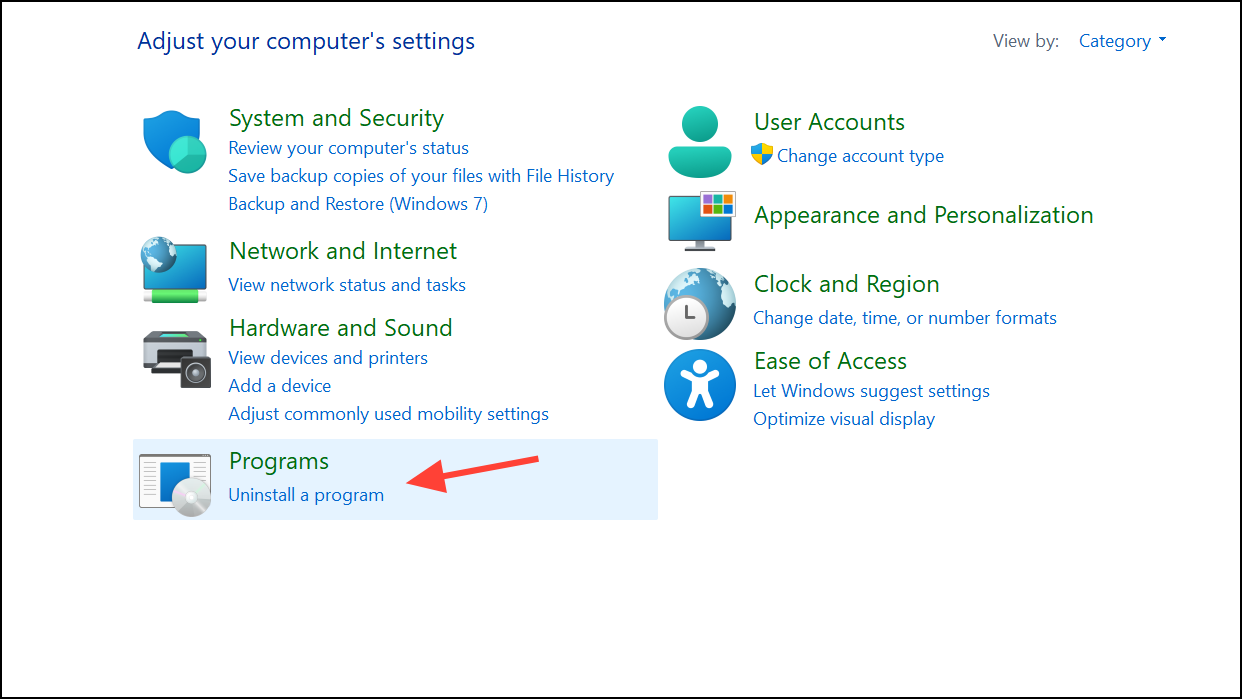
Step 3: Look through the list of installed programs to find the Virtual Camera software. Select it, then click "Uninstall" at the top of the list.
Step 4: Follow the on-screen prompts to complete the uninstallation process. Once done, restart your computer to ensure all components are fully removed.
Additional Steps: Removing Residual Files and Registry Entries
Sometimes, even after uninstalling, leftover files or registry entries remain. To ensure complete removal, consider manually deleting these remnants.
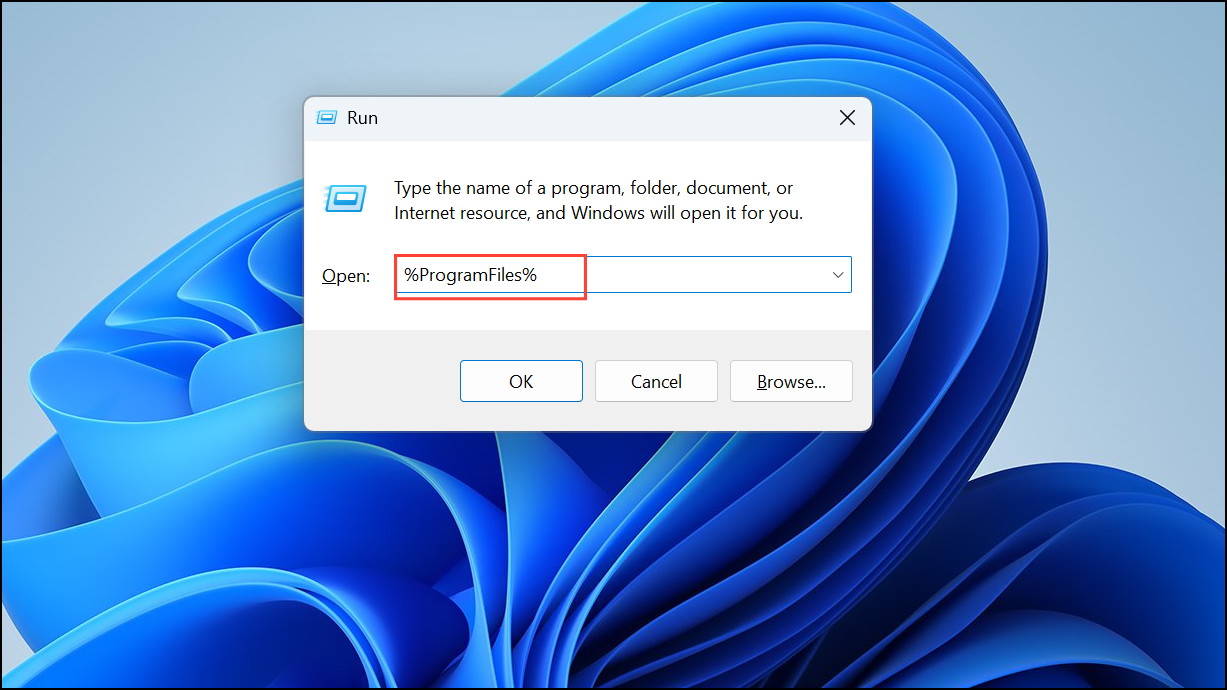
Step 1: Press Windows key + R to open the Run dialog box, type %ProgramFiles% and press Enter. Look for folders related to the Virtual Camera software and delete them.
Step 2: Repeat the previous step, but type %AppData% and press Enter. Again, remove any related folders.
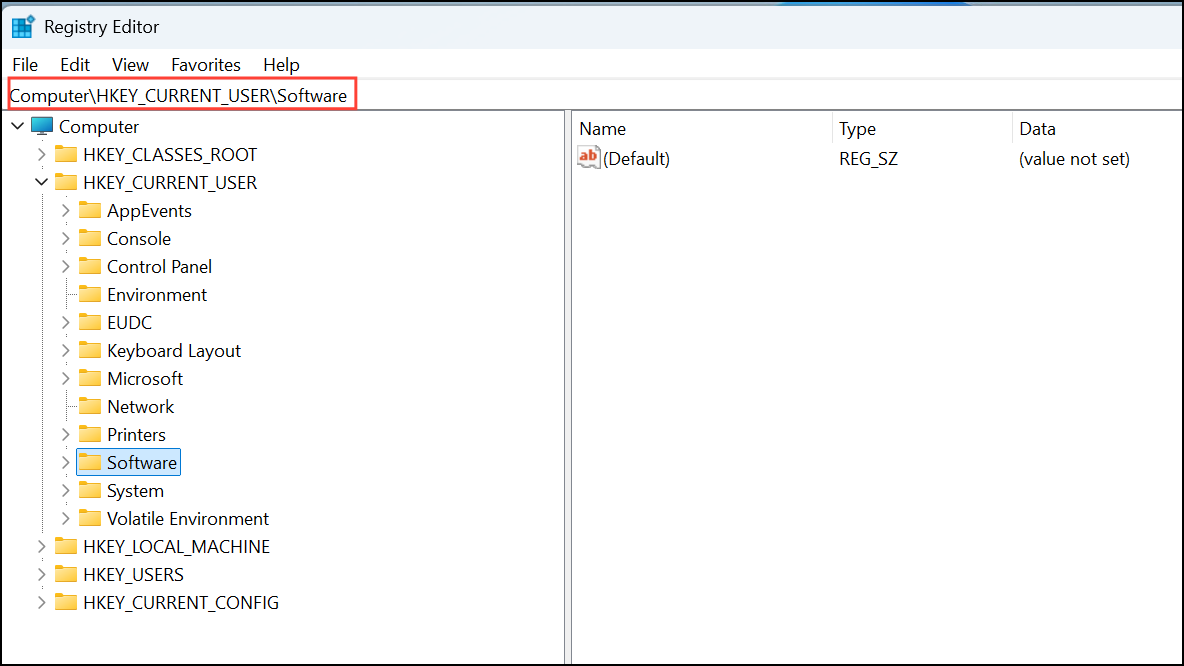
Step 3: To clean registry entries, press Windows key + R, type regedit, and press Enter to open Registry Editor. Be careful—editing the registry incorrectly can cause system instability.
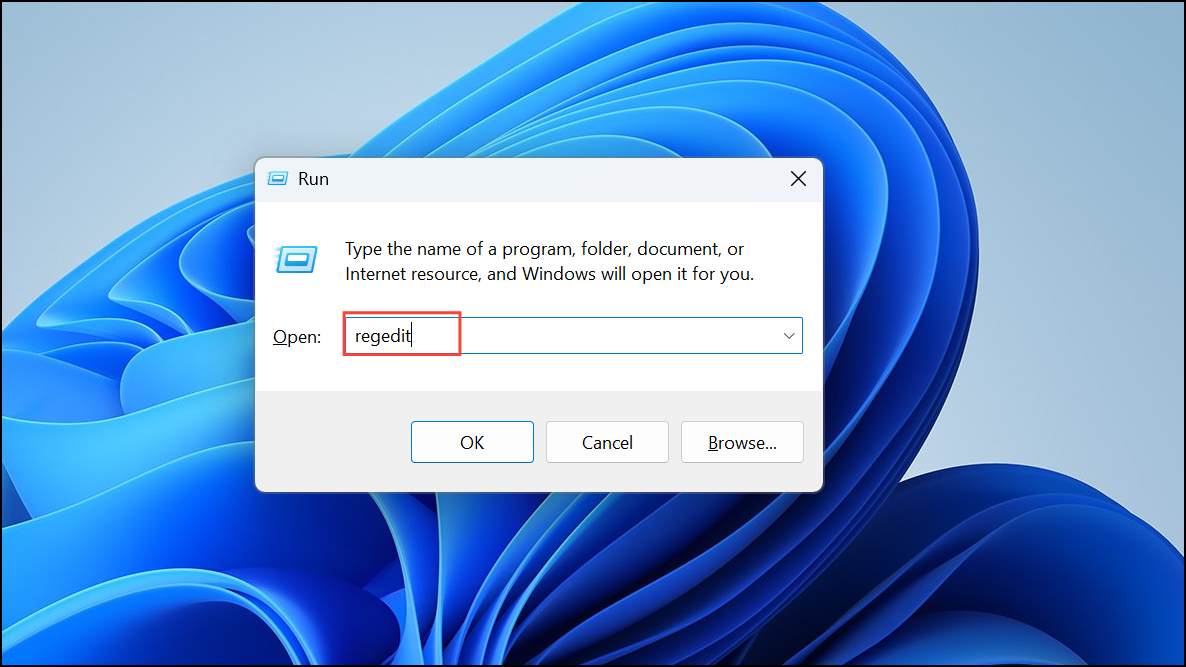
Step 4: Navigate to HKEY_CURRENT_USER\Software and HKEY_LOCAL_MACHINE\SOFTWARE to look for and remove keys associated with the Virtual Camera software.
With these straightforward methods, your Windows 11 system will be free from unwanted Virtual Camera software, streamlining your device's camera options and improving overall system organization.