Windows 11 comes equipped with a variety of command-line utilities, and one particularly useful tool is the chkdsk (Check Disk) command. This powerful utility allows users to scan and verify the logical integrity of their computer's storage devices. It's designed to identify and rectify file system errors, making it an invaluable asset for maintaining your Windows 11 system's health.
The chkdsk command offers multiple parameters, enabling users to customize its actions according to their specific needs. Whether you're experiencing performance issues or simply want to ensure your hard drive is in optimal condition, chkdsk is a tool worth mastering. This guide will walk you through the process of running chkdsk on your Windows 11 PC and help you make the most of its capabilities.
Benefits of using CHKDSK
The primary purpose of the chkdsk command is to examine the file system integrity on your hard drive and perform necessary repairs. Additionally, it can address bad sectors on your storage device.
Bad sectors come in two varieties: 'Soft bad sectors' and 'Hard bad sectors'. The chkdsk command can quickly resolve 'Soft bad sectors', which are logical in nature. While it can't repair 'Hard bad sectors' caused by physical damage, it can mark these sectors to prevent data writing and avoid unexpected issues.
Here are some common problems that chkdsk can potentially resolve:
- Difficulty reading data from the hard disk
- Boot errors
- Slow or degraded performance when accessing files
- Unexpected computer shutdowns during tasks
Run CHKDSK using File Explorer
For those less comfortable with command-line interfaces, Windows 11 provides a user-friendly method to run chkdsk directly from File Explorer.
- Open File Explorer by double-clicking the 'This PC' icon on your desktop or pressing
Windows + Eon your keyboard.

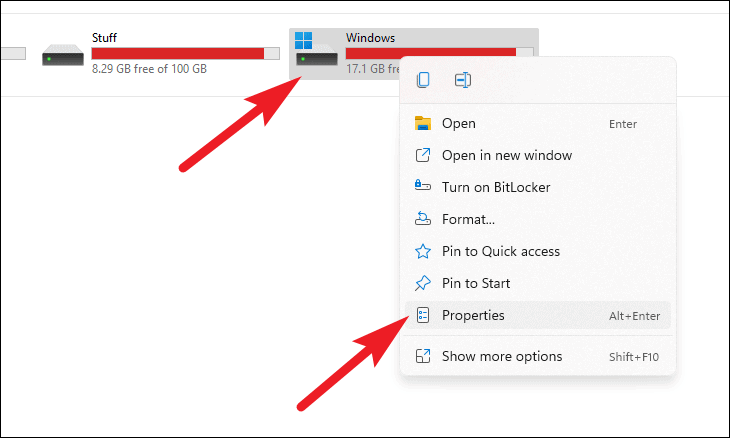
- Right-click on the drive you want to check and select 'Properties' from the context menu.
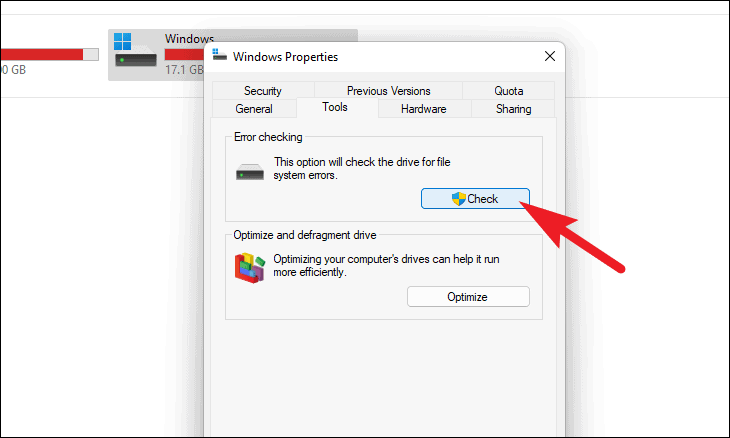
- In the 'Properties' window, switch to the 'Tools' tab and click the 'Check' button in the 'Error checking' section.
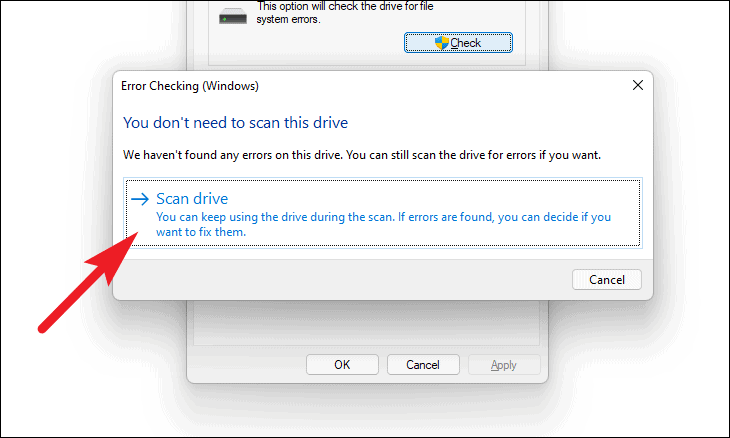
- If Windows doesn't detect any errors, you'll see a prompt stating so. To proceed with the scan anyway, click 'Scan drive'. Otherwise, click 'Cancel'.
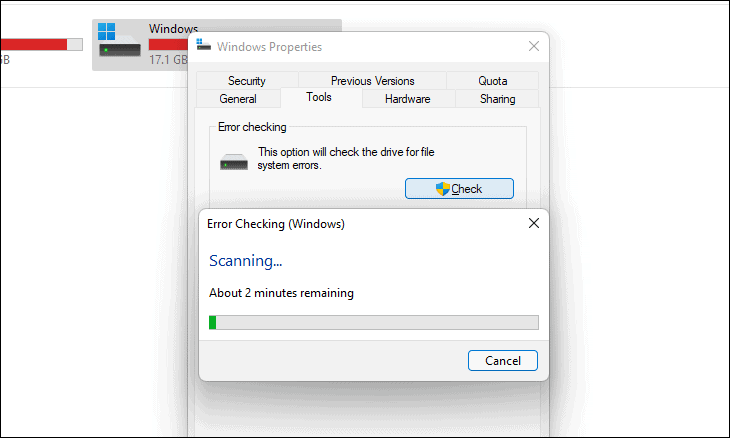
- The scanning process may take some time. Allow it to run in the background until completion.
While this method is straightforward, using the Command Prompt offers more control over the chkdsk command.
Run CHKDSK using Command Prompt
For users seeking greater flexibility and control, running chkdsk via Command Prompt is the preferred method.
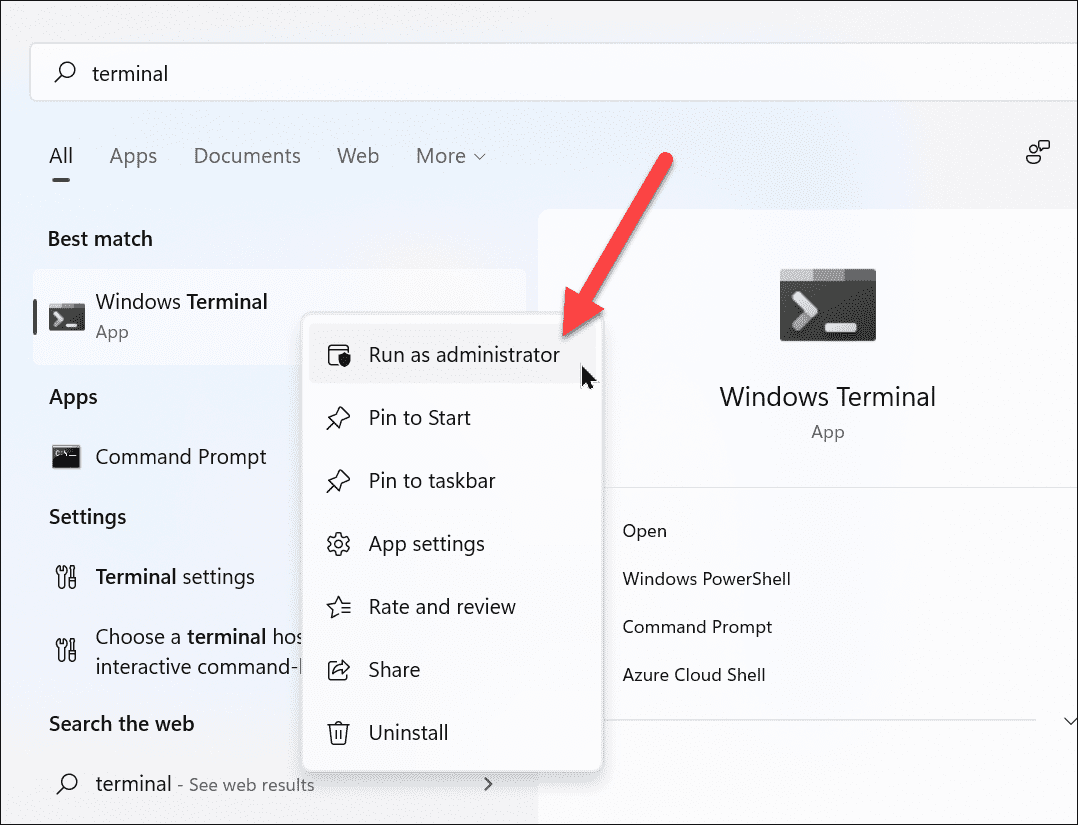
- Open Windows Terminal as an administrator. Search for 'Terminal' in the Start menu, right-click on 'Windows Terminal', and choose 'Run as administrator'.
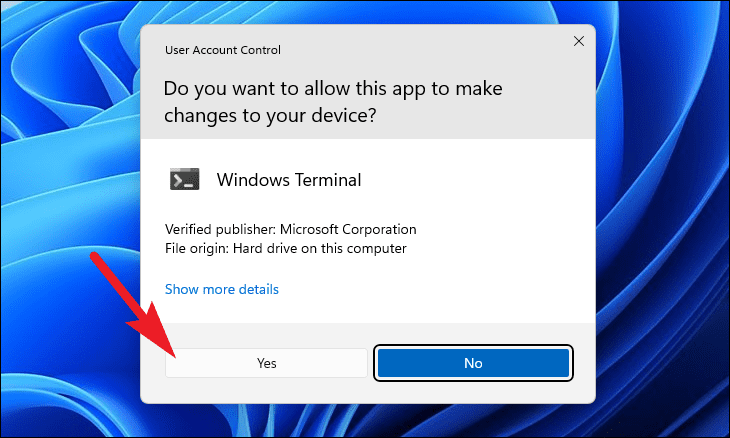
- If prompted by User Account Control (UAC), click 'Yes' to proceed.
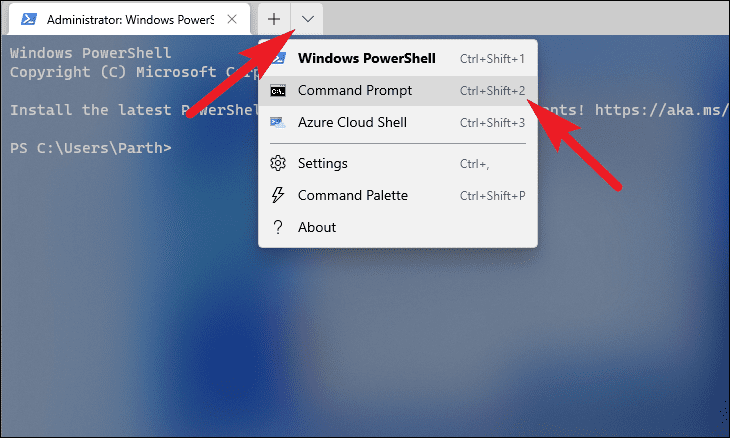
- In the Terminal window, click the downward arrow icon and select 'Command Prompt'. Alternatively, press
Ctrl + Shift + 2.
-
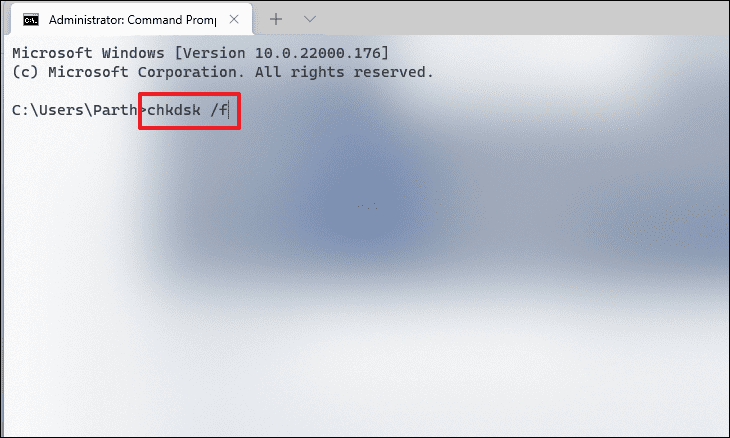
Type or paste the following command and press Enter:
chkdsk /f
- You may be prompted to schedule the
chkdskoperation for the next system boot. PressYto schedule orNto cancel.
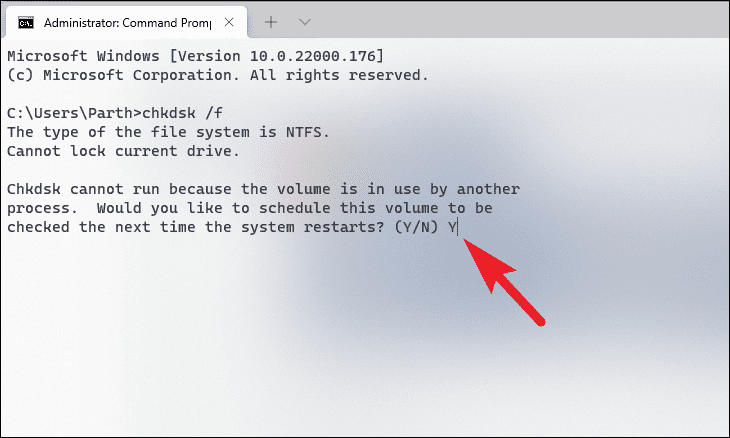
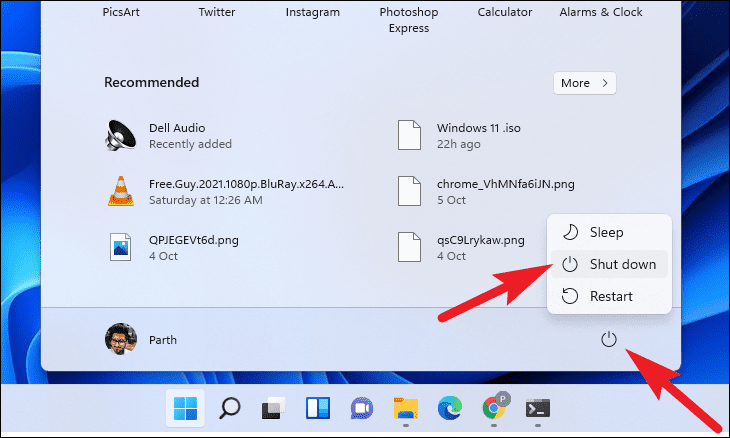
- Shut down your computer and restart it. The
chkdsktool will automatically begin scanning your storage volume before Windows boots up.
CHKDSK command parameters
The chkdsk command supports various parameters to customize its operation. Here's a comprehensive list of these parameters and their functions:
/f: Scans and fixes errors on the disk./v: Displays the name of each file in every directory during the check./r: Locates bad sectors and recovers readable information. Includes/ffunctionality./x: Force dismounts the volume if necessary before scanning and fixing./i: Performs a less vigorous check of index entries. (NTFS only)/c: Skips checking of cycles within the folder structure to reduce check time. (NTFS only)/l[:size]: Changes the log file size. Displays current size if used without the 'size' parameter. (NTFS only)/b: Re-evaluates bad clusters on the volume. Includes/rfunctionality. (NTFS only)/scan: Runs an online scan on the volume. (NTFS only)/forceofflinefix: (Used with /scan) Skips online repairs, queuing all defects for offline repair./perf: (Used with /scan) Increases scan priority and system resource usage for faster completion. (NTFS only)/spotfix: Runs spot-fixing on the volume. (NTFS only)/sdcleanup: Performs garbage collection on unnecessary security descriptor data. (NTFS only)/offlinescanandfix: Runs an offline scan and fixes the volume./freeorphanedchains: Frees orphaned cluster chains instead of recovering their contents. (FAT/FAT32/exFAT only)/markclean: Marks the volume as clean if no corruption is detected. (FAT/FAT32/exFAT only)/?: Displays help and lists all supported parameters for CHKDSK.
CHKDSK exit codes
After completing its operation, chkdsk returns exit codes to indicate the outcome:
- 0: No errors found.
- 1: Errors were found and fixed.
- 2: Performed disk cleanup or skipped cleanup due to missing
/fparameter. - 3: Unable to check the disk, or errors couldn't be fixed (possibly due to missing
/fparameter).
By understanding these parameters and exit codes, you can effectively utilize the chkdsk command to maintain your Windows 11 system's storage health and resolve various disk-related issues.

