Having multiple audio devices connected to your Windows 11 PC can sometimes lead to confusion when selecting the right one for your current task. To streamline your experience, it’s helpful to rename your audio devices so you can easily identify them when switching outputs or inputs.
Rename audio devices via the Settings menu
Follow these steps to rename your audio devices using the Windows 11 Settings:
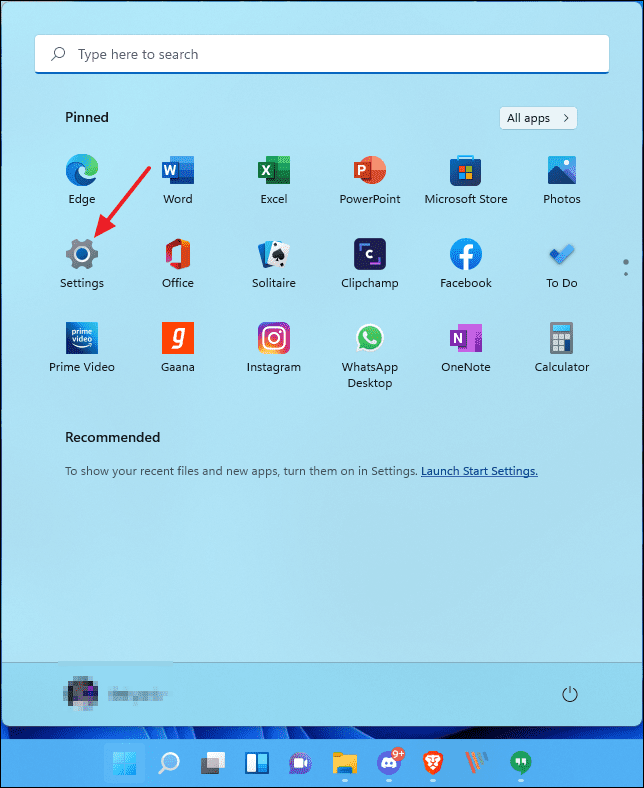
- Press the
Windowskey to open the Start menu, then select Settings. Alternatively, you can pressWindows+Ito open Settings directly.
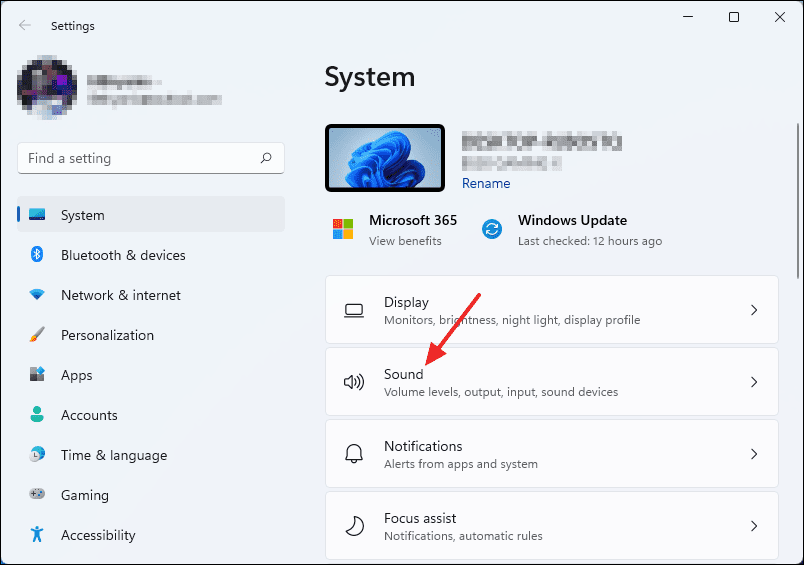
- In the Settings window, click on Sound under the System section.
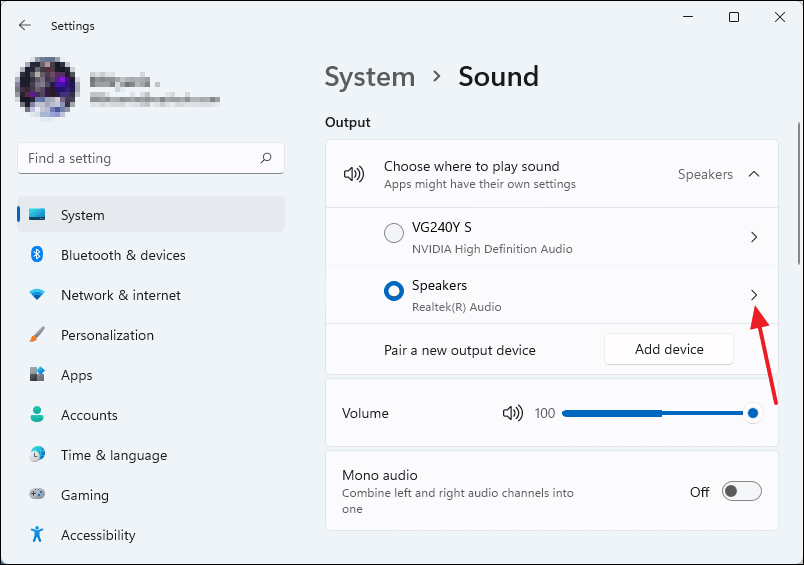
- Under the Output section, you’ll see a list of your installed audio output devices. Click on the right-facing arrow next to the device you want to rename (e.g., Speakers).
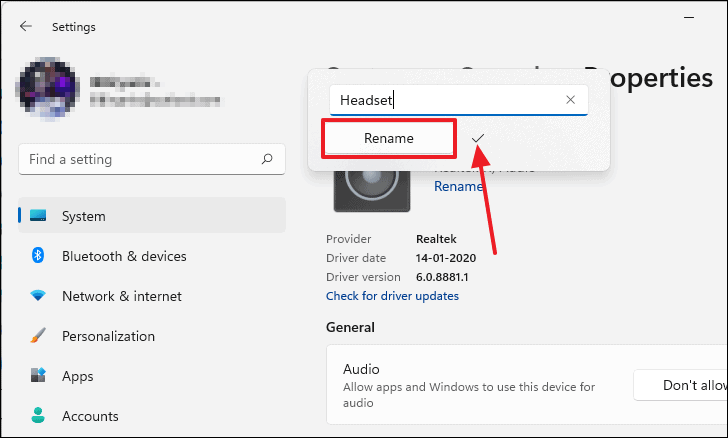
- In the device’s properties page, click on the Rename button located below the device’s current name.
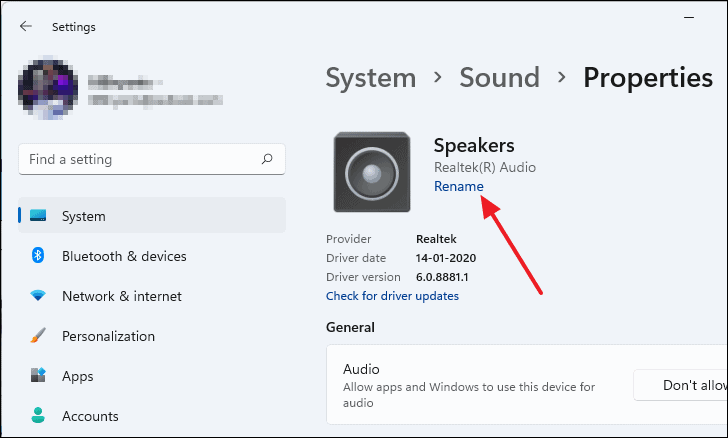
- Enter the new name for your audio device (for example, rename it to Headset if it’s a headset driver), then click Rename. A checkmark will appear next to the button, indicating the name has been successfully changed.
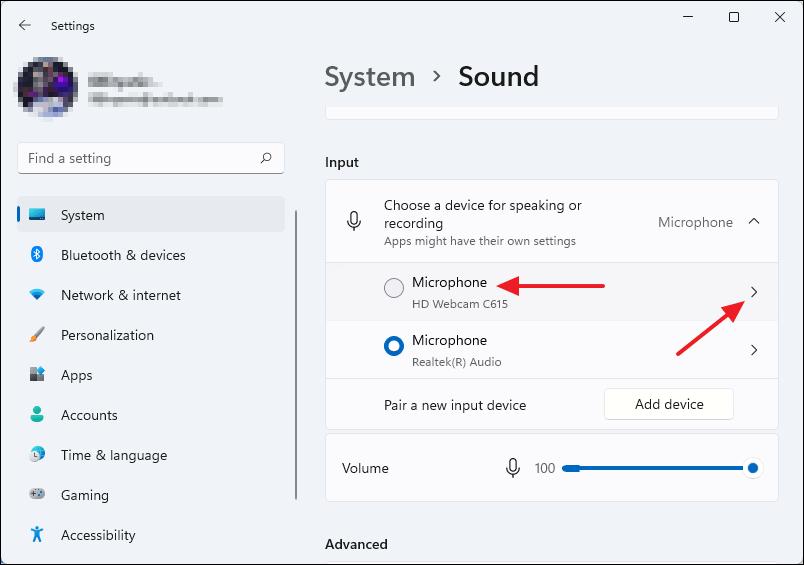
You can also rename your input devices using the same method:
- Back in the Sound settings, scroll down to the Input section to find your installed input devices. Click on the arrow next to the input device you wish to rename.
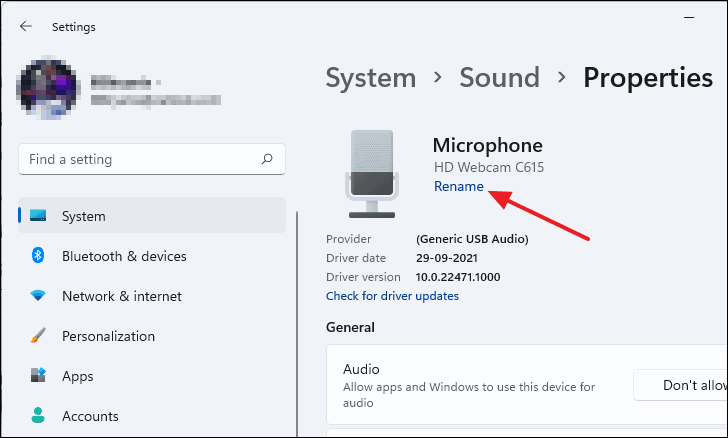
- Click the Rename button under the device’s name.
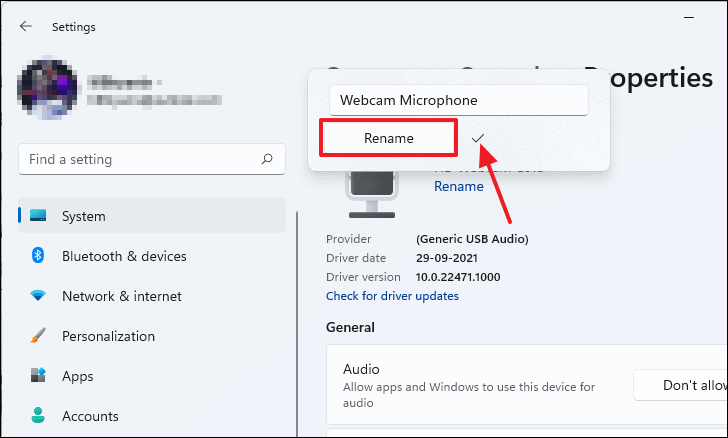
- Type in the new name for your input device and click Rename. A checkmark will confirm the change.
You’ve successfully renamed your audio devices using the Settings menu.
Related: How to Rename Your PC in Windows 11
Rename audio devices via the Control Panel
If you prefer using the Control Panel, you can rename your audio devices there as well:
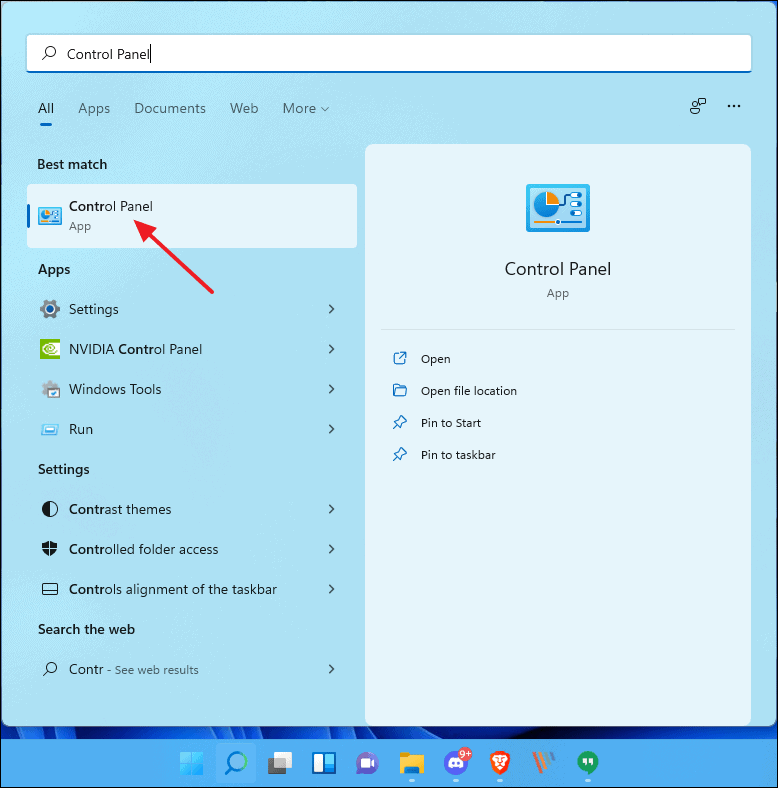
- Open the Control Panel by typing Control Panel in the Windows Search and selecting it from the results.
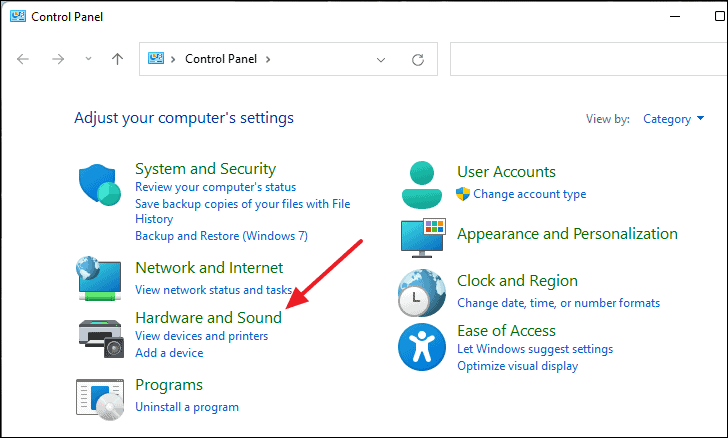
- In the Control Panel, click on Hardware and Sound.
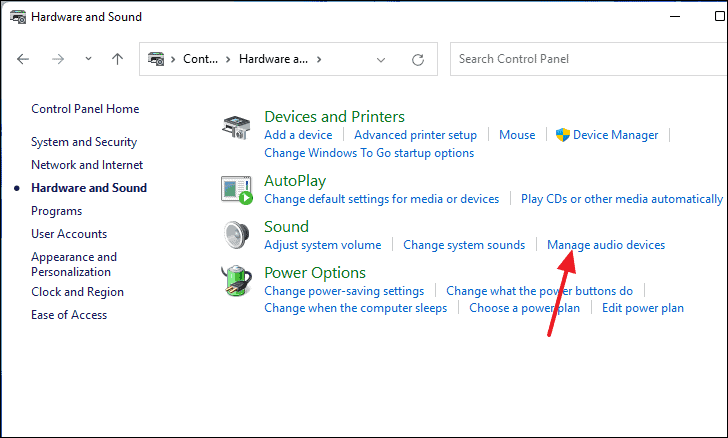
- Under the Sound section, click on Manage audio devices.
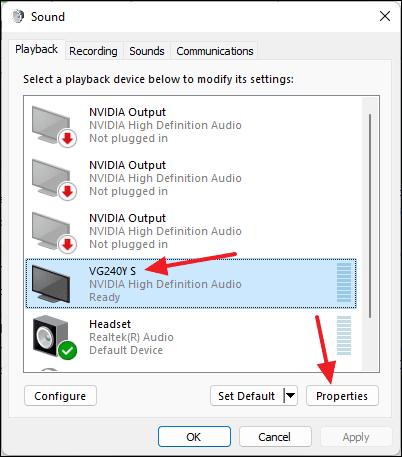
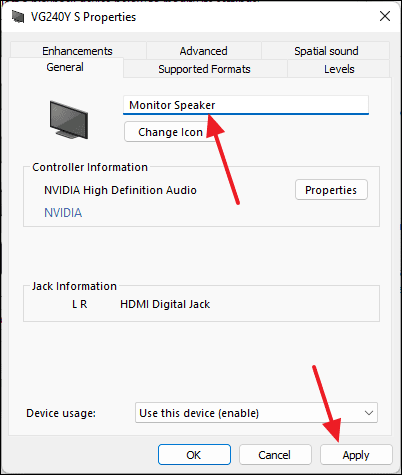
- In the Sound window, go to the Playback tab to see your output devices. Select the device you want to rename and click on Properties at the bottom right.
- In the device properties window, enter the new name for your audio device in the text field at the top, then click Apply to save the changes.
To rename input devices:
- Switch to the Recording tab to view your input devices. Select the device you wish to rename and click on Properties.
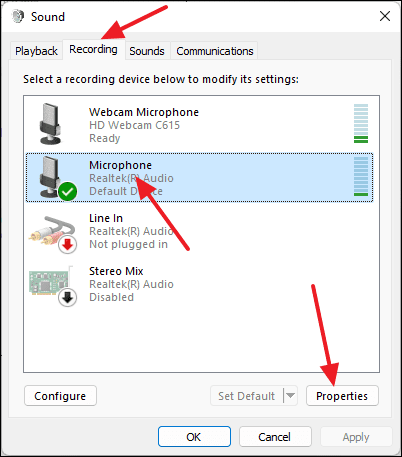
- Enter the new name for your input device and click Apply to confirm the change.

By renaming your audio devices, you can easily identify and select the correct input and output devices, enhancing your overall user experience on Windows 11.