Microsoft Teams has become a pivotal tool for facilitating communication and collaboration among teams, both within organizations and with external partners. One of its key features is the ability to schedule meetings, allowing users to plan discussions, presentations, and collaborative sessions in advance. This guide will walk you through the various ways to schedule a meeting in Microsoft Teams, ensuring you can choose the method that best fits your needs.
Scheduling a meeting from Microsoft Teams
Step 1: Launch the Microsoft Teams desktop application on your computer or navigate to teams.microsoft.com in your web browser. Sign in with your Microsoft account if prompted.
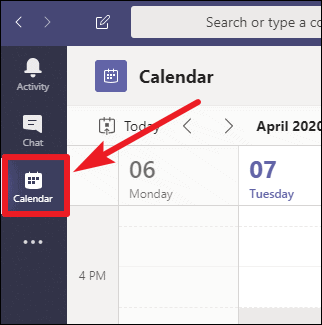
Step 2: In the left-hand navigation pane, click on the Calendar icon to access your calendar within Teams.
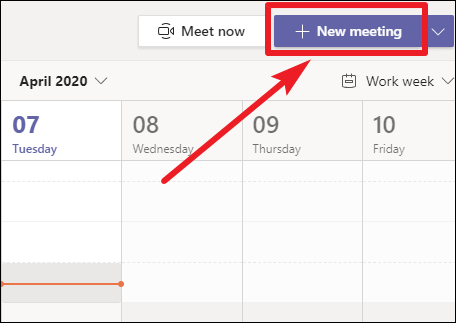
Step 3: At the top right corner of the calendar view, click on the New Meeting button to open the meeting scheduler.
Step 4: In the new meeting window, enter a title for your meeting in the Add title field. This should accurately reflect the purpose of the meeting.
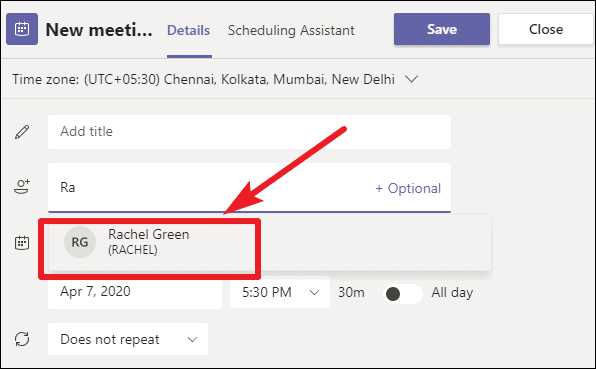
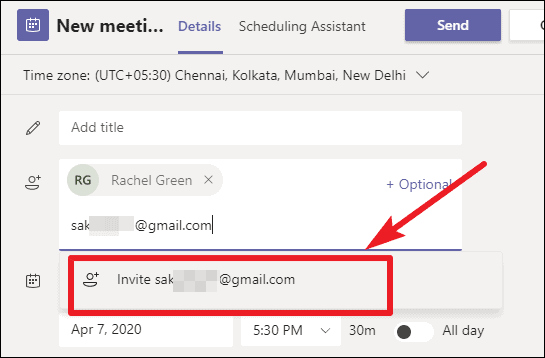
Step 5: Invite attendees by typing their names or email addresses in the Add required attendees box. Teams will suggest contacts as you type. You can invite both internal team members and external guests by entering their email addresses.
Step 6: Set the date and time for your meeting. Use the calendar picker to select the date, and the dropdown menus to set the start and end times. If the meeting is recurring, use the Does not repeat dropdown to choose the appropriate frequency, such as daily, weekly, or custom intervals.
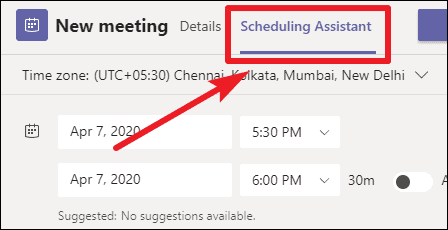
Step 7: To find a time that works for all attendees, click on the Scheduling Assistant at the top of the window. This tool displays the availability of all participants, helping you choose a suitable time.
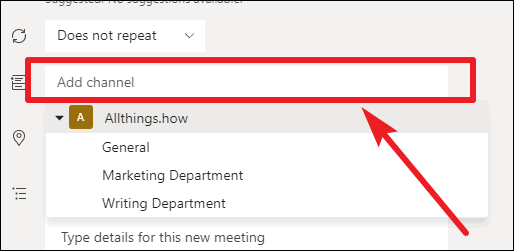
Step 8: If you wish to host the meeting within a particular channel so that all team members can join and participate, click on the Add channel field and select the desired team and channel from the dropdown menu. Leaving this field blank will keep the meeting private to the invited attendees.
Step 9: Add any additional details or an agenda in the meeting description box to inform attendees about the meeting's purpose and topics of discussion.
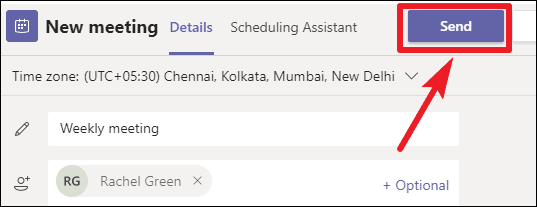
Step 10: Once all the details are filled in, click on the Send button at the top right corner to schedule the meeting and send invitations to the attendees.
Scheduling a meeting from Outlook
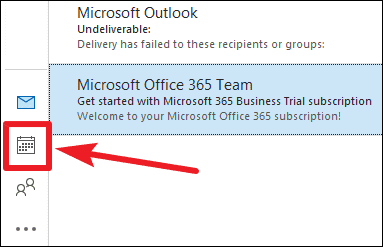
Step 1: Open the Microsoft Outlook application on your computer. If you're not already in the calendar view, click on the Calendar icon located at the bottom of the left navigation pane.
Step 2: In the Outlook toolbar, click on the New Teams Meeting button. This option is available if the Microsoft Teams add-in is installed in Outlook by default.
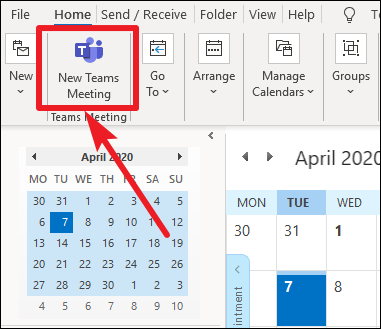
Step 3: A new meeting invitation window will open. Enter the email addresses of your attendees in the To field.
Step 4: Add a subject for the meeting in the Subject field, providing a clear description of the meeting's purpose.
Step 5: Set the start and end times for the meeting using the date and time selectors.
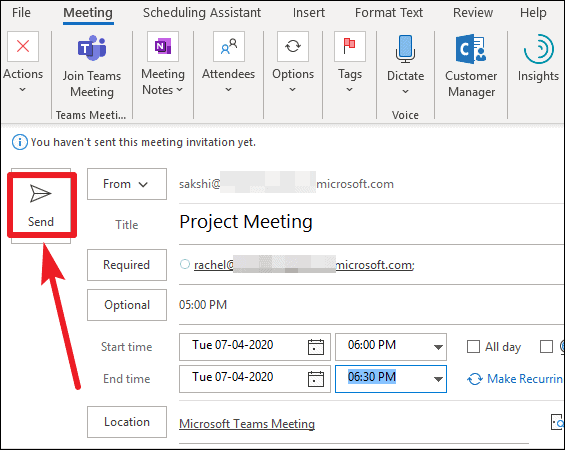
Step 6: If necessary, add any additional information or an agenda in the body of the invitation to provide context to the attendees.
Step 7: Click on the Send button to dispatch the meeting invitation to all attendees. The meeting will be added to your Outlook and Teams calendars.
Note: When scheduling a meeting from Outlook, you cannot select a Teams channel to host the meeting. The meeting will be private and accessible only to the invited participants.
Scheduling a meeting as a Microsoft Teams Free user
Step 1: Open the Microsoft Teams desktop application or visit teams.microsoft.com in your web browser. Sign in with your Microsoft account.
Step 2: In the left navigation pane, click on the Meetings or Calendar option. If you don't see this option, ensure your Teams application is updated to the latest version.

Step 3: Click on the Schedule a Meeting button to open the meeting scheduler.

Step 4: Enter a title for your meeting and select the date and time for the meeting.
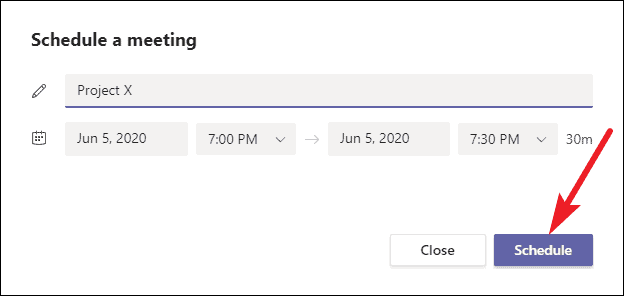
Step 5: Click on the Schedule button to create the meeting.
Step 6: After scheduling, you'll be provided with options to share the meeting invitation. You can copy the meeting link to share via email or messaging apps, or add the meeting to your Google Calendar or Outlook Calendar.
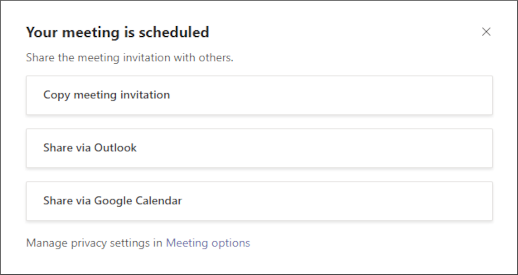
Important: Be sure to copy the meeting information before closing this window, as you may not be able to access it again later. Keep the meeting link handy for yourself and for inviting others.
Note: As a free user, you can schedule private meetings but not channel meetings. Only those with the meeting link can join your scheduled meeting.
Scheduling meetings in Microsoft Teams is a straightforward process, whether you're using the Teams application or Outlook. By following these steps, you can efficiently organize meetings with colleagues and external guests, keeping everyone informed and aligned.

