Microsoft Teams offers a versatile platform for teams to collaborate and communicate seamlessly, whether they are working remotely or in different parts of the world. With capabilities like chat, file sharing, video conferencing, and integration with various apps, it consolidates all your team's needs into a single workspace. The free version of Microsoft Teams provides access to these features across desktop apps for Windows, Mac, and Linux, as well as web and mobile apps for Android and iOS.
How to Set Up Microsoft Teams
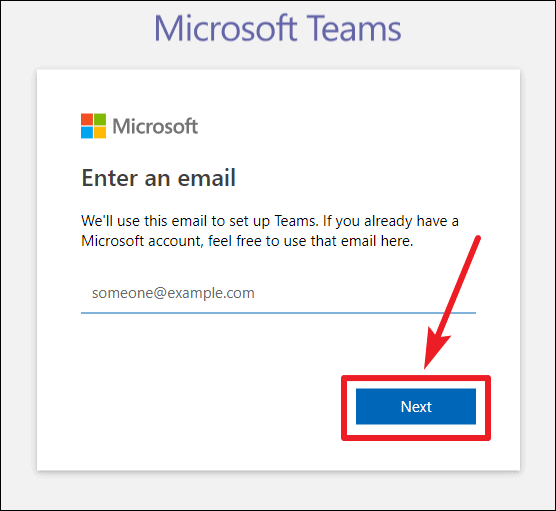
To begin setting up Microsoft Teams, navigate to teams.microsoft.com and enter your email address to create an account. If you have an existing Microsoft account, you can use that email address to sign in.
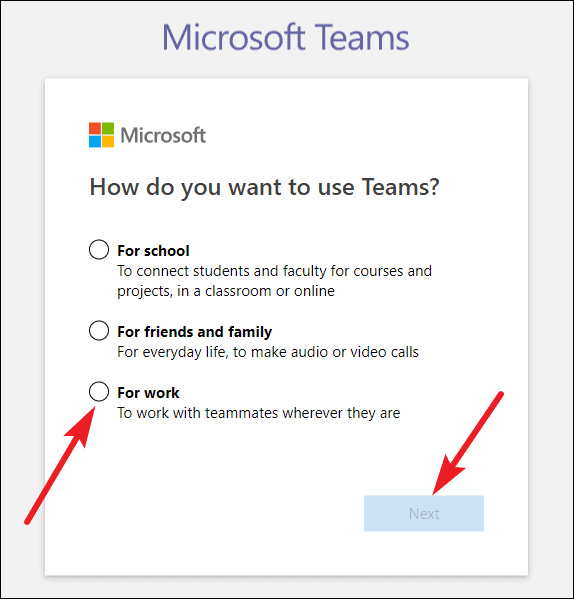
Upon proceeding, you'll be prompted with the question, "How do you want to use Teams?" You'll see three options: For school, For friends and family, and For work. Choose the option that best fits your intended use. To set up Teams for your workplace or organization, select For work and click on Next.
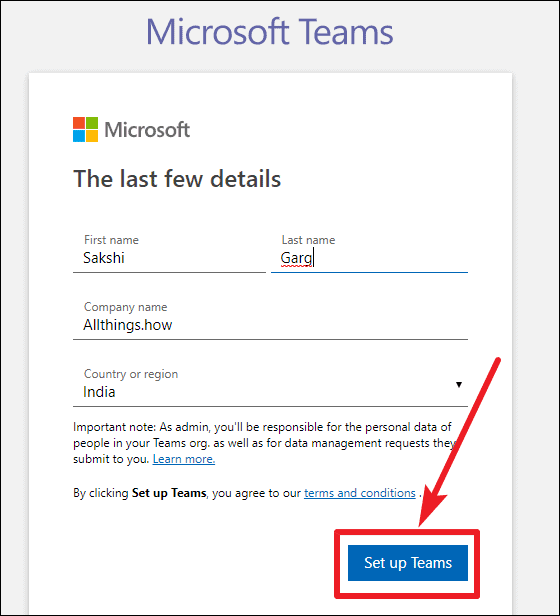
You'll be asked to sign in using your Microsoft account. If you don't have one, you can create a new account using the email address you provided. After signing in, enter your first and last name, along with the name of your organization. Your country or region should already be selected based on your location. Click on Set up Teams to proceed.
Microsoft Teams will now create your organization within the platform. This process may take a few moments. Once the setup is complete, you'll be given the option to either Download the Windows app or Use the web app instead. While both options provide access to Teams' features, downloading the desktop app is recommended for regular use, as it offers better performance for features like screen sharing.
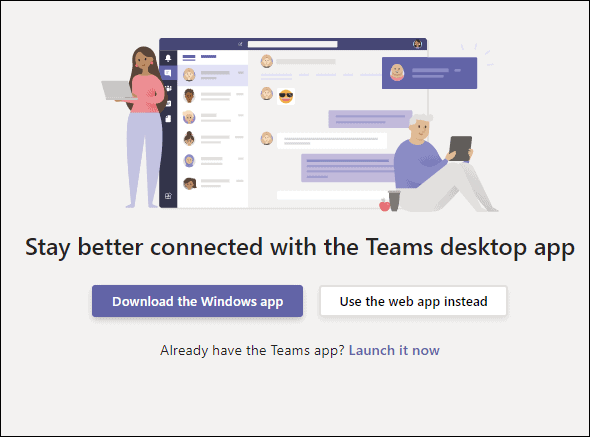
The interface and functionality remain consistent across the desktop and web apps, so you can choose the option that best suits your needs.
How to Invite People to Your Organization in Teams
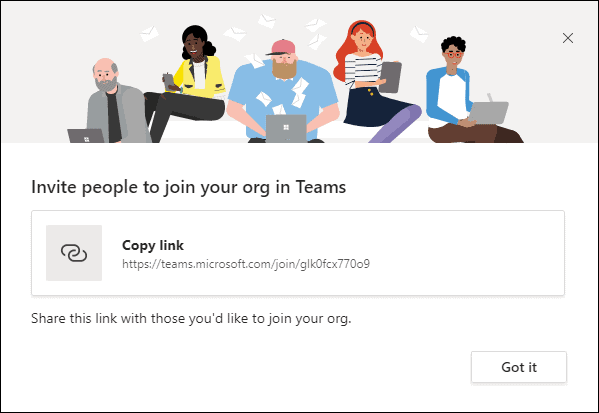
After setting up your organization, you'll receive an email from Microsoft Teams containing a link that you can share with others. This link is also displayed when you first open your Teams account and can be accessed at any time from within the app. Share this link with your colleagues or team members; when they use it, you'll receive a request from them to join your organization.
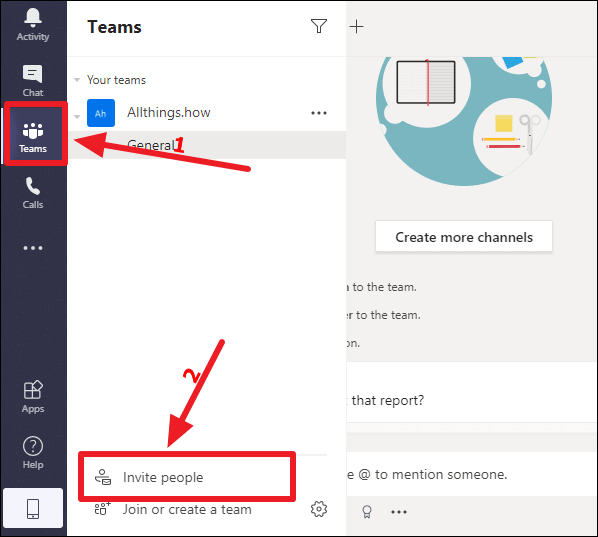
To approve join requests from your teammates, open the Teams app and click on the Invite people option. This is typically found on the bottom left corner of the app interface.
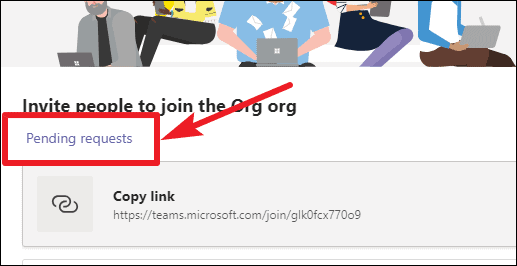
Next, select the Pending requests tab to view all incoming requests and invitations.
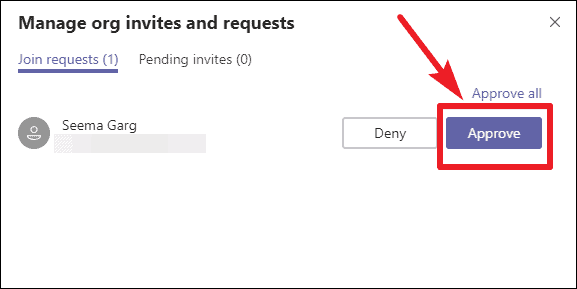
Locate the request from your colleague and click on the Approve button next to their name to add them to your organization.
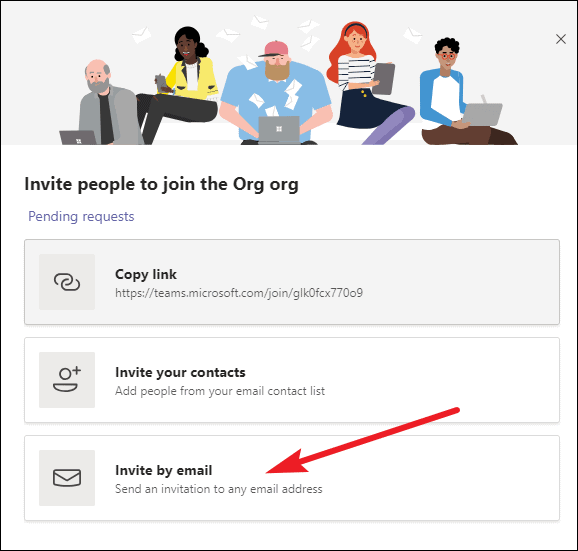
You can also invite people directly via email or from your contact list. In the Teams app, click on the Invite people option, and then choose Invite by email. Enter the email addresses of your team members and click on Send invites. These invitations will appear under the Pending invites section until they are accepted.
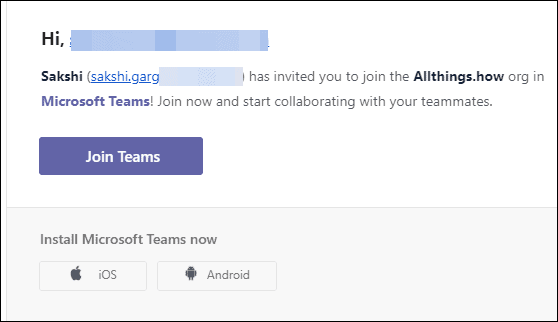
Your colleagues will receive an email invitation to join your organization in Microsoft Teams. When they click on the Join Teams button in the email, they'll be guided through the process of setting up their account if they don't have one already. Once completed, they'll become part of your organization on Teams.
How to Use Microsoft Teams
With your organization set up and team members added, you can start leveraging the features of Microsoft Teams to enhance collaboration.
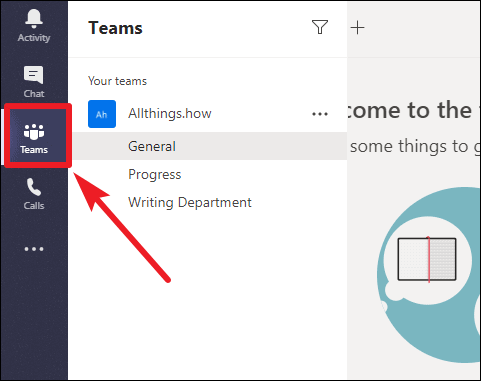
Step 1: Open the Microsoft Teams app and click on the Teams icon on the left-side toolbar. This section displays all the teams that you are currently a part of.
Creating Teams
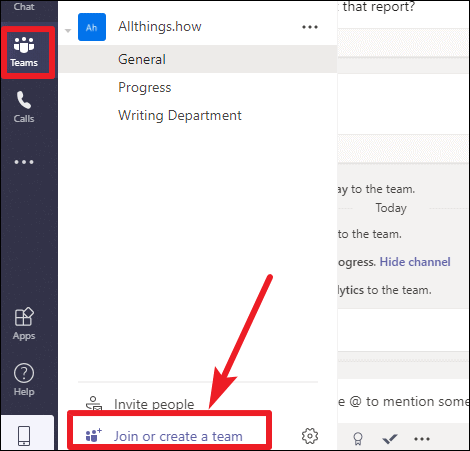
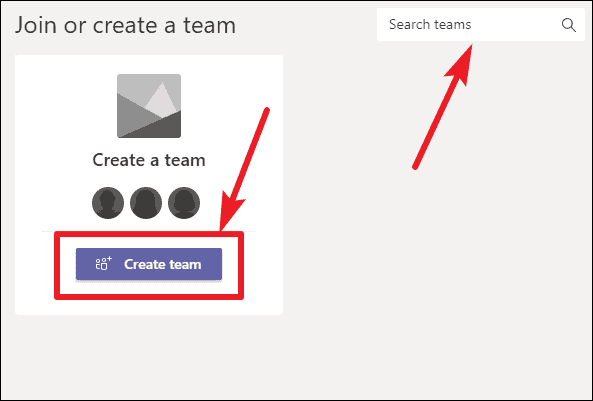
Step 2: To create a new team or join an existing one, scroll to the bottom of the Teams list and click on Join or create a team.
Step 3: Click on Create team to start a new team. If you're looking to join an existing team, use the Search teams field to find it.
Managing Teams
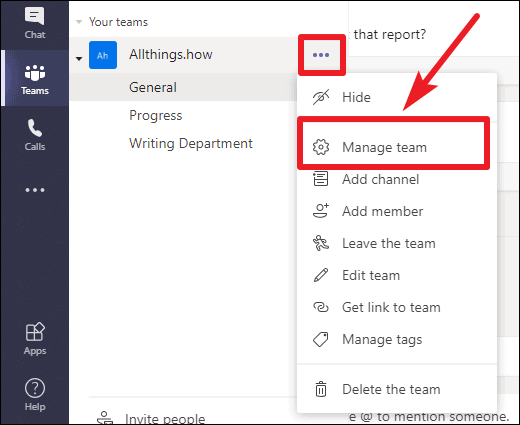
Step 4: To manage a team, click on the More options (three dots) next to the team's name and select Manage team. This allows you to oversee team members, adjust settings, and manage permissions. The options available may vary depending on whether you're an owner or a member of the team.
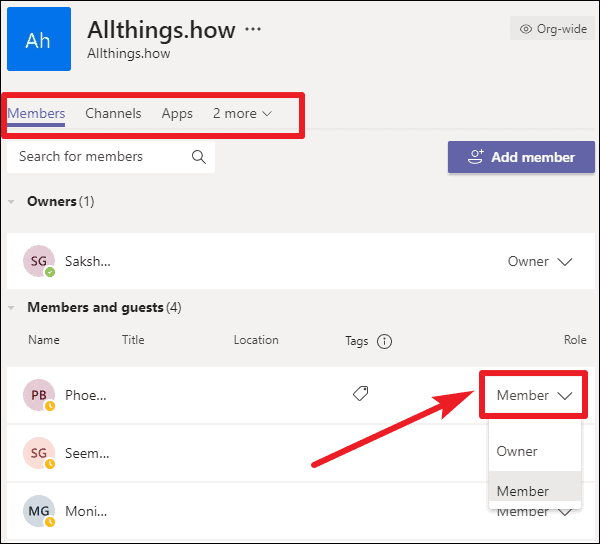
Step 5: Within the management screen, you can add or remove members, create new channels, and assign roles. To promote a member to an owner, click on the dropdown next to their role and select Owner. This grants them administrative privileges within the team.
Using Team Channels
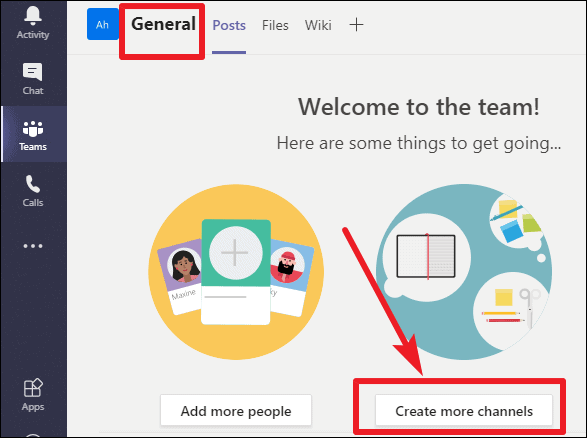
Step 6: Teams are organized into channels, which are dedicated spaces for specific topics, projects, or departments. Every team has a General channel by default. To create additional channels, click on the Create more channels button within the General channel, or select Add channel from the More options menu next to the team name.
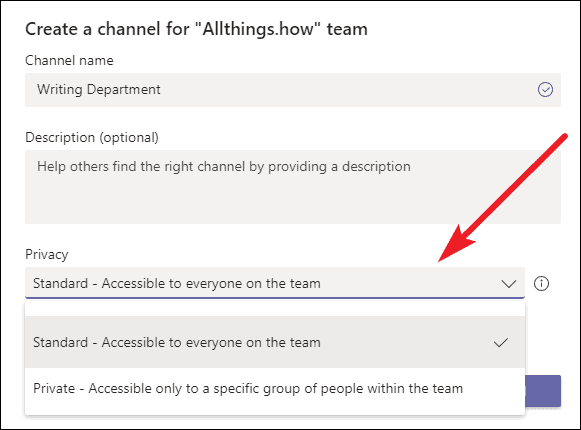
Step 7: When creating a channel, you can set its privacy level. Choose Standard to make it accessible to everyone on the team, or Private to restrict access to specific team members.
Managing Tabs in Team Channels
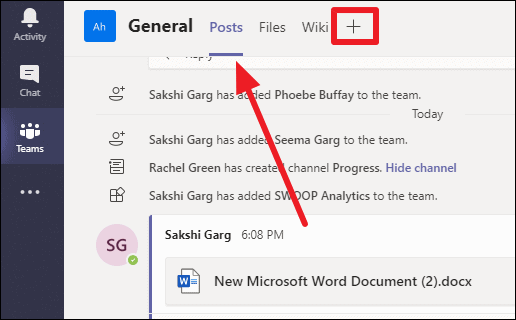
Step 8: Channels contain Tabs at the top, providing quick access to posts, files, and other tools. By default, each channel includes Posts, Files, and Wiki tabs. To add more tabs, click on the + icon and select the app or service you want to integrate.
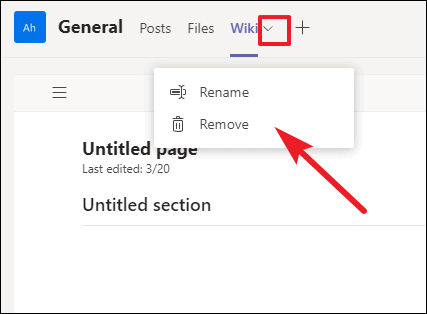
Step 9: To rename or remove a tab, click on the dropdown arrow next to the tab's name and choose the appropriate option.
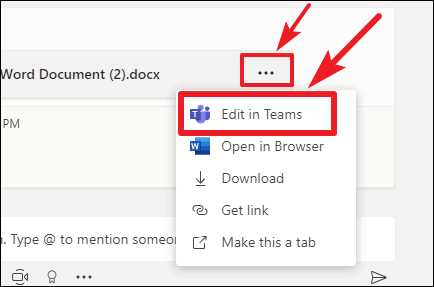
Step 10: Collaborate on shared files within a channel by clicking on the file in the Posts tab. Use the Edit in Teams option to make changes directly within the app, allowing multiple team members to work on the document simultaneously and discuss edits in real-time.
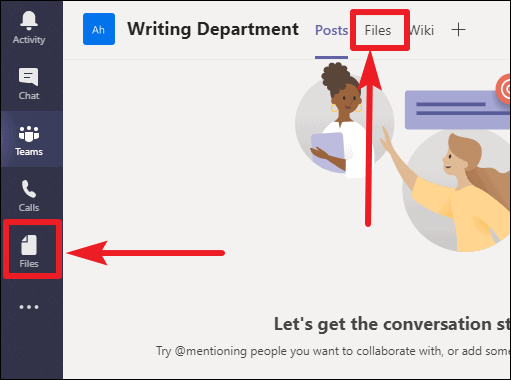
Step 11: To view all files shared within a channel, navigate to the Files tab. For a comprehensive view of files shared across all teams and channels, click on the Files icon on the left-side toolbar.
Chat in Groups or Privately
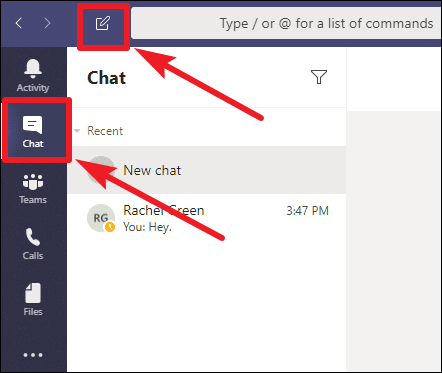
Step 12: To communicate privately with individuals or groups outside of channels, click on the Chat icon on the left. Click on the New chat button, type the names of the people you want to message, and start your conversation.
Making Audio and Video Calls
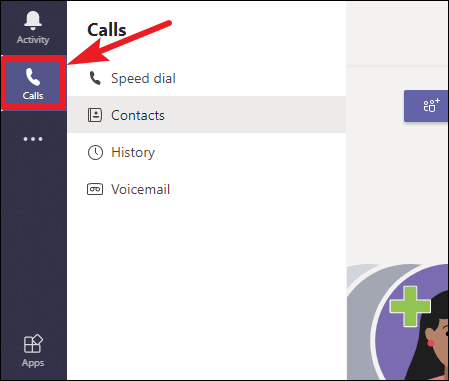
Step 13: To make audio or video calls, select the Calls icon on the left-side toolbar. You can call individuals or create group calls. Add team members to your Speed Dial list for quick access. Microsoft Teams supports features like screen sharing and background blur during video calls.
Integrating Apps and Services into Microsoft Teams
Step 14: Enhance your Teams experience by integrating various apps and services. Click on the Apps icon on the left-side toolbar to browse available integrations. You can add apps like Trello, Adobe Creative Cloud, or Microsoft Planner to streamline your workflows.
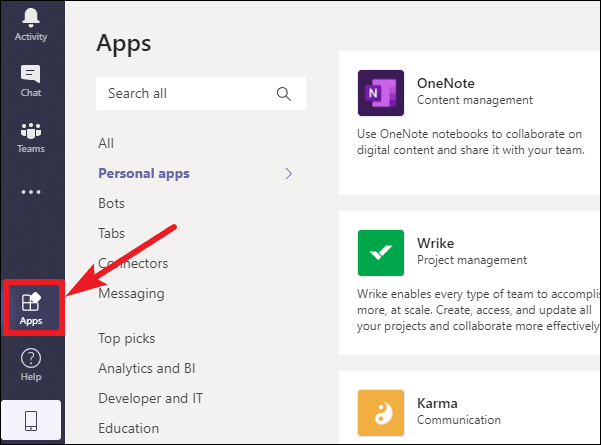
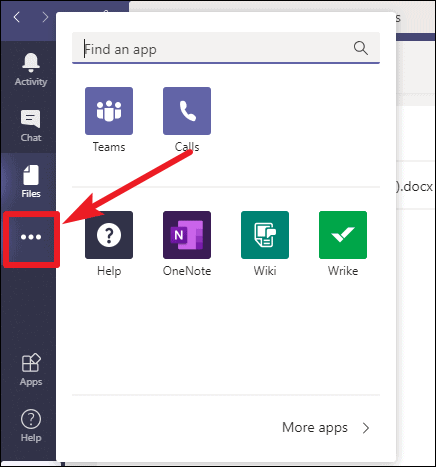
Step 15: Once added, these apps can be accessed from the More added apps option (three dots) on the left-side toolbar or added as tabs within your channels for easy access.
Microsoft Teams provides a comprehensive solution for team collaboration, bringing together communication, file sharing, and app integration in one platform. The free version offers a robust set of features to help your team stay connected and work efficiently from anywhere.

