Apple recently released the native Apple Music app for Windows, making it easy for Windows users to access and use the app. With the app, users can not only have a great listening experience on their PCs but also do a variety of tasks, such as changing the artwork, importing song files, and setting up content restrictions.
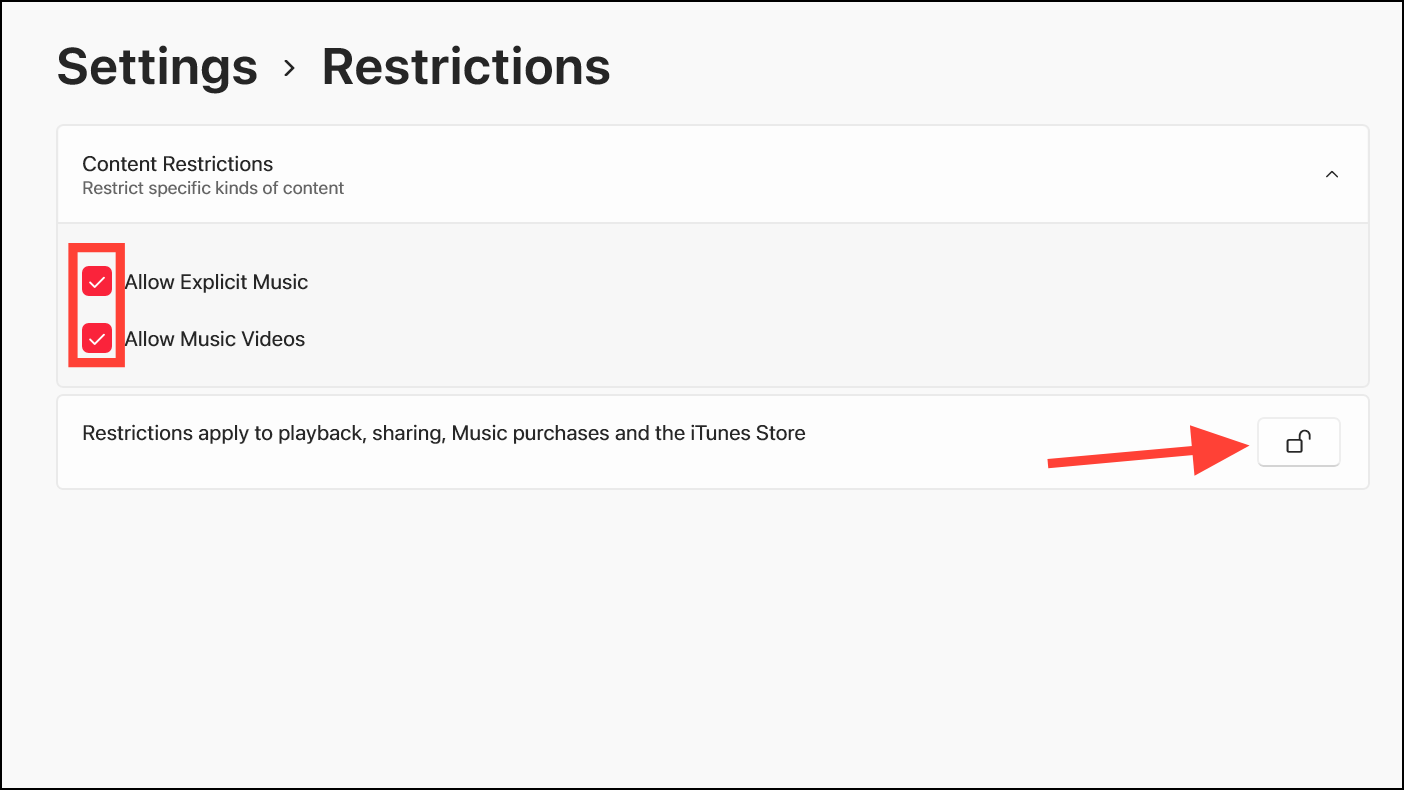
Content restrictions is a fantastic option to use if you don’t want all of the content on the music platform freely accessible, especially if younger listeners are involved. The options involve restricting explicit music and explicit videos; you can tailor what a user can and cannot access in the app.
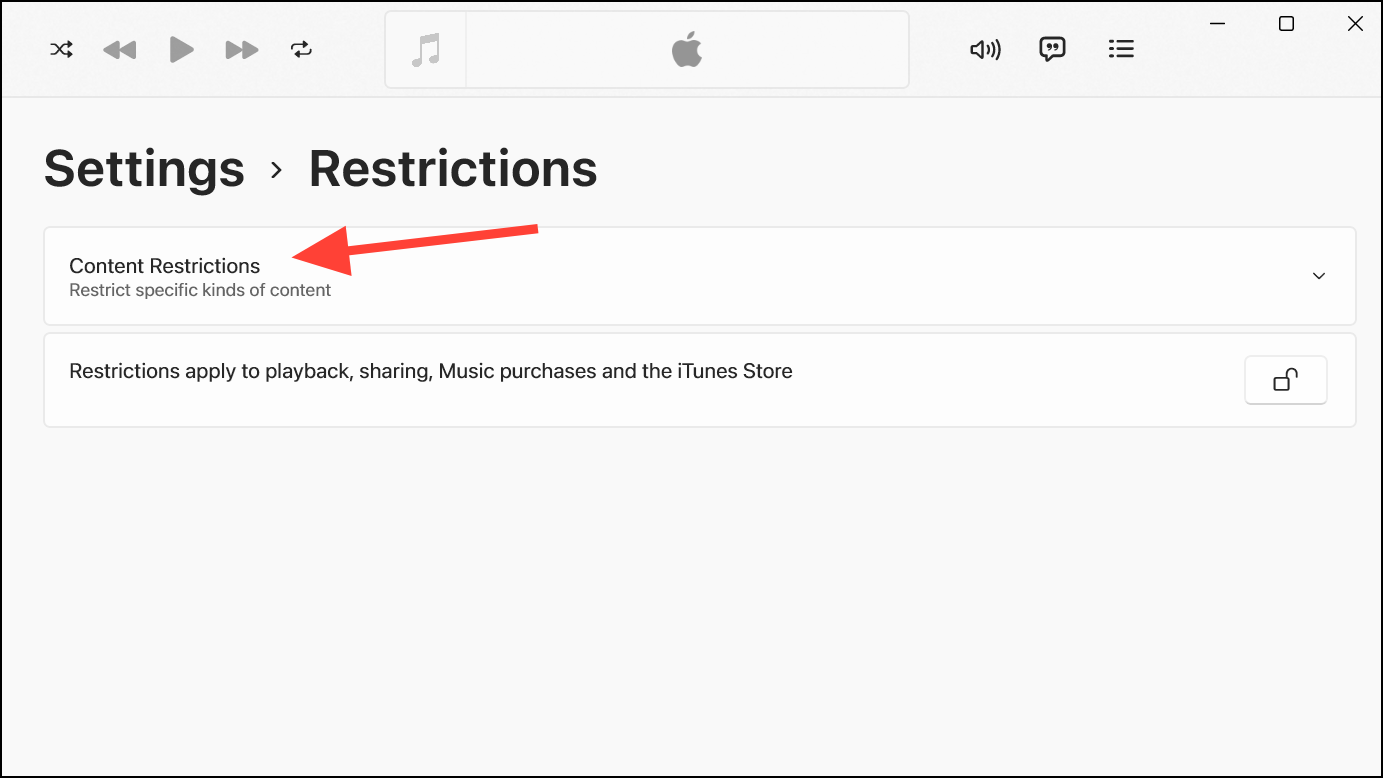
To set up content restrictions in the Apple Music app on Windows, follow these steps:
- Open the Apple Music app on your Windows device.
- Click on the ‘Sidebar Actions’ button (three-dot menu) in the top-right corner of the sidebar.
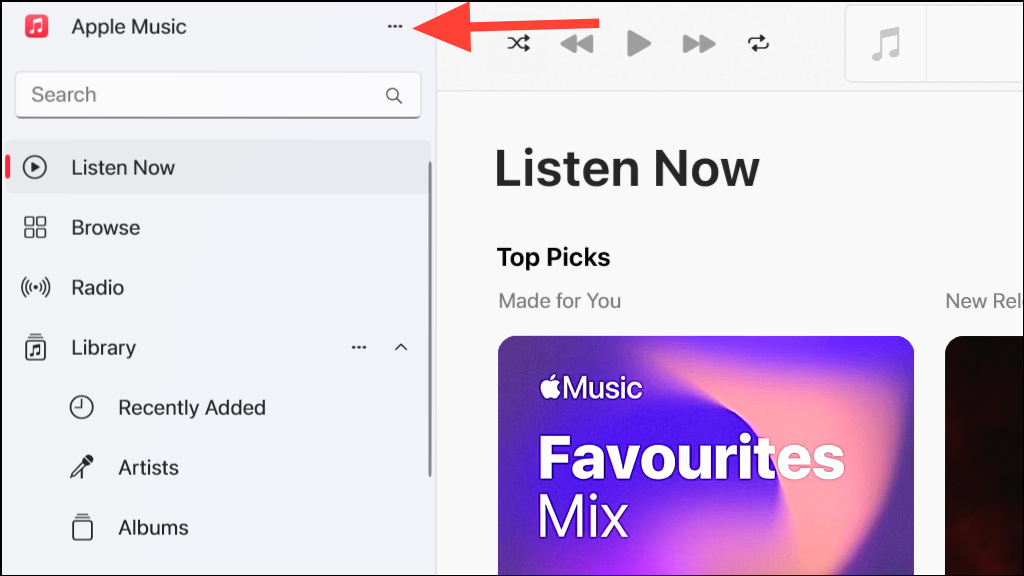
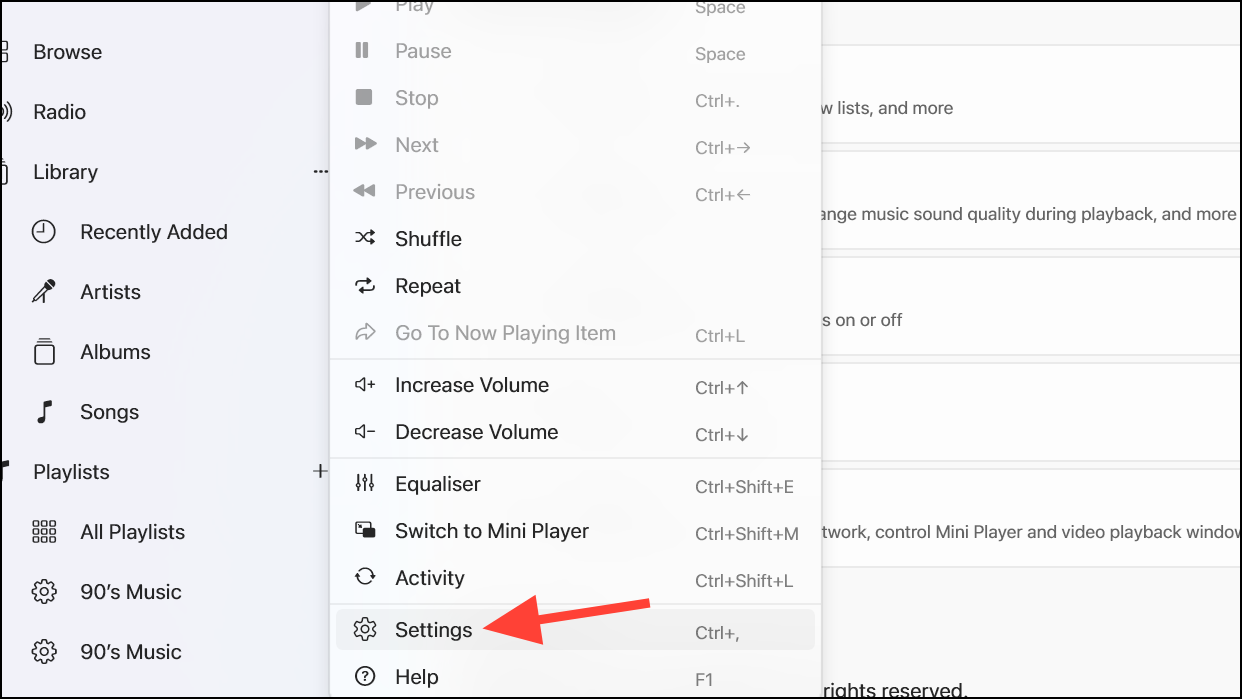
- Select ‘Settings’ from the menu.
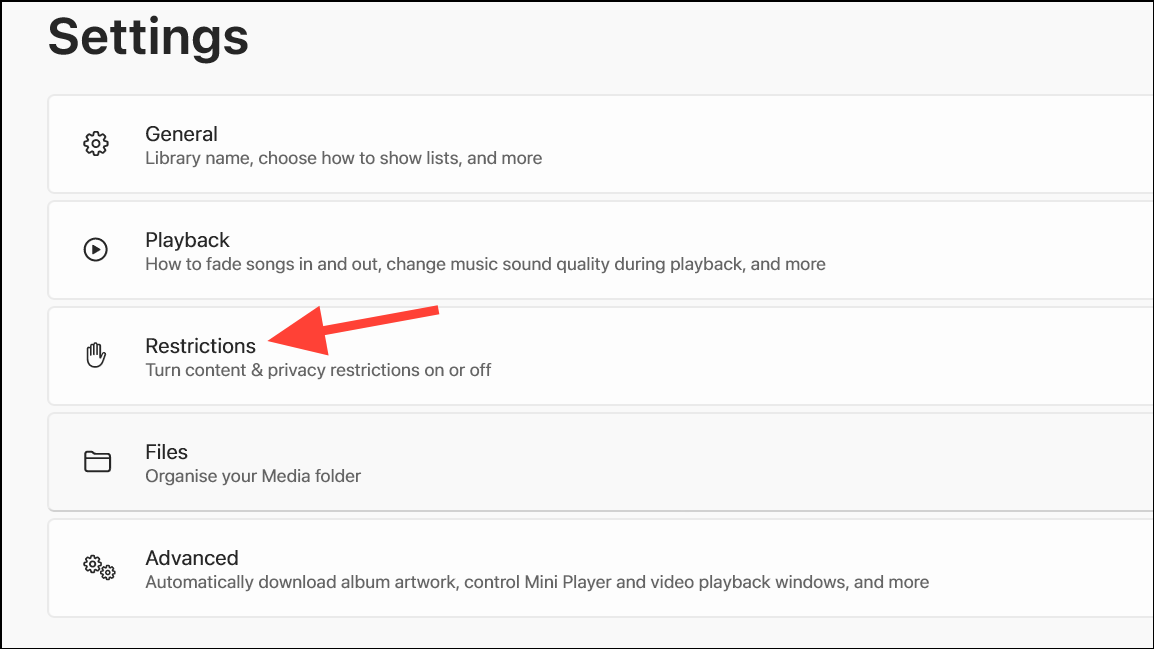
- In the Settings, click on the ‘Restrictions’ tab.
- Click on ‘Content Restrictions’ to expand it.
- Then, uncheck either both or one of the options from ‘Allow Explicit Music’ and ‘Allow Explicit Videos’, depending on what you want to restrict in the app.
- To prevent others from changing the settings while accessing the content in the app, click the ‘Lock’ icon to lock the settings.
- A User Account Control prompt will appear; click on ‘Yes’ to apply the setting.
Content restrictions are an important feature for families using Apple Music, allowing parents to control what media their children can access through the app. By restricting explicit music and videos with a few simple settings, users can ensure the Apple Music experience remains age-appropriate for all members of their household. You can also use content restriction settings even if there are no children accessing the app and you simply don’t want explicit music and videos accessible through the app.