Microsoft Teams provides an intuitive platform for sharing files with your colleagues, whether you wish to distribute documents team-wide or privately to specific individuals. You can share files directly from your computer or integrate supported cloud services like OneDrive, Google Drive, or Dropbox for easy access.
Moreover, Teams allows you to delete files you’ve previously shared, ensuring you maintain control over who has access to your content. Once a file is deleted, it becomes inaccessible to others in the team.
Sharing a File with Your Team
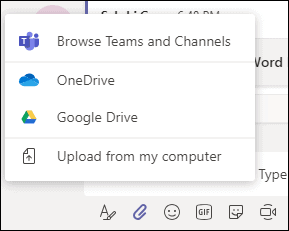
To share a file with your team, launch the Microsoft Teams app on your desktop or access it through a web browser at teams.microsoft.com. By default, you have the option to share files from your computer or your Microsoft OneDrive account.
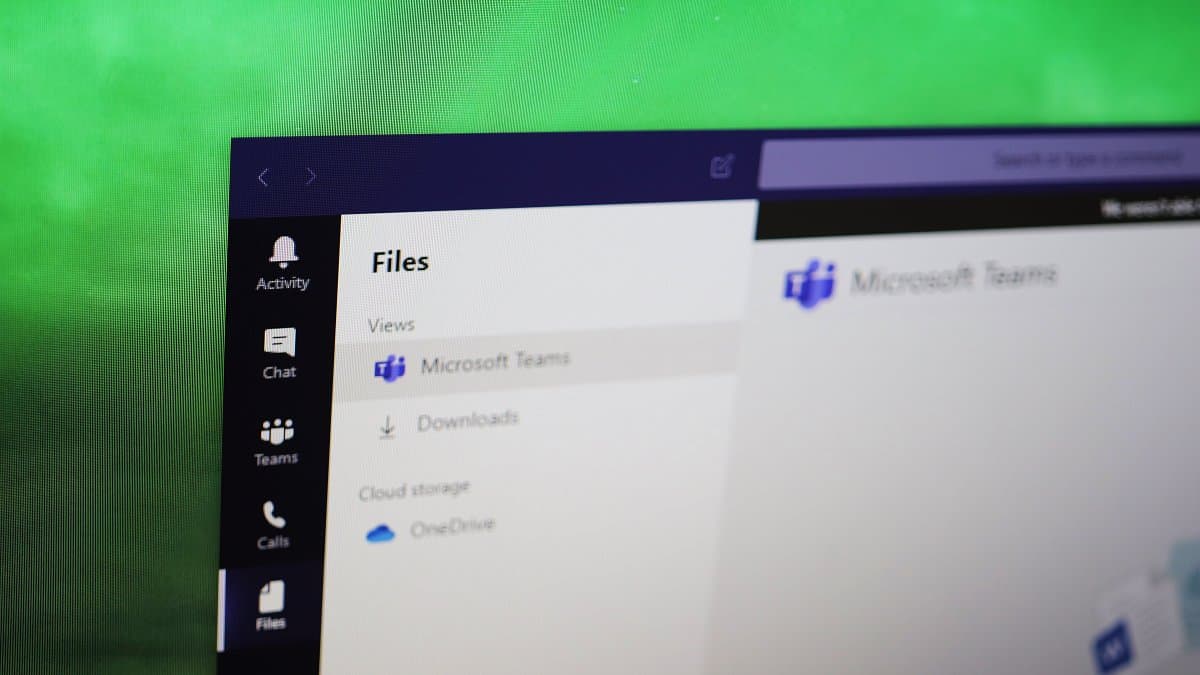
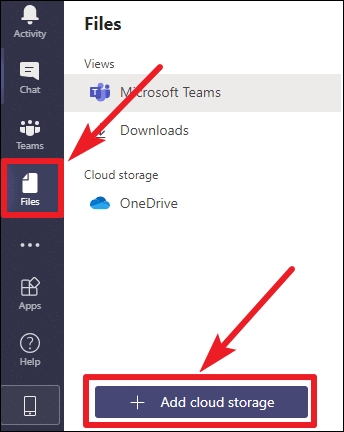
If you need to share files from other cloud services such as Google Drive, Dropbox, Box, or ShareFile, you’ll need to add these services to your Teams account. Click on ‘Files’ in the navigation bar on the left side of the Teams interface.
In the Files section, you’ll see all files shared across your teams. Under Cloud Storage, OneDrive is already integrated. If you’re signed into OneDrive with the same Microsoft account used for Teams, your OneDrive files will be available for sharing. To add another cloud service, click on ‘Add cloud storage’ at the bottom left corner of the screen.
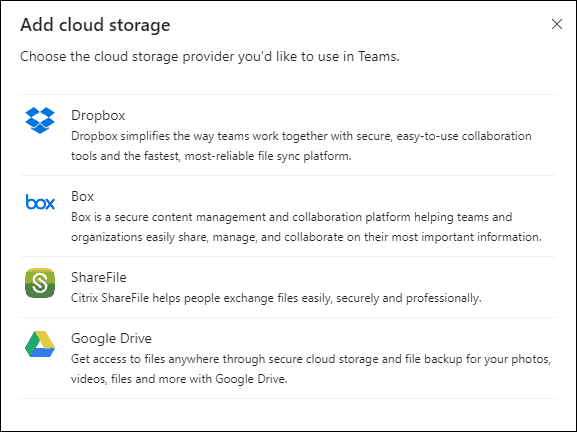
A window will appear listing available cloud services. Select the service you’d like to add. A login prompt will appear; sign in using your credentials (ensure you’re using the same email address associated with your Teams account). Once authenticated, the cloud service will be added, and your files from that service will be accessible for sharing within Teams.
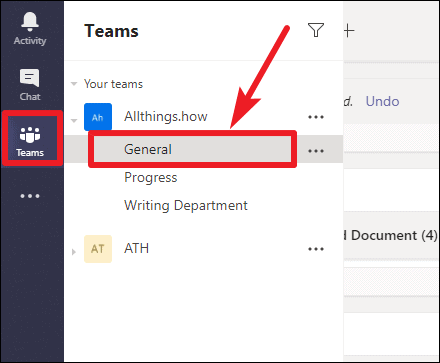
Next, click on ‘Teams’ in the navigation bar and select the team you want to share the file with. Choose the specific channel within that team where you intend to share the file.
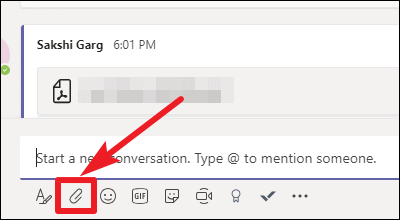
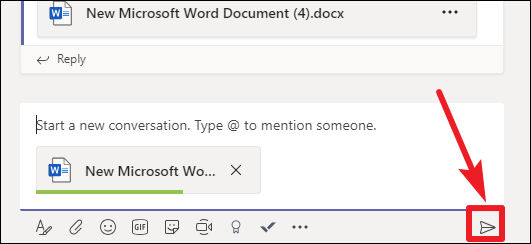
The file will appear in the compose box with a green progress bar indicating the upload status. Wait for the upload to complete; once the progress bar disappears, click on the ‘Send’ button to share the file with your team.
Deleting a Shared File from a Team Channel
If you need to remove a file that you’ve shared in a team channel, you can do so easily. Navigate to the channel where the file was originally shared. Click on ‘Teams’ in the navigation bar, then select the appropriate team and channel.
Select ‘Delete’ from the dropdown menu.
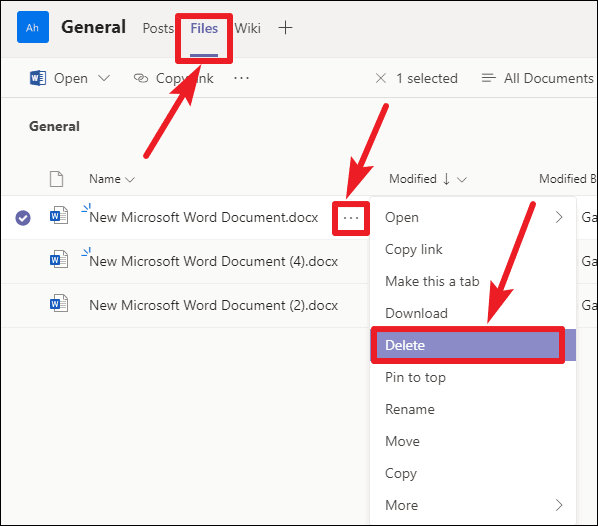
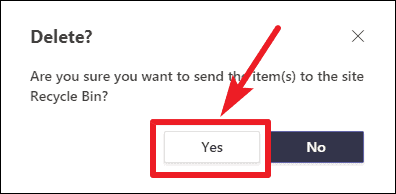
A confirmation dialog will appear. Click ‘Yes’ to confirm the deletion of the file.
The file will be removed from the channel and the ‘Files’ section, and team members will no longer have access to it.
Sharing Files Privately in Teams
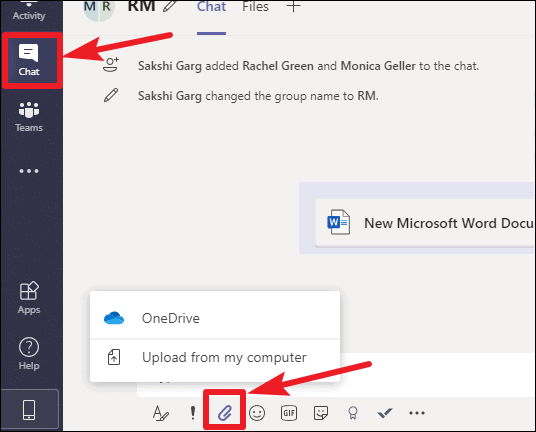
To share a file privately with an individual or a select group rather than the entire team, you can use private chats.

Deleting a File Sent in a Private Chat
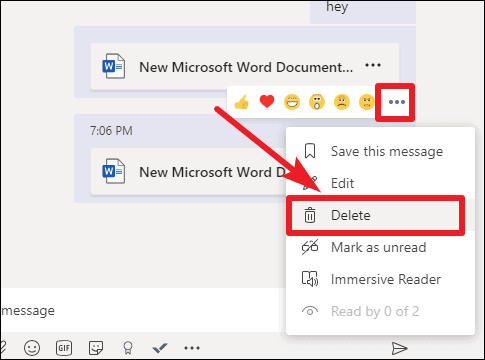
If you need to delete a file you’ve shared in a private chat, you can remove it to revoke access.
Note: Deleting the message removes the file from the chat but not necessarily from the ‘Files’ tab. To completely remove access, make sure to delete the file itself from the ‘Files’ section if needed.
Managing file sharing in Microsoft Teams is straightforward, allowing you to collaborate effectively while maintaining control over your documents. Whether sharing with the entire team or privately, Teams ensures your files are accessible to the right people.