Apple introduced Focus modes last year with iOS 15. And while they seemed pretty great in principle, the reality of using them was a classic case of disillusionment. Don’t get me wrong, they were still extremely useful and became a part of many users’ daily lives. But they fell short of what we expected from them.
However, when a feature is as new as Focus modes, it’s hard for them to live up to their full potential. And that’s what happened here, as well. Focus modes are still in a very early phase and there’s a lot of room for growth. With iOS 16, Focus modes are headed that way. There have been a lot of additions to Focus modes this year with Lock Screen linking and Focus Filters. But there’s one new feature that’s gone rather under the radar.
Focus Modes now have a feature to silence notifications from specific people and apps by adding them to a Silence list which would make things a lot more convenient than before. How does it differ from before? Let’s have a look.
What Does the Silence List in a Focus Do?
Previously, the Focus modes only had an ‘Allow’ list. You had to manually add the people or apps you wanted to allow notifications from to the list. When that particular focus was on, only notifications from your allowed people or apps were let through. All others were silenced and directed to the notification centre.
Now, imagine you wanted to set up a Personal focus where you only wanted to silence the notifications from people and apps related to work and allow all others. That would be a long list to handle. You can’t possibly add all the contacts in your list to an “allow” list.
But with the new ‘Silence’ list, you can set up a focus to silence notifications from selected people and apps and let all others through. So, in the situation alluded to above, all you would now have to do is set up the Personal focus to exclude contacts and apps from work. Notifications from all others contacts and apps would be automatically allowed, without you having to set up an extensive list. That would be a much more practical feat to handle and makes the entire process a lot less intimidating.
So, where you have more people and apps to silence than there are to allow, you can use the allow list. And where you only want to silence a handful of people and apps, the silence list would be the way to go. Let’s see how you can create a silence list to silence notifications from specific people and apps.
How to Use the Silence List
You can either use the silence list to silent notifications from specific apps and people while setting up a new Focus or edit an old Focus to make the changes.
Open the Settings app and tap the option for ‘Focus’.
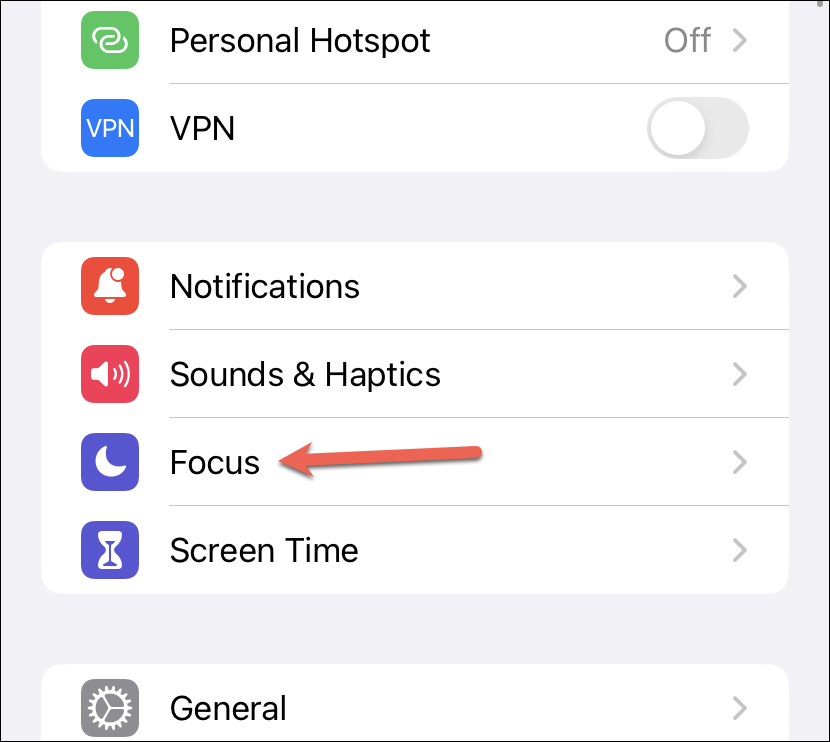
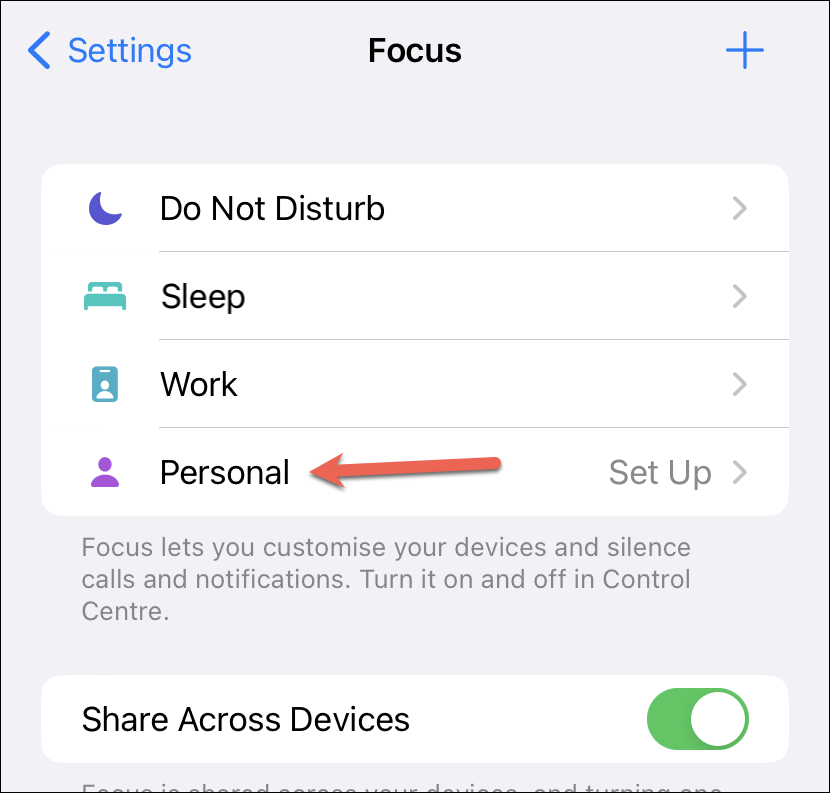
Then, tap the Focus you want to edit or tap a new Focus to set it up. For this guide, we’ll be setting up the ‘Personal’ Focus.
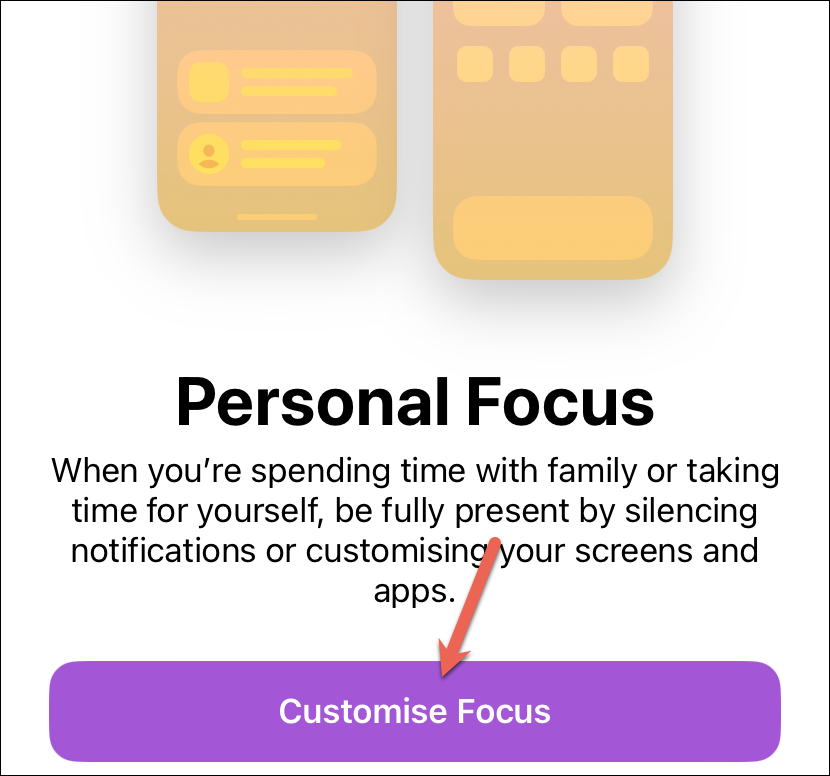
If you too are setting a new Focus, the onboarding screen for the same will appear. Tap ‘Customise Focus’ to proceed. The screen for customizing the Focus will open.
If you’re editing an old Focus, the screen for customizing the Focus will open right away. In both cases, the next steps are the same.
Silence Notifications from Specific People
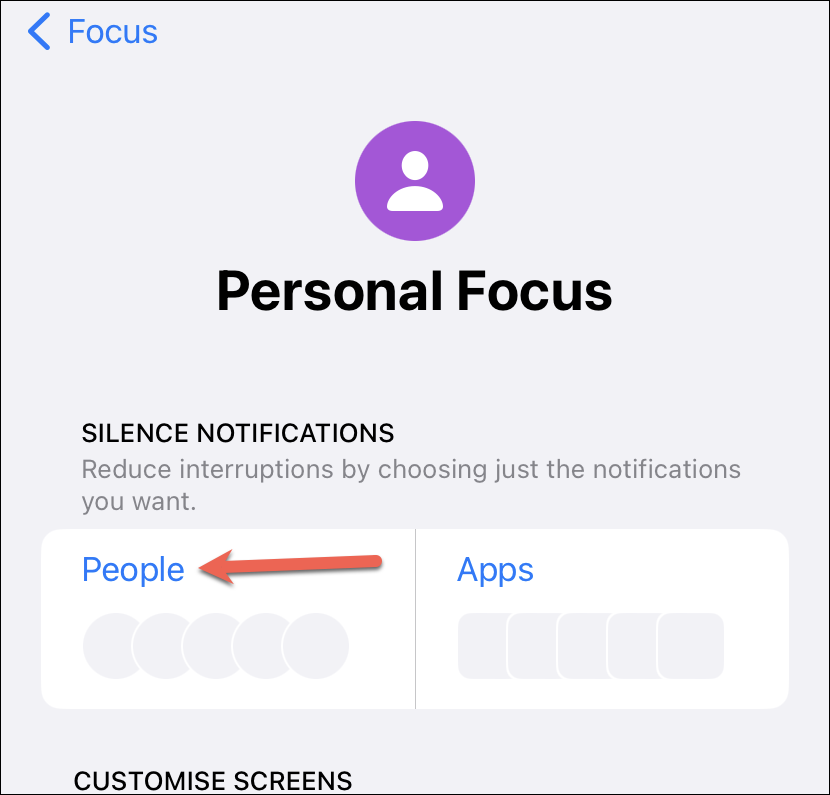
To silence notifications from specific people, tap the ‘People’ option under the ‘Silence Notifications’ section.
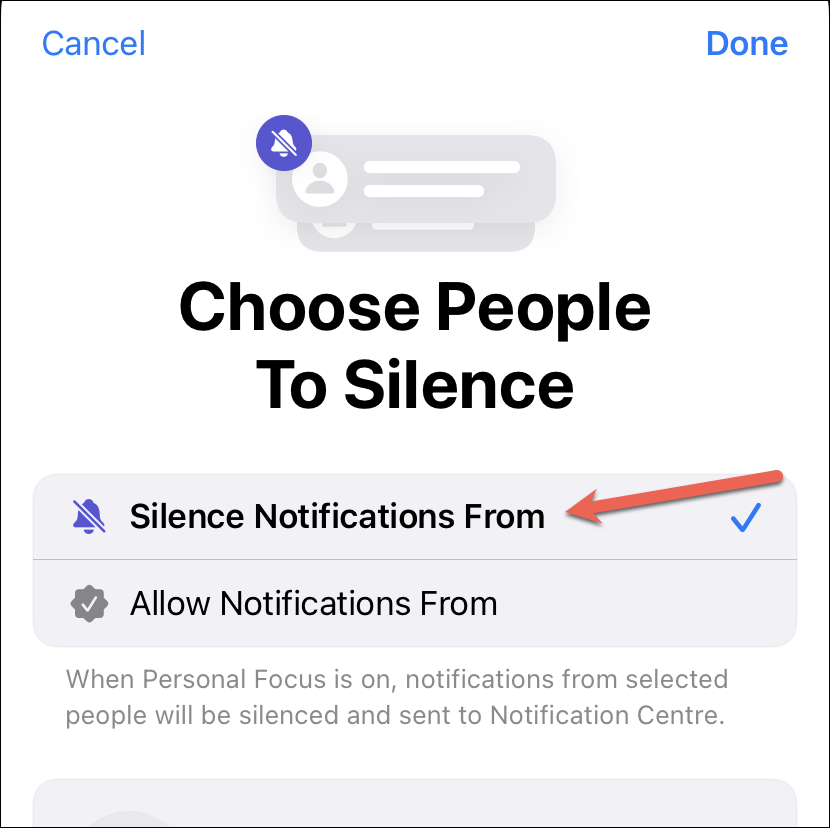
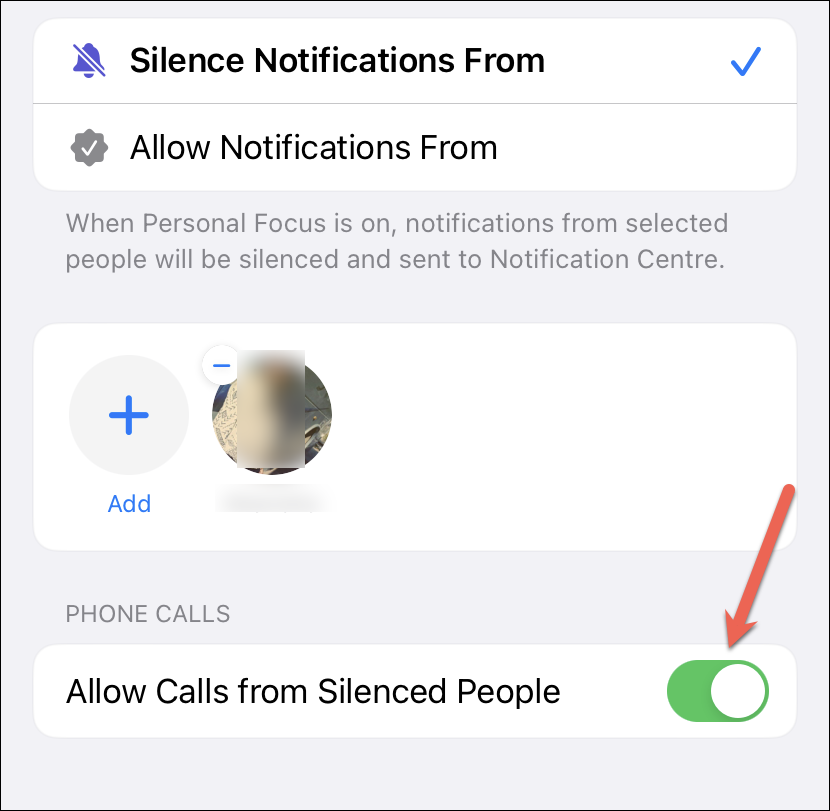
Now, in the new setup, you can either have a silence list or an allow list. To silence notifications from specific people while allowing them from all others, select the ‘Silence Notifications From’ option.
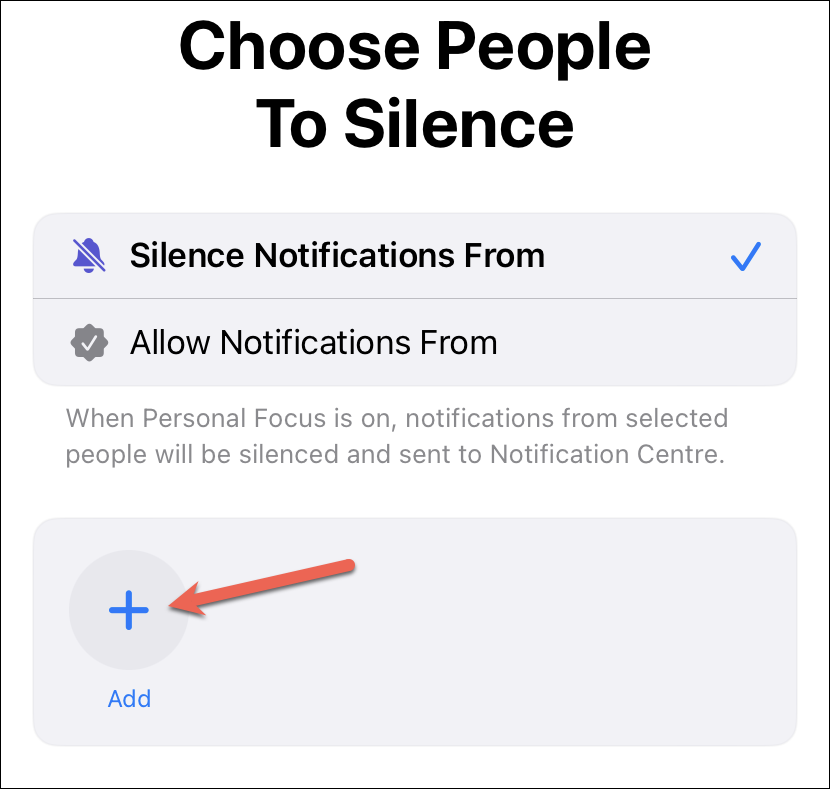
Then, tap the ‘Add’ option and select the contacts you want to silence the notifications from when the Focus in question is active.
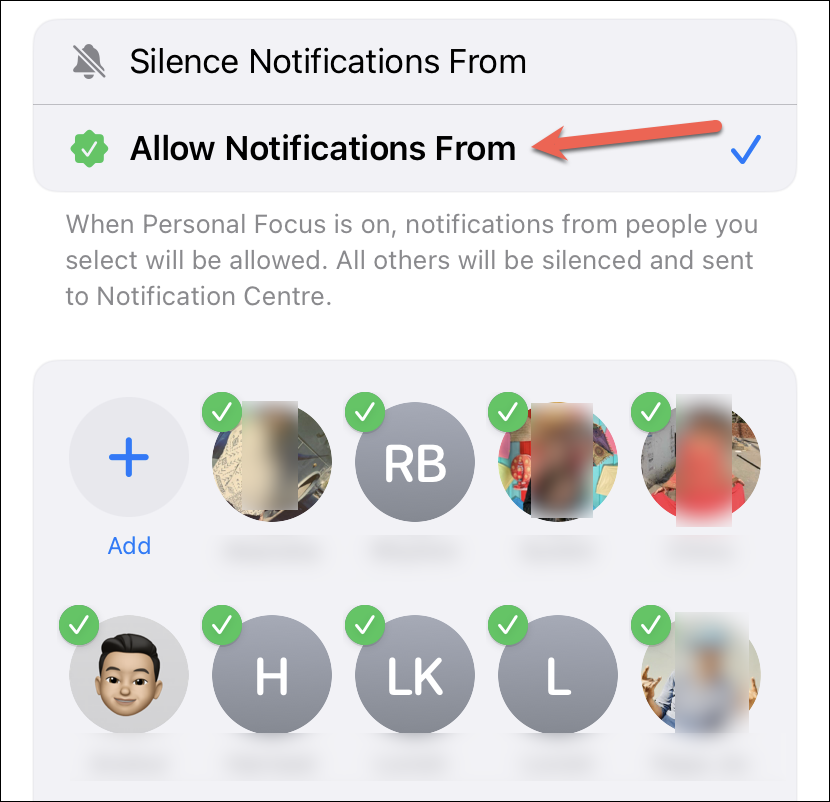
If you select the ‘Allow Notifications From’ option, the list will then become an Allow List, i.e., only notifications from people you add to the list will be allowed and the rest will be silenced. The allow list is basically how Focus worked before iOS 16. The only difference is that iOS will also suggest people you might want to allow calls from according to the Focus you’re customizing while setting it up.
If you only want to silence message notifications from people in the list, but want their calls to get through, enable the toggle for ‘Allow Calls from Silenced People’, otherwise leave it disabled.
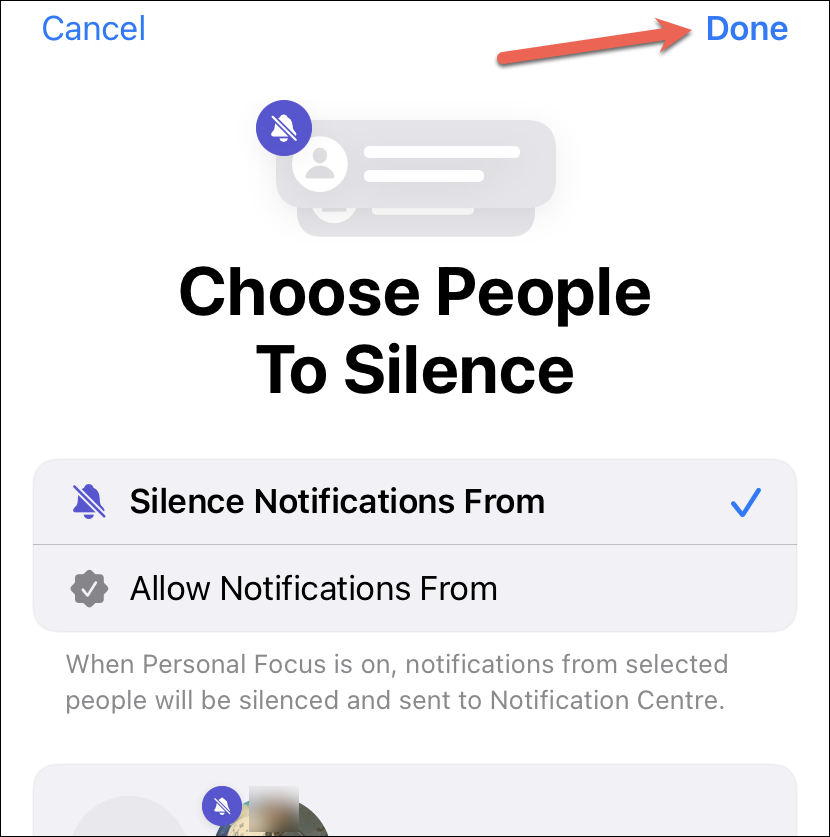
Tap ‘Done’ in the upper-right corner to save the changes.
Silence Notifications from Specific Apps
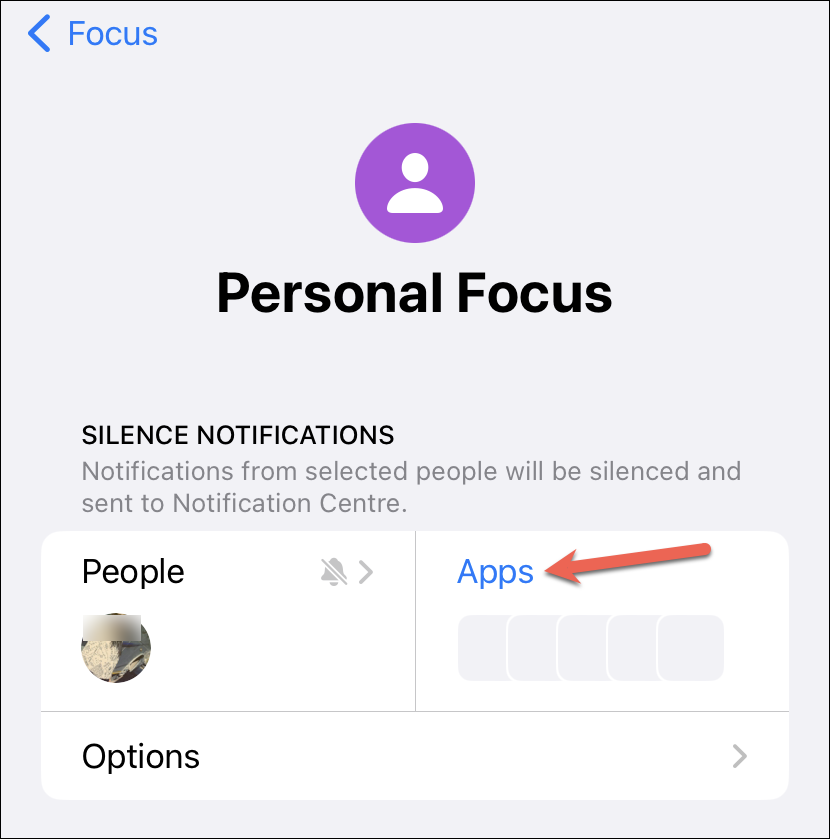
Now, similarly, to silence notifications from specific apps, tap the option for ‘Apps’.
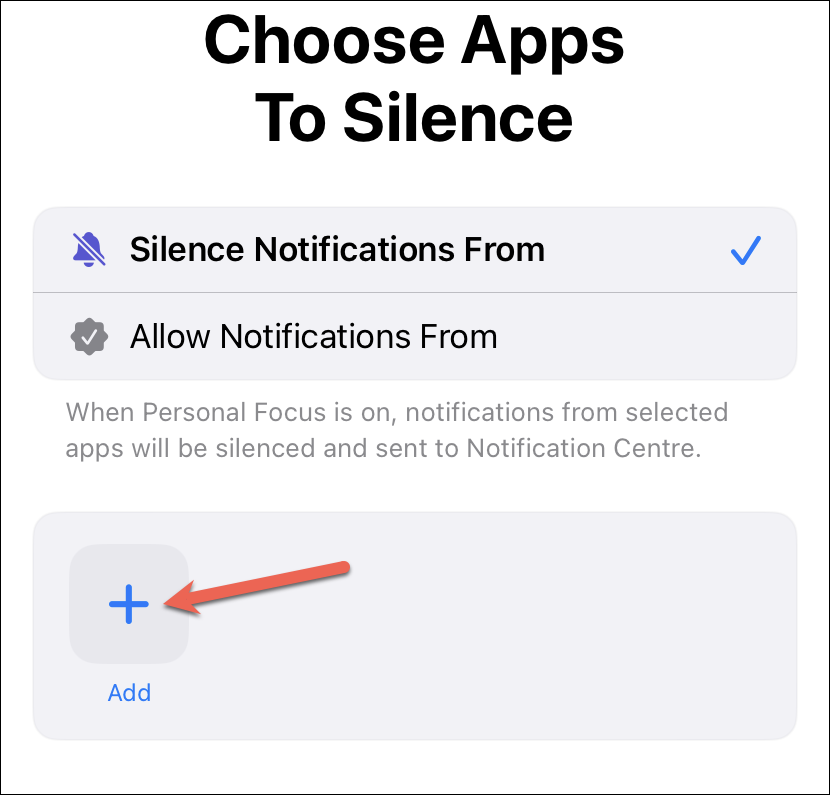
Then, make sure you select the ‘Silence Notifications From’ option to configure a silence list.
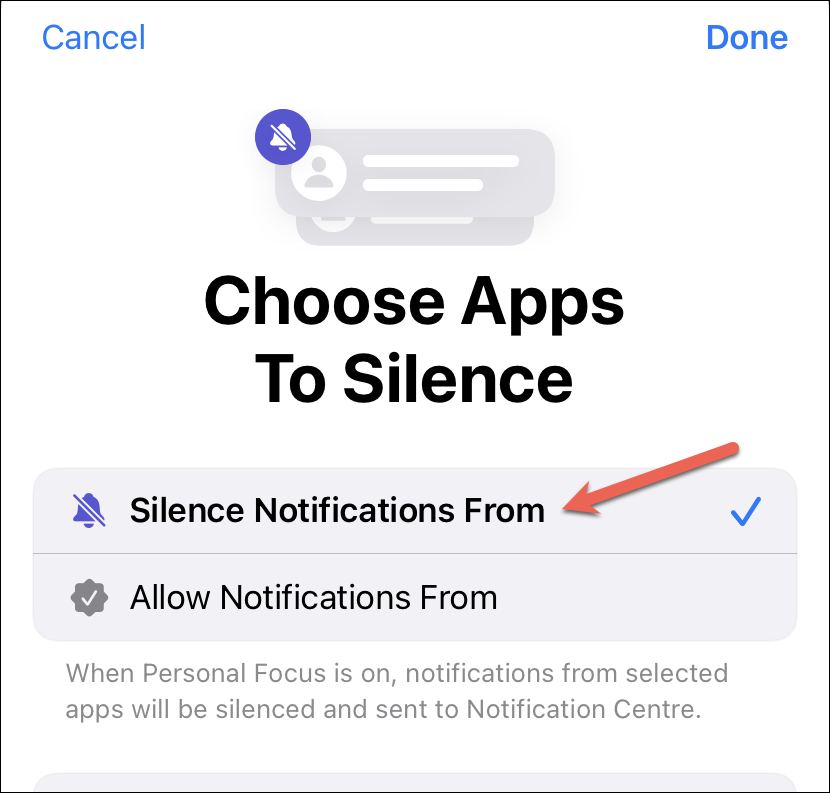
Tap ‘Add’ and select the apps you want to add to the silence list. Notifications from selected apps will go straight to the notification centre when this particular Focus is on.
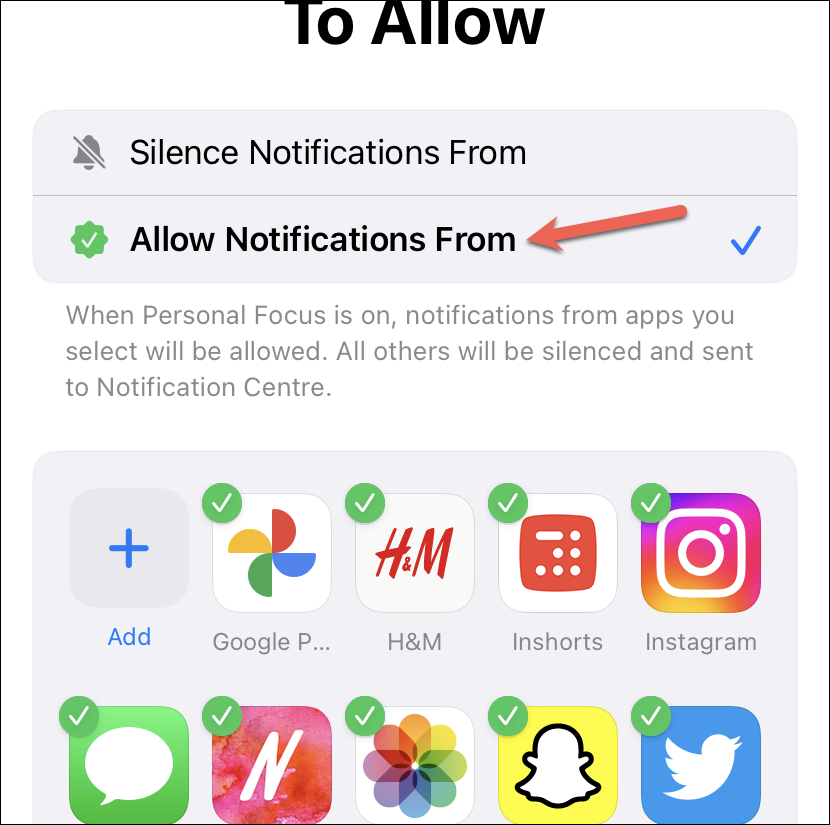
To have an ‘Allow’ list instead, change the selection to ‘Allow Notifications From’ and notifications will only be allowed from all the apps you have added and the rest will be silenced. iOS will suggest some apps to allow when setting up a particular Focus for the first time; you can keep them or unselect them and choose the apps on your own.
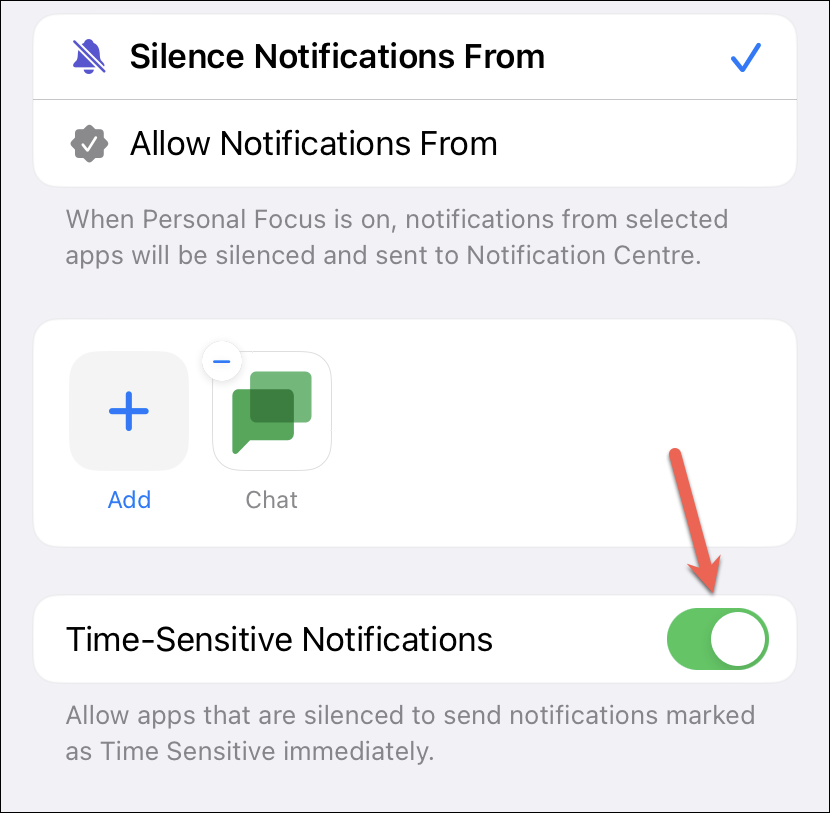
To allow time-sensitive notifications from the apps you have silenced, enable the toggle for ‘Time-Sensitive Notifications’. Otherwise, keep it disabled.
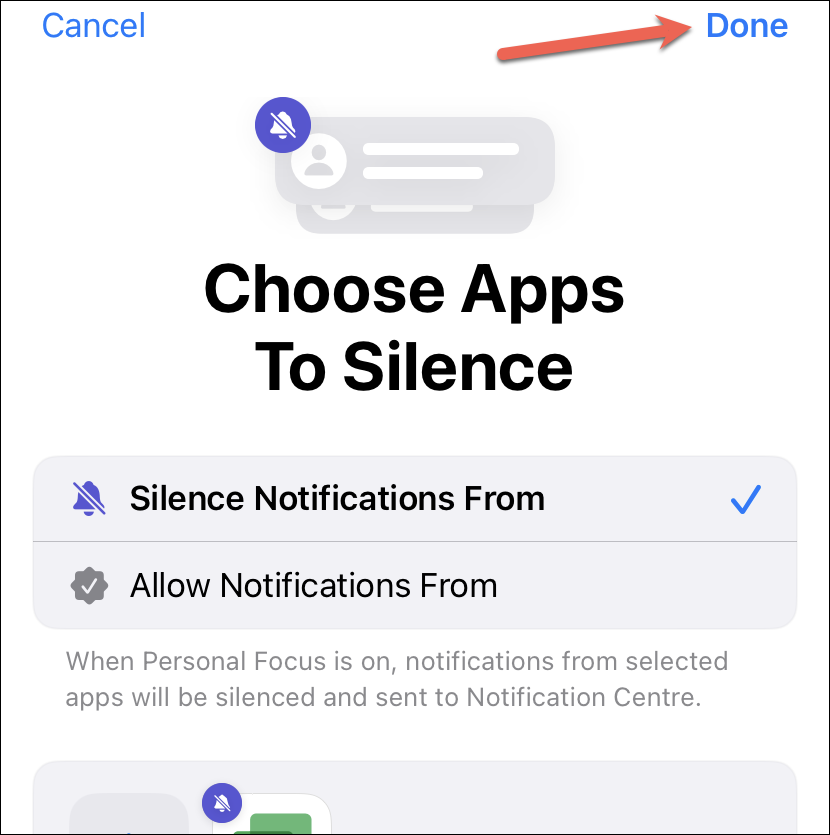
Tap ‘Done’ in the upper-right corner to save your selection.
Note: You can have separate types of lists for People and Apps for a single Focus, i.e., there’s no rule to say that both should have a Silence list or an Allow list. For example, for the Personal Focus, you can have a Silence list for People, whereas an Allow list for Apps.
You can also customize the Focus a little further. Tap ‘Options’ under the People & Apps section to do that.
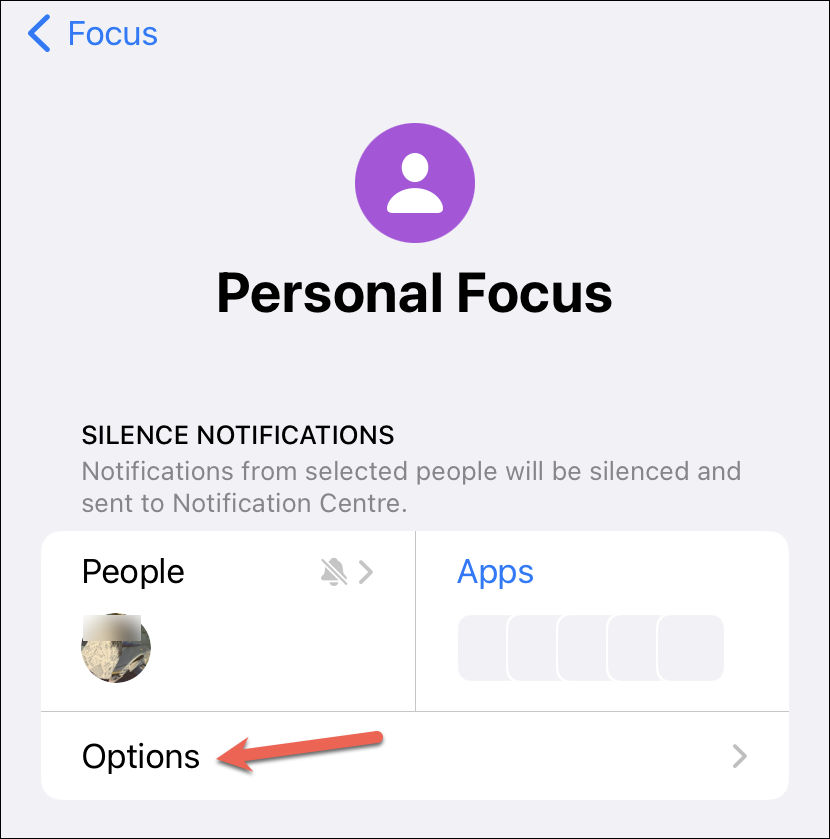
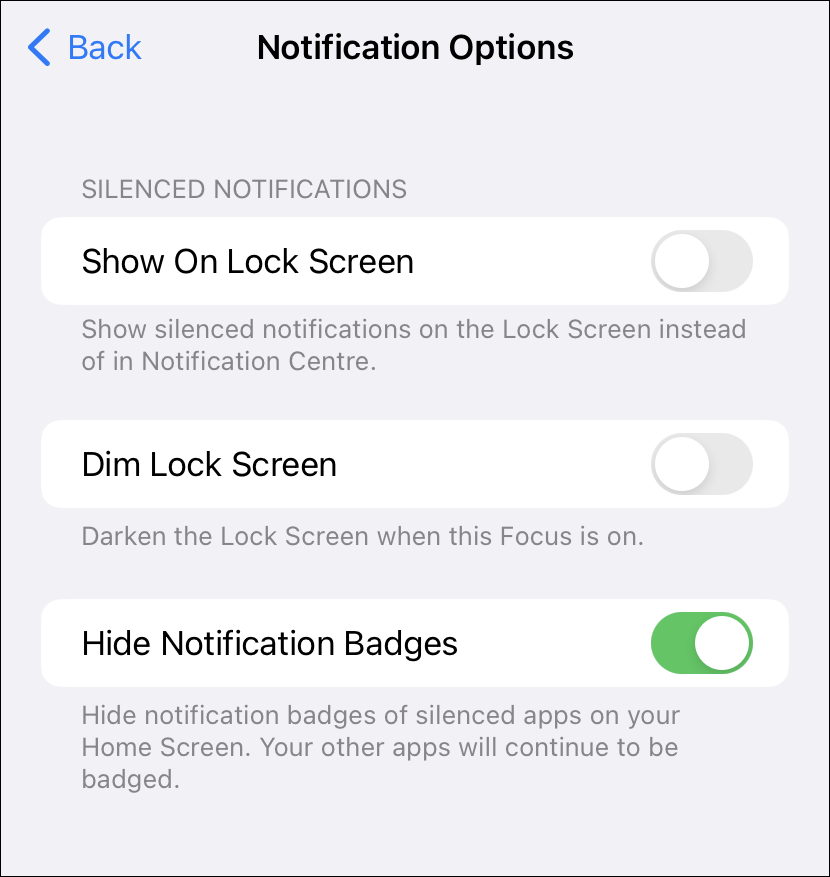
Here, you can choose to display the silenced notifications on the lock screen instead of the notification centre, dim the lock screen when the focus is on, and select whether you want the silenced apps to show notification badges.
Focus modes on iPhone, when used correctly, can help you gain more control of your phone and your digital well-being. But previously, configuring it could prove to be a pain in the neck sometimes. Now, with silence lists complementing allow lists in iOS 16, the process is easier than ever before.

