In today’s digital landscape, efficiently managing your camera and microphone can significantly enhance your online communication experience. Whether you’re in virtual meetings, connecting with loved ones, or engaging in online activities, having quick control over these devices is essential. This guide will show you how to set up global keyboard shortcuts to toggle your camera and microphone on or off in Windows 11/10 using PowerToys, as well as an alternative method for rapid access.
Using PowerToys to Globally Control Camera and Microphone
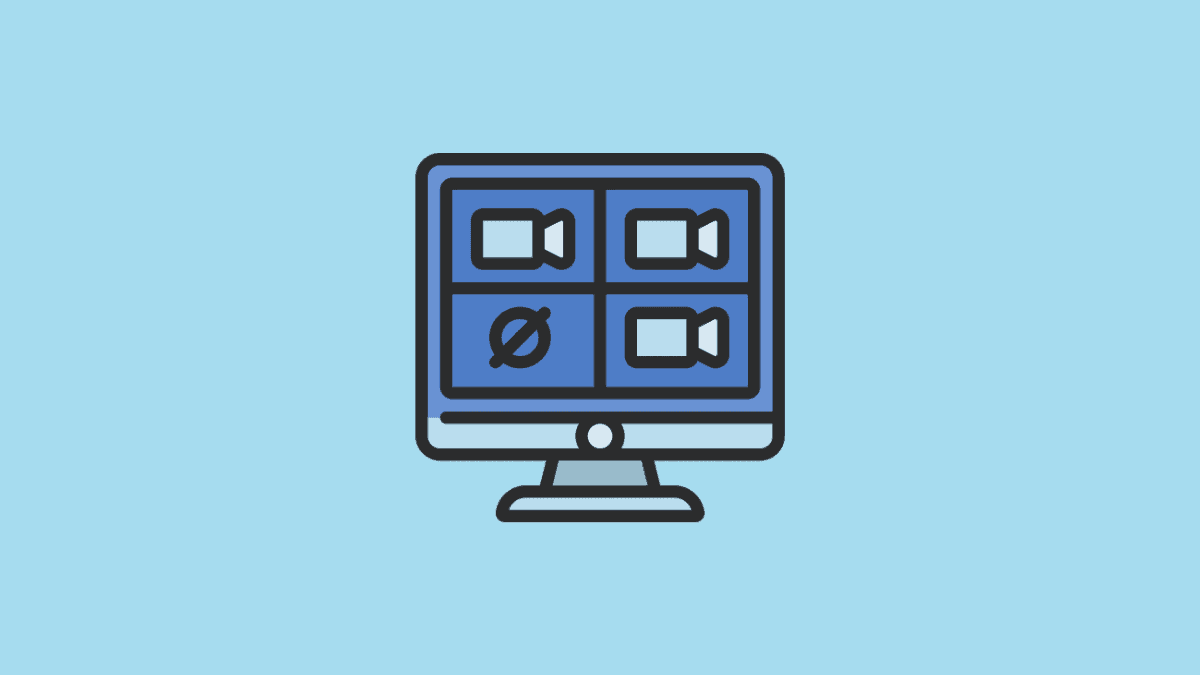
PowerToys, a suite of utilities for advanced users, includes a feature called Video Conference Mute. This utility allows you to mute your microphone and disable your camera instantly with customizable keyboard shortcuts. These shortcuts work system-wide, regardless of the application you’re using, and even when the app isn’t in focus. This means you can control your camera and microphone without interrupting your workflow or switching applications during a call.
However, the Video Conference Mute utility isn’t included in the stable release of PowerToys. You’ll need to install the experimental version to access this feature.
Installing the Experimental Version of PowerToys
To utilize the Video Conference Mute utility, follow these steps to install the experimental version of PowerToys:
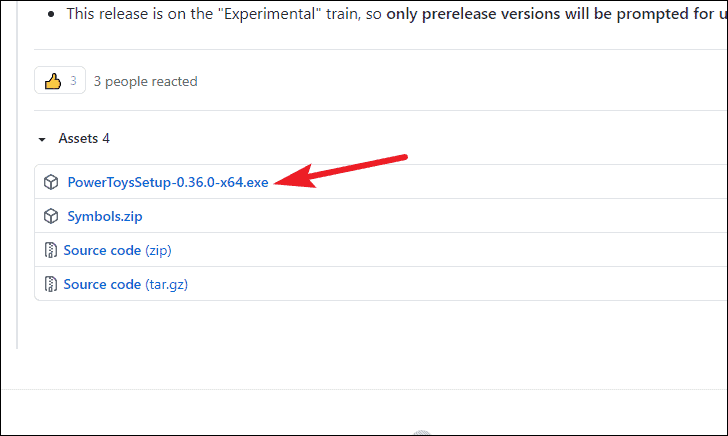
- Navigate to the PowerToys GitHub releases page and scroll down to find the experimental release.
- Under the Assets section, download the .exe file for version v0.36.0.
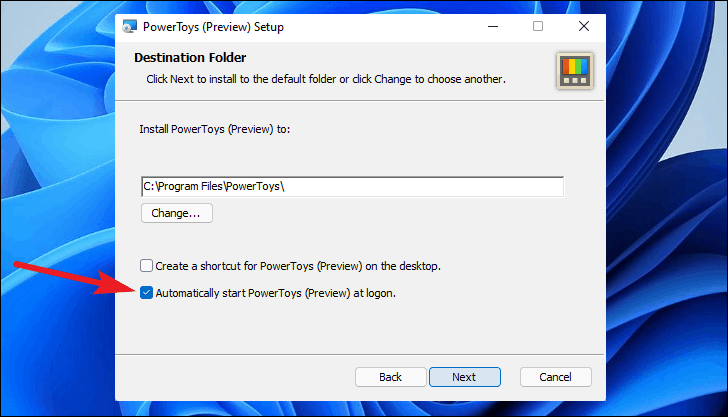
- Run the installer and follow the installation wizard’s instructions. If you have the stable version of PowerToys installed, you may need to uninstall it first.
- During installation, check the option for ‘Automatically start PowerToys at log on’ to ensure it runs in the background. While optional, this setting allows PowerToys to start automatically, so you don’t have to launch it manually each time.
Configuring Video Conference Mute
Once installed, you’ll need to configure the Video Conference Mute utility:
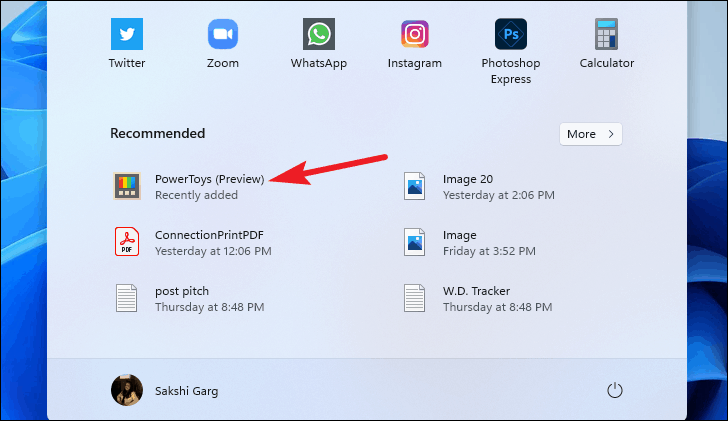
- Launch PowerToys from the Start menu or desktop shortcut.
- In the PowerToys settings window, go to the ‘General’ tab and click ‘Restart as administrator’ to run PowerToys with administrative privileges.
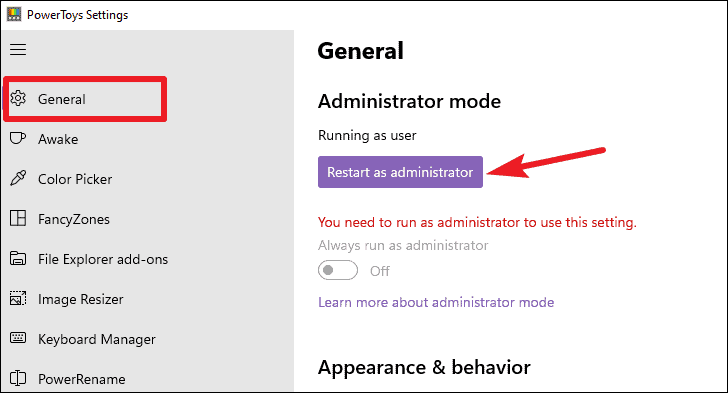
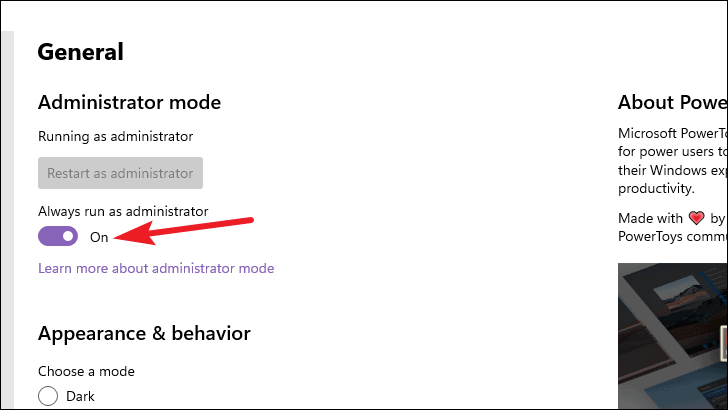
- After restarting, you can enable the ‘Always run as administrator’ toggle for convenience.
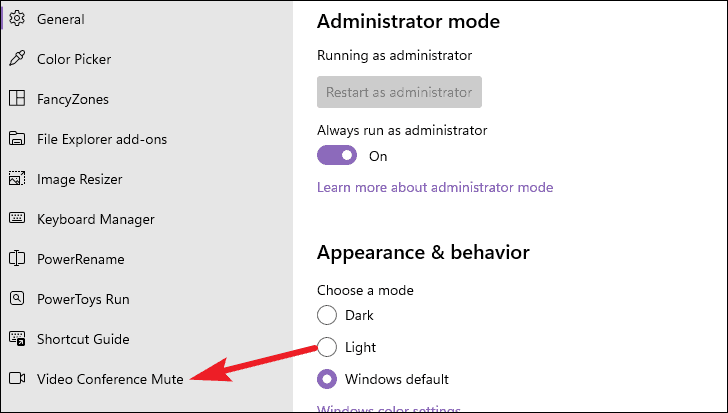
- From the left-hand menu, select ‘Video Conference Mute’.
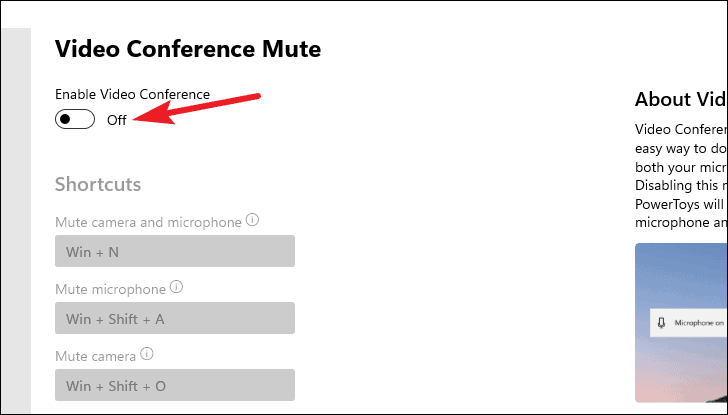
- Enable the ‘Enable Video Conference’ toggle to activate the utility.
With the utility enabled, you can now set up keyboard shortcuts:
- Mute camera and microphone – Default shortcut: Windows + N.
- Mute microphone – Default shortcut: Windows + Shift + A.
- Mute camera – Default shortcut: Windows + Shift + O.
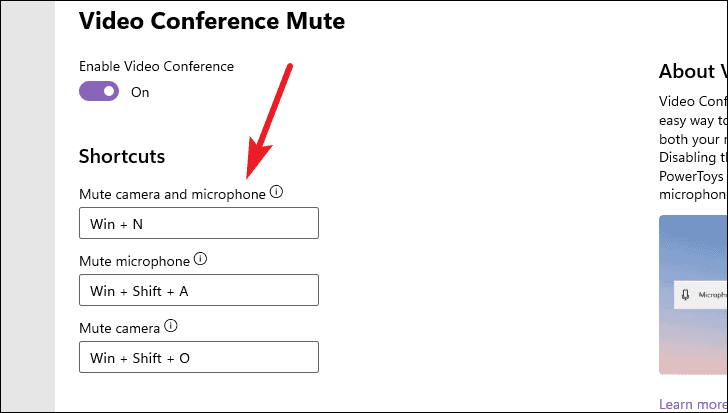
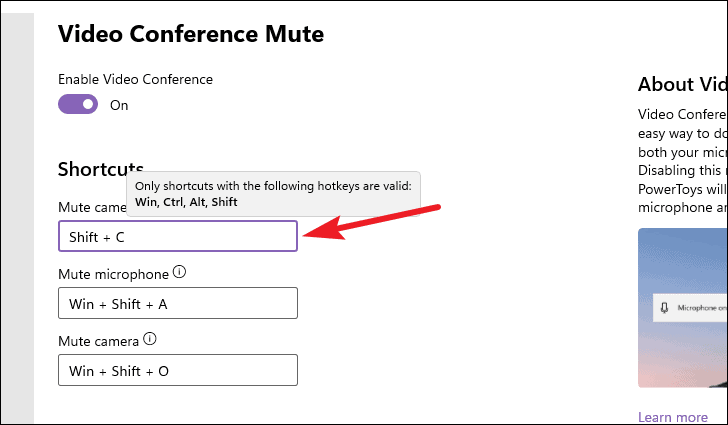
To customize these shortcuts, click on the text box next to each action and press your desired key combination. The new shortcut must include one or more of the following keys: Windows, Alt, Ctrl, or Shift.
Note: If you disable Video Conference Mute or close PowerToys, the shortcuts will no longer function.
If the changes don’t apply immediately, restart PowerToys to refresh the settings.
Next, configure your devices:
- Under the ‘Microphone’ section, select the microphone you wish to control. You can choose a specific device or leave it set to ‘All’ to affect every microphone connected to your system.
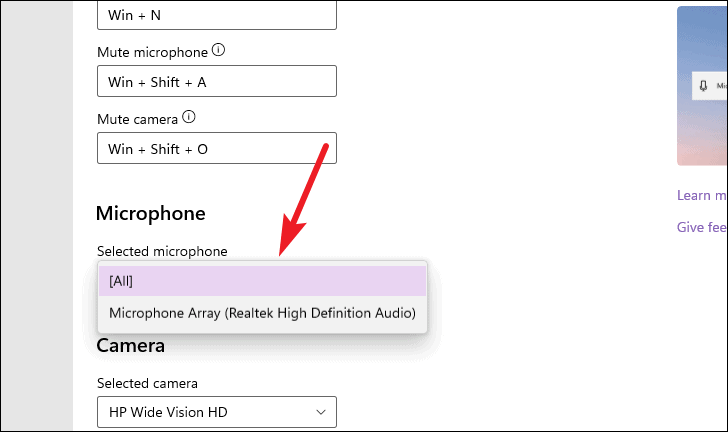
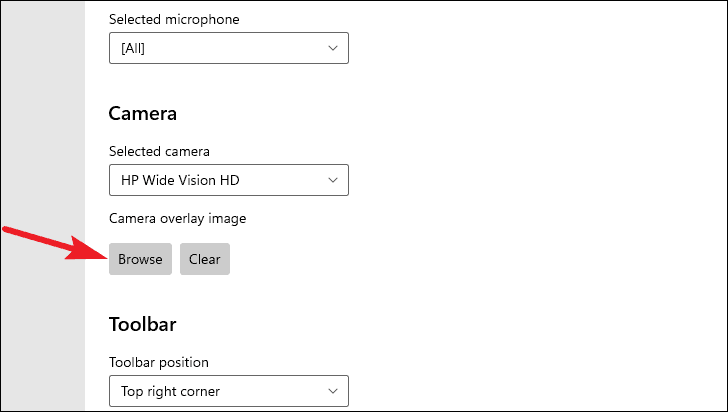
- In the ‘Camera’ section, select your camera from the drop-down menu.
- Optional: Click ‘Browse’ to choose an overlay image that will display when your camera is turned off. By default, a black screen is shown. After selecting an image, restart PowerToys to apply the change.
Additionally, you can customize the toolbar that appears when you mute your camera or microphone:
- Choose the toolbar’s position on your screen.
- Select which screen the toolbar appears on if you have multiple monitors.
- Decide whether to hide the toolbar when both the camera and microphone are unmuted.

Alternative Method: Creating Desktop Shortcuts to Toggle Camera and Microphone
If you prefer not to use PowerToys or want a simple way to access your camera and microphone settings, you can create desktop shortcuts:
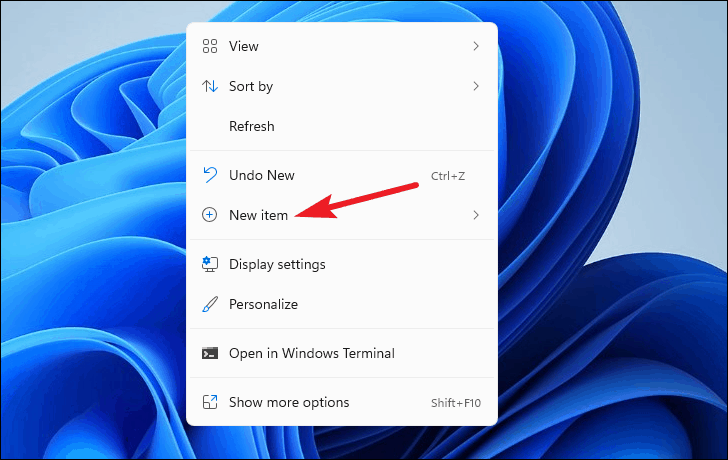
- Right-click on your desktop, hover over ‘New’, and select ‘Shortcut’.
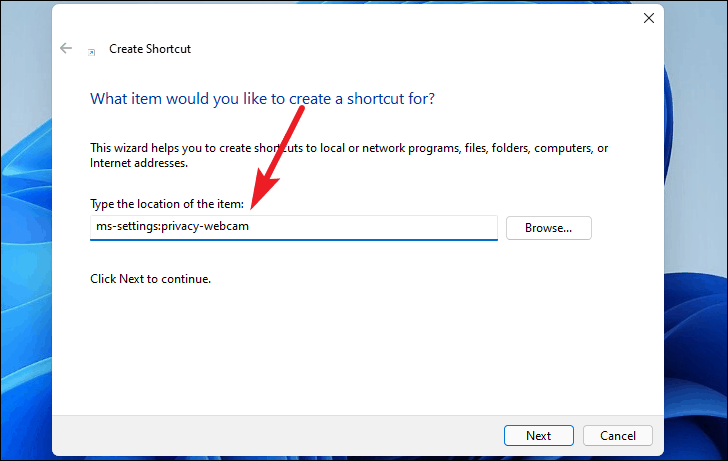
- In the ‘Create Shortcut’ window, enter
ms-settings:privacy-webcamto create a shortcut for the camera settings, then click ‘Next’.
- Name the shortcut (e.g., ‘Camera On-Off’) and click ‘Finish’.
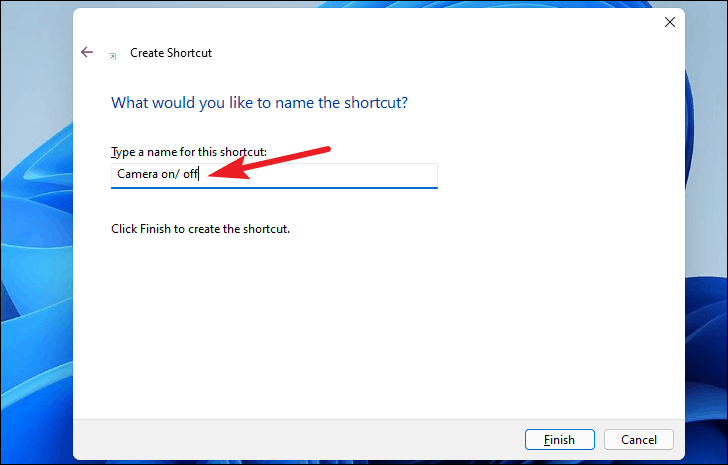
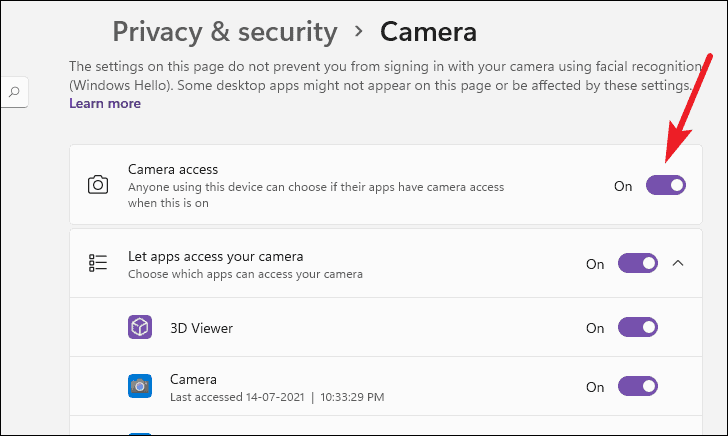
This creates a desktop shortcut that opens the camera settings, allowing you to toggle the camera on or off quickly.
To create a shortcut for the microphone settings, repeat the steps above:
- Right-click on the desktop, choose ‘New’, and select ‘Shortcut’.
- Enter
ms-settings:privacy-microphonein the location field, then click ‘Next’.
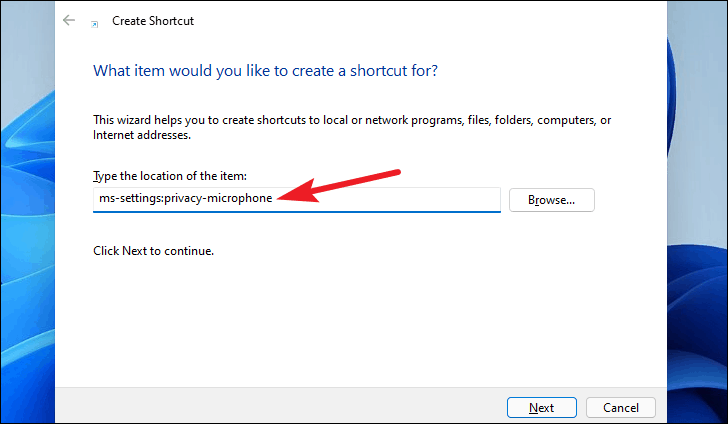
- Provide a name for the shortcut (e.g., ‘Microphone On-Off’) and click ‘Finish’.
By setting up global keyboard shortcuts with PowerToys or creating desktop shortcuts, you can efficiently manage your camera and microphone settings, enhancing both privacy and convenience during your online interactions.


