How to Transfer Photos from iPhone to a Windows 11 PC
Transfer photos from your iPhone to a Windows 11 PC easily and quickly. Learn about the different methods available, including using iCloud, USB Cable, and Windows Photos app.
Transfer photos from your iPhone to a Windows 11 PC easily and quickly. Learn about the different methods available, including using iCloud, USB Cable, and Windows Photos app.
by Sakshi Garg
Transferring photos from your iPhone to a Windows 11 PC might seem daunting, but it’s quite simple. Despite the perception that Apple devices don’t integrate well with Windows, there are multiple straightforward methods to accomplish this task. In this guide, we’ll explore various ways to transfer your photos, whether you prefer using File Explorer, the Windows 11 Photos app, or iCloud Photos.
Transfer Photos Using File Explorer on Windows 11
One of the most direct methods to transfer photos is by using File Explorer on your Windows 11 PC. This approach allows you to manually copy your photos from your iPhone to your computer.
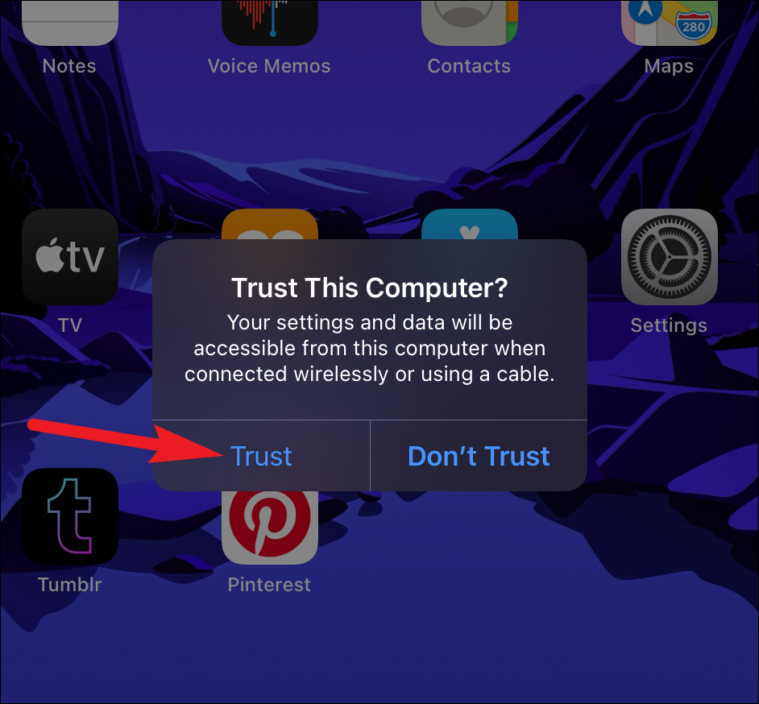
Connect your iPhone to your Windows 11 PC using a USB cable. Make sure your iPhone is unlocked. If prompted on your iPhone, tap Trust to allow your PC to access your device. You might need to enter your iPhone’s passcode to confirm.
On your PC, open File Explorer. You can do this by clicking the File Explorer icon on the taskbar or by pressing the Windows logo key + E on your keyboard.
In File Explorer, navigate to This PC from the left sidebar. Under Devices and Drives, you should see your iPhone listed. It may appear as “Apple iPhone” or display your device’s name. Double-click on your iPhone to open it.
You’ll find one or more folders inside DCIM, such as “100APPLE”, “101APPLE”, etc. Open these folders to access your photos and videos. You can now select the files you wish to transfer. To select multiple files, hold down the Ctrl key while clicking on the files.
Once you’ve selected the desired photos and videos, right-click and choose Copy, or press Ctrl + C. Navigate to the folder on your PC where you want to save the files, right-click, and select Paste or press Ctrl + V. Alternatively, you can drag and drop the files to your chosen location. Be cautious: moving files instead of copying them will delete them from your iPhone.
Remember, you cannot transfer files back to your iPhone using this method. If you accidentally delete photos from your device, you’ll need to use iCloud Photos or another method to restore them.
Transferring Photos Using Windows 11 Photos App
The Windows 11 Photos app provides another convenient way to import photos from your iPhone. This method is similar to importing photos from a digital camera and doesn’t require any additional software beyond iTunes version 12.5.1 or later installed on your PC.
Connect your iPhone to your Windows 11 PC using a USB cable, ensuring your iPhone is unlocked. If prompted, tap Trust on your iPhone and enter your passcode if necessary. You might also see a prompt asking if you want to allow the PC to access your photos and videos; tap Allow.
In the Photos app, click on the Import button located in the top-right corner of the window, and then select From a connected device from the dropdown menu.
The Photos app will begin searching for photos and videos on your iPhone. Once the images are displayed, select the ones you wish to import by clicking the checkbox on each photo. You can also use the dropdown menu to Select all or choose photos From a certain date range.
By default, the Photos app imports your photos to the Pictures folder. To change the destination, click on Change destination and select your preferred folder.
If you’d like to remove the photos from your iPhone after importing them, check the box next to Delete original items after import. Be cautious with this option to avoid accidentally deleting important photos from your device.
Click on Import [number] of items to begin transferring your selected photos to your PC.
Note: If you have iCloud Photos enabled on your iPhone with the Optimize Storage setting, full-resolution versions of your photos might not be stored on your device. You’ll need to download the original photos to your iPhone before importing them to your PC.
Transferring Photos Using iCloud Photos
If you prefer a wireless solution, iCloud Photos allows you to access your photos across all your devices, including your Windows 11 PC. This method requires that you have iCloud Photos enabled on your iPhone and the iCloud app installed on your PC.
Toggle on iCloud Photos to enable photo syncing. Ensure that you have sufficient iCloud storage to accommodate your photo library. If you’re running low on space, you may need to upgrade your iCloud storage plan.
On your Windows 11 PC, download and set up the iCloud app if you haven’t already. You can find detailed instructions in this guide on how to use iCloud on Windows 11.
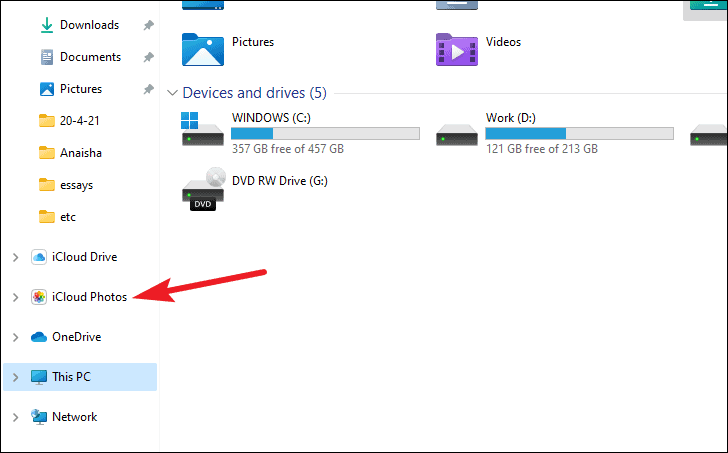
In the iCloud Photos folder, you’ll see all your photos and videos synced from your iPhone. These files are stored in the cloud but can be downloaded to your PC as needed.
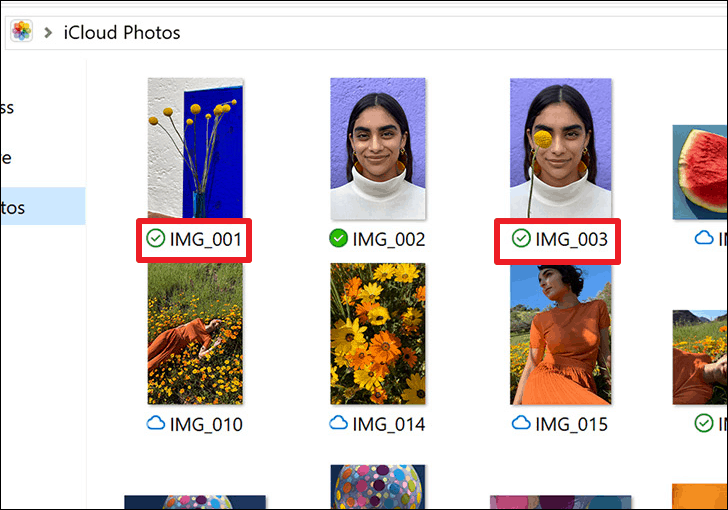
To download a photo, double-click on it. A cloud icon indicates that the photo is stored in iCloud and not yet downloaded. Once downloaded, you’ll see a checkmark icon.
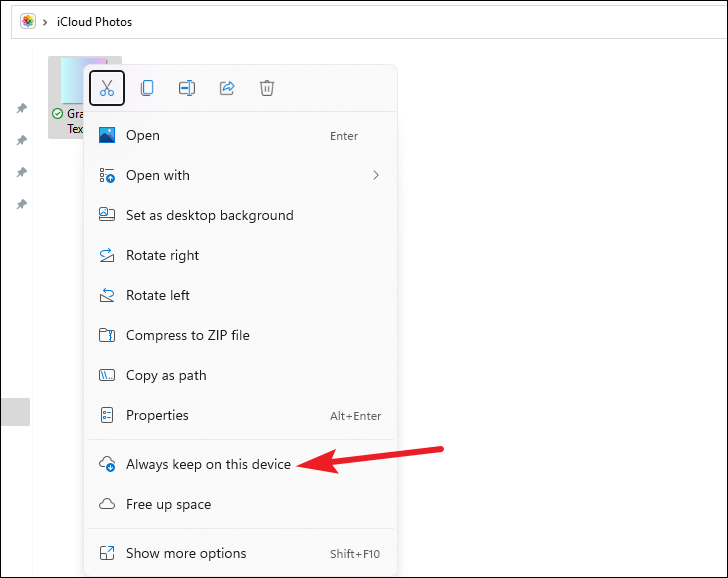
You can copy or move downloaded photos to other folders on your PC. Simply select the photos, right-click and choose Copy, then paste them into your desired location. Be aware that moving photos out of the iCloud Photos folder will remove them from iCloud and all synced devices.
Note: If you use other cloud services like Google Photos, Dropbox, or OneDrive to store your iPhone photos, you can similarly download them directly to your Windows 11 PC from those platforms.
Dealing with Incompatible iPhone Photo Formats
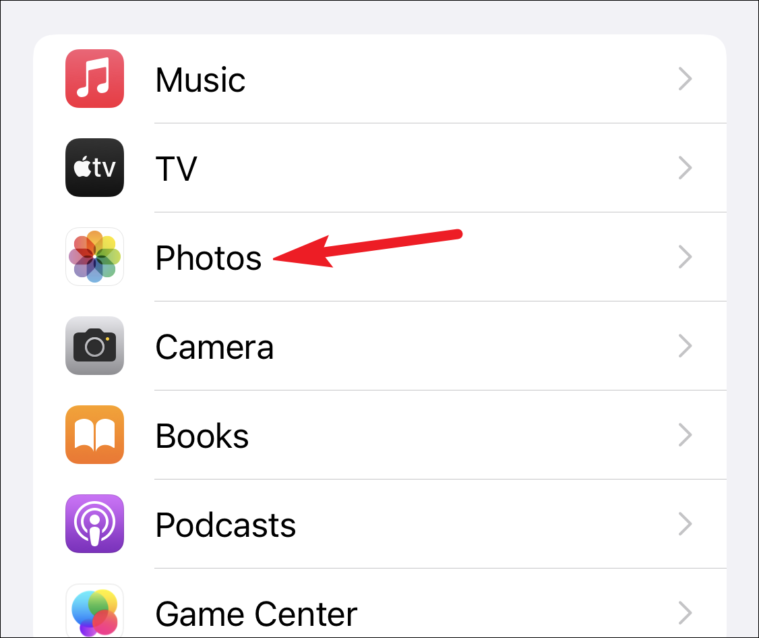
iPhones can save photos and videos in HEIF and HEVC formats, which might not be compatible with Windows 11 by default. If you encounter issues opening these files on your PC, you can adjust your iPhone settings to ensure future photos are saved in formats compatible with Windows.
Scroll down to the bottom and under Transfer to Mac or PC, select Automatic. This setting ensures that your iPhone converts HEIF and HEVC photos and videos to compatible formats like JPEG and H.264 when transferring to a PC.
Choosing Keep Originals will transfer the photos in their original formats, which may not be viewable on your Windows PC without additional software or conversion steps.
Transferring photos from your iPhone to a Windows 11 PC doesn’t have to be complicated. Whether you prefer using File Explorer, the Photos app, or iCloud Photos, there’s a method that fits your workflow and makes managing your photo library a breeze.