Notifications are useful for staying updated, but too many can become distracting. If you'd like to reduce interruptions on your Windows 11 PC, you can customize or turn off notifications entirely.
Disable All Notifications
If you want to stop all notifications from all apps, Windows 11 allows you to do so with a simple setting.
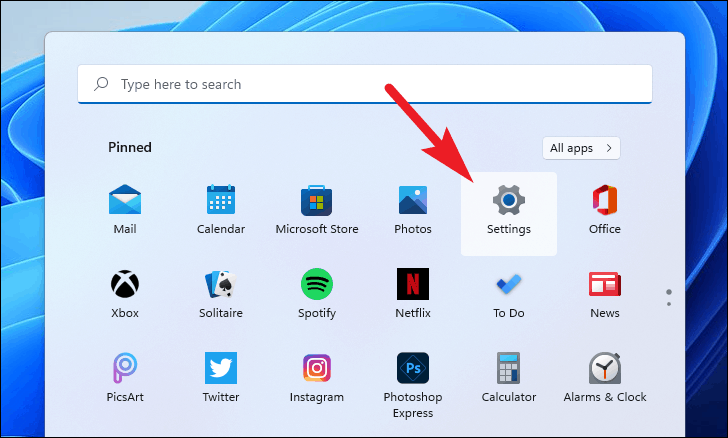
- Open the
Settingsapp by clicking theStartbutton and selectingSettings.
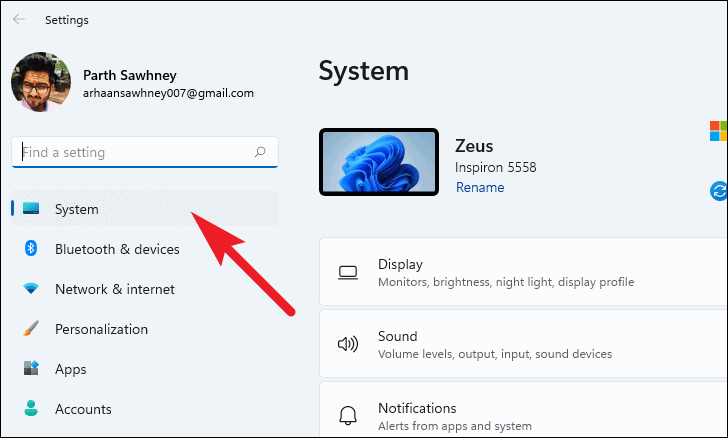
- In the Settings window, click on
Systemfrom the left sidebar.
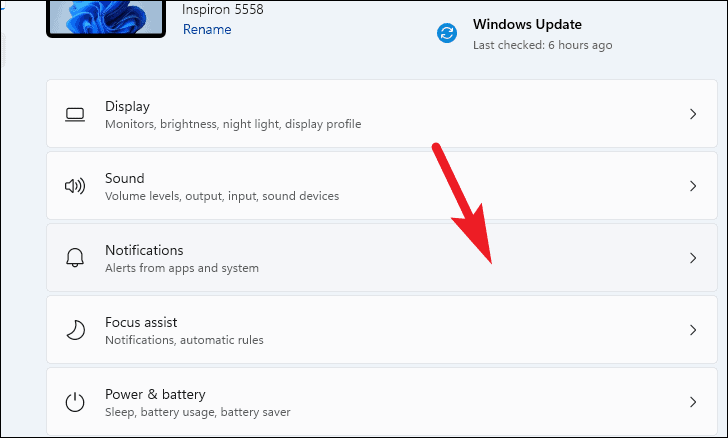
- Select
Notificationson the right side of the window.
- Toggle the
Notificationsswitch to theOffposition.
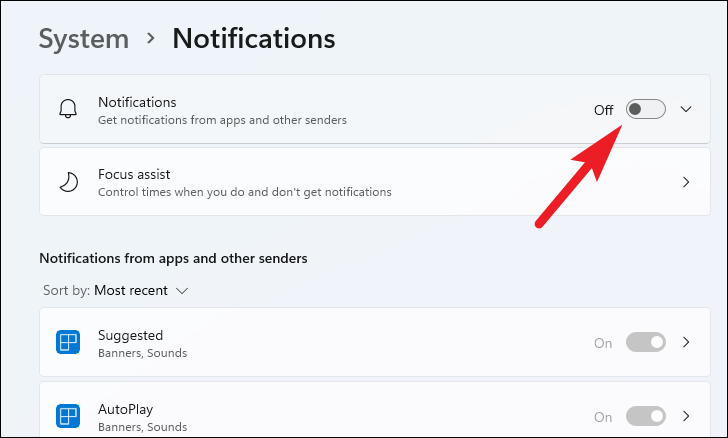
With this setting turned off, you won't receive any notifications from apps or senders.
Disable Notifications for Specific Apps
To stop notifications from certain apps while keeping them enabled for others, you can adjust individual app settings.
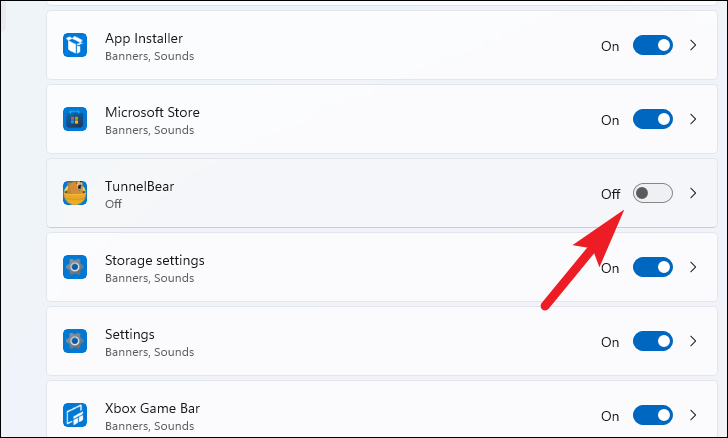
- In the
Notificationssettings, scroll down toNotifications from apps and other senders. - Find the app you want to silence and toggle its switch to
Off.
Silence Notifications Instead of Disabling
If you prefer to receive notifications without visual pop-ups or sounds, you can customize an app's notification settings.
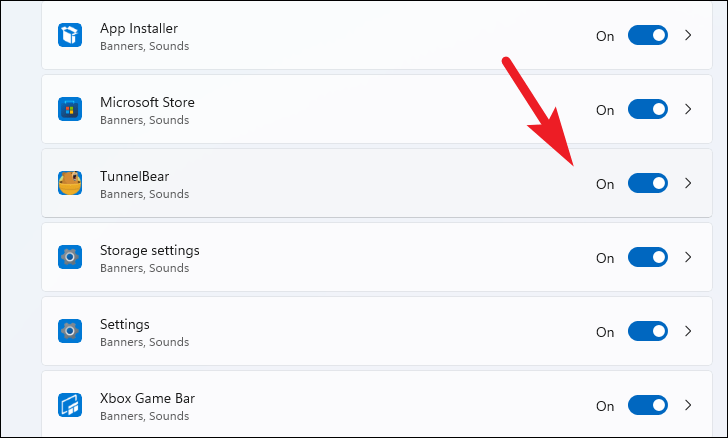
- Click on the app within
Notifications from apps and other sendersto access its notification settings.
- Uncheck
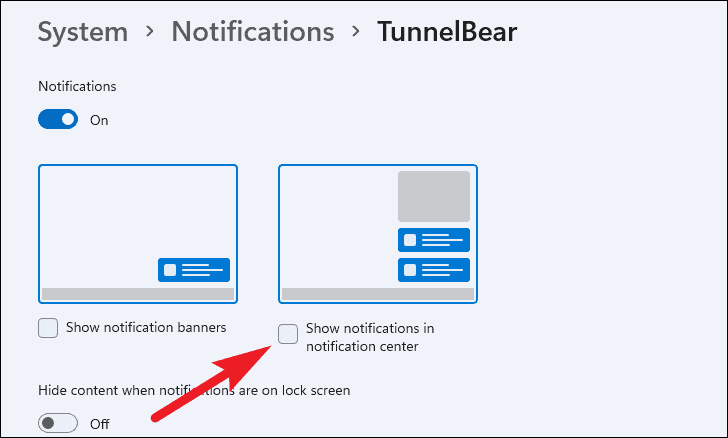
Show notification bannersto stop visual pop-up notifications.
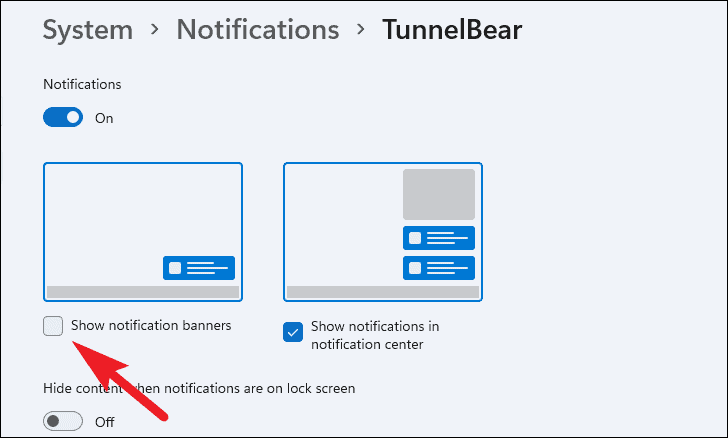
- If you don't want notifications to appear in the notification center, uncheck
Show notifications in notification center.
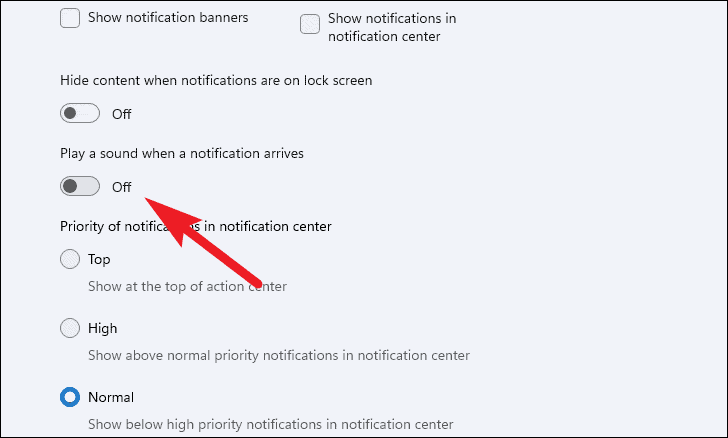
- Toggle off
Play a sound when a notification arrivesto disable notification sounds.
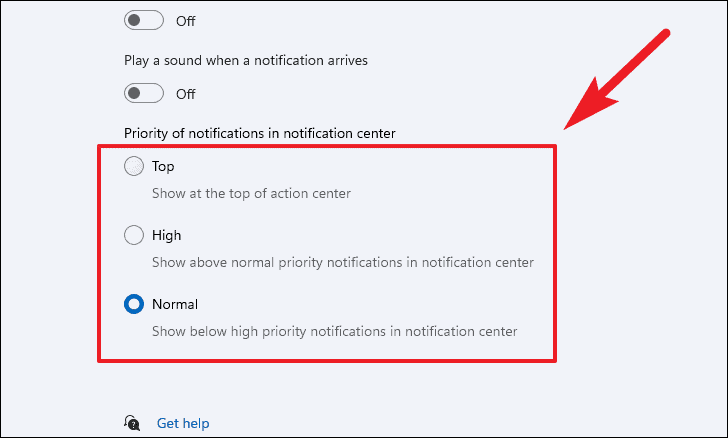
- Under
Priority of notifications in notification center, select the desired priority level for the app's notifications.
Utilize Focus Assist
Focus Assist helps you manage notifications by allowing only certain notifications during specific times or activities.
- In the
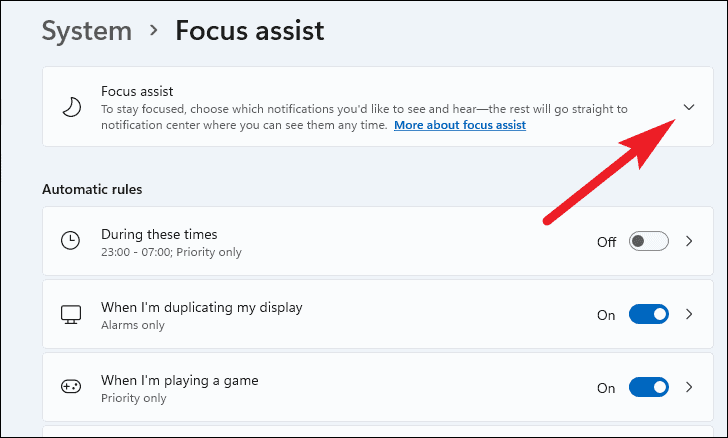
Settingsapp, go toSystemand selectFocus assist.
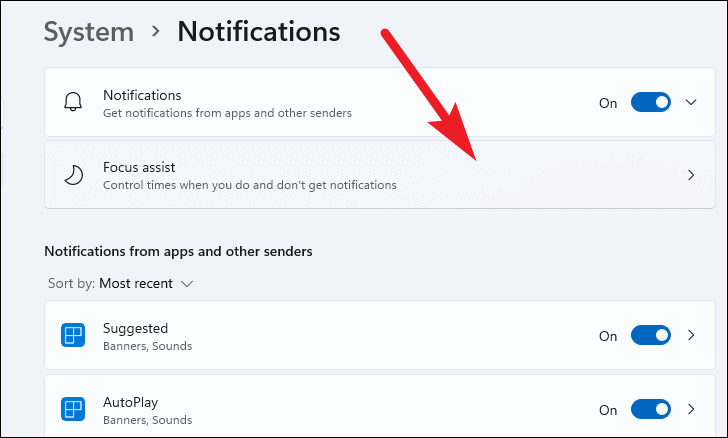
- Click the arrow next to
Focus assistto expand its options.
- Choose
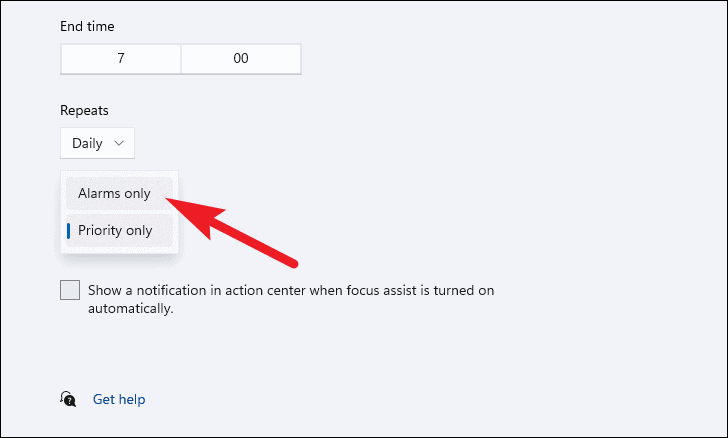
Priority onlyto see notifications from apps on your priority list. ClickCustomize priority listto modify this list.
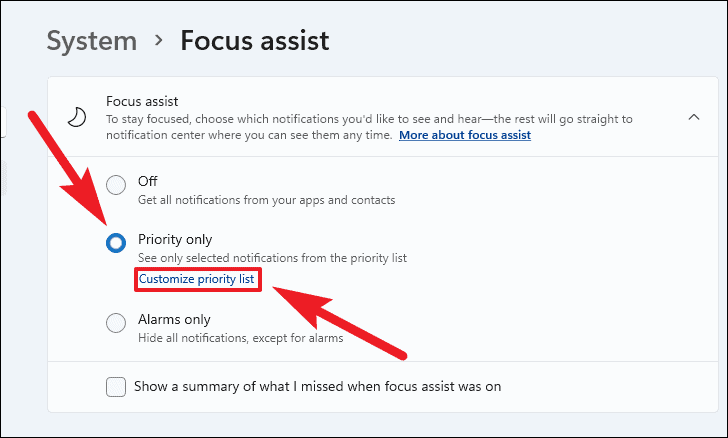
- Select
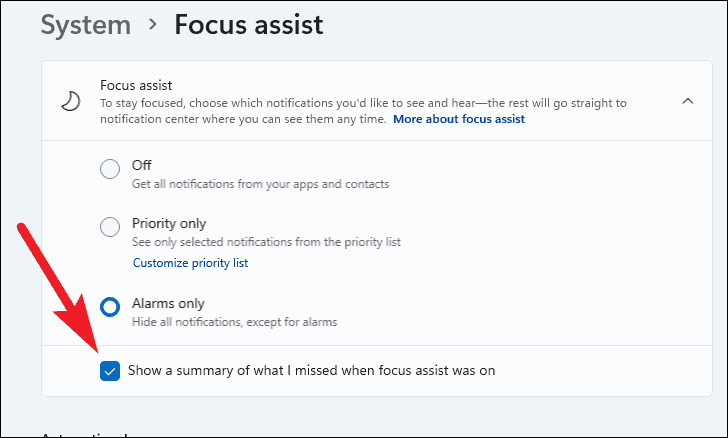
Alarms onlyto hide all notifications except for alarms. - To receive a summary of missed notifications, check
Show a summary of what I missed when focus assist was on.
- Under
Automatic rules, click onDuring these timesto set up a schedule for Focus Assist.
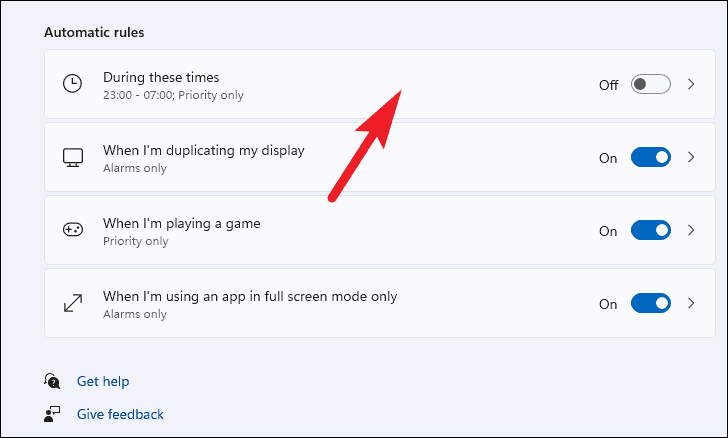
- Toggle the switch to
On, then set your preferredStart timeandEnd time.
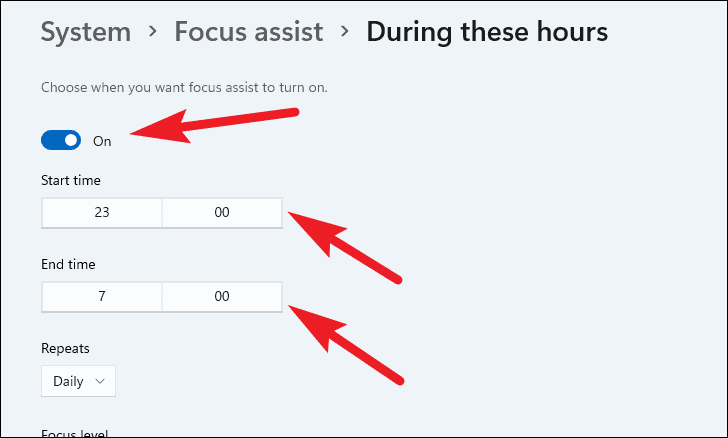
- Choose the frequency by selecting an option under
Repeats. - Select the
Focus levelby choosing eitherPriority onlyorAlarms only.
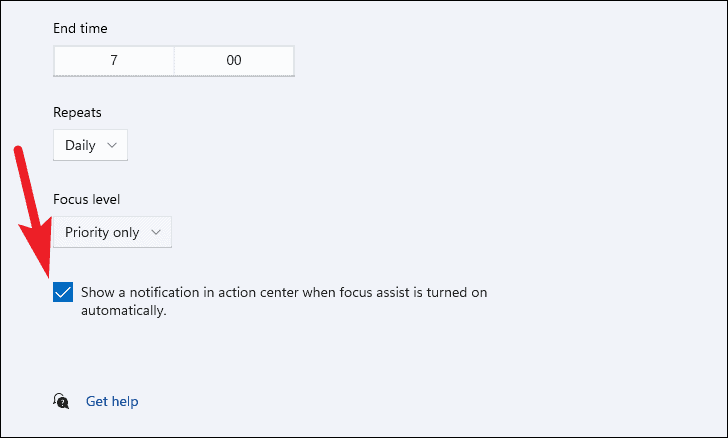
- Optionally, check
Show notification in action center when focus assist is turned on automaticallyto be notified when Focus Assist activates.
By customizing these settings, you can manage notifications on your Windows 11 PC to minimize distractions and focus on what's important.

