
Windows 11 brings a refreshed user interface, Android app support, and enhanced multitasking features. For those eager to experience Microsoft’s latest operating system, there are several methods to upgrade from Windows 10 or perform a clean installation. This guide will walk you through the various approaches to install Windows 11 on your PC.
Check Windows 11 minimum system requirements
Before attempting to upgrade, ensure your computer meets the following Windows 11 system requirements:
Prepare your PC for the Windows 11 upgrade
Check for compatibility
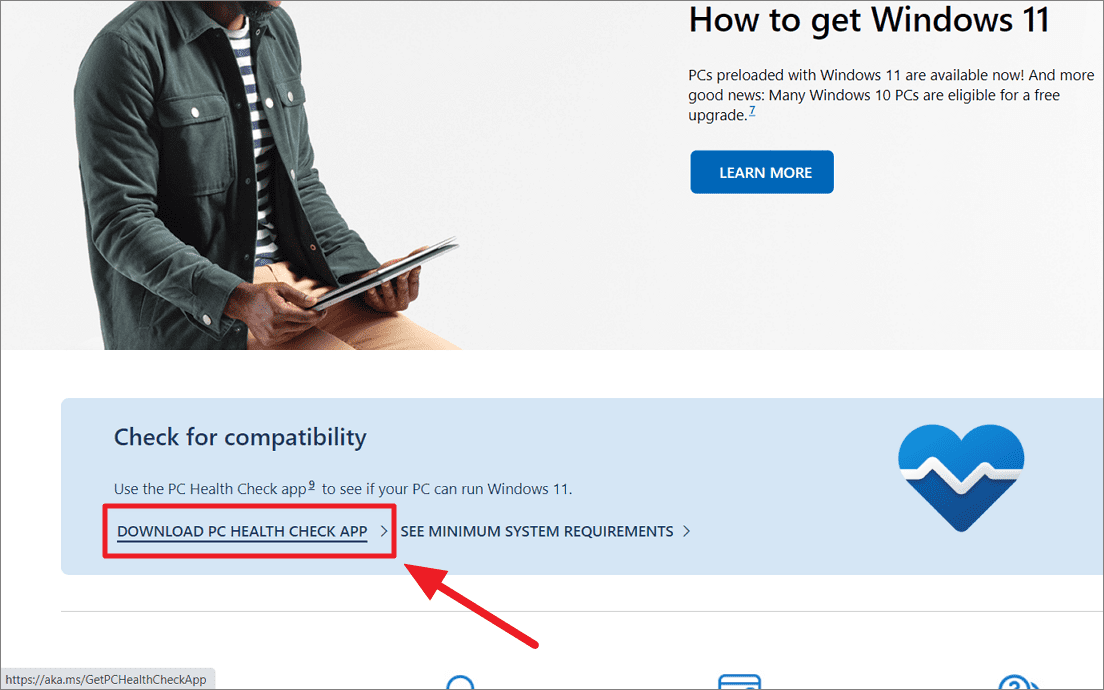
Download and run Microsoft’s PC Health Check app to verify if your device is compatible with Windows 11:
- Visit the Windows 11 download page.
- Click “Download PC Health Check App” under the Check for compatibility section.
- Run the downloaded WindowsPCHealthCheckSetup.msi file to install the app.
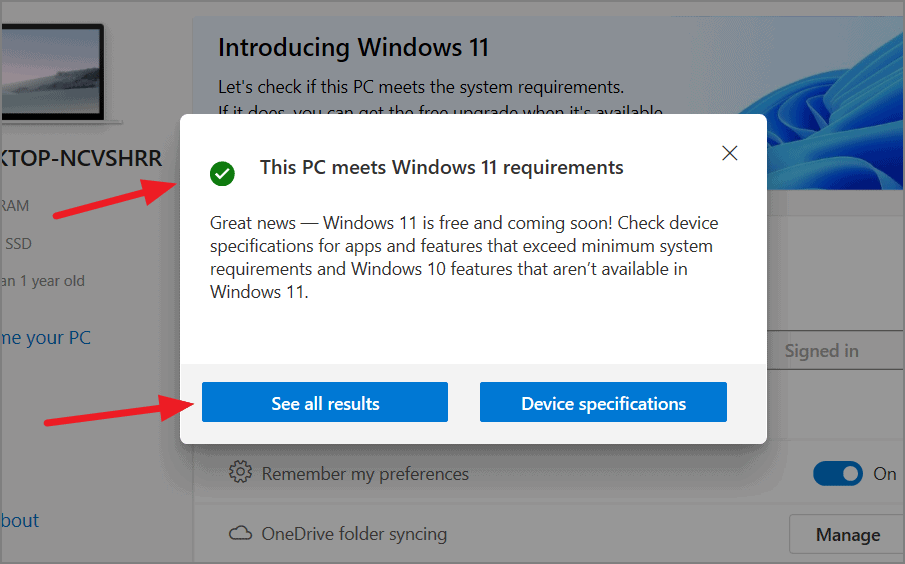
- Launch the PC Health Check app and click “Check now”.

If your device is compatible, you’ll see a message confirming it meets Windows 11 requirements. For a detailed report, click “See all results”.
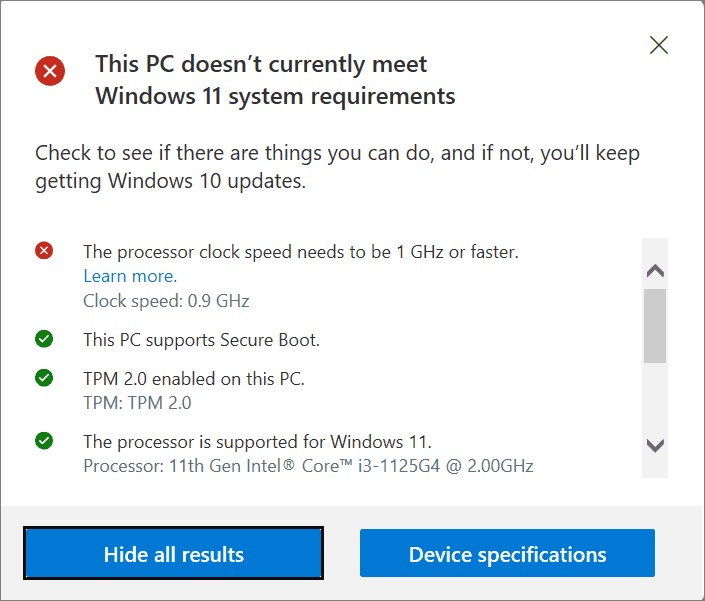
If your PC doesn’t meet the requirements, you’ll see a message indicating which components are incompatible.
Backup your files before upgrading to Windows 11
It’s crucial to back up your important documents, apps, and data before upgrading. You can create a recovery image to restore your previous Windows version if needed.
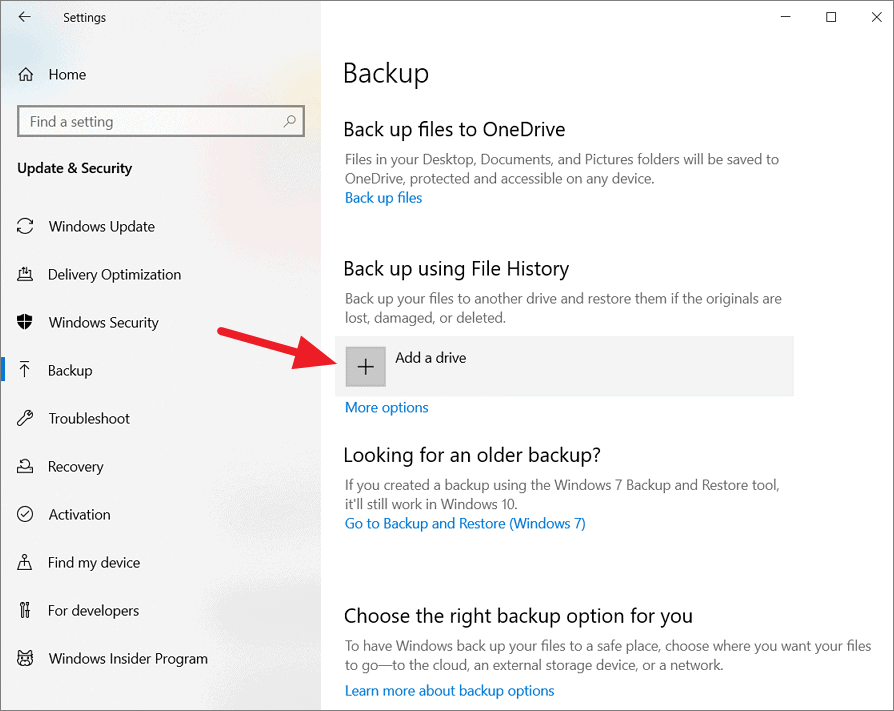
To backup your files in Windows 10:
- Open the Settings app and go to Update & Security.
- Select “Backup” from the left pane.
- To backup files to OneDrive, click “Back up files” under “Back up files to OneDrive”.
- To backup to another drive, click “Add a drive” under “Back up using File History”.
For more detailed backup options:
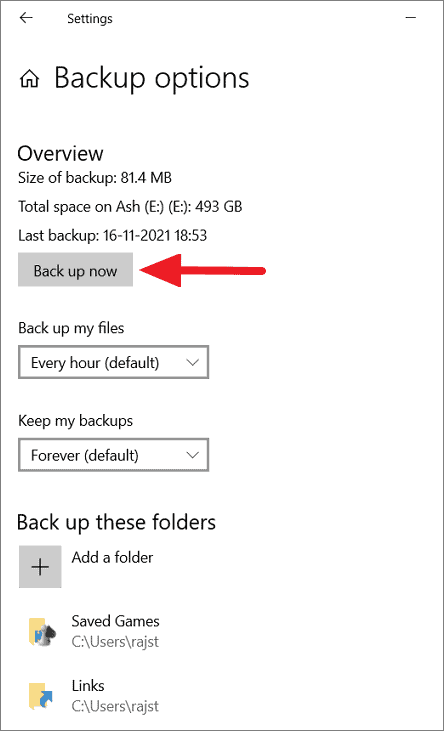
- Click “More options” under File History.
- Manage which folders to back up and click “Back up now” to start the backup process immediately.
To create a system image:
- Click “See advanced settings” under Related settings in the Backup options.
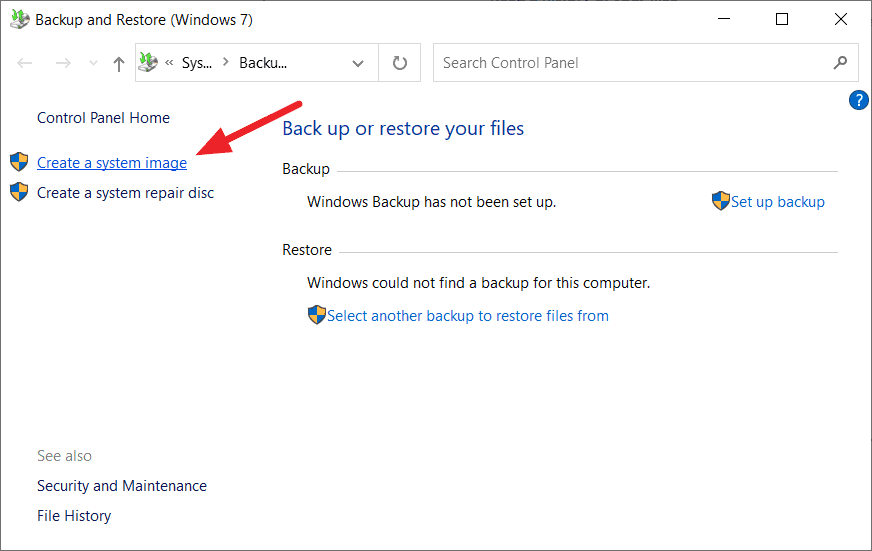
- In the File History control panel, click “System Image Backup” in the bottom-left corner.
- Click “Create a system image” on the left side of the Backup and Restore panel.
- Choose where to save the backup and follow the prompts to create the system image.
Enable TPM, Secure Boot, and other required features
Windows 11 requires TPM 2.0 and Secure Boot. These features may need to be enabled in your UEFI firmware settings. To access these settings, restart your PC and press the appropriate key (often Del, F2, or F12) during startup to enter BIOS/UEFI settings.
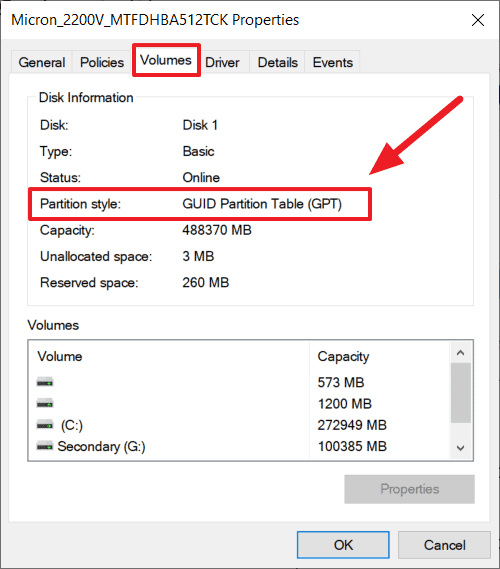
To check if your system uses GPT partition:
- Open Disk Management (search for “Create and format hard disk partitions” in the Start menu).
- Right-click on the main disk and select “Properties”.
- In the Volumes tab, check if “GUID Partition Table (GPT)” is listed next to Partition style.
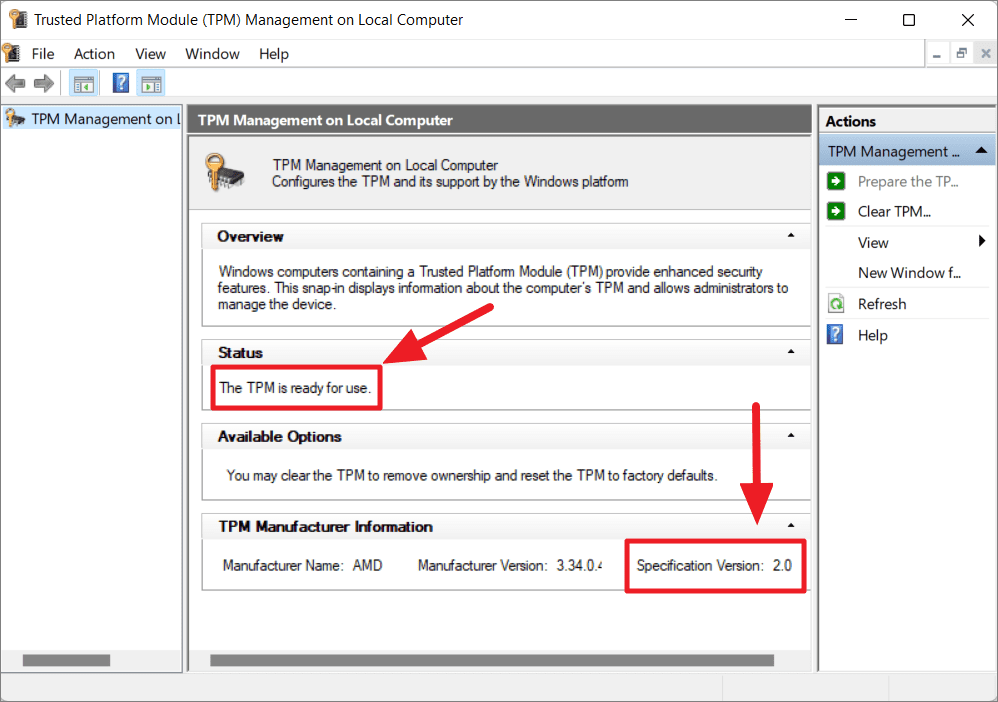
To check if TPM is enabled:
- Press Windows+R, type “tpm.msc”, and press Enter.
- In the TPM Management window, check if it says “The TPM is ready for use” under the Status section.
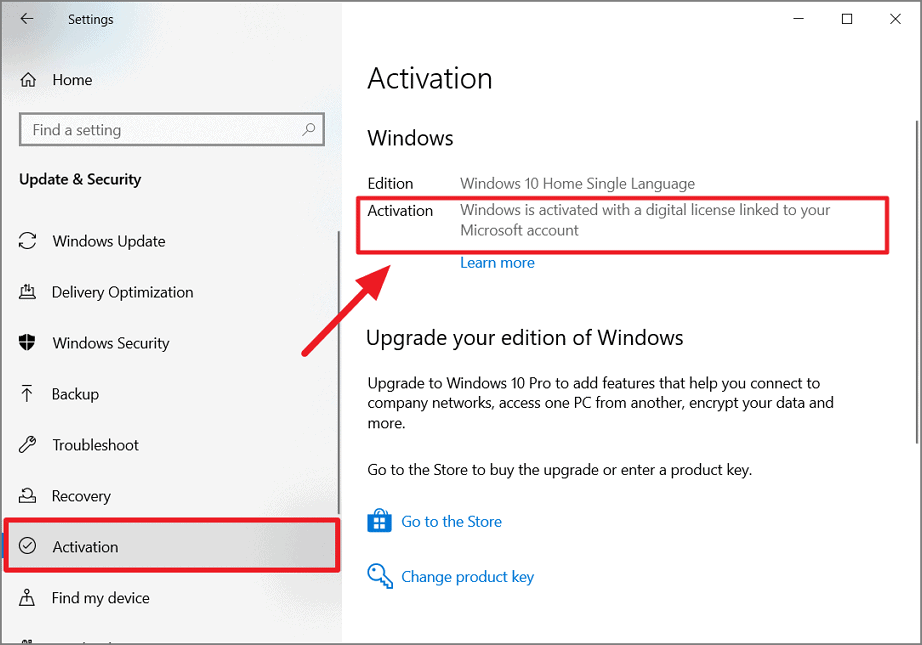
Check Windows 10 current activation
Ensure your Windows 10 is properly activated before upgrading. To check:
- Open Settings and go to Update & Security.
- Click on “Activation” in the left panel.
- Check the activation status under the Windows section.
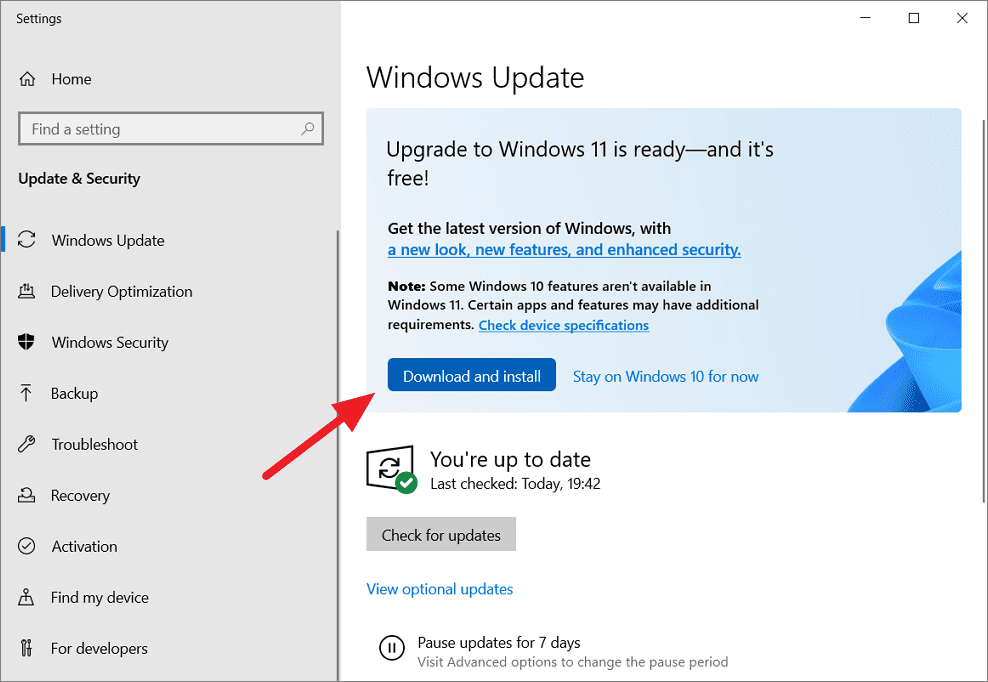
Upgrade to Windows 11 from Windows Update
The simplest method to upgrade is through Windows Update:
- Open Settings and go to Update & Security.
- Select “Windows Update” on the left pane and click “Check for updates” on the right.
- If Windows 11 is available, you’ll see an “Upgrade to Windows 11 is ready” message with an option to download and install.
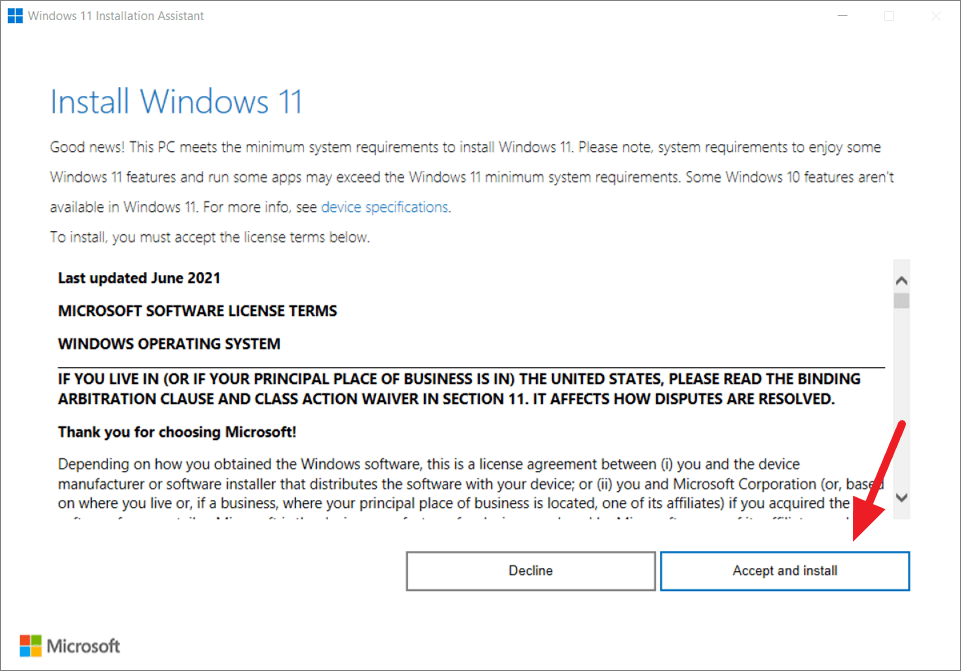
Upgrade to Windows 11 using Installation Assistant
If Windows Update doesn’t offer the upgrade, you can use the Windows 11 Installation Assistant:
- Visit the Windows 11 download page and click “Download now” under the Windows 11 Installation Assistant section.
- Run the downloaded Windows11InstallationAssistant.exe file.
- In the wizard, click “Accept and install”.
- The tool will download and install Windows 11. Once complete, restart your PC to finish the installation.
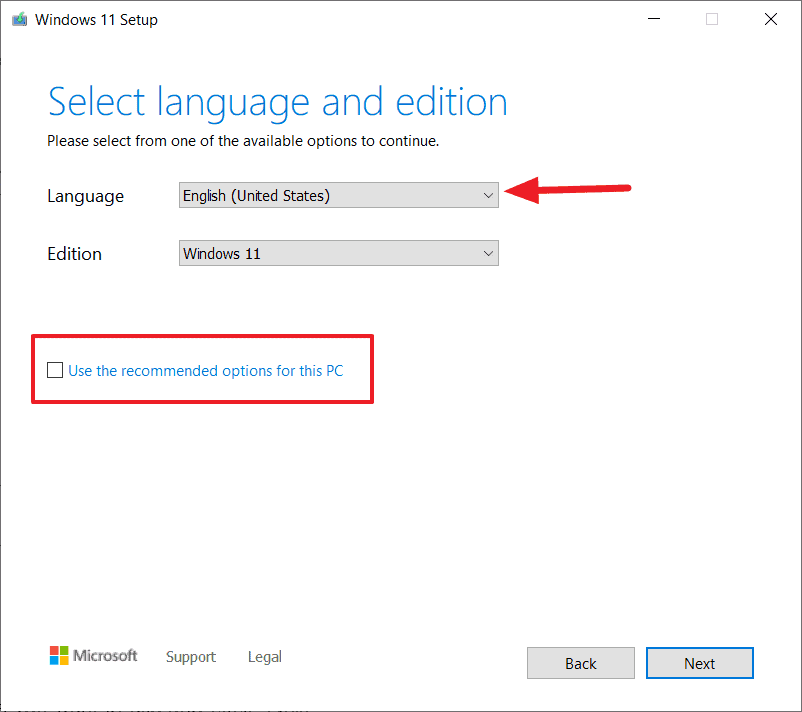
Upgrade to Windows 11 using an installation media (DVD or USB)
For a clean install or to upgrade multiple PCs, create a bootable USB or DVD:
- On the Windows 11 download page, scroll to “Create Windows 11 Installation Media” and click “Download now”.
- Run the tool and accept the license terms.
- Choose language, edition, and architecture settings.
- Select USB flash drive or ISO file as your media.
- Follow the prompts to create the installation media.
Clean installation of Windows 11 from USB drive or DVD
To perform a clean install:
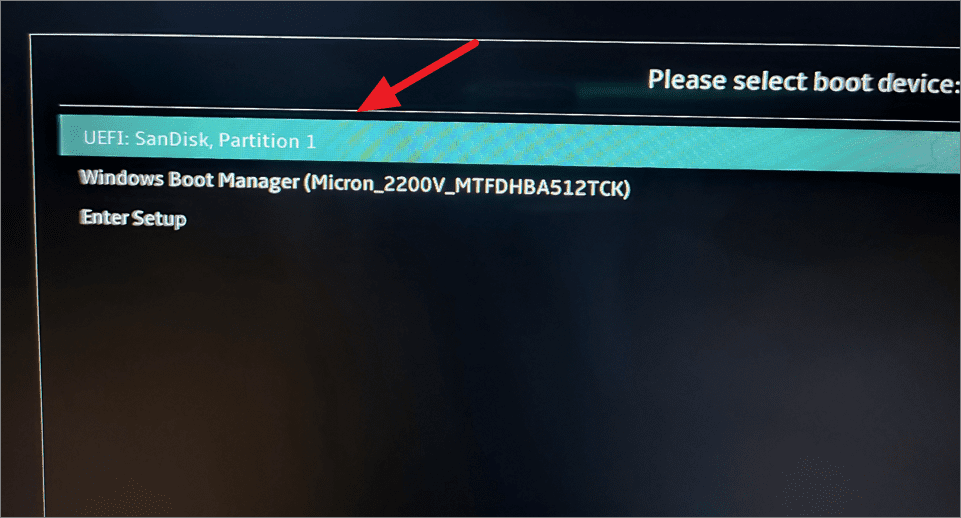
- Insert the bootable USB or DVD and restart your PC.
- Press the appropriate key to enter the boot menu during startup.
- Select the USB drive or DVD as the boot device.
- Follow the on-screen instructions to install Windows 11.
Upgrade Windows 11 directly from installation media files
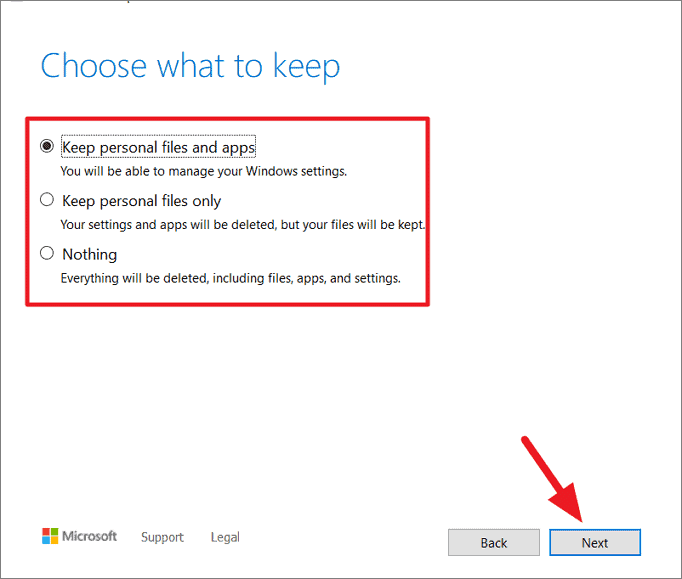
To upgrade while keeping your files and settings:
- Insert the installation media and run setup.exe.
- Choose to keep personal files and apps when prompted.
- Follow the on-screen instructions to complete the upgrade.
Upgrade to Windows 11 using disk image (ISO)
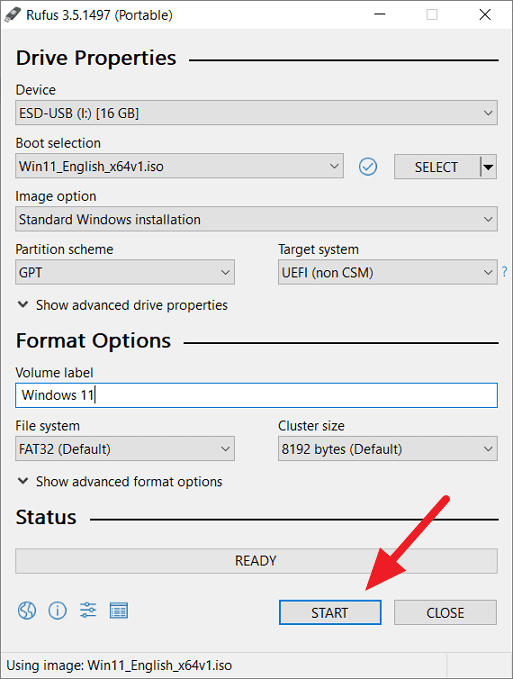
You can also download the Windows 11 ISO and create a bootable USB using third-party software like Rufus:
- Download the Windows 11 ISO from the Microsoft website.
- Download and run Rufus.
- Select your USB drive and the Windows 11 ISO file in Rufus.
- Click Start to create the bootable USB.
Upgrade to Windows 11 on an unsupported PC (without TPM 2.0)
If your PC doesn’t meet all requirements, you may still be able to install Windows 11 using a registry hack:
- Press Windows+R, type “regedit”, and press Enter.
- Navigate to HKEY_LOCAL_MACHINE\SYSTEM\Setup\MoSetup.
- Right-click in the right pane, select New > DWORD (32-bit) Value.
- Name it “AllowUpgradesWithUnsupportedTPMOrCPU”.
- Double-click the new value and set it to 1.
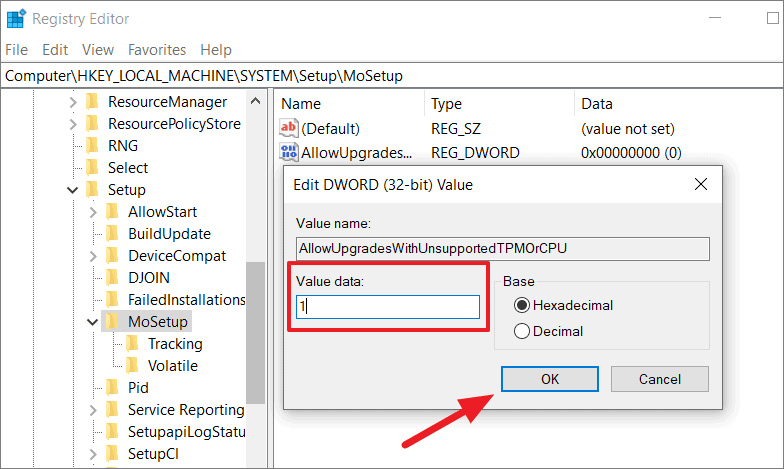
Note: This method may result in an unstable system and is not recommended for daily use.
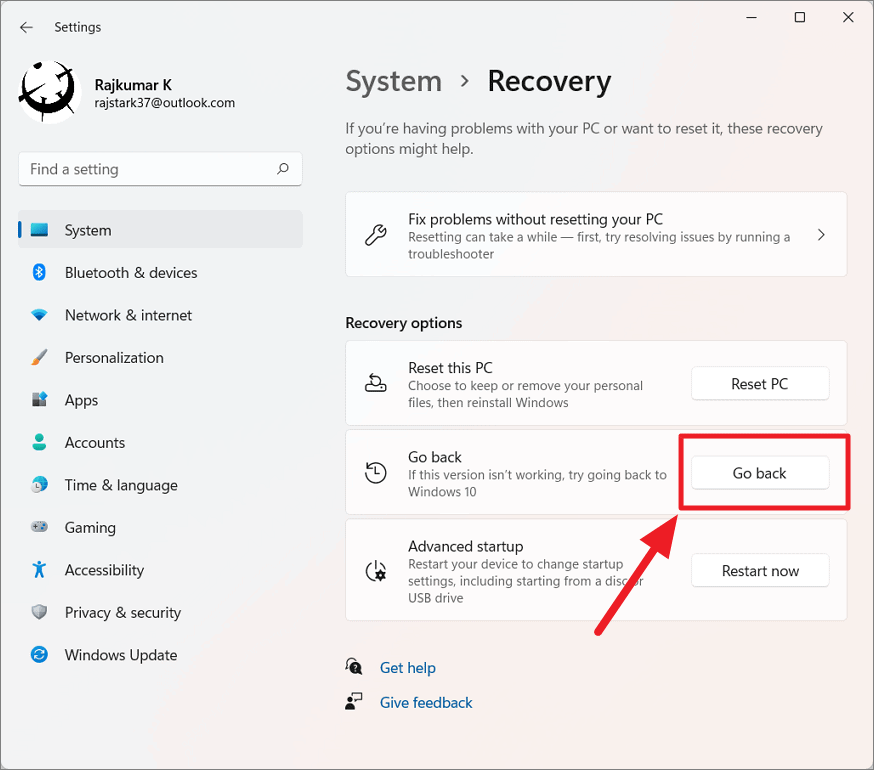
Go back to the previous version of Windows (Downgrade)
If you’re not satisfied with Windows 11, you can revert to your previous Windows version within 10 days of upgrading:
- Open Settings and go to System > Recovery.
- Click “Go back” under Recovery options.
- Follow the on-screen instructions to complete the downgrade process.
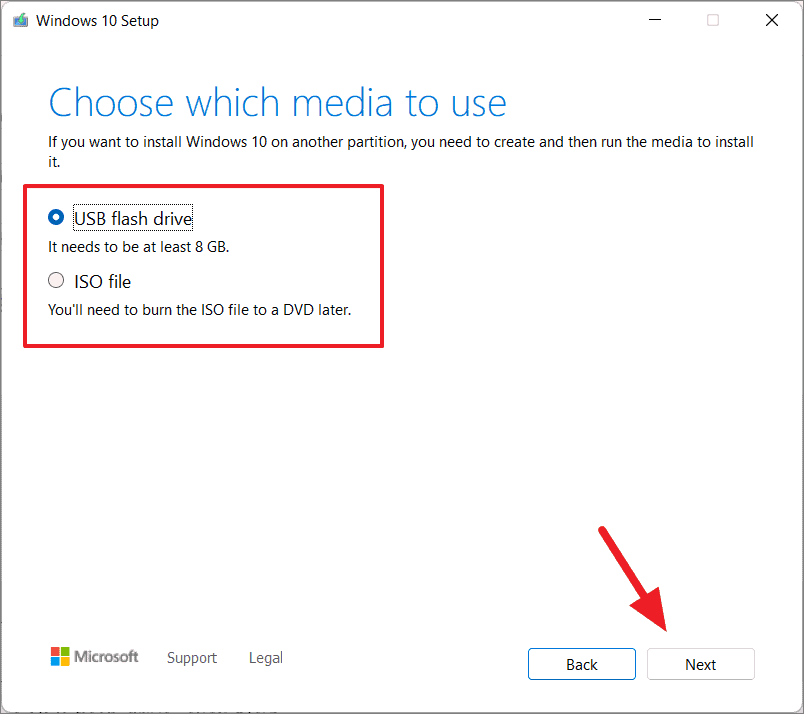
Downgrade to Windows 10 using installation media (Clean install)
If it’s been more than 10 days since upgrading, you’ll need to perform a clean install of Windows 10:
- Download the Windows 10 Media Creation Tool from the Microsoft website.
- Run the tool and create a bootable USB drive with Windows 10.
- Boot from the USB drive and follow the installation instructions to perform a clean install of Windows 10.
Remember to back up your important files before performing any major operating system changes.


