
Updating repeated information across a long Microsoft Word document can be tedious, especially when the same details—like a client name or project title—appear in multiple places. Document Property Quick Parts in Word solve this by linking fields so that editing one instance updates all others instantly, reducing manual edits and the risk of inconsistencies.
Using Built-In Document Property Quick Parts
Step 1: Open your Word document and go to the Insert tab. In the Text group, select Quick Parts, then hover over Document Property. You’ll see a dropdown list of built-in properties such as Title, Author, Company, and more.
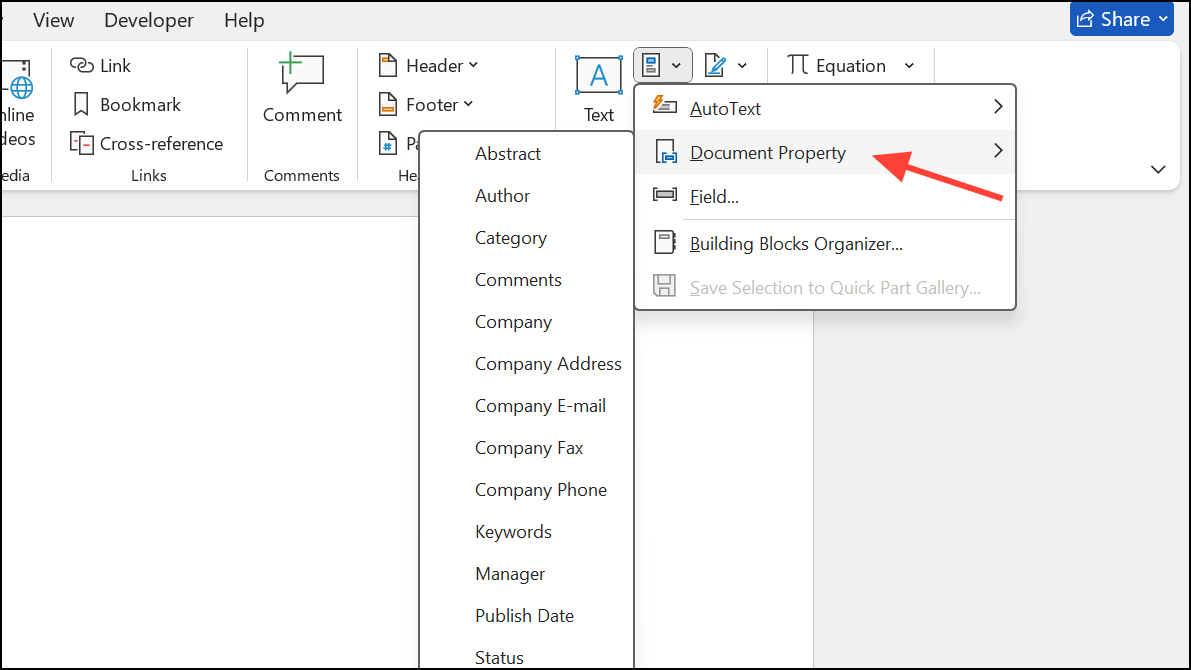
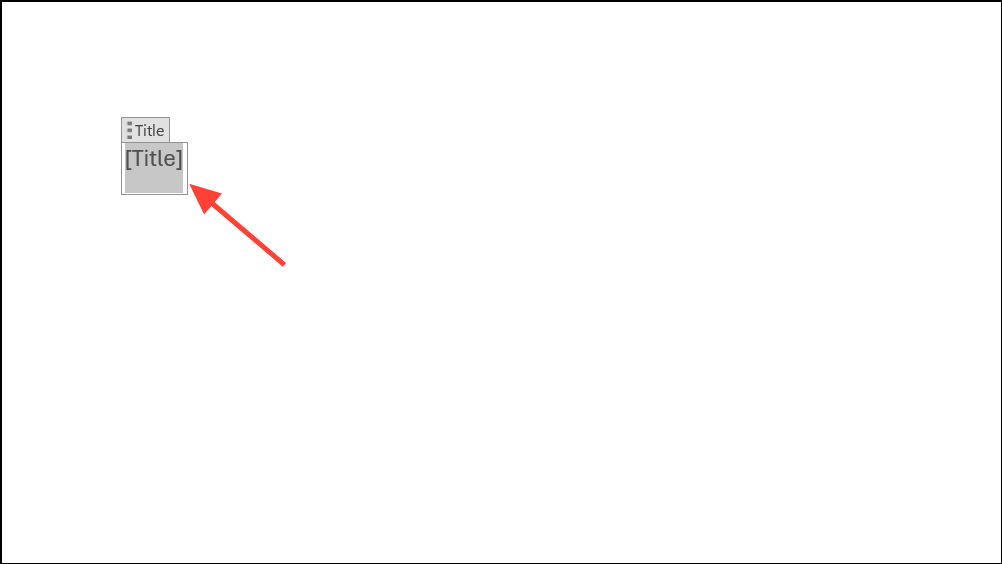
Step 2: Click the property you want to use (for example, Title). This inserts a content control field at your cursor position. Enter the desired value in the field. Any other instance of the same property in your document will automatically reflect updates to this value.
Step 3: To use the same property elsewhere, repeat Step 1 and select the same property. This links the fields, so changes made to one will appear in all linked fields throughout the document.
Built-in properties are especially effective for automating repeated content in templates or standardized documents, such as contracts or letters, where information like client names, dates, or reference numbers must appear consistently.
Repurposing and Managing Built-In Document Properties
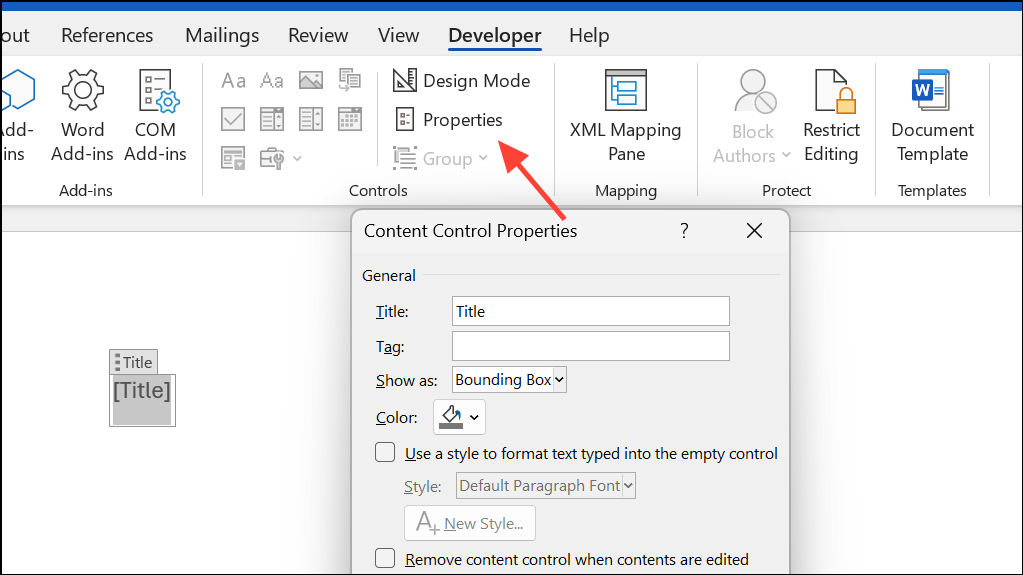
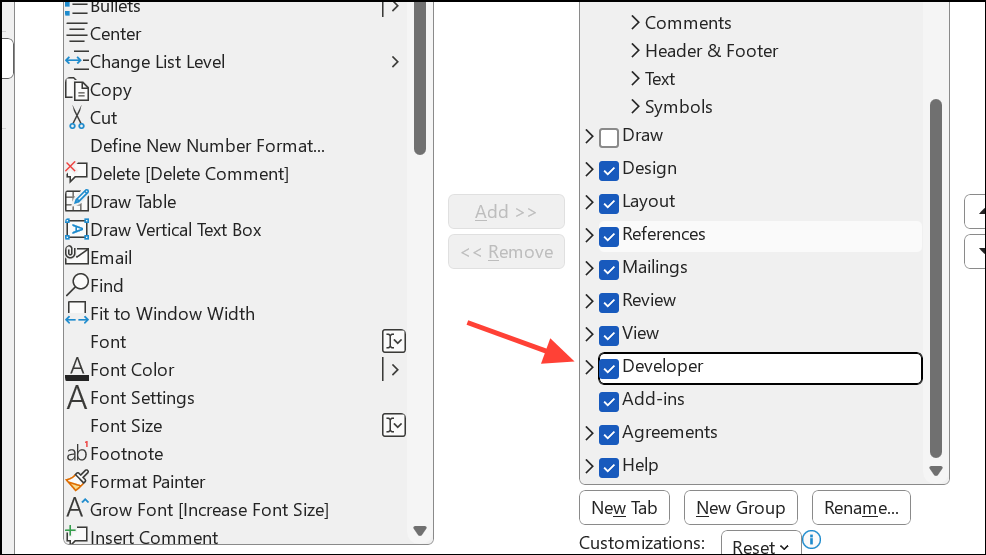
Step 1: If the existing built-in properties do not match your needs exactly, you can repurpose them by renaming them within your document or template. Insert the property as described above, then right-click the content control and use the Properties option on the Developer tab to change its title or tag for clarity. This does not change the underlying property name in the dropdown, but helps identify its purpose in your document.
Step 2: For templates, copy and paste the content control fields to other locations as needed. All instances remain linked to the same property, so updating one updates all.
Repurposing is a practical workaround when you need more fields than the default built-in list provides, but be mindful that the underlying property names remain unchanged in the Quick Parts menu.
Creating Custom Document Properties
Word also allows you to create custom document properties, which can be inserted as fields. However, these do not behave exactly like built-in Document Property Quick Parts: edits to one field do not automatically update all other instances. Instead, you must update the property value in the document’s properties dialog, and then refresh fields to propagate changes.
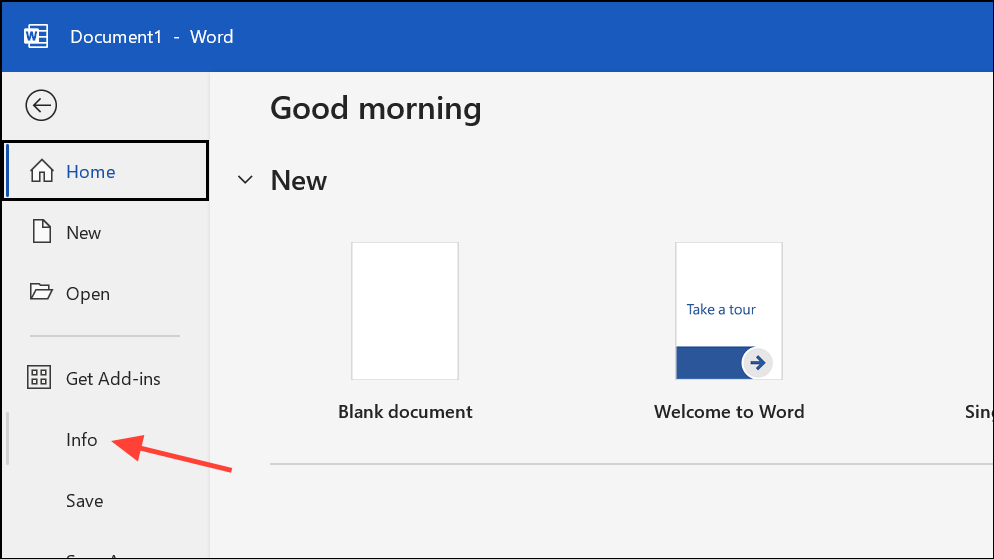
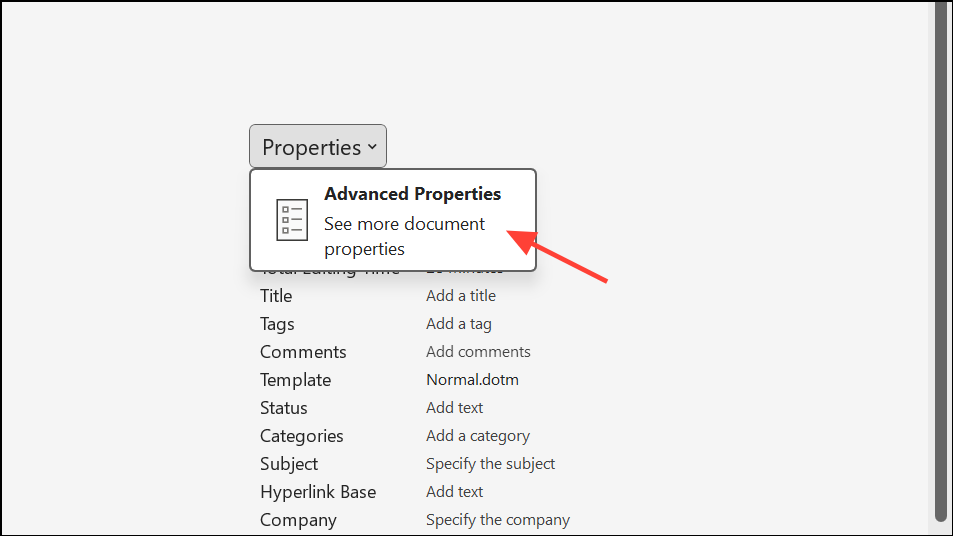
Step 1: Go to the File menu and select Info.
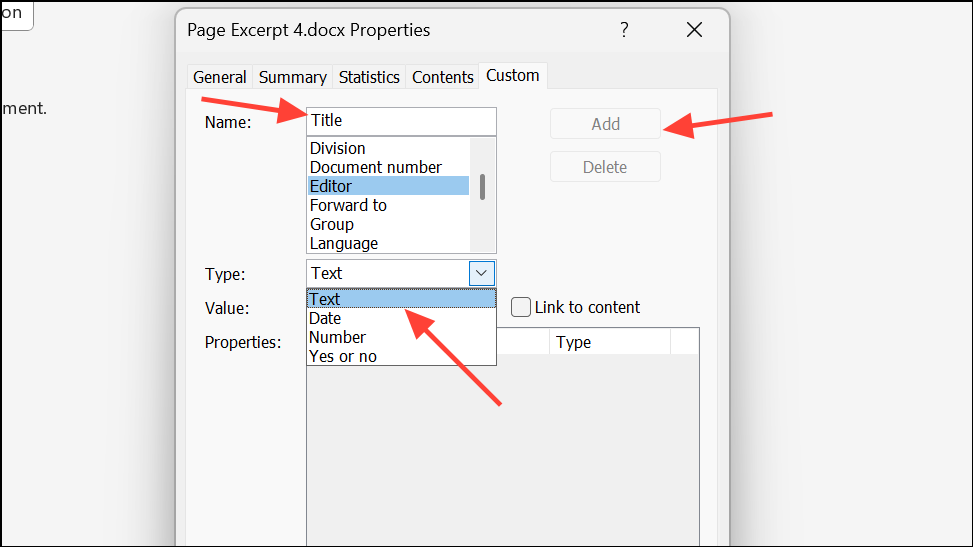
Step 2: Click Properties > Advanced Properties. In the dialog, switch to the Custom tab.
Step 3: Enter a name for your new property, select a type (such as Text), and assign a value. Click Add and then OK to save.
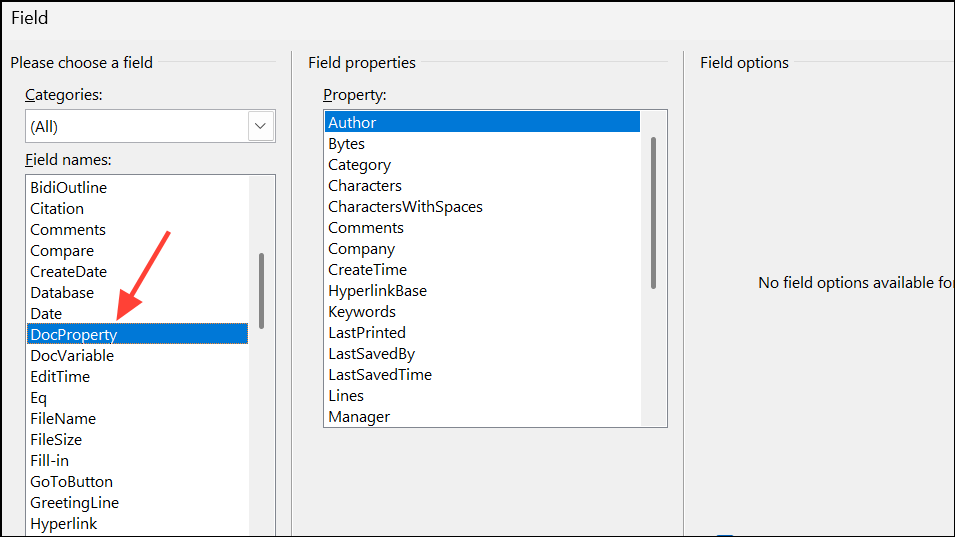
Step 4: To insert the custom property into your document, go to Insert > Quick Parts > Field.
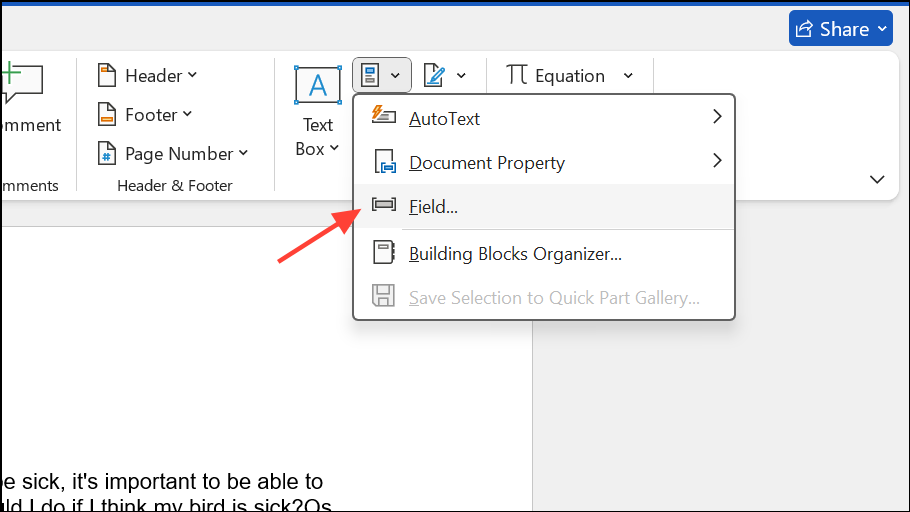
Step 5: In the Field dialog, choose DocProperty from the list, then select your custom property and click OK.
Step 6: To update all fields after changing a property value, select the entire document with Ctrl + A and press F9. This refreshes all fields to display the current property values.
While this method allows for more flexibility in naming, it does not provide the instant, in-document editing and auto-updating found with built-in Document Property Quick Parts.
Using Mapped Content Controls for Advanced Scenarios
When you need more fields than the built-in Document Property list provides, mapped content controls offer a solution. These controls are linked to custom XML parts within the document, allowing you to create additional fields that auto-update across the document, similar to built-in properties.
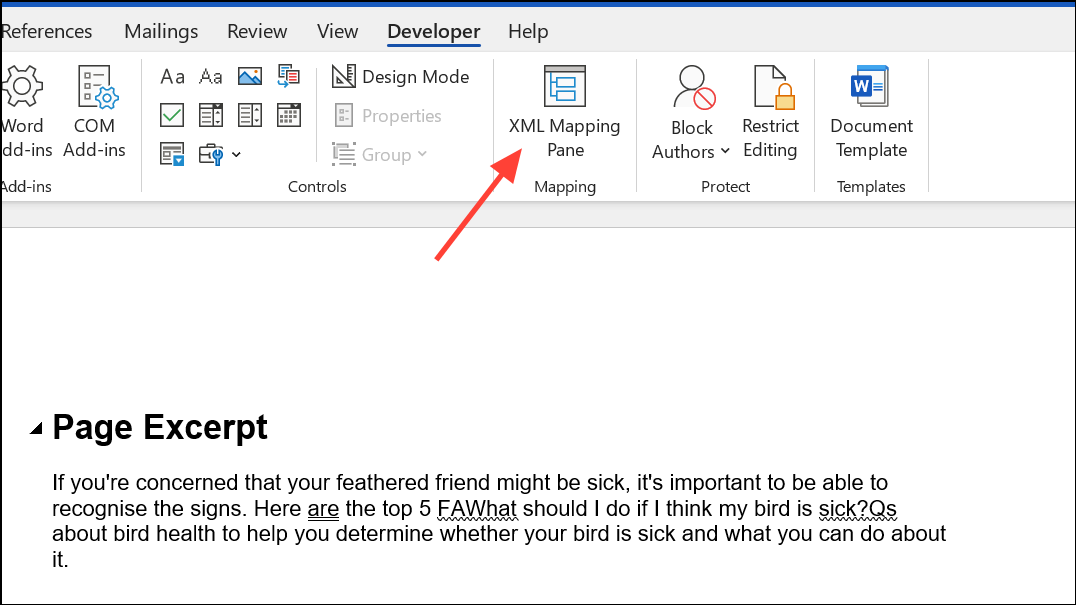
Step 1: Enable the Developer tab in Word by right-clicking the ribbon, selecting Customize the Ribbon, and checking Developer.
Step 2: Open the XML Mapping Pane (on the Developer tab, select XML Mapping Pane). If you do not have a custom XML part, you may need to create one externally and add it to the document.
Step 3: In the XML Mapping Pane, right-click the desired XML node and choose Insert Content Control > Plain Text or another suitable control type. This links the content control to the XML data, enabling auto-updating across all mapped controls in the document.
Step 4: To reuse the mapped content control, copy and paste it to other locations in your document. All instances will reflect updates made to any one of them, matching the behavior of built-in Document Property Quick Parts.
This method is more technical and may require initial setup with external XML tools, but it removes the limitation on the number of linked properties you can use. It is especially useful for complex templates or when automating document generation at scale. For detailed walkthroughs, refer to guides such as Greg Maxey’s tutorials or video demonstrations available online.
Limitations and Cautions
Word does not allow users to add custom properties directly to the Document Property Quick Parts dropdown menu; only built-in properties or those added via SharePoint or advanced XML mapping appear there. Custom document properties and mapped content controls can be used as fields or building blocks, but their management and reuse may require more advanced setup or template-based workflows. If you need to distribute templates with custom mapped controls, ensure all users have access to the template file, as mapped controls are tied to the document’s XML structure.
Automating repeated information in Word with Document Property Quick Parts saves time, reduces manual edits, and keeps documents consistent. For more advanced needs, mapped content controls and custom properties provide flexibility, though they require a bit more setup and technical familiarity.