If you rely on several different subscription-based services, you may find it hard to keep track of all of them. While you can use various tools, including the platforms you purchased the subscriptions from, to track them, they usually have certain limitations.
For instance, if you bought a subscription using the Google Play Store or Apple App Store, you will only be able to track that subscription using that particular store. Alternatively, if you rely on paid tracker apps, they are going to just add to your expenses. However, managing your subscriptions doesn't have to be difficult, and you can easily do so just by using Google Sheets, a free and lightweight tool.
Step 1: Creating your Subscription Tracker
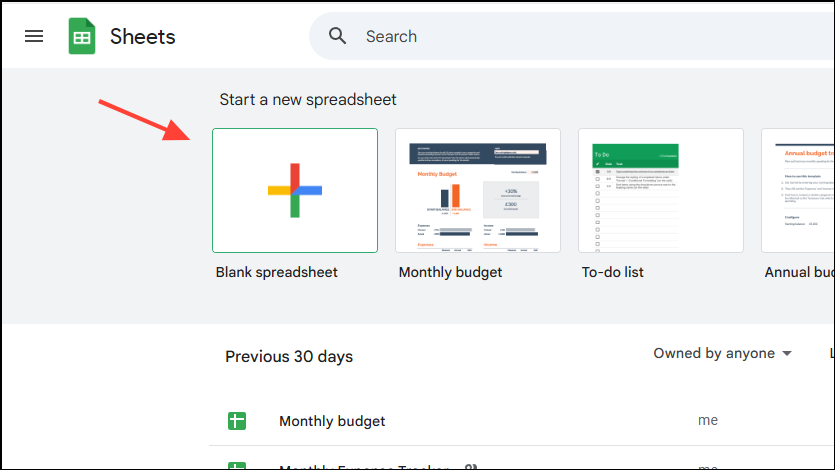
- Open Google Sheets in your web browser and sign in to your Google account.
- Click on 'Blank spreadsheet' to open a new spreadsheet for your subscription tracker.
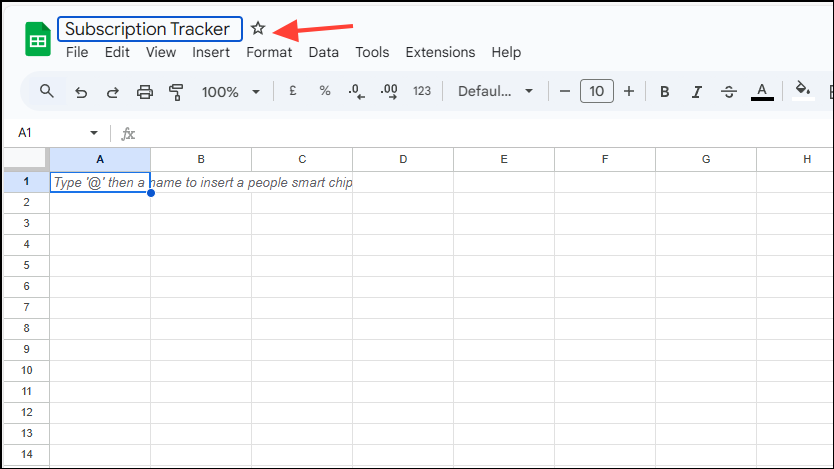
- Click on the box where it says 'Untitled spreadsheet' and give the sheet a name you prefer, such as 'Subscription Tracker'.
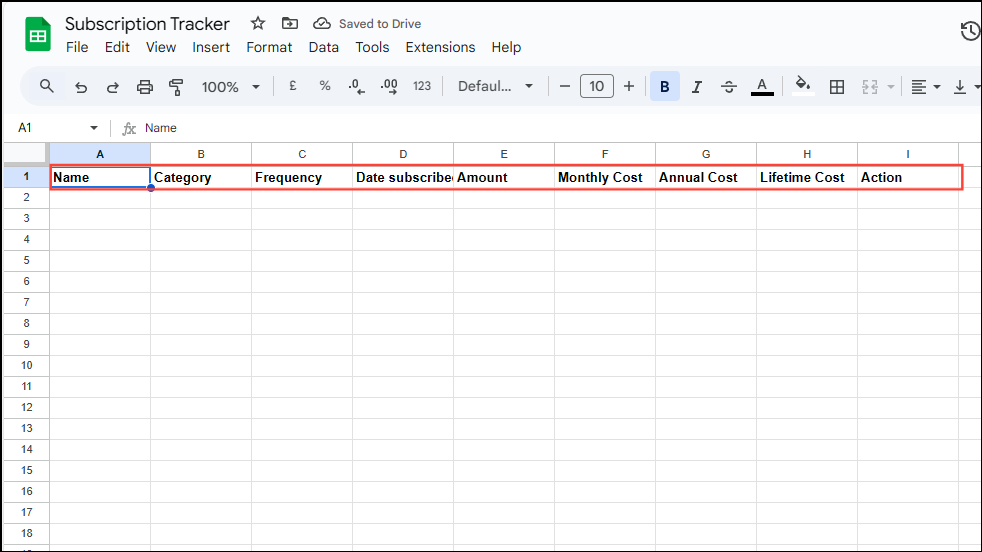
- Now, you will have to set up your Subscription Tracker sheet by creating different column headers. You can create headers for your subscriptions, subscription categories, monthly, annual, and lifetime costs, and actions like renewal or cancellation.
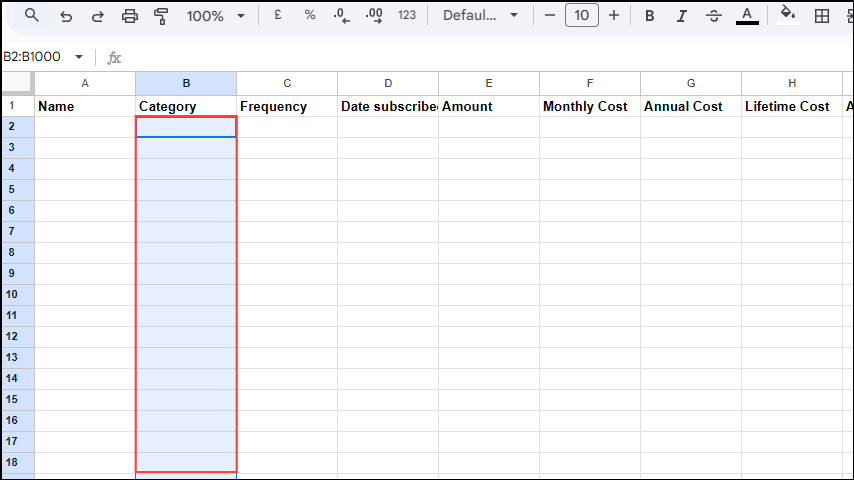
- You will need to add dropdown lists for columns like the Category and Frequency columns. To do so, click on the column header and then press and hold
Ctrlbefore clicking on the name of the column to select all the cells in the column except the one containing the column name.
- Now click on the 'Insert' menu at the top.
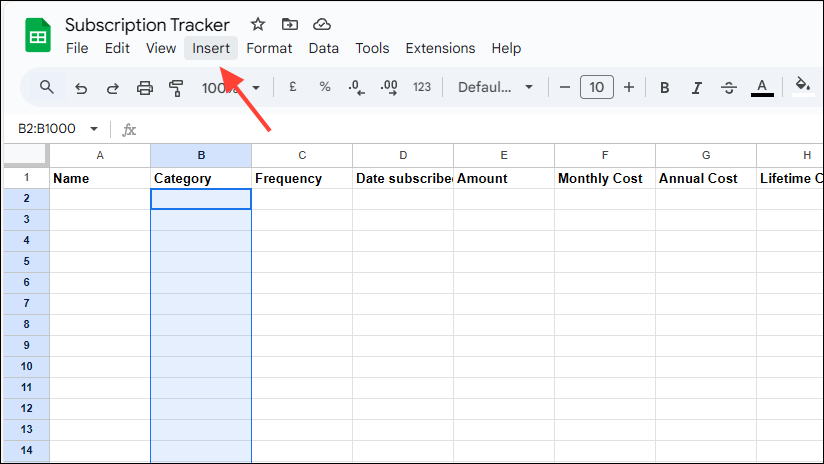
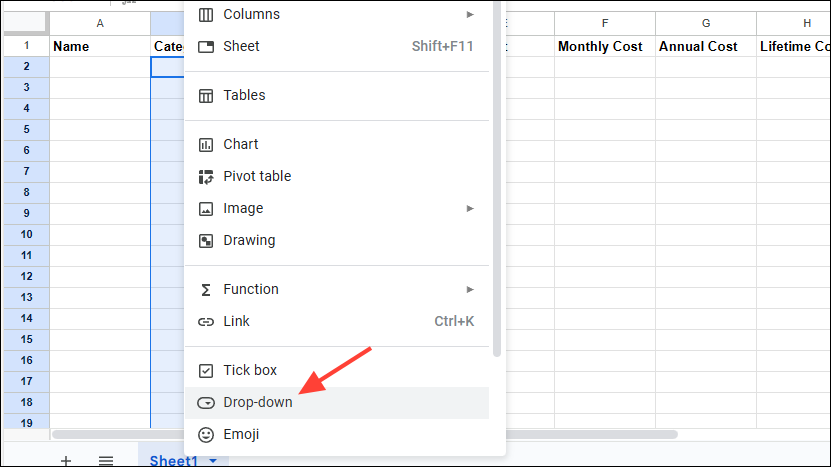
- Then click on 'Drop-down' in the list of options that appear. This will add dropdown menus to the entire column and a new panel will open on the right.
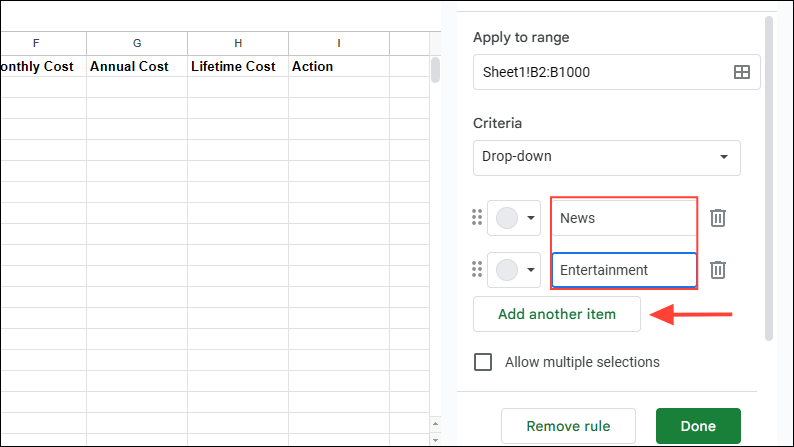
- You can enter the names of the items you want to appear in the dropdown by typing them in the spaces provided on the right. Add categories for your subscriptions using these and use the 'Add another item' button to add more items.
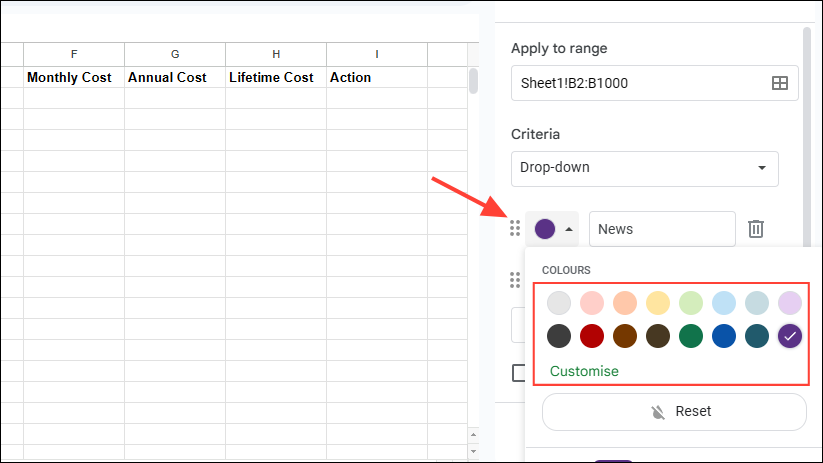
- Clicking on the left of an item will let you choose a color for it, so you can color-code different items as you like.
- After adding all the 'Category' items, repeat the process for the 'Frequency' column by inserting drop-downs and adding items. Then you can type in the details of your subscriptions in the sheet. You do not need to add the currency symbol when entering the amounts.
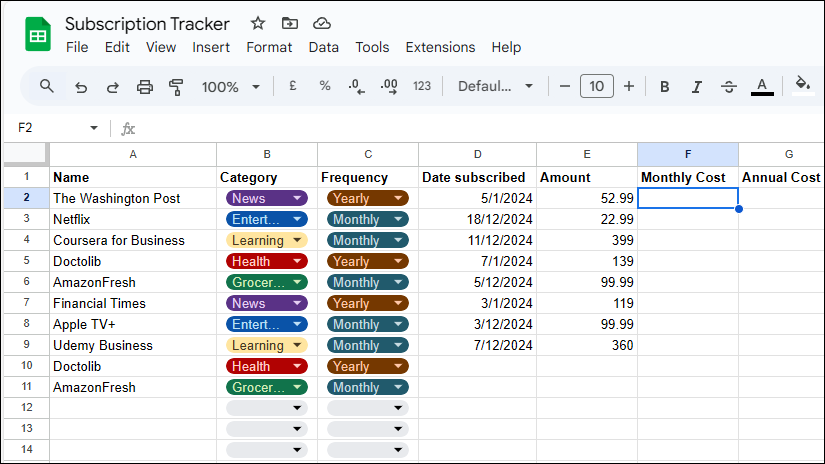
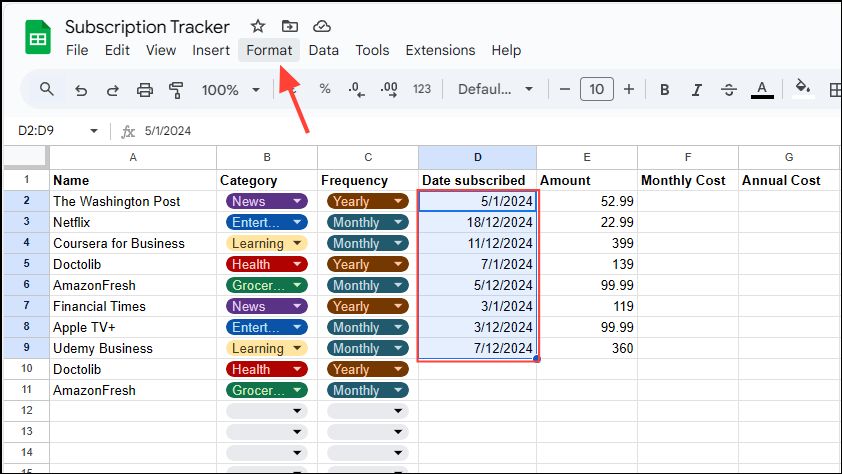
- Select all the items in the 'Date subscribed' column and click on the 'Format' menu.
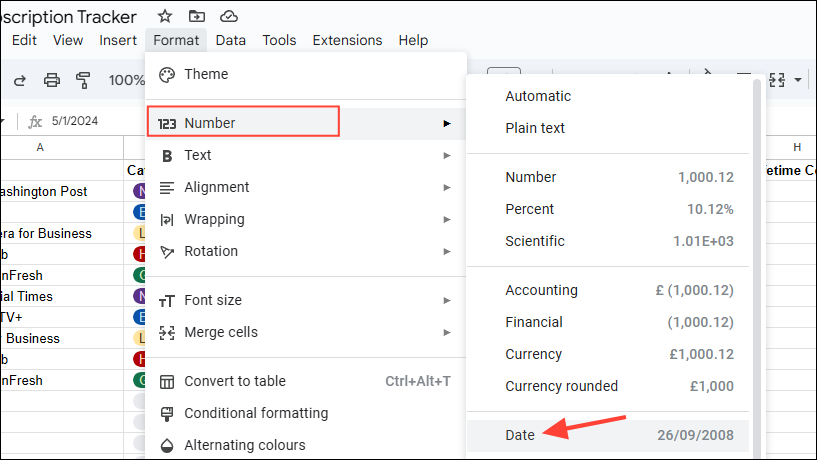
- Then go to 'Number' and click on 'Date' to format all the items in the column as dates.
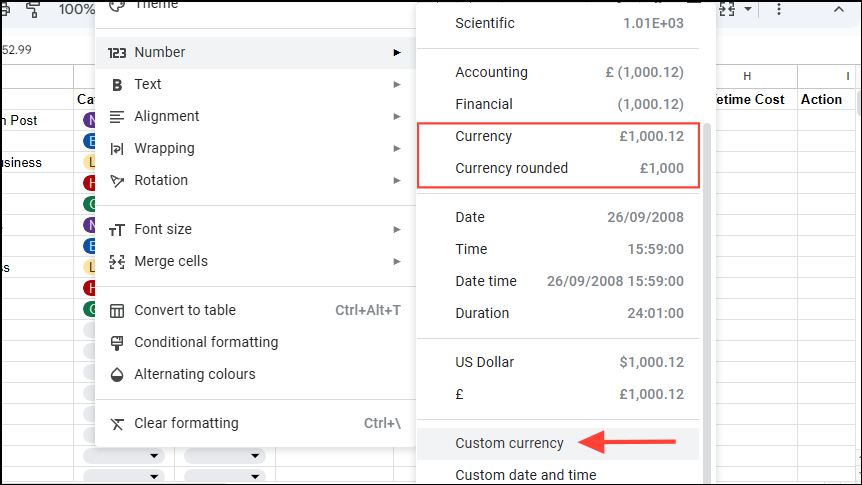
- Then select all the items in the 'Amount' column and follow the same process but this time, select 'Currency' or 'Currency rounded' instead of Date. You can also select 'Custom currency' if you're using a different currency than the one set by default in Google Sheets based on your location.
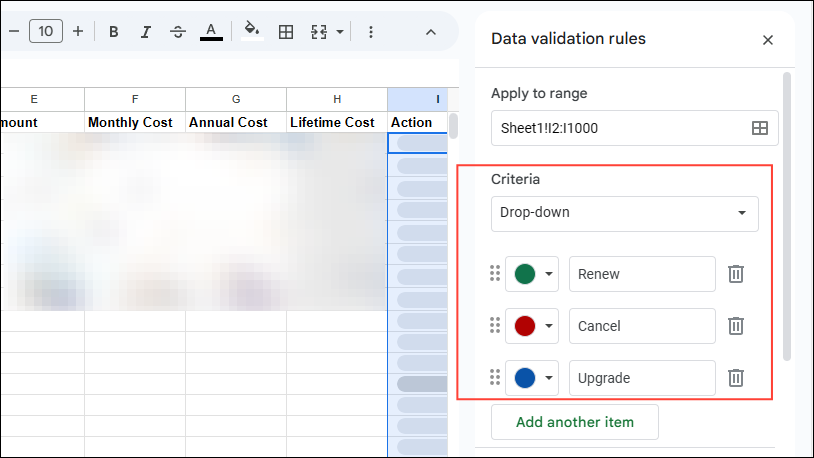
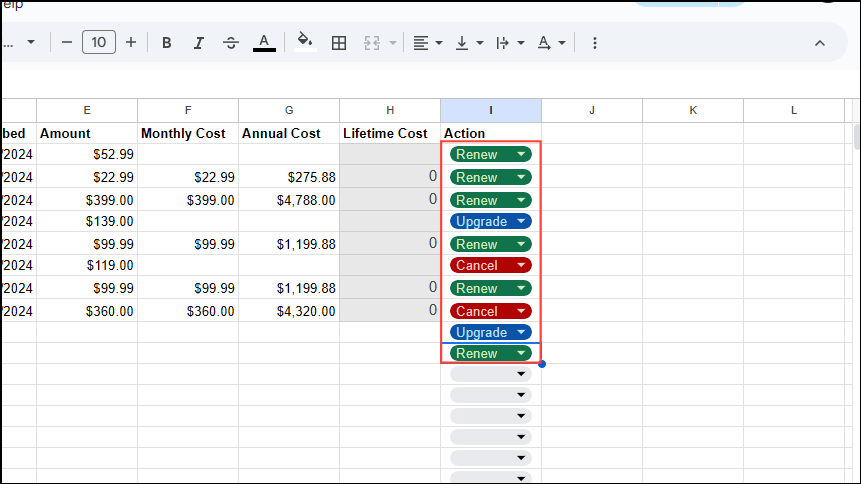
- Finally, create dropdowns for the last column 'Action' by adding items like 'Renew', 'Cancel', and 'Upgrade'.
Step 2: Tracking your subscriptions
The calculation of the monthly cost depends on how frequently you buy a particular subscription. You can either multiply the amount by four, divide it by 12, or simply enter it as it appears.
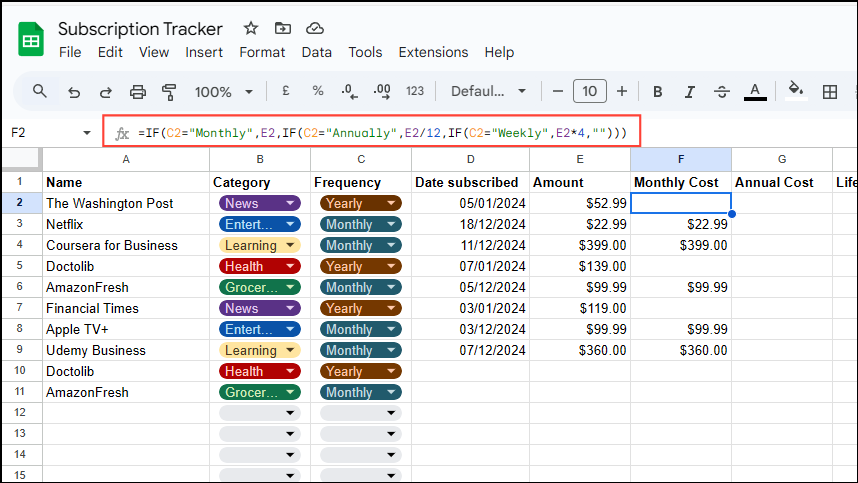
- To calculate the monthly cost of a subscription, use the following formula:
=IF(C2="Monthly",E2,IF(C2="Annually",E2/12,IF(C2="Weekly",E2*4,""))).
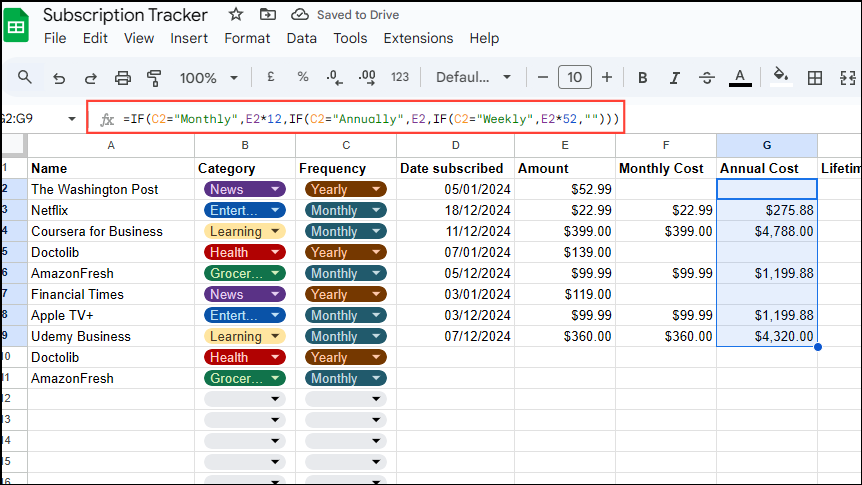
- To get the annual cost, multiply the monthly cost by 12. The formula for this is:
=IF(C2="Monthly",E212,IF(C2="Annually",E2,IF(C2="Weekly",E252,"")))
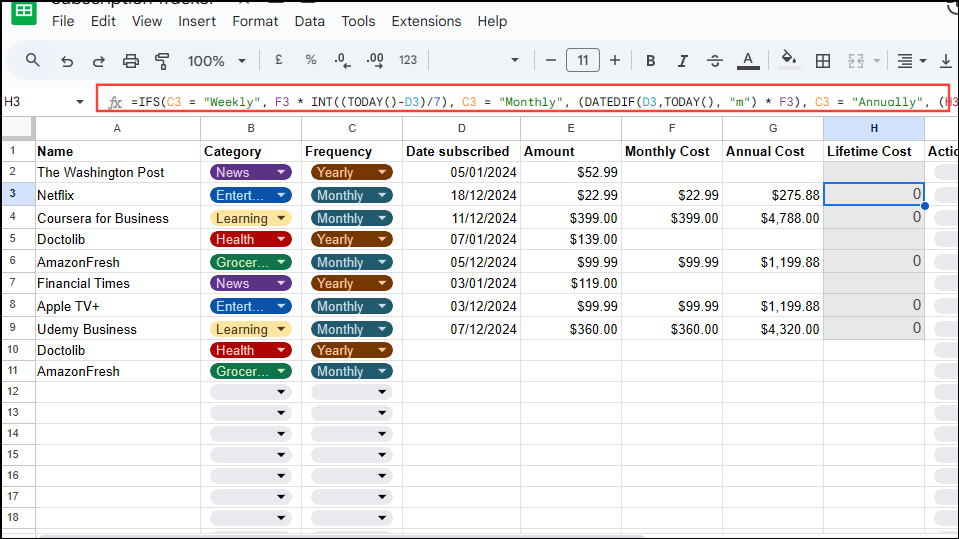
- Now, you can find out the lifetime cost by multiplying the amounts with the years, months, or weeks since you made the first payment. The formula is:
=IFS(C2 = "Weekly", F2 * INT((TODAY()-D2)/7), C2 = "Monthly", (DATEDIF(D2,TODAY(), "m") * F2), C2 = "Annually", (H2 * DATEDIF(D2, TODAY(),"y"))).
- In the last column, you can choose whether to renew, cancel, or upgrade your subscription.
If you only want a place to keep track of your subscriptions, you need not proceed further. However, you can get additional insights from your tracker.
Step 3: Use conditional formatting
You can use conditional formatting to easily know which subscriptions need to be renewed soon.
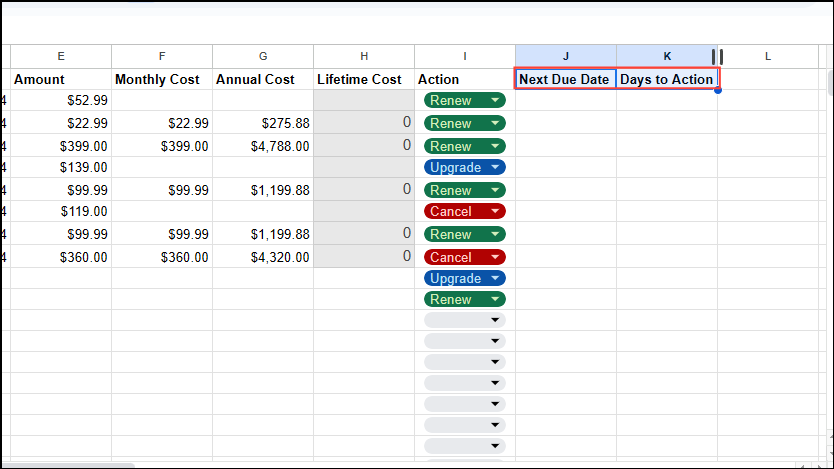
- Add two additional columns to your sheet, named 'Next Due Date' and 'Days to Action'.
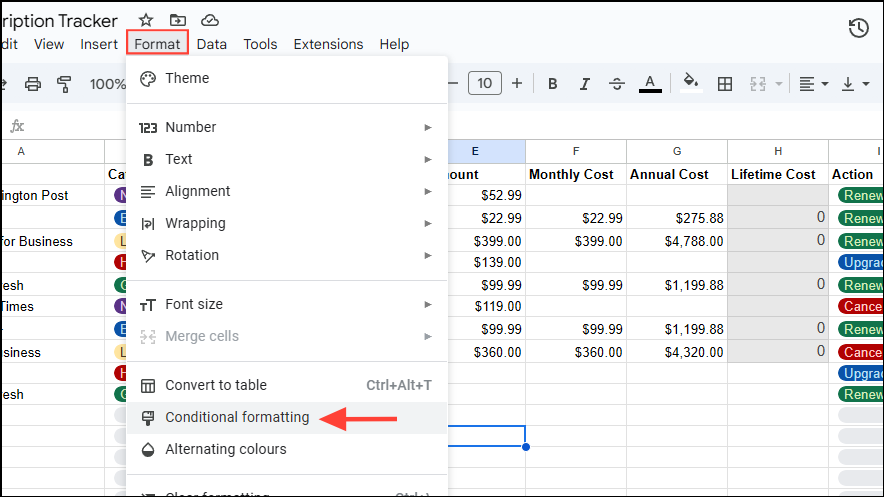
- Now, go to the 'Format' menu and click on 'Conditional Formatting'.
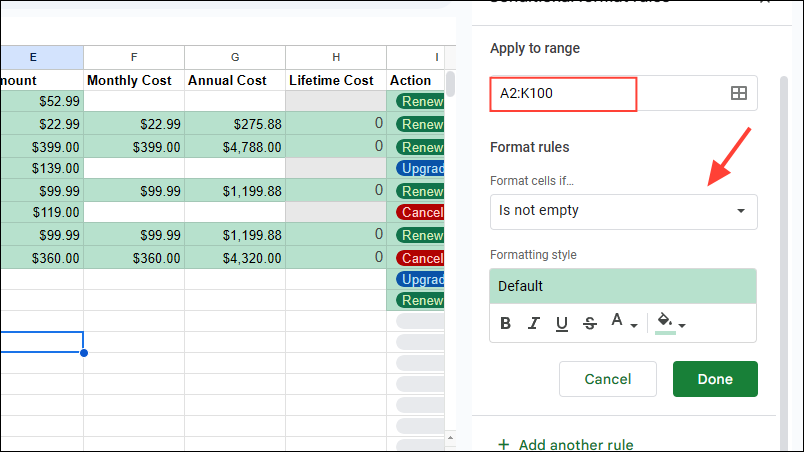
- In the panel that opens on the right, enter the range of cells to which you want to apply conditional formatting, such as
A2:K100. Then click on the 'Format cells if' dropdown.
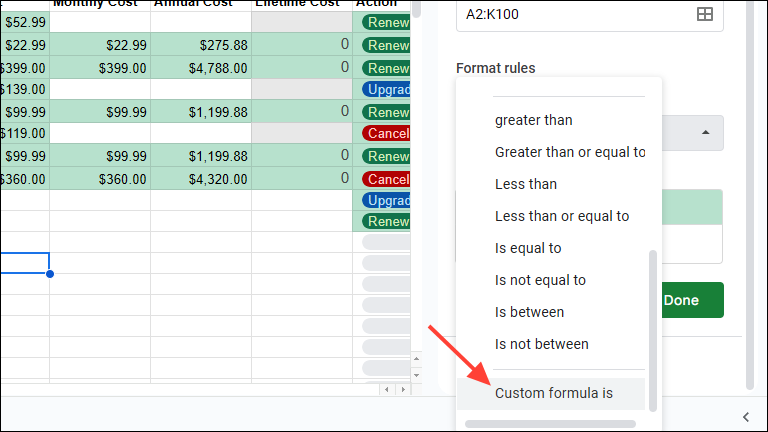
- In the 'Format cells dropdown, select 'Custom formula is'.
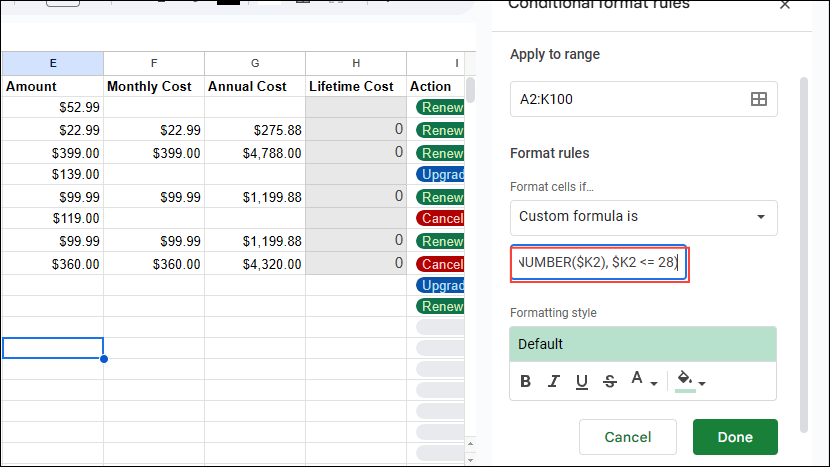
- Paste the following formula in the 'Value or Formula' field:
=AND(ISNUMBER($K2), $K2 <= 28). This formula will check whether there is any entry in the 'Days to Action' column and whether it is less than or equal to 28.
Things to know
- Once you create your subscription tracker, you can simply update information, like the amount, without needing to put down additional details. Google Sheets will automatically update the rest of the information accordingly.
- You can also create Pivot tables that can provide information from your spreadsheet at a glance.
- While you cannot create pivot charts in Google Sheets, you can export your spreadsheet and open it in Microsoft Excel, which does let you create pivot charts.
- If you think creating your own subscription tracker is too much work, Google Sheets has a premade template that you can use.
- Alternatively, if you have a Google Workspace plan, you can add your own subscription tracker to the Template Gallery in Google Sheets.

