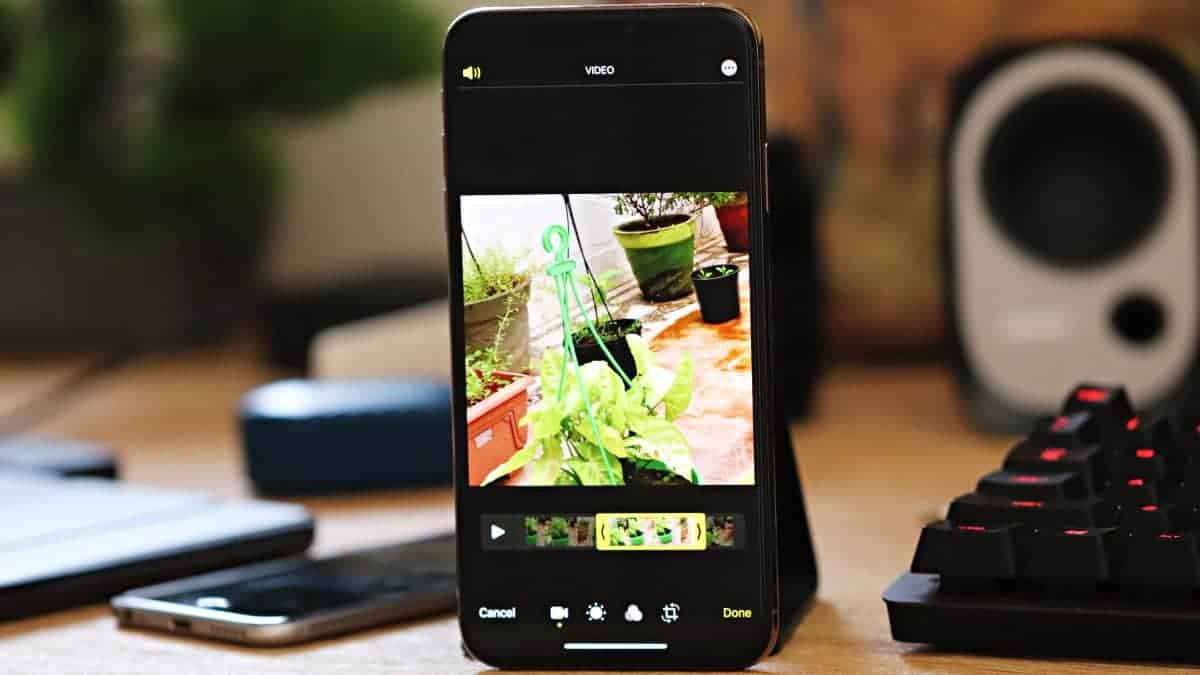
iPhone is getting a cool new video editor built into the Photos app with the release of iOS 13. It’s as good as the photo editor on iPhone, and most importantly, very easy to use. Video editing has always been considered a pro thing. But the iPhone’s new video editor is simple to the point that anybody can use it.
It works the same way and offers the same filters and adjustments that the built-in photo editor does. If you have ever used the photo editor on iPhone, you’ll feel right at home with the new video editor controls as well.
The new video editor lets cut, trim, crop, and rotate videos while making adjustments like exposure, contrast, noise reduction, brightness, and many more. You can even apply filters such as Vivid, Mono, Dramatic, and a few others to your videos on iPhone.
In this post we’ll guide you to make the most out of iPhone’s new video editor in iOS 13.
Cut or trim a video
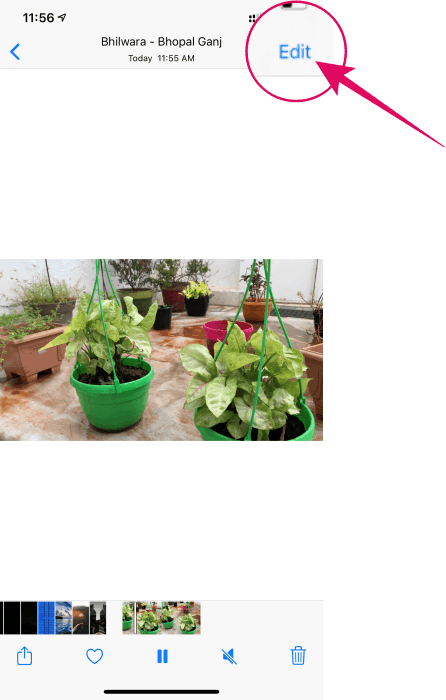
To access the new video editor on your iPhone running iOS 13, you need only need to tap the “Edit” button when viewing a video in the Photos app.
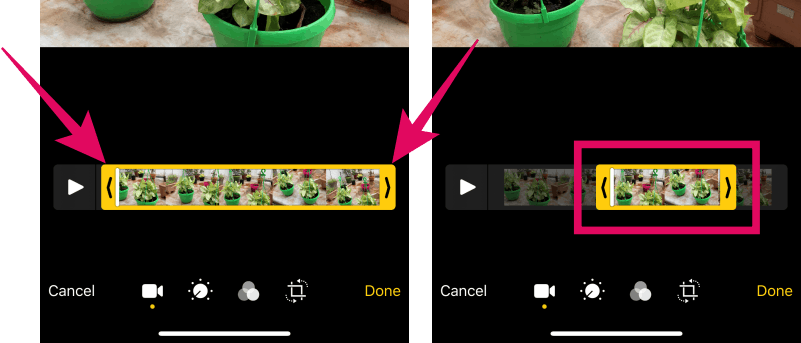
To cut or trim a video, drag the sliders next to the play button on the video editor screen. Adjust the sliders from both ends for the part of the video you want to cut into. The output video will contain the video part that you set within the yellow sliders frame.
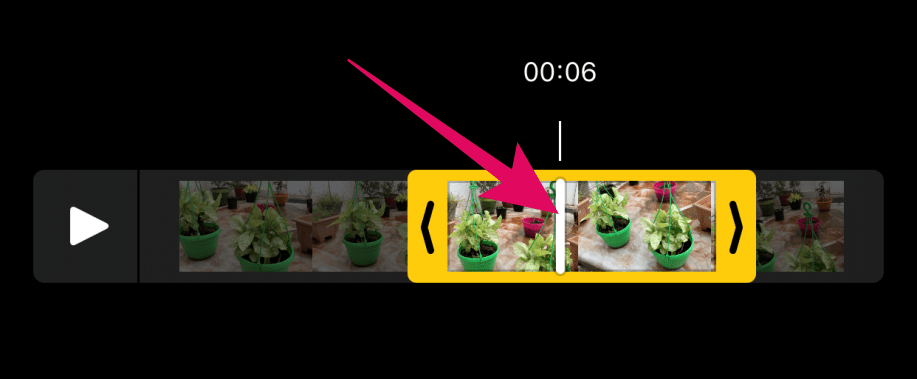
Tap and hold the white vertical bar in the yellow frame to preview your selection by hand and make fine adjustments to the part you’re cutting into.
Tap “Done” to save the changes you made. Or continue with other video editing features on the iPhone such crop, flip, fine adjustments, and filters.
Making adjustments
The new editor feature a wide range of controls to make adjustments to your videos. To access these adjustments, tap the “Adjust”button on video editing screen.
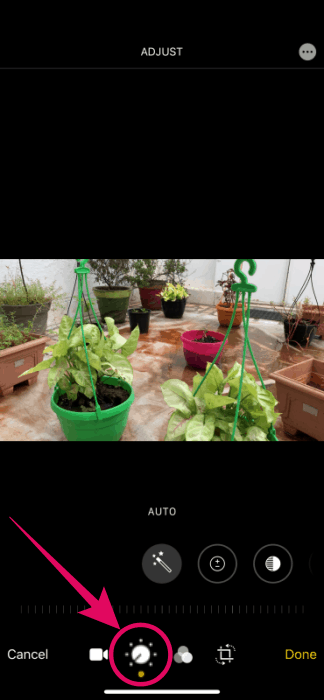
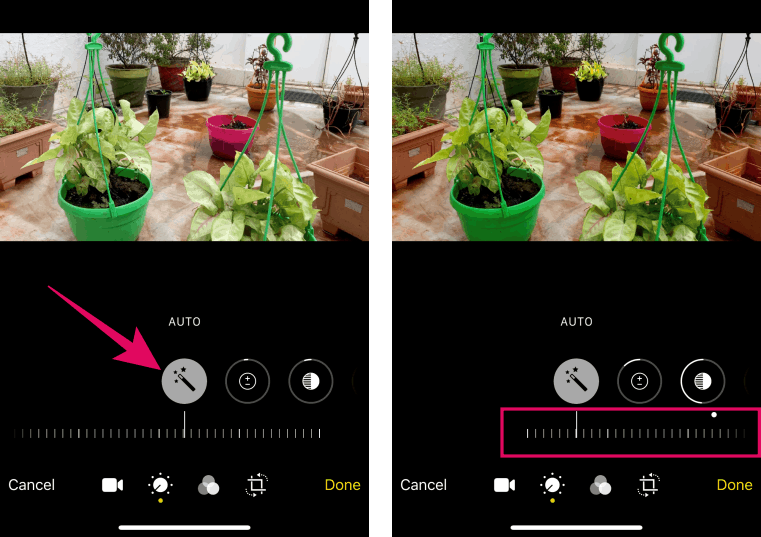
From the adjustments control screen, you can select a range of options. The first is the “Auto” mode to auto adjust the video details based on how bright or dark you want it. Tap the “Auto” button and drag the slider below it to increase or decrease the impact of changes made by the auto option.
Similarly you can make various other adjustments to your videos. Check out the list of all available adjustments in the iPhone video editor below.
- One-tap auto adjust
- Exposure
- Highlights
- Shadows
- Contrast
- Brightness
- Black point
- Vignette
- Saturation
- Vibrance
- Warmth
- Tint
- Sharpness
- Definition
- Noise reduction
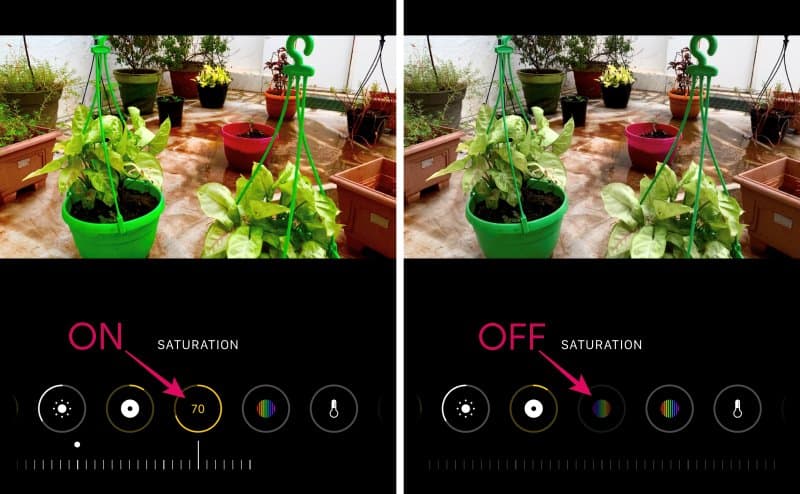
To select and use these adjustments, tap the icons next to the “Auto” adjustment we used above. You’ll find all above mentioned adjustments there. Use the slider available for each to increase or decrease the impact of it on the video.

💡 Tip
You can only make adjustments while previewing a single frame of the video. But it’s effortless anyway to tap the “Video” button to preview the adjustments you made applied to the enter video.
To undo an adjustment in the video editor, simply tap on the adjustment icon to turn it off and remove its impact from the video.
Tap “Done” on the bottom right corner of the screen to apply and save the changes you made to the video. If you want to edit further, continue with the rest of the instructions below.
Applying filters
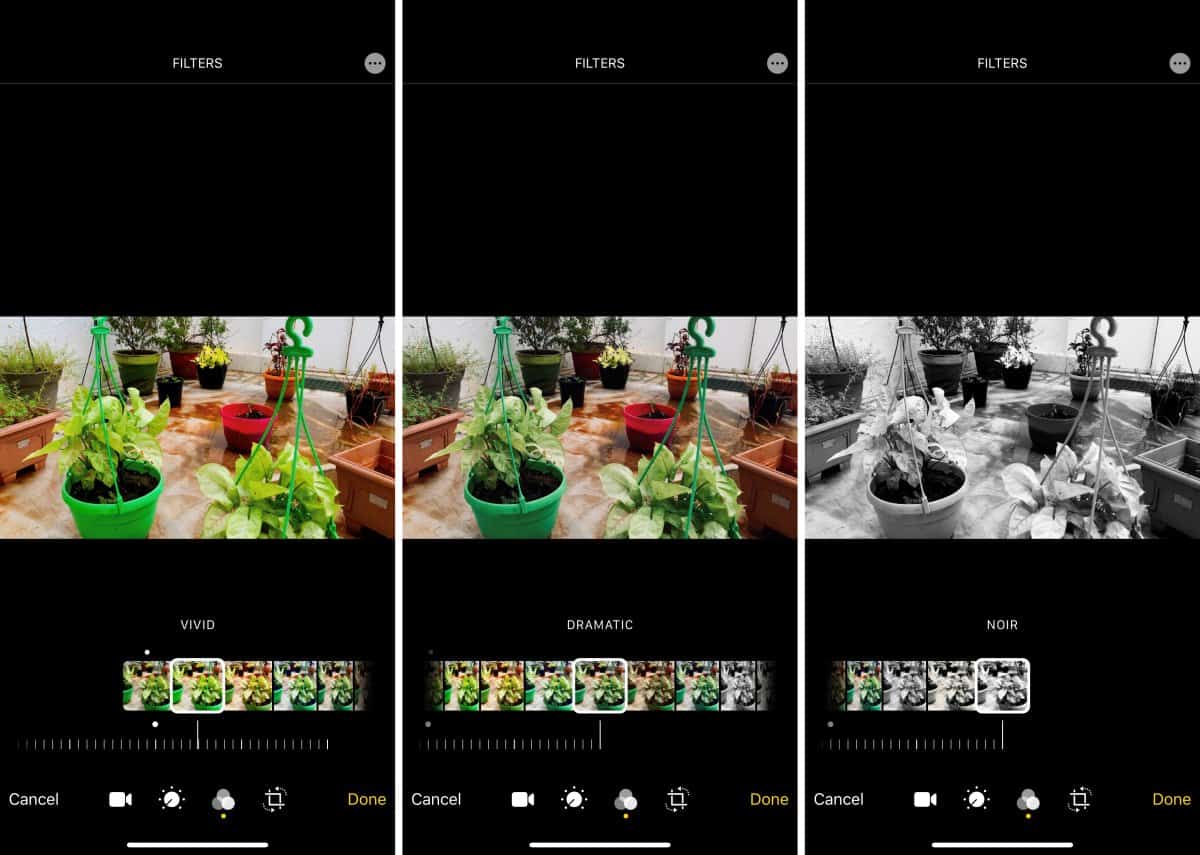
You know what’s a quick way to make your video shine? Apply a filter to it. If you’re a long time iPhone user, you are probably already familiar with the beautiful effect of the “Vivid” filter on your photos. Well, with the new video editor for iPhone, you can apply filters to your videos as well.
Tap the “Filters” icon on the bottom bar of the video editing screen on your iPhone, and select one of the available filters. You can adjust the intensity of the filter by dragging the slider left and right.
Below is a list of all filters you can apply to your videos using the new video editor in iOS 13.
- Vivid
- Vivid Warm
- Vivid Cool
- Dramatic
- Dramatic Warm
- Dramatic Cool
- Mono
- Silvertone
- Noir
Tap “Done” on the bottom-right corner to save the changes to your video.
Crop, rotate, or straighten a video
You can now crop and rotate videos on your iPhone without using a third-party app. The new video editor makes it ridiculously simple to crop, rotate, and straighten a video on your iPhone.
To get started, tap the “Crop and Rotate” icon at the bottom bar of the video editing screen.

Now there are a lot of controls on this single screen, so take a look at the labelled screenshot below to understand what each icon does here.
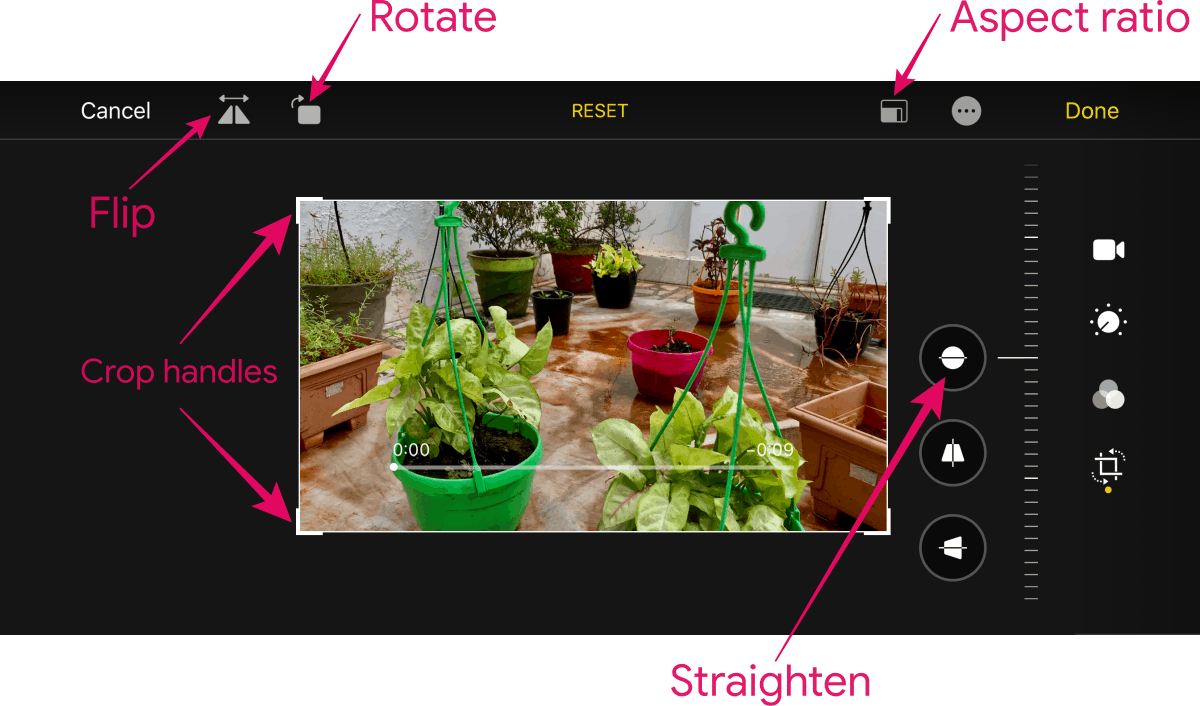
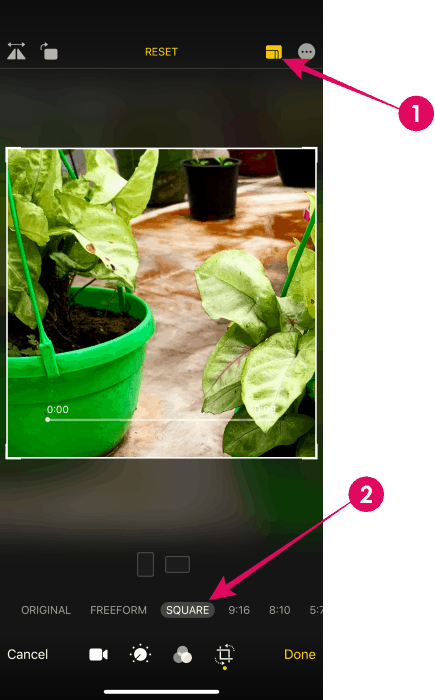
Use the crop handles on all four corners of the video to crop the video. Or tap the “Aspect Ratio” button to crop the video into a square or with different aspect ratios.
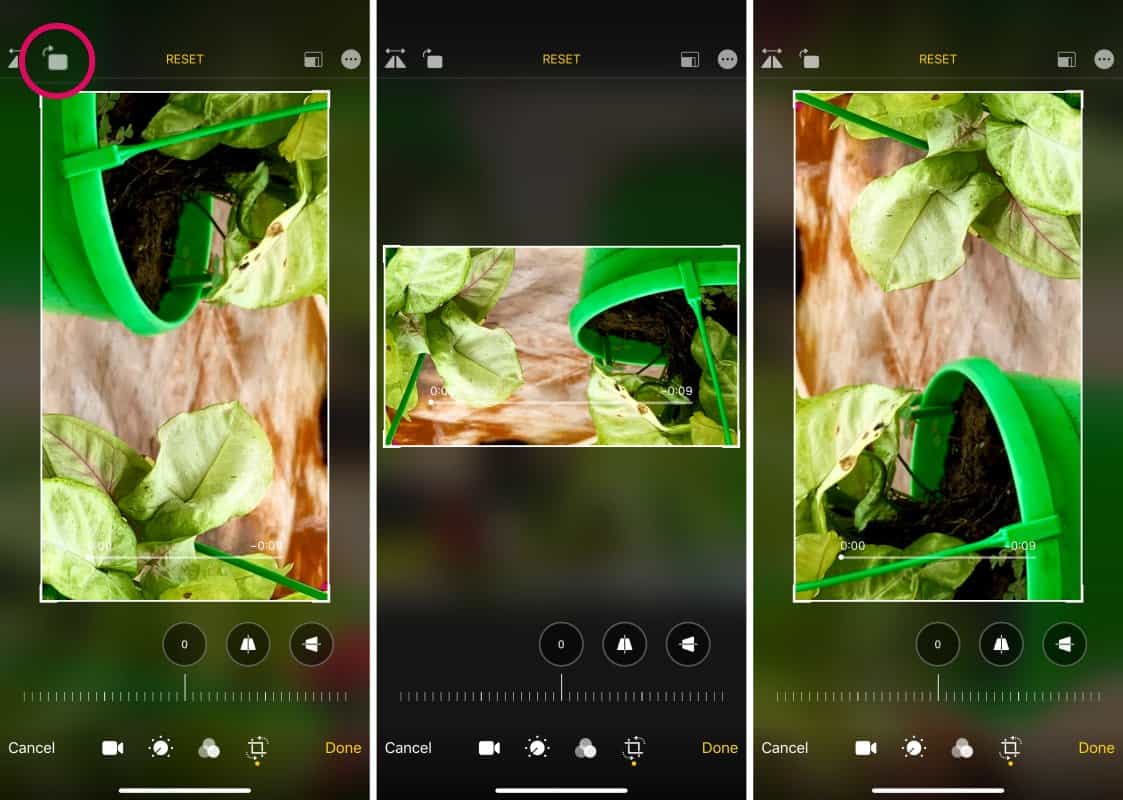
To rotate a video, tap the “Rotate” button at the top bar to clock-wise rotate the video at 90-degree angle each time you tap the button.
Similarly, you can flip the video by tapping the “Flip” button at the top bar. And to straighten a video, use the slider at the bottom of the screen to straighten out the video if need be. You can also straighten a video vertically or horizontally using the icons above the slider.
💡 Tip
You cannot play/pause the video while cropping or rotating, but you can use the progress bar on the video preview to get a glimpse of the changes you made to the video.
Or you can also effortlessly preview the entire video without saving, by tapping the video icon at the bottom bar and then hit the play button.
Finally, tap “Done” at the bottom right corner of the screen to apply and save all changes you made to the video.
Undo/revert edits
Undoing changes or even reverting the entire video to its original state is effortless with the new video editor.
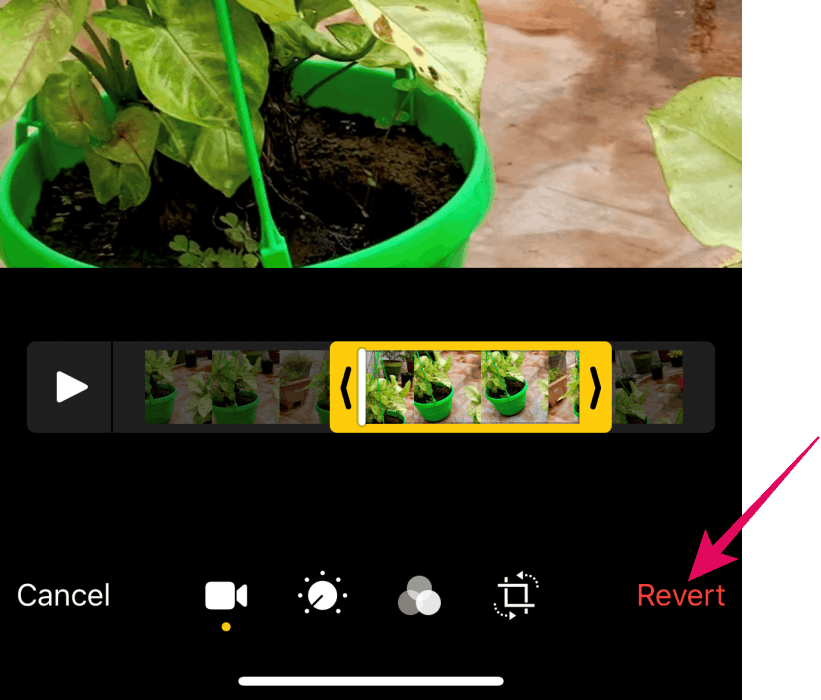
Tap the “Edit” button on the video that you previously edited with the Photos app. Then go over all the edits you previously made to make adjustments, or tap “Revert” at the bottom right of the screen to undo all changes and restore the original video.
That’s it. We hope you found the instructions on this page helpful.


