
The Media Player app in Windows 11 brings a fresh experience for playing music and videos, aligning with the new design aesthetics of the operating system. It consolidates the functionalities of Groove Music and the classic Windows Media Player into a unified app. Here’s how you can get started with the new Media Player, including installing it on various versions of Windows 11 and exploring its features.
How to Get the New Media Player App for Windows 11
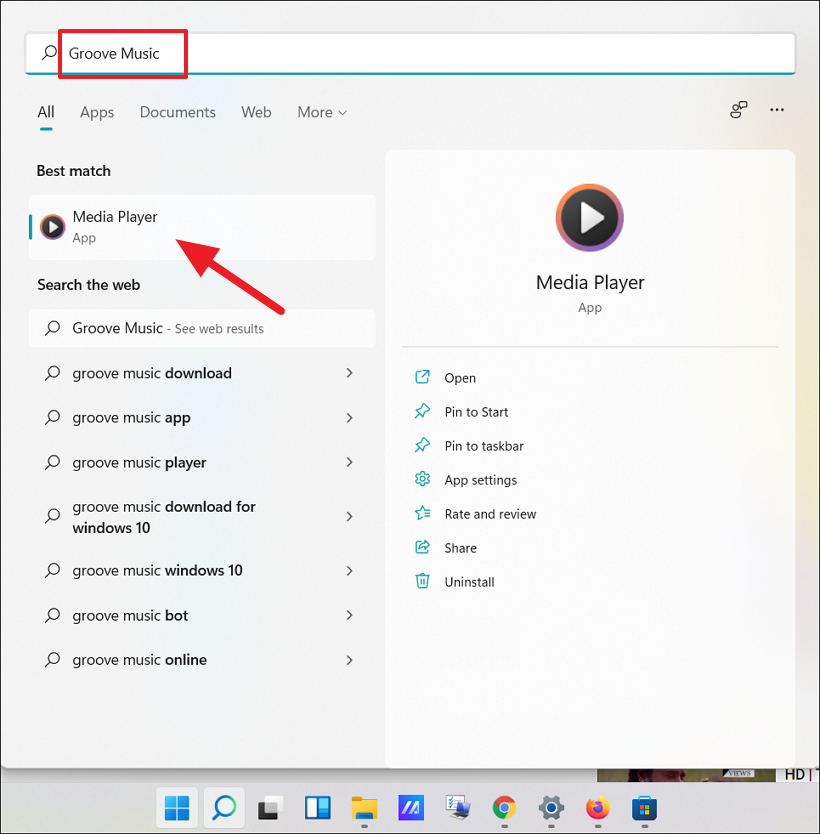
Currently, the Media Player app is available to Windows Insiders in the Dev Channel running Windows 11 build 22471 or higher. Microsoft plans to roll out the app to all Windows 11 users soon. In the meantime, if you’re eager to try it out on any version of Windows 11, there are ways to install it manually.
Installing the Media Player App from Microsoft Store
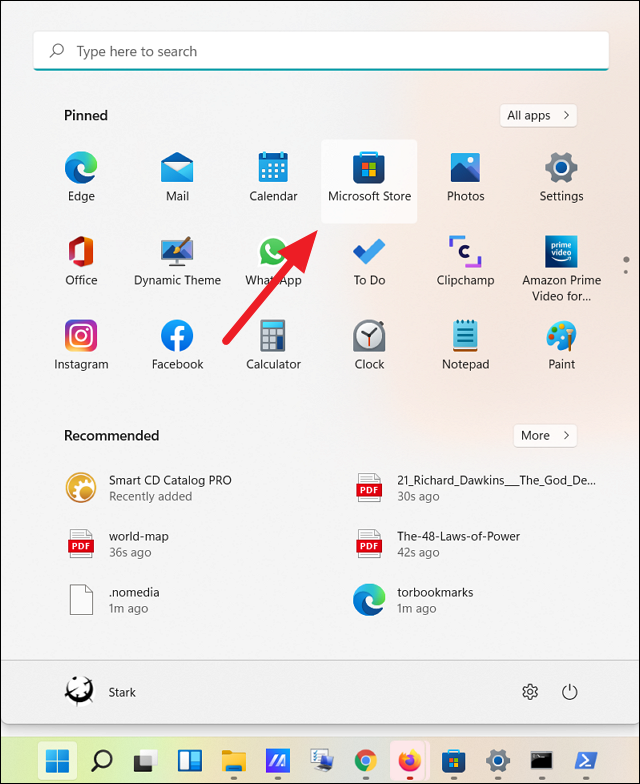
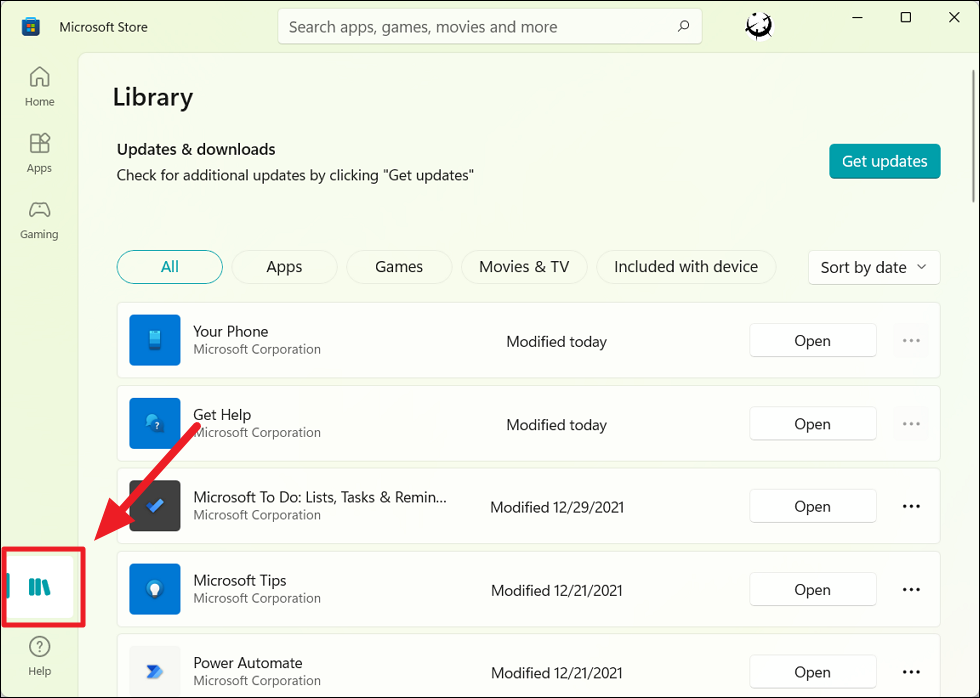
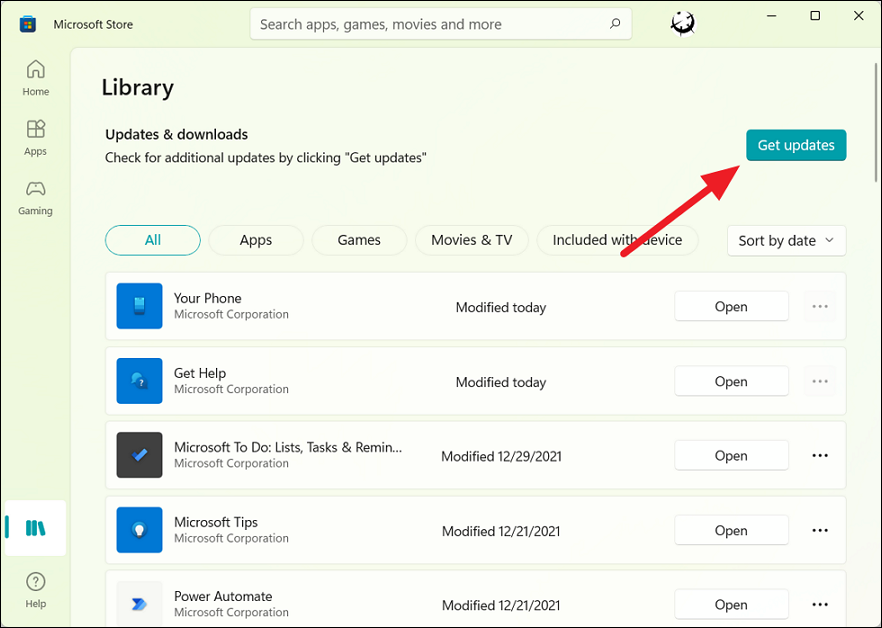
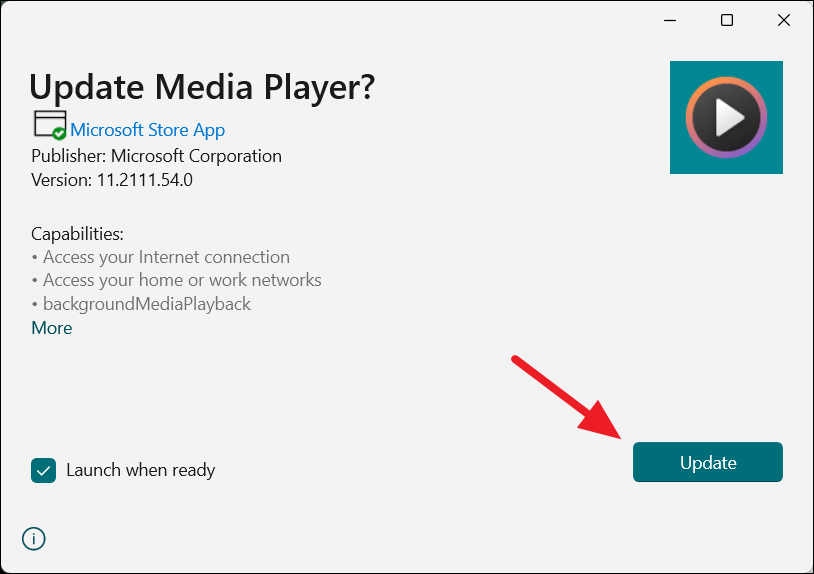
If you’re enrolled in the Dev Channel of the Windows Insider Program, you can update to the new Media Player through the Microsoft Store. Here’s how:

Installing the New Media Player on Any Windows 11 Version
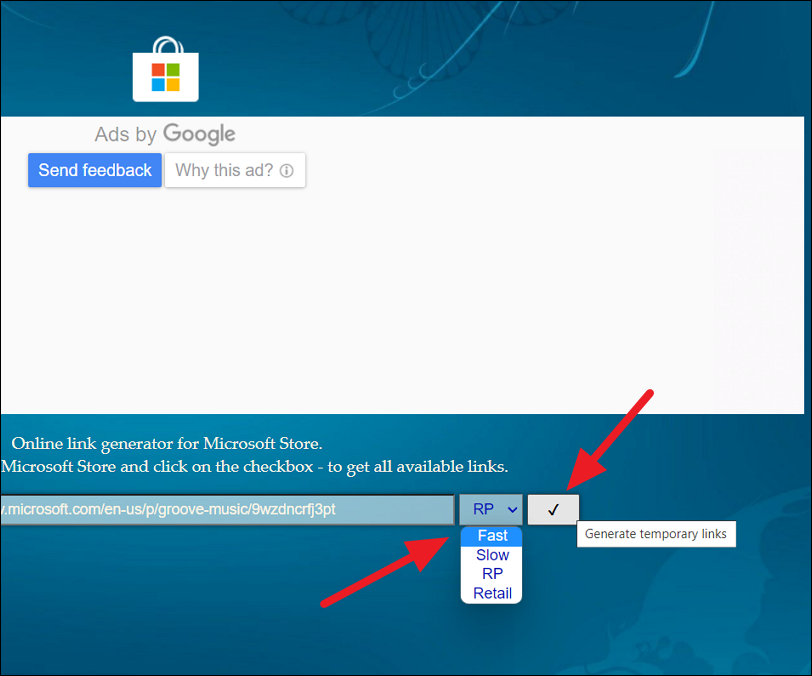
If you’re not part of the Dev Channel or don’t receive the update, you can still install the Media Player app on any Windows 11 version by manually downloading the app package. Step 1: Visit the Adguard website, an online tool that generates direct download links for Microsoft Store apps. Step 2: On the website, select ‘URL (link)’ from the drop-down menu on the left. Then, paste the following URL into the text field:
https://www.microsoft.com/en-us/p/groove-music/9wzdncrfj3pt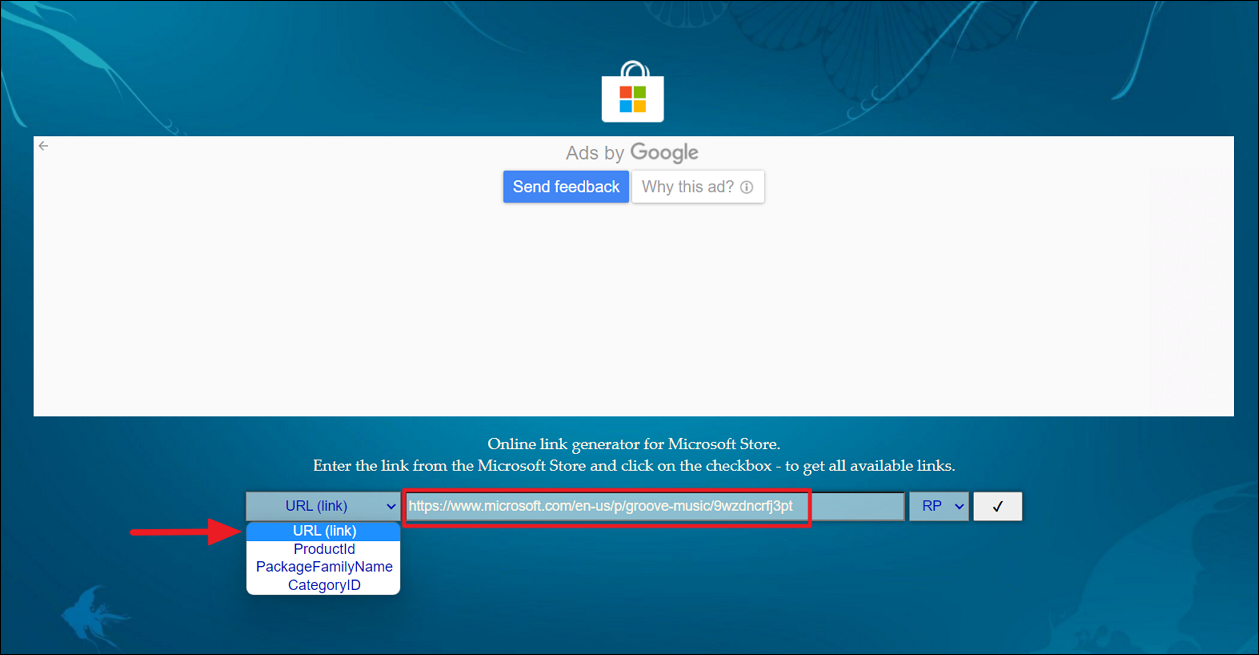
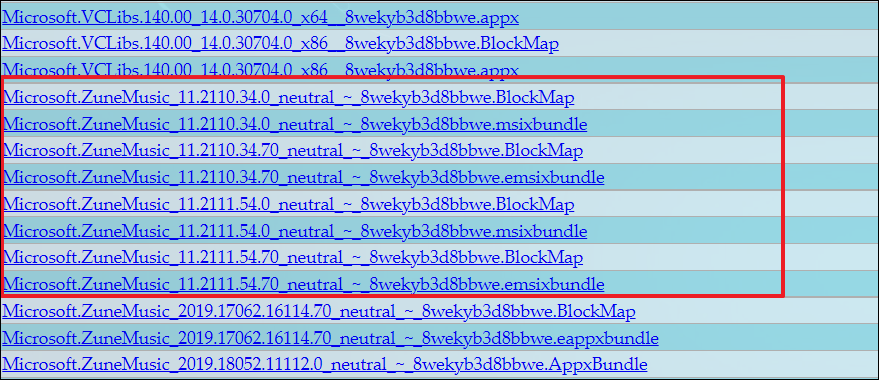
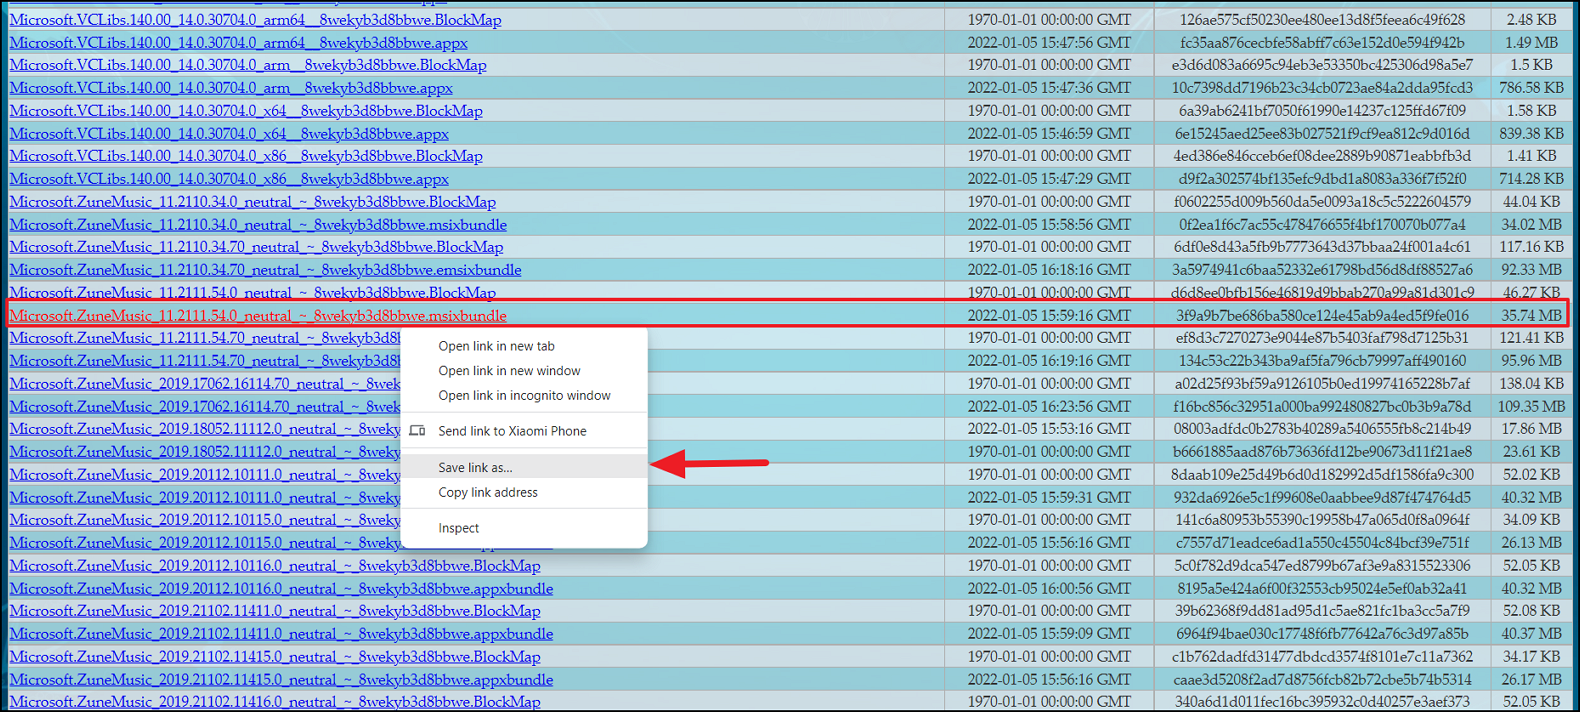
Note: Avoid downloading larger files around 95 MB, as these may not be compatible for this purpose. Step 5: Right-click on the correct file link and choose ‘Save link as…’ to download it to your computer.
If the above method doesn’t work, you can download the Media Player package from this Mega Drive link as an alternative.
Using the New Media Player in Windows 11
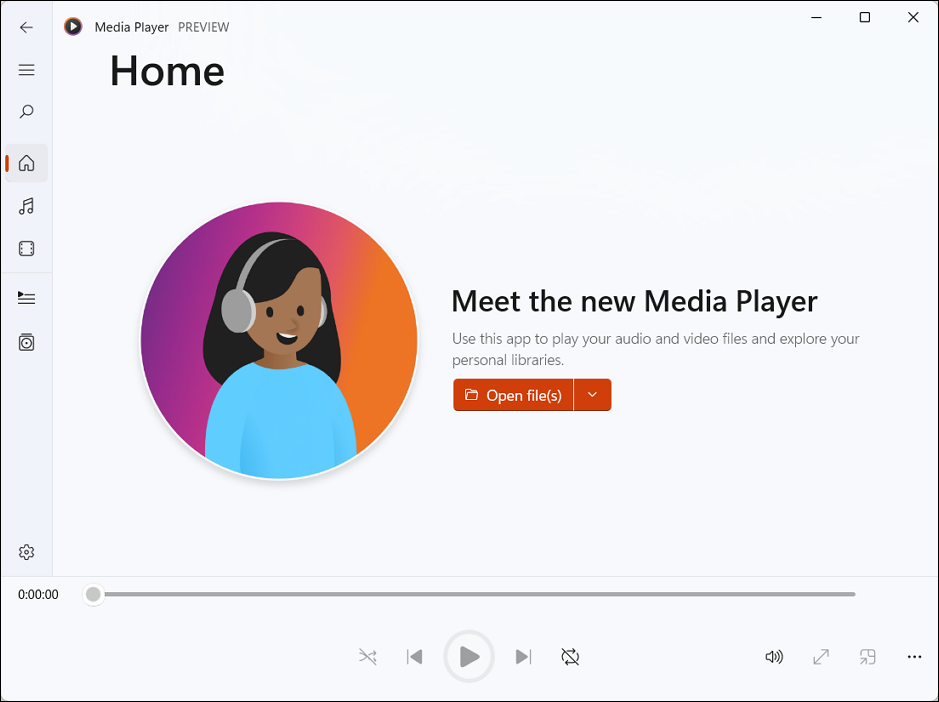
When you open the Media Player app, you’ll be greeted with a modern interface that aligns with Windows 11’s aesthetics.
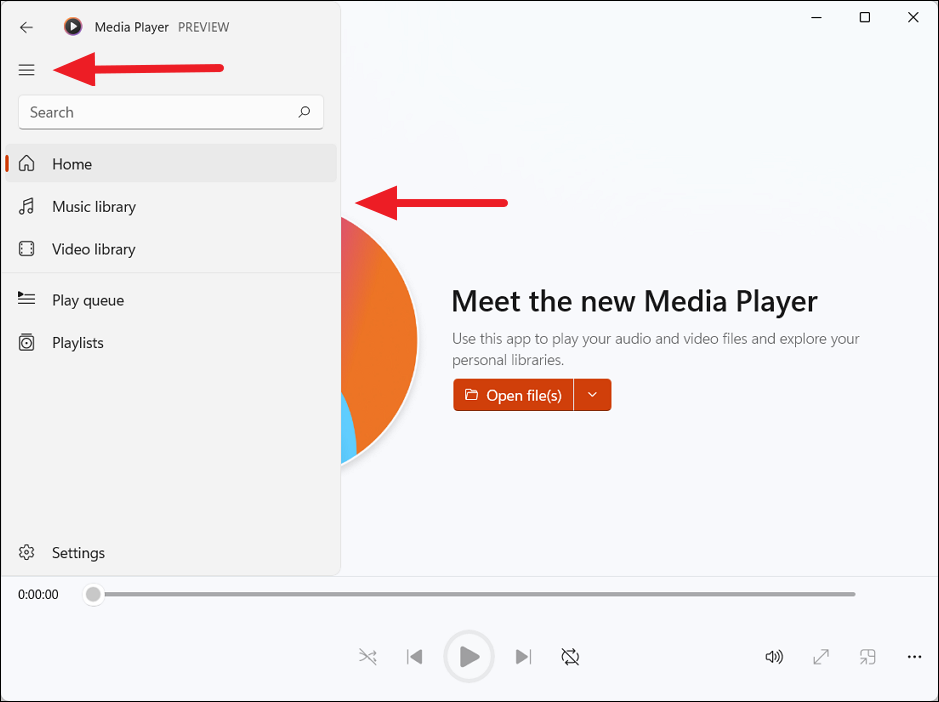
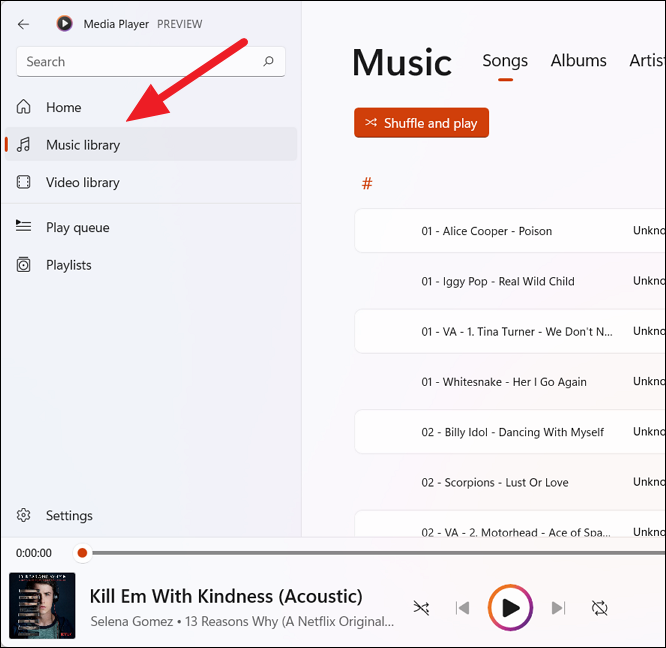
The app features a navigation pane on the left, accessible by clicking the hamburger menu icon. From here, you can access your music library, video library, play queue, and playlists.
Upon first launch, the Media Player automatically scans your Music and Videos folders and adds the media files to its library. You can also add custom folders to include more content.
Playing Audio and Video Files
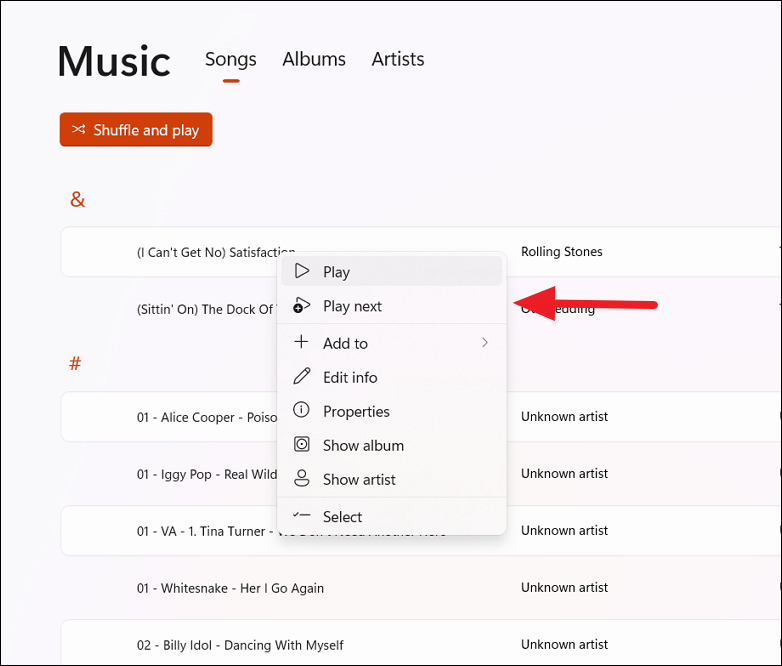
You can play media files from the library, play queue, playlists, or directly from File Explorer. To play a single file: Double-click on the file or right-click and select ‘Play’. To queue it to play next, right-click and choose ‘Play next’.
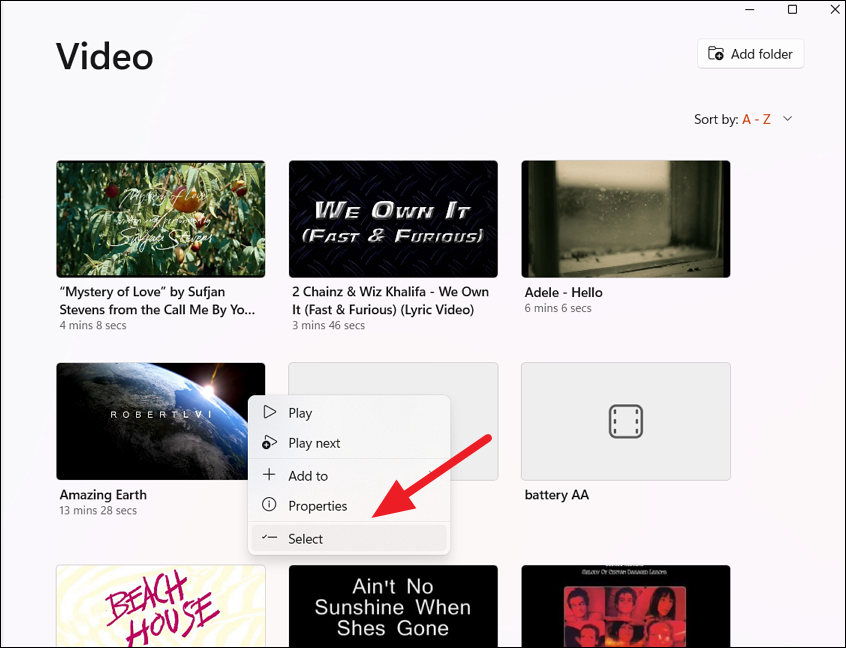
To play multiple files: Select the checkboxes next to the files you want to play and click the ‘Play’ button. If the checkboxes aren’t visible, right-click any file and select ‘Select’. This will enable the selection mode.
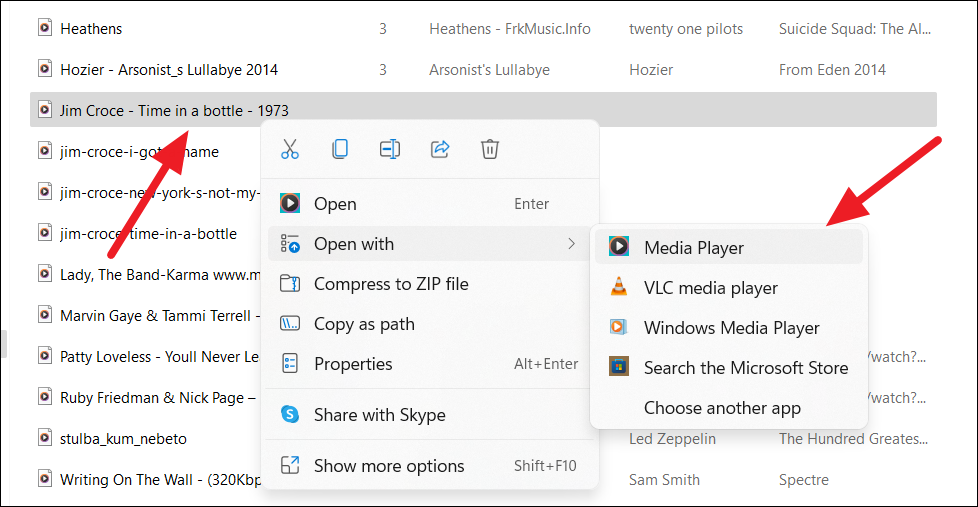
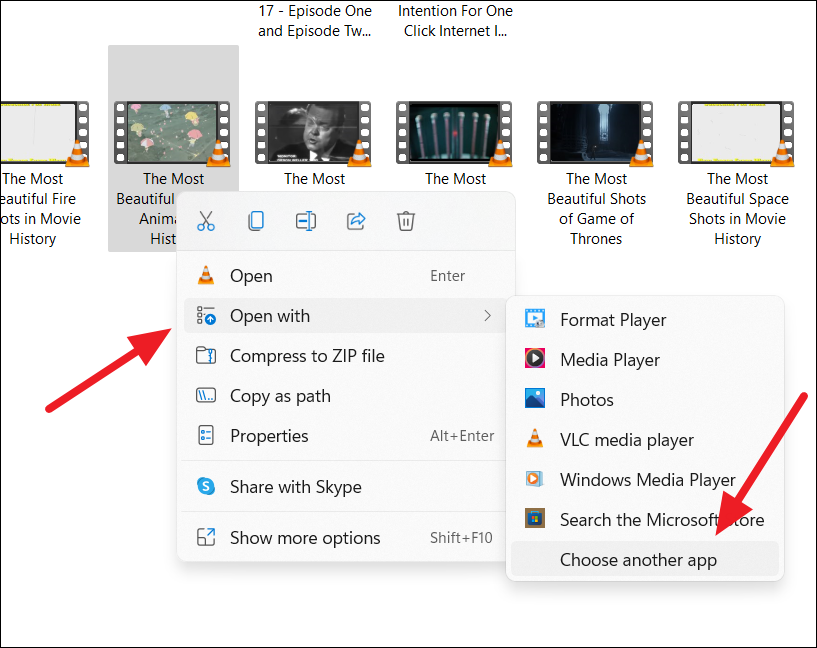
From File Explorer: Right-click an audio or video file, select ‘Open with’, and choose ‘Media Player’. If Media Player is your default app, simply double-click the file.
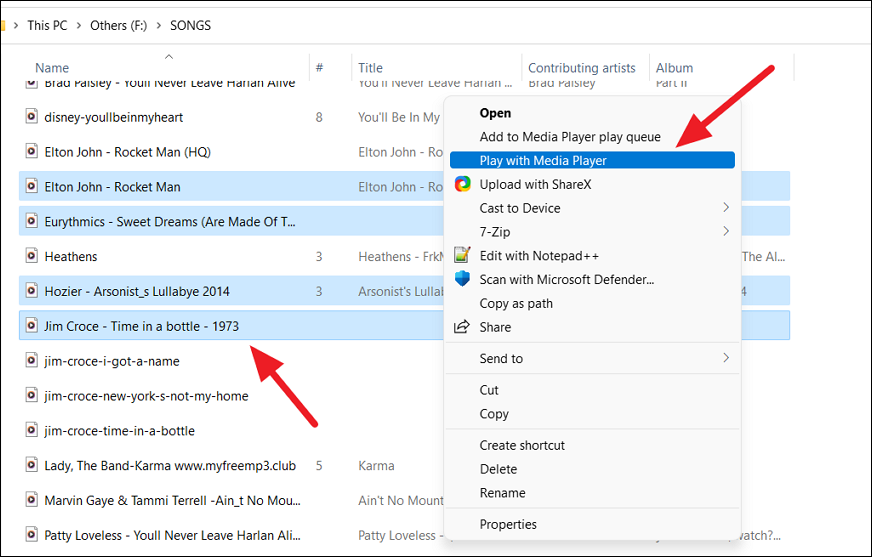
To play multiple files from File Explorer, select the files, right-click, and choose ‘Show more options’. Then select ‘Play with Media Player’.
Playback Controls
The playback control bar at the bottom includes play/pause, previous/next track, shuffle, and repeat options.

For quick access: – Play/Pause: Click the button or press Ctrl+P. – Previous Track: Click the left button or press Ctrl+B. – Next Track: Click the right button or press Ctrl+F. – Shuffle: Click the shuffle icon or press Ctrl+H. – Repeat: Click the repeat icon or press Ctrl+T to cycle through repeat modes.
Additional Controls for Videos
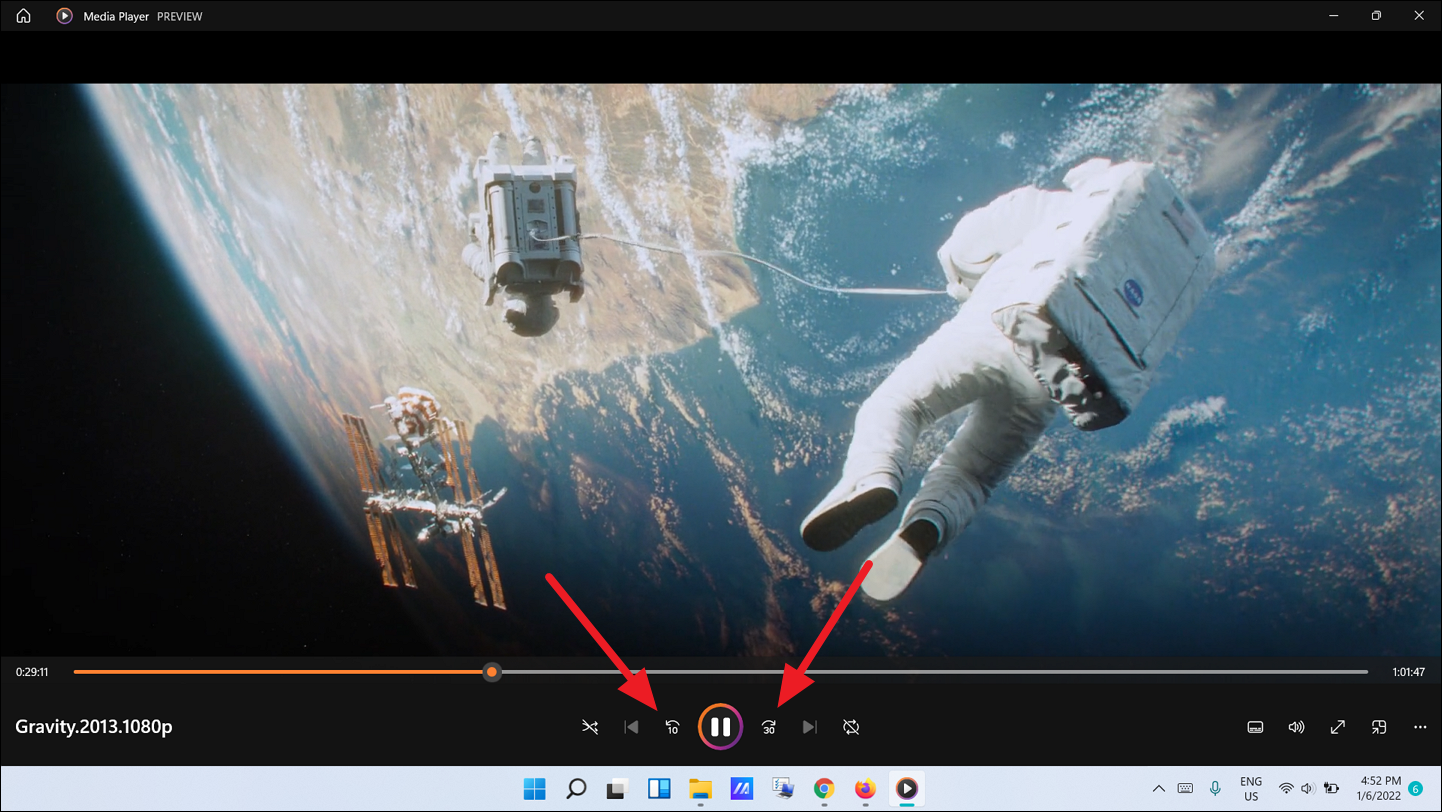
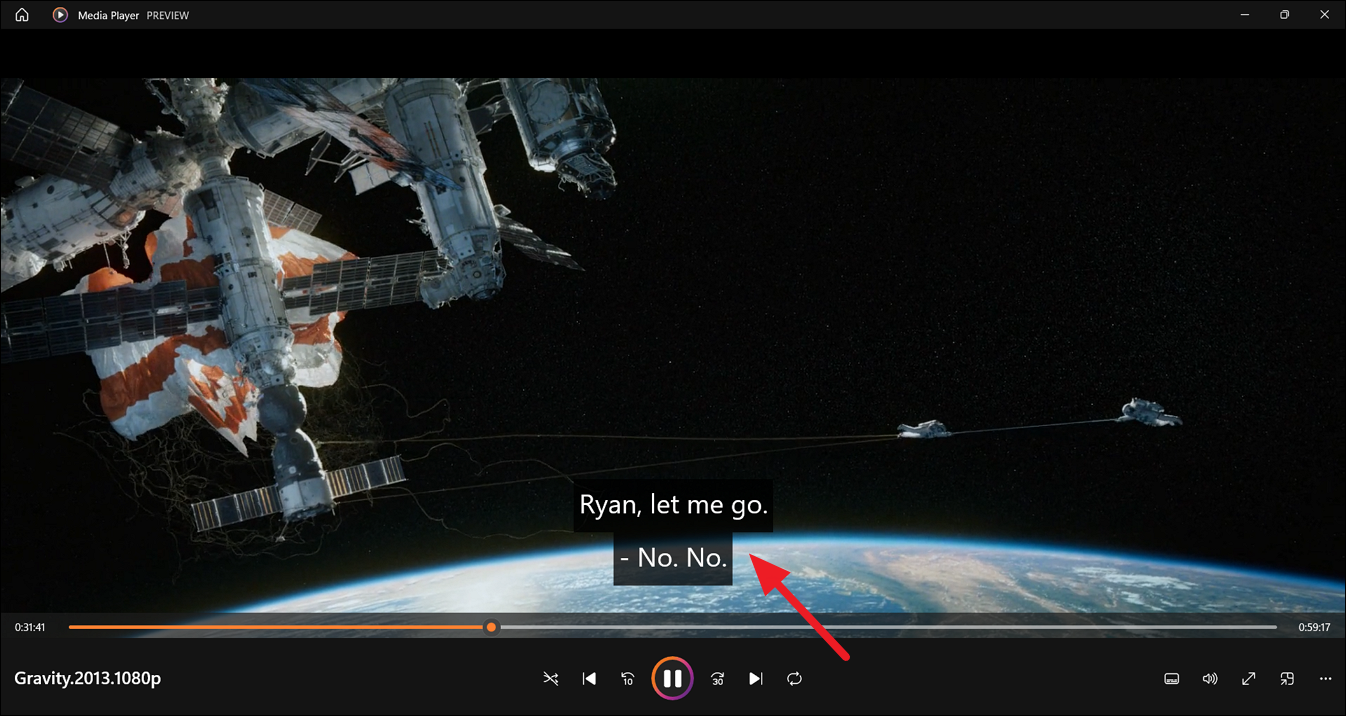
When playing videos, additional controls appear: – Skip back 10 seconds: Click the backward arrow or press Ctrl+Left. – Skip forward 30 seconds: Click the forward arrow or press Ctrl+Right. – Languages and Subtitles: Click the speech bubble icon or press Ctrl+L.
Changing Audio Tracks and Adding Subtitles
To change the audio track: Click the ‘Languages and Subtitles’ icon and select the desired audio option under ‘Audio’. To add subtitles: Click ‘Choose subtitle file’, navigate to the .srt file on your computer, and open it. Subtitles will now display during playback.
Full Screen and Mini Player Modes
Full Screen: Click the ‘Full Screen’ icon or press F11 to enter or exit full-screen mode. Mini Player: To enable Mini Player mode, click the ‘Mini Player’ icon or press Ctrl+M. This mode allows the video to play in a small, resizable window on top of other applications.
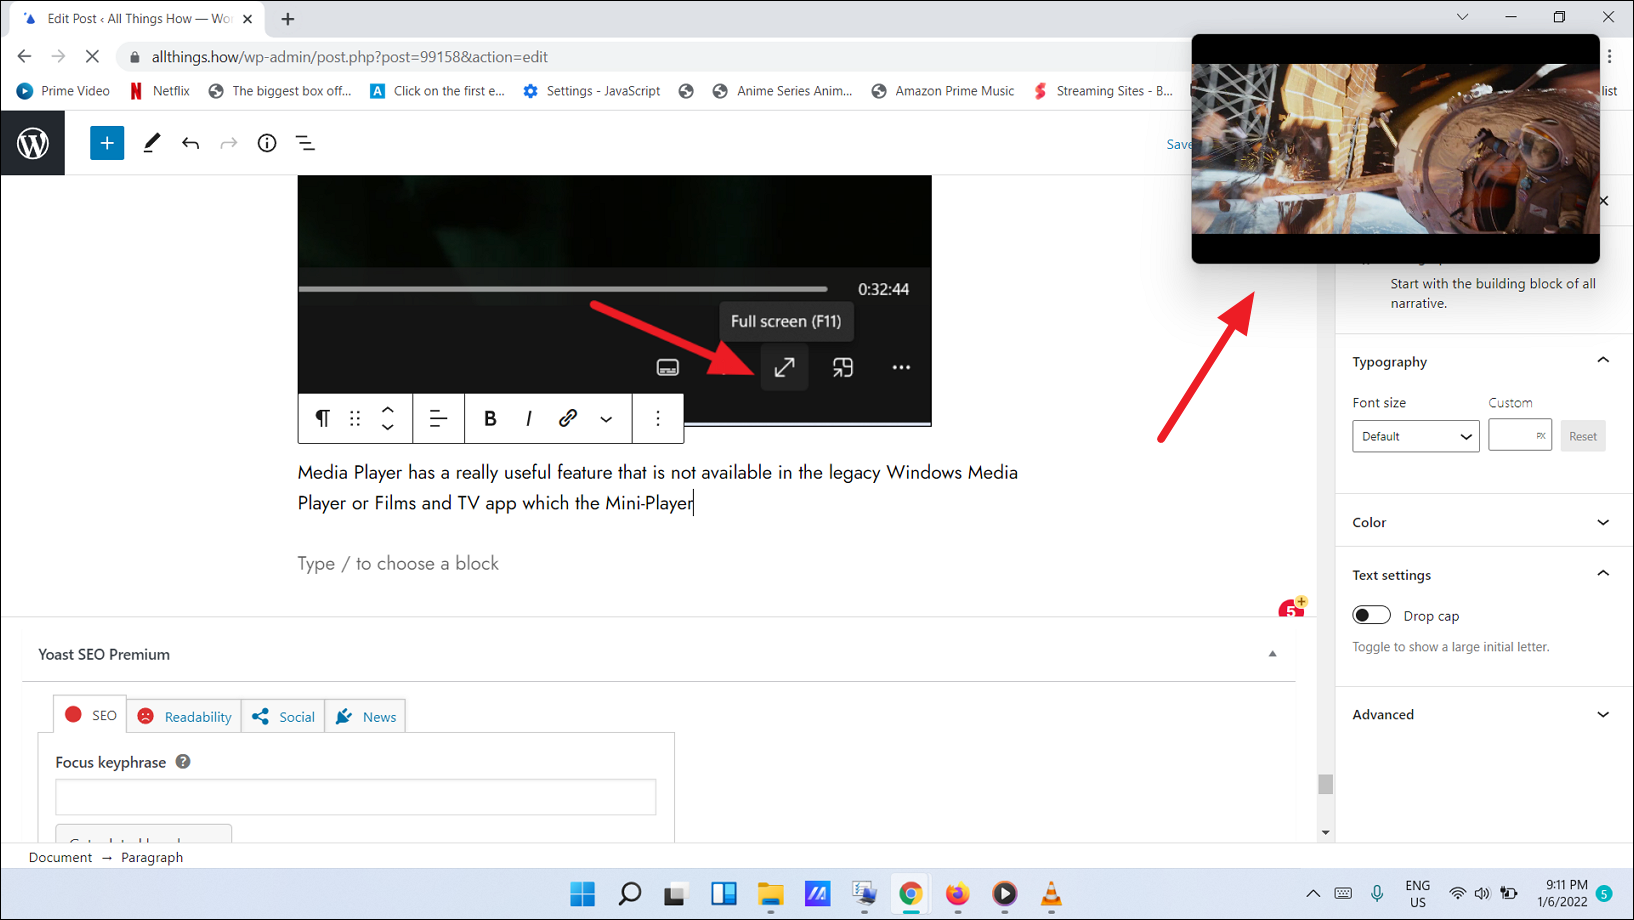
To exit Mini Player mode, click the ‘Exit Mini Player’ button or press Ctrl+M again.
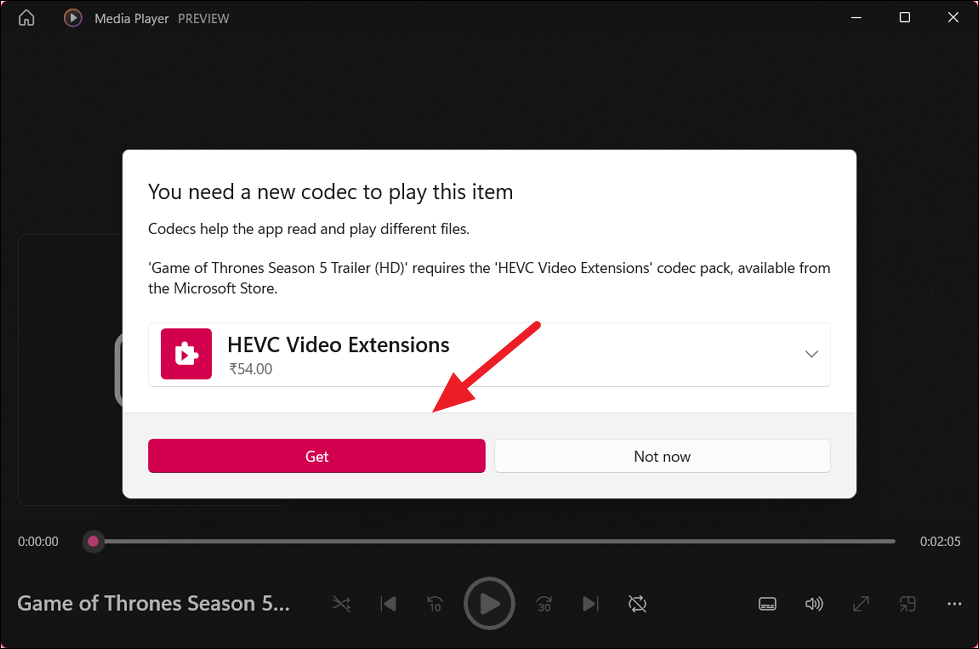
Playing Advanced Video Formats
Some advanced video formats like HEVC (H.265) require additional codecs. If you attempt to play such a file, Media Player may prompt you to purchase the HEVC Video Extensions from the Microsoft Store.
Adding Custom Folders to Media Player Library
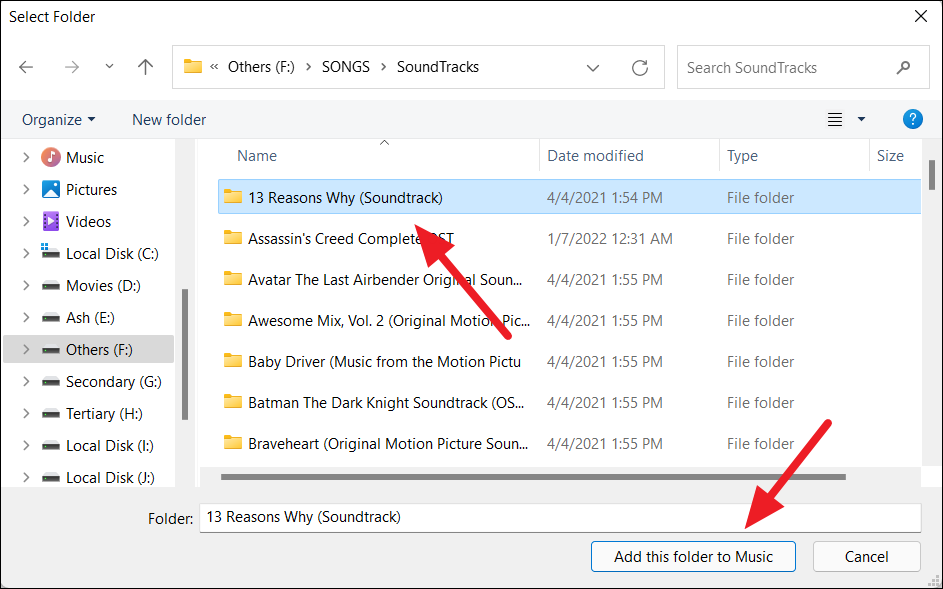
Media Player automatically includes media from your Music and Videos folders. You can add other folders to expand your library.
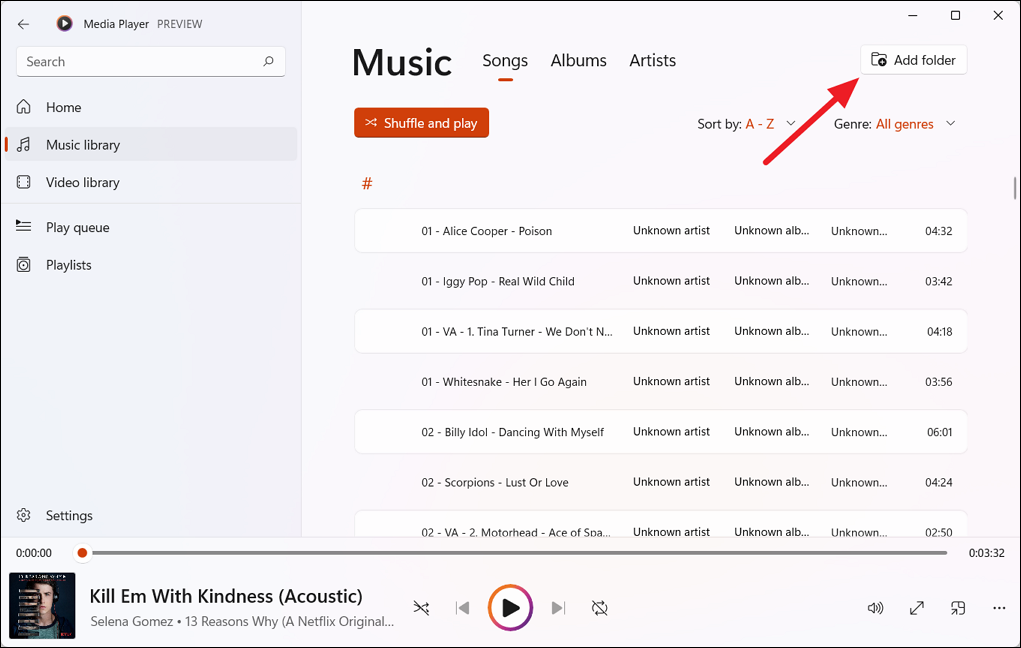
Adding to Music Library
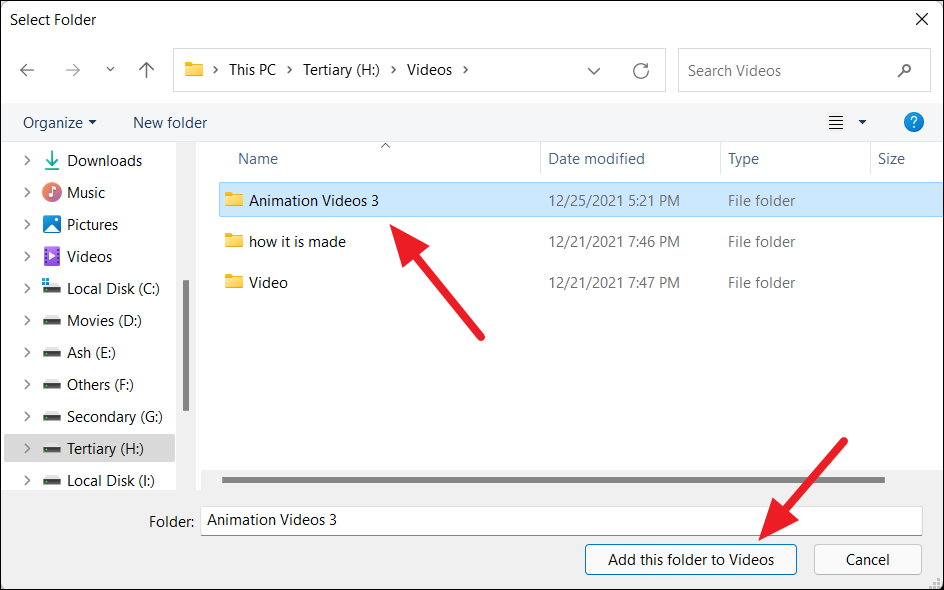
Adding to Videos Library
Ctrl+D. Step 2: Click ‘Add folder’ in the top-right corner.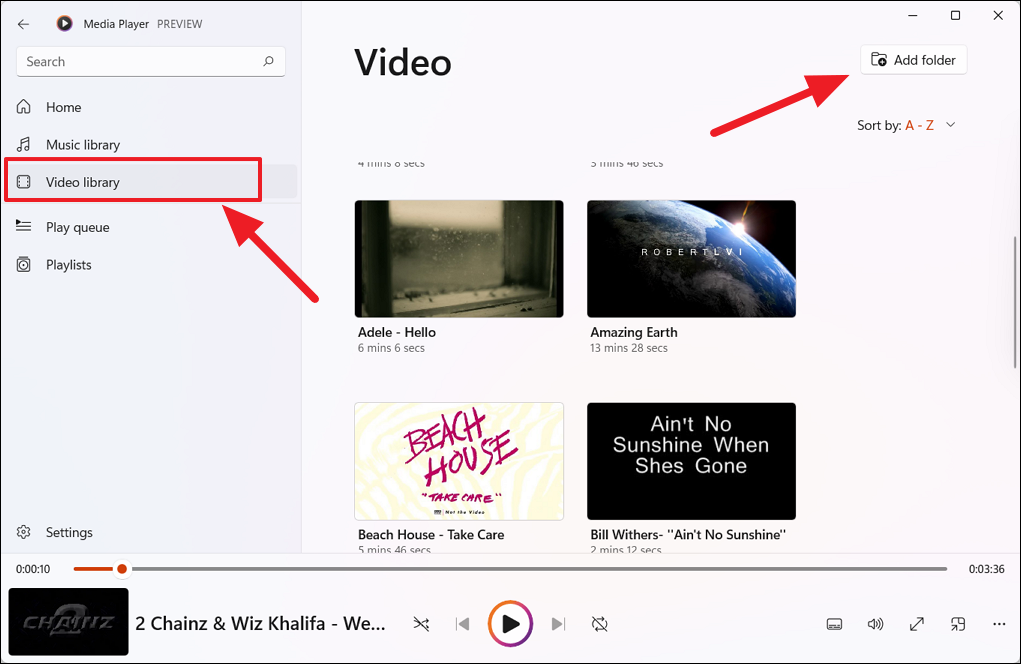
Managing Your Media Collection
Organizing Music
In the Music library, you can browse your collection by songs, albums, or artists. You can also sort by different criteria using the ‘Sort by’ dropdown menu.
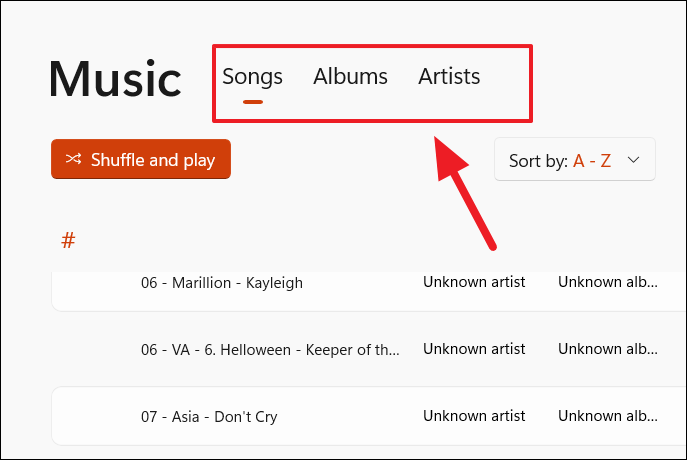
To find songs starting with a specific letter, click the hash symbol ‘#’ and select the desired letter.
Organizing Videos
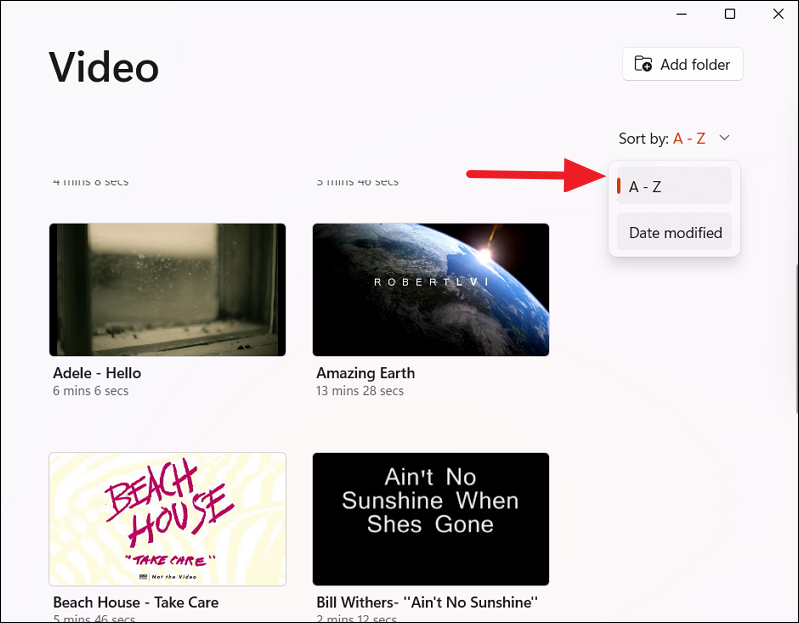
In the Videos library, you can sort your videos by name or date modified using the ‘Sort by’ dropdown.
Managing the Play Queue
You can queue multiple media files to play in a specific order. To add files to the queue: – Right-click a file, select ‘Add to’, and choose ‘Play queue’. – To add multiple files, select them using checkboxes, click ‘Add to’, and choose ‘Play queue’.

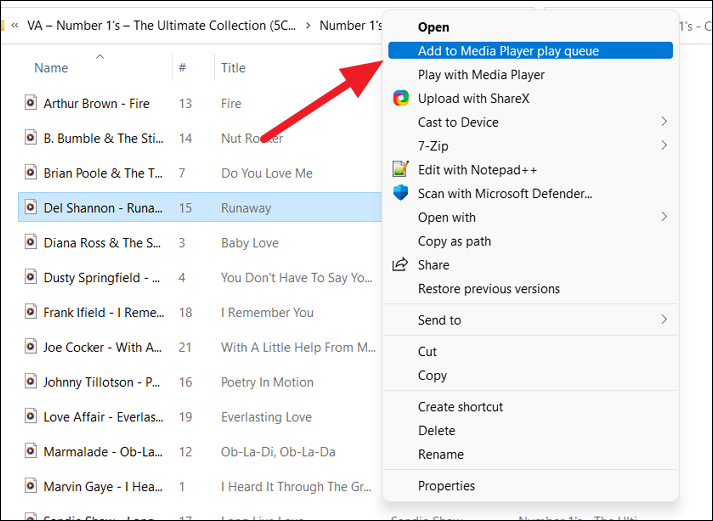
From File Explorer: Right-click the file(s), select ‘Show more options’, then choose ‘Add to Media Player play queue’.
To view and manage your queue: Go to the ‘Play queue’ tab. Here, you can rearrange or remove items and save the queue as a playlist by clicking ‘Save as playlist’ or pressing Ctrl+S.
Creating and Managing Playlists
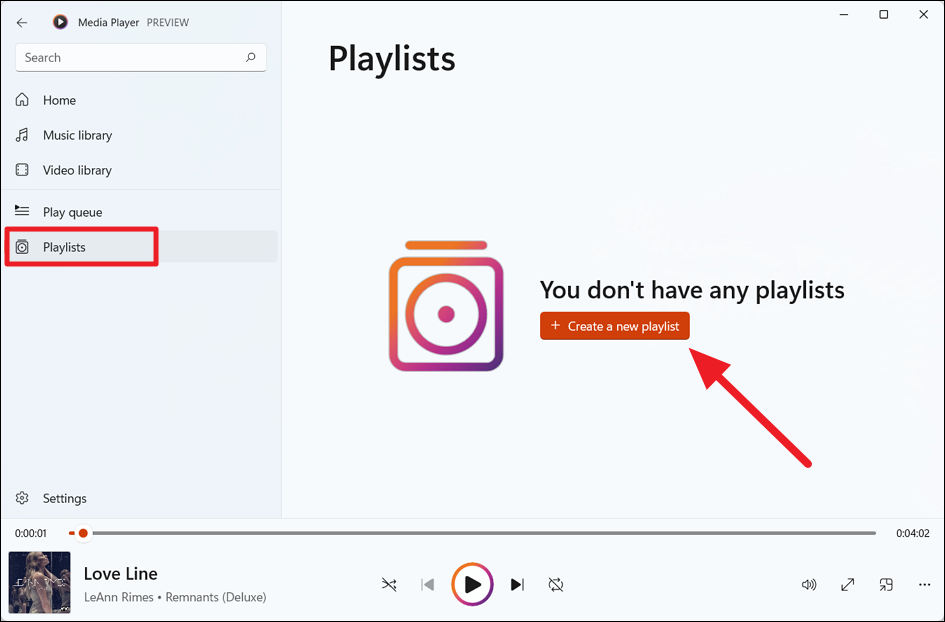
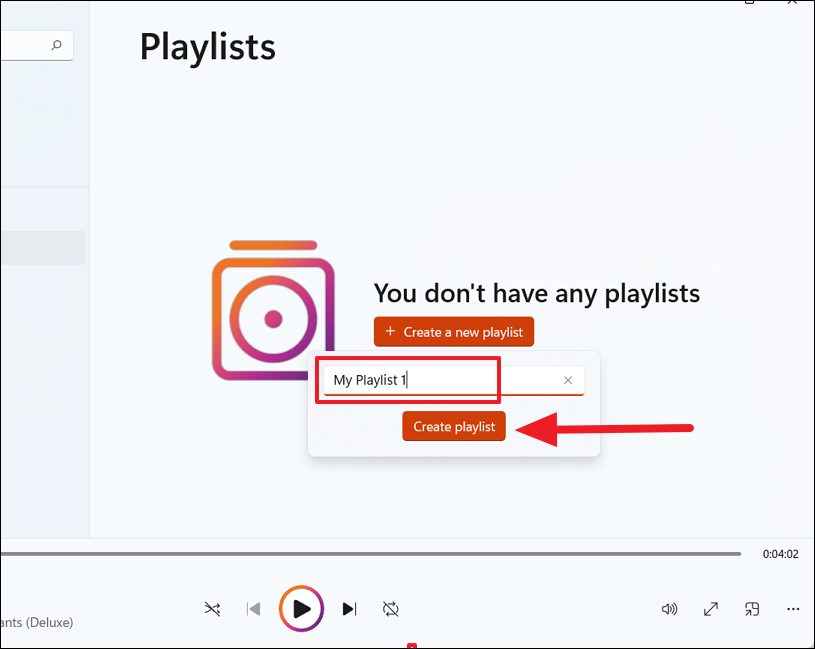
Playlists allow you to organize media files for different occasions. To create a new playlist: Step 1: Go to the ‘Playlists’ tab and click ‘Create a new playlist’ or ‘New playlist’.
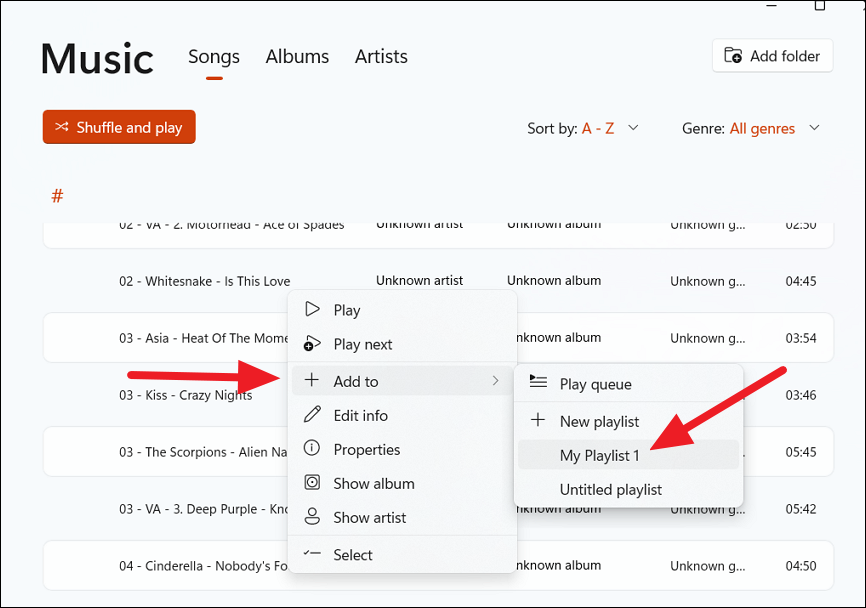
To add files to the playlist: – Right-click a file, choose ‘Add to’, and select the playlist. – To add multiple files, select them, click ‘Add to’, and choose the playlist.
To play, rename, or delete a playlist: Go to the ‘Playlists’ tab, right-click the playlist, and select the desired option.
Viewing Media File Details
To view detailed information about a media file: Step 1: Locate the file in Media Player. Step 2: Right-click the file and select ‘Properties’.
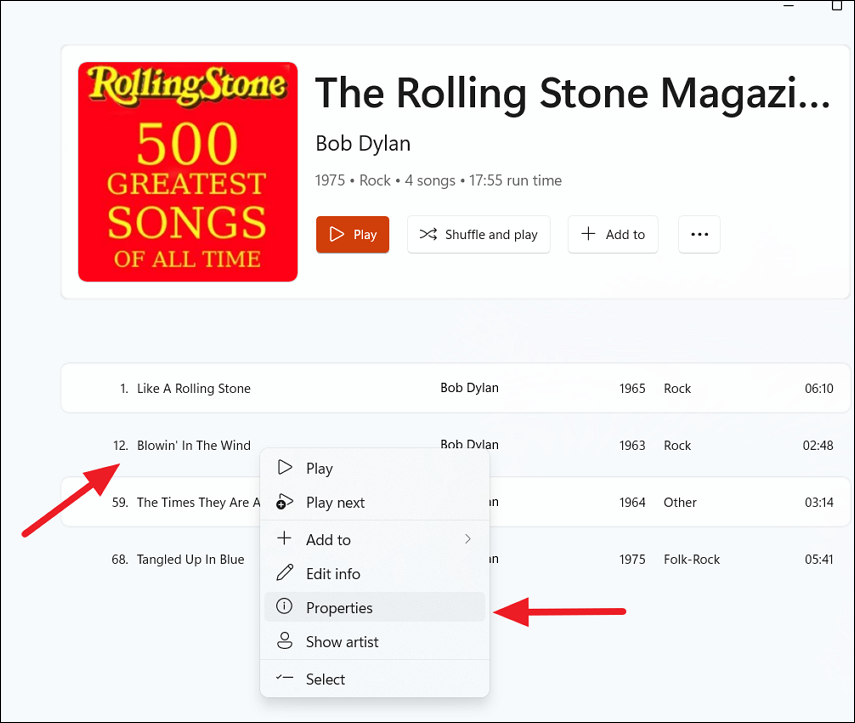
This will display information like title, artist, album, genre, file type, length, bitrate, and file location.
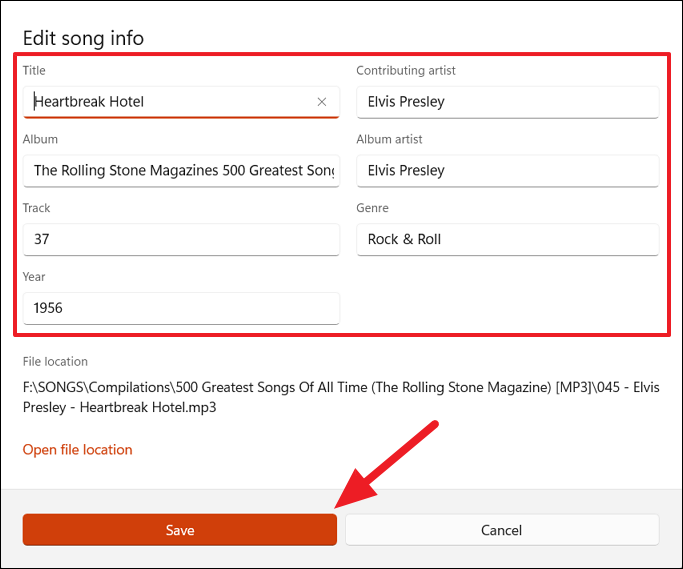
Editing Song Information
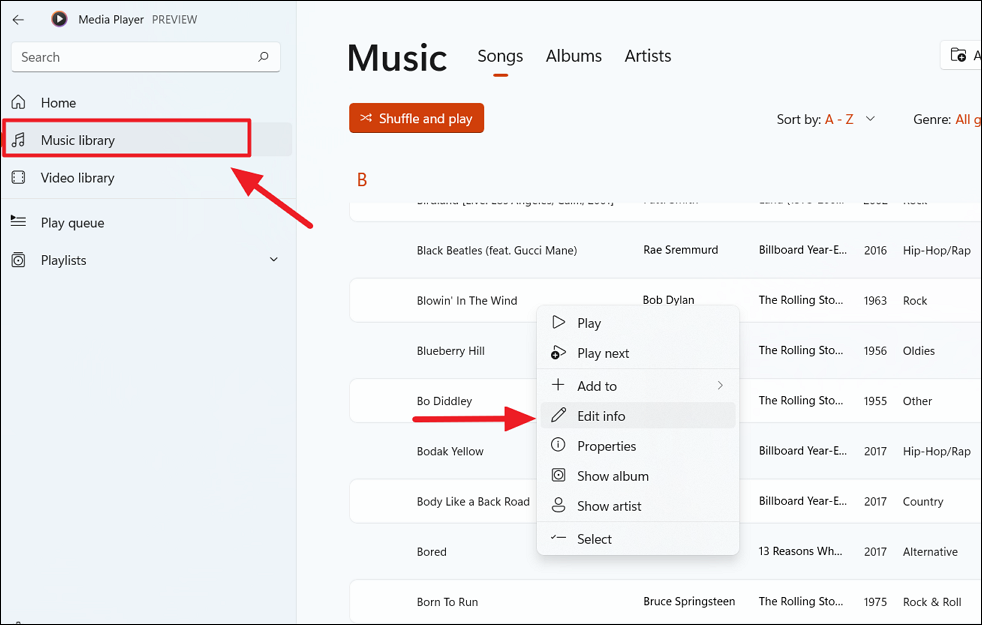
You can edit metadata for your music files directly within Media Player. To edit a song’s info: Step 1: In the Music library, right-click the song and select ‘Edit info’.
To edit album info: Right-click the album under the ‘Albums’ tab and select ‘Edit info’ or open the album and click ‘Edit info’. You can also update the album info online using the app’s database.
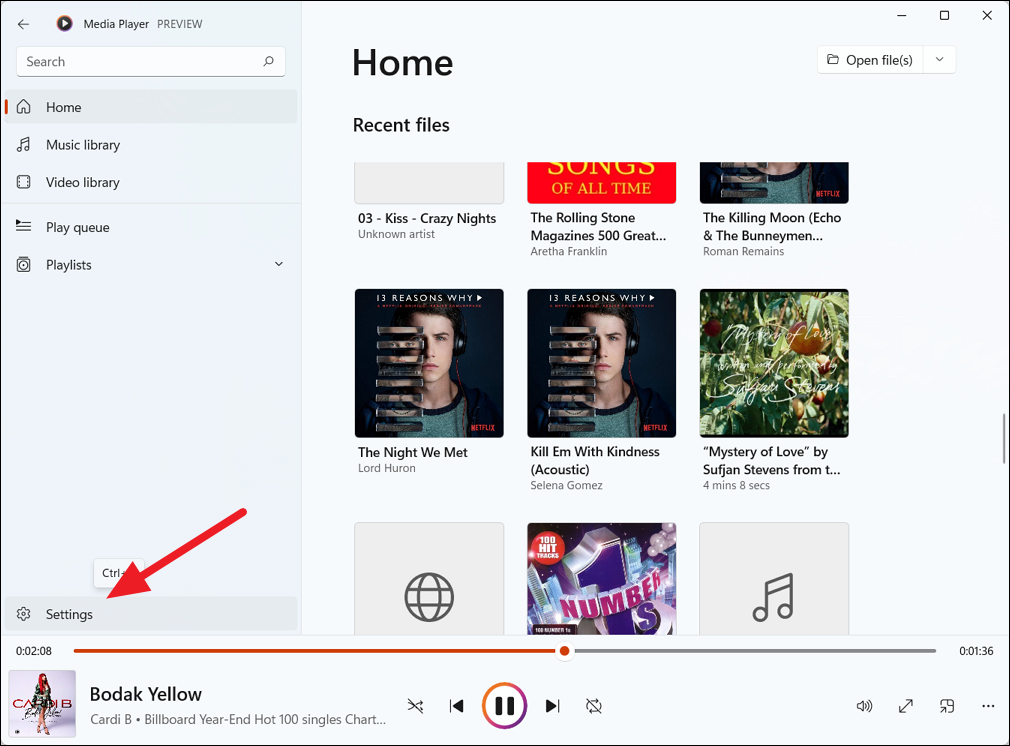
Personalizing Media Player’s Theme and Color
You can customize the appearance of Media Player to match your preferences. Step 1: Open Media Player and click the ‘Settings’ (gear icon) at the bottom of the left pane.
To change the theme: Under ‘Personalization’, click the dropdown next to ‘App theme’ and select ‘Light’, ‘Dark’, or ‘Use system settings’.
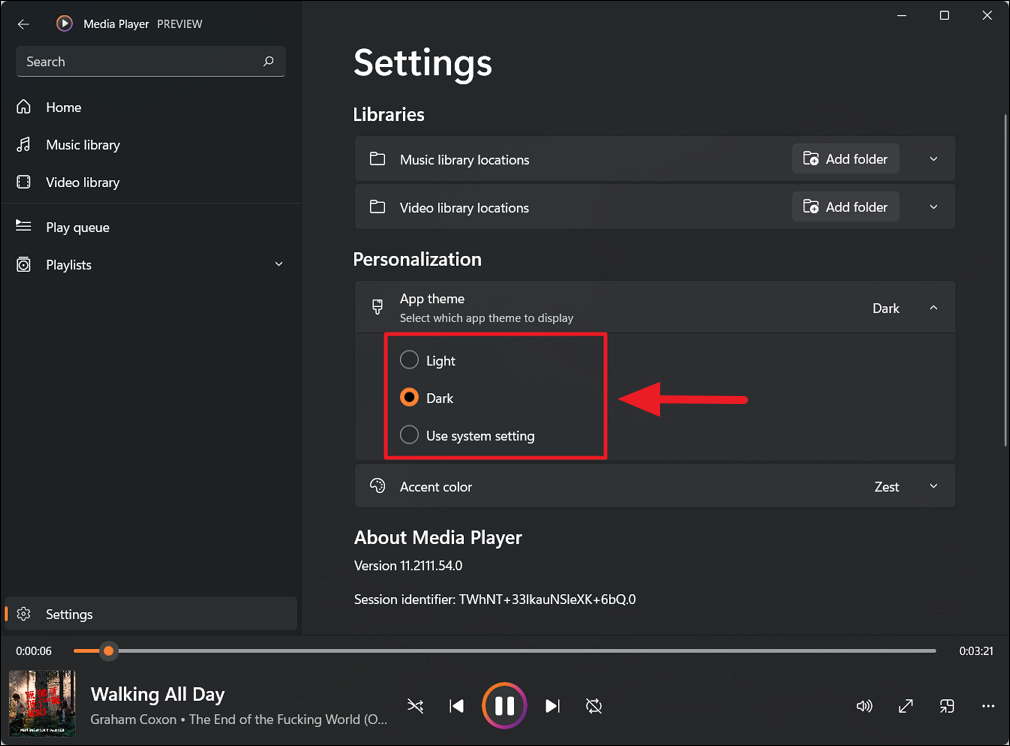
To change the accent color: Click the dropdown next to ‘Accent color’ and choose ‘Use system settings’. This will make the app adopt the system’s accent color.
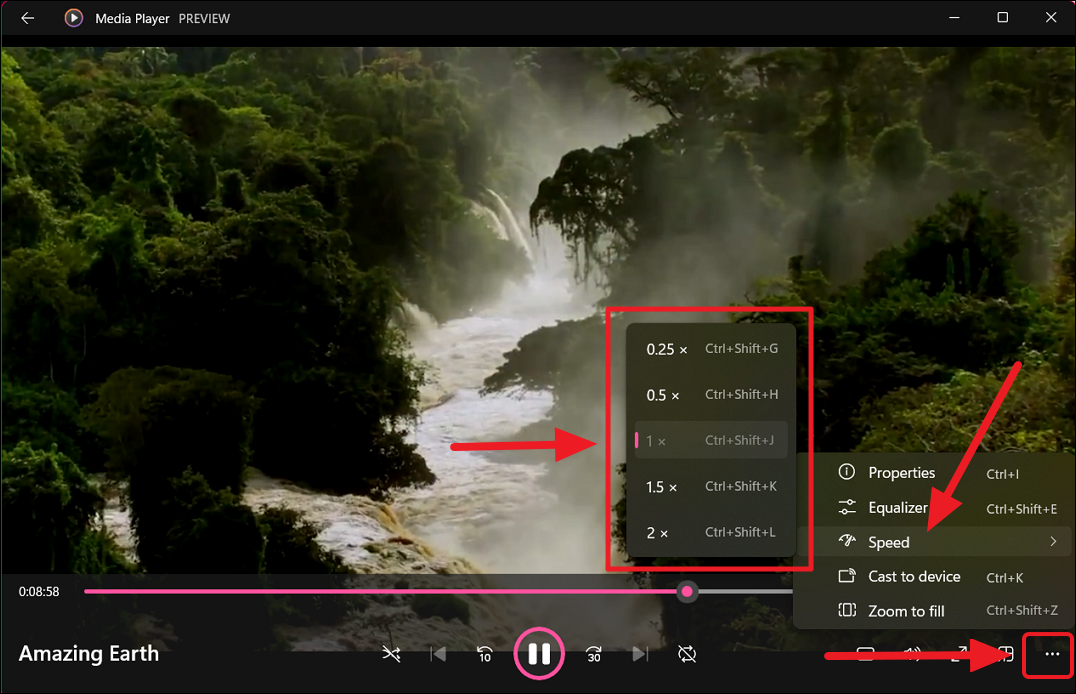
Adjusting Media Playback Speed
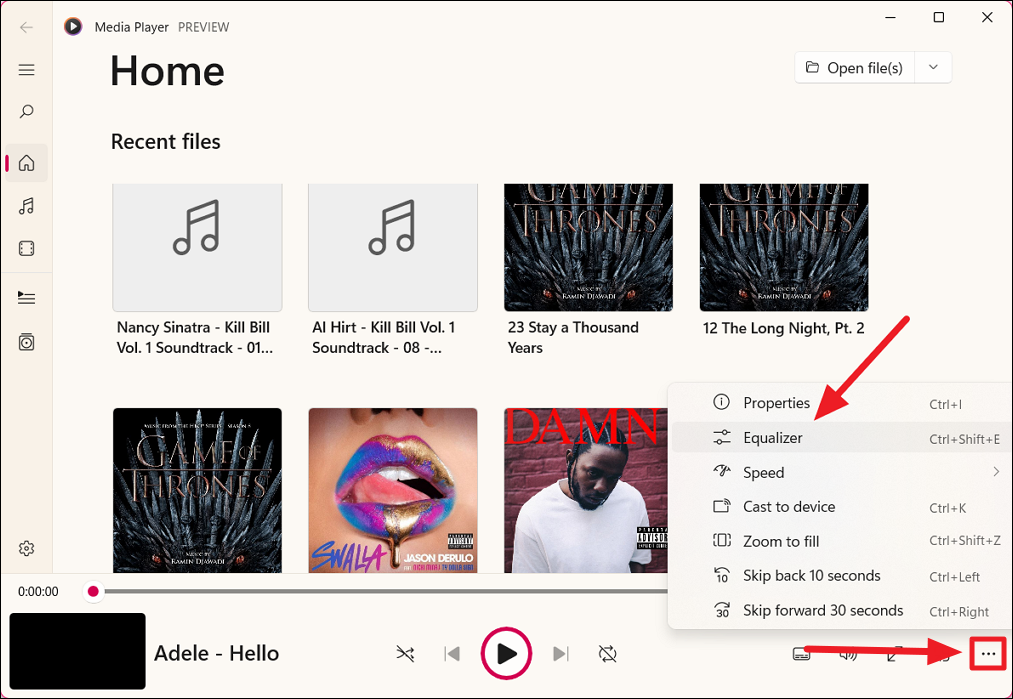
You can control the playback speed of audio and video files. Step 1: While playing a media file, click the three-dot ‘More options’ icon at the bottom right. Step 2: Select ‘Speed’ and choose from 0.25x, 0.5x, 1x (normal), 1.5x, or 2x.
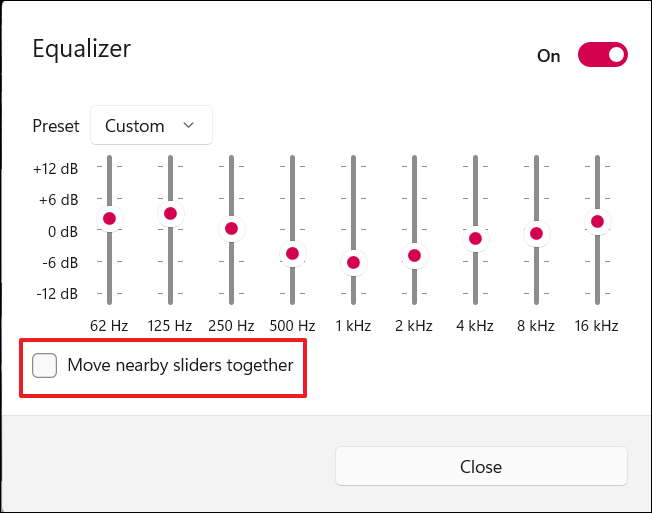
Using Equalizer Filters
Media Player includes an equalizer to adjust the sound quality. Step 1: While playing a media file, click the ‘More options’ icon and select ‘Equalizer’ or press Ctrl+Shift+E.
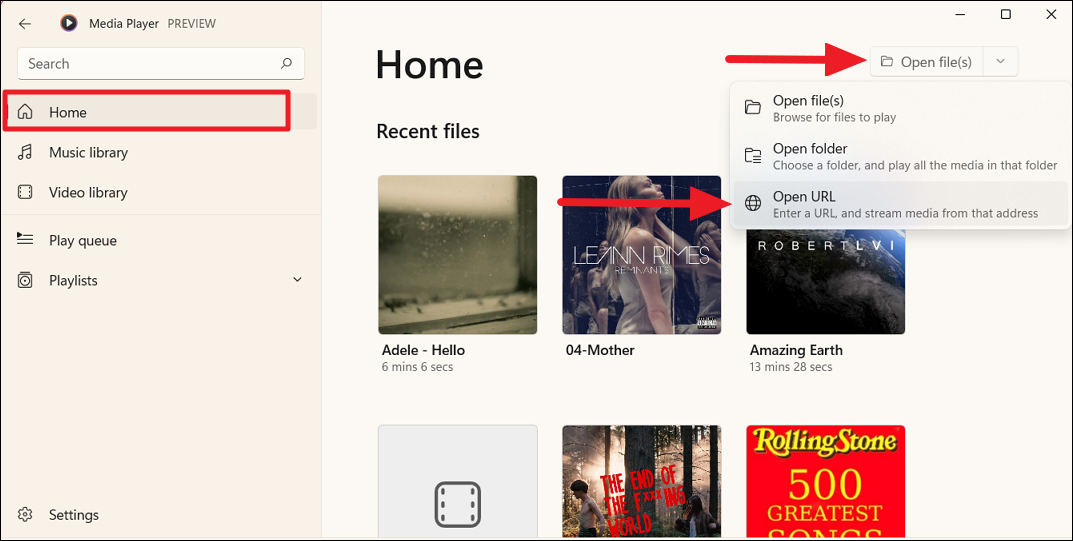
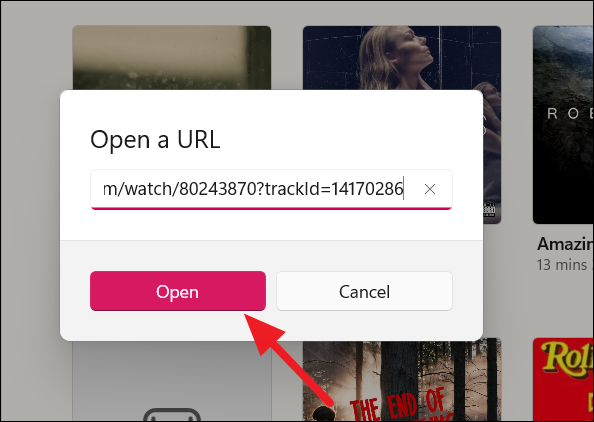
Streaming Media from a URL
You can stream audio or video content directly from a URL. Step 1: On the ‘Home’ tab, click the dropdown next to ‘Open file(s)’ and select ‘Open URL’.
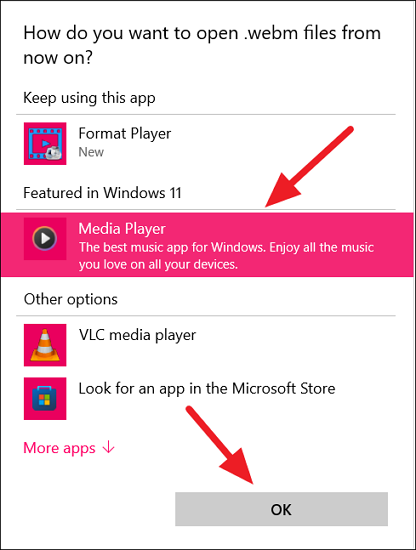
Setting Media Player as the Default App
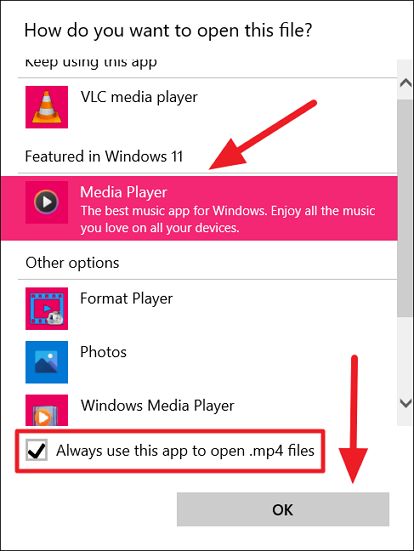
To make Media Player your default app for certain file types, you can do so via File Explorer or Windows Settings.
Using File Explorer
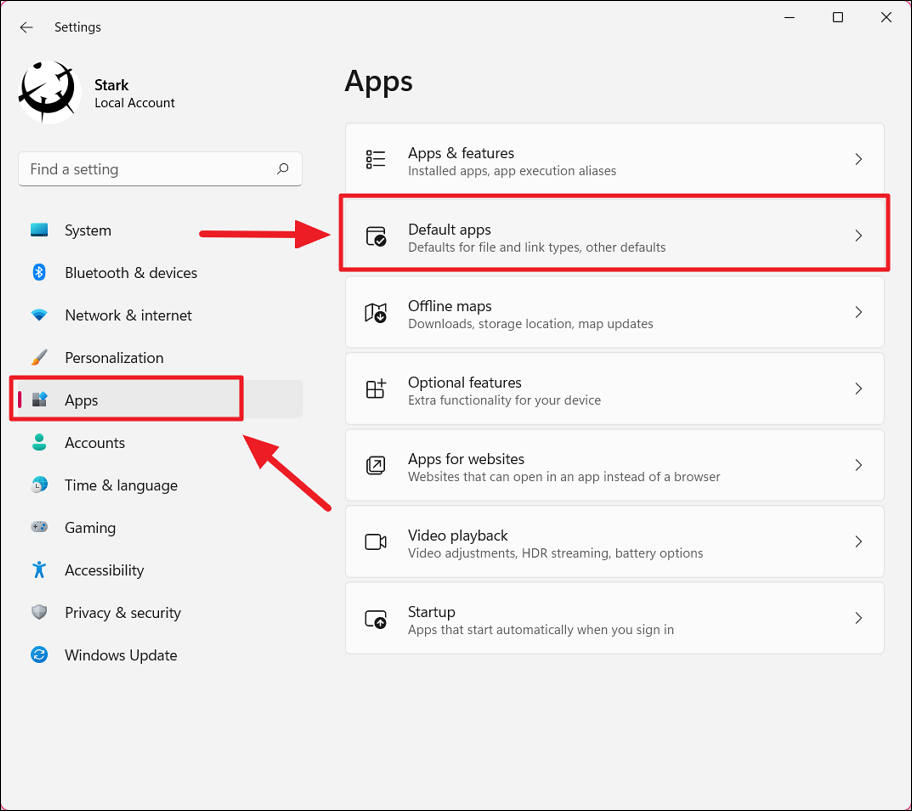
Using Windows Settings
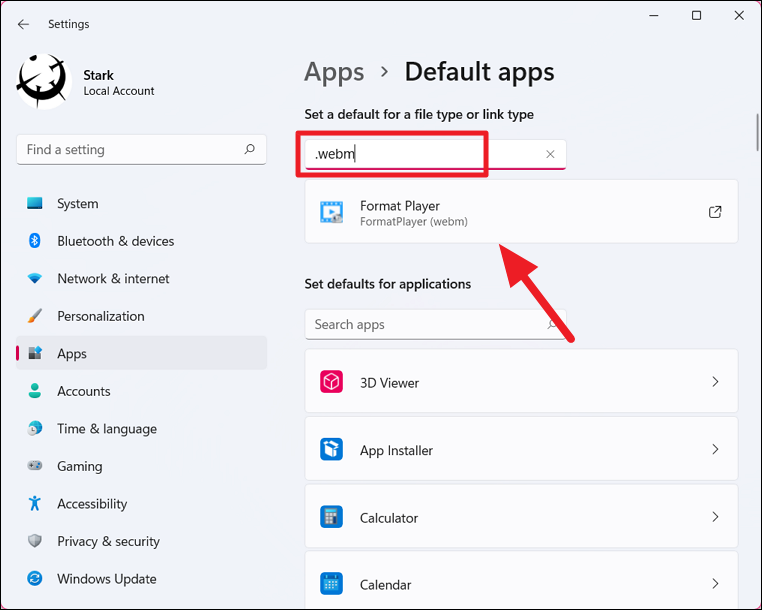
Repeat these steps for each file type you want to associate with Media Player.
Keyboard Shortcuts for Media Player
Here are some useful keyboard shortcuts to navigate and control Media Player:
| Action | Keyboard Shortcut |
|---|---|
| Play/Pause | Ctrl+P |
| Previous Track | Ctrl+B |
| Next Track | Ctrl+F |
| Shuffle On/Off | Ctrl+H |
| Repeat Mode | Ctrl+T |
| Add Files | Ctrl+O |
| Skip Back 10 Seconds | Ctrl+Left |
| Skip Forward 30 Seconds | Ctrl+Right |
| Full Screen Toggle | F11 |
| Mini Player Toggle | Ctrl+M |
| Open Home Tab | Ctrl+Shift+F |
| Open Music Library | Ctrl+R |
| Open Videos Library | Ctrl+D |
| Open Play Queue | Ctrl+Q |
| Open Playlists | Ctrl+Y |
| Settings | Ctrl+G |
| Properties | Ctrl+I |
| Equalizer | Ctrl+Shift+E |
| Cast to Device | Ctrl+K |
| Normal Speed | Ctrl+Shift+J |
| Slower Speed (0.5x) | Ctrl+Shift+H |
| Slowest Speed (0.25x) | Ctrl+Shift+G |
| Faster Speed (1.5x) | Ctrl+Shift+K |
| Fastest Speed (2x) | Ctrl+Shift+L |
With the new Media Player app in Windows 11, you can enjoy your media with a modern interface and enhanced features. Whether you’re listening to music or watching videos, the app provides a seamless experience tailored to your preferences.


