
Cross-references in Microsoft Word allow you to connect sections, figures, tables, footnotes, and more, so readers can easily jump to related content. This feature is especially valuable in lengthy or complex documents like research papers, legal briefs, or dissertations, where information may shift as you edit. Cross-references automatically update if you move or renumber referenced items, saving time and reducing errors.
Using the Cross Reference Tool
Step 1: Prepare the content you want to reference. Before you can insert a cross-reference, ensure the target item—such as a heading, figure, table, footnote, or numbered list—already exists in your document. For figures or tables, use Word’s Insert Caption tool so Word can recognize and track them.
Step 2: Place your cursor where you want the cross-reference to appear. For example, if you want to refer readers to a specific figure, position your cursor within the sentence where the reference should go.
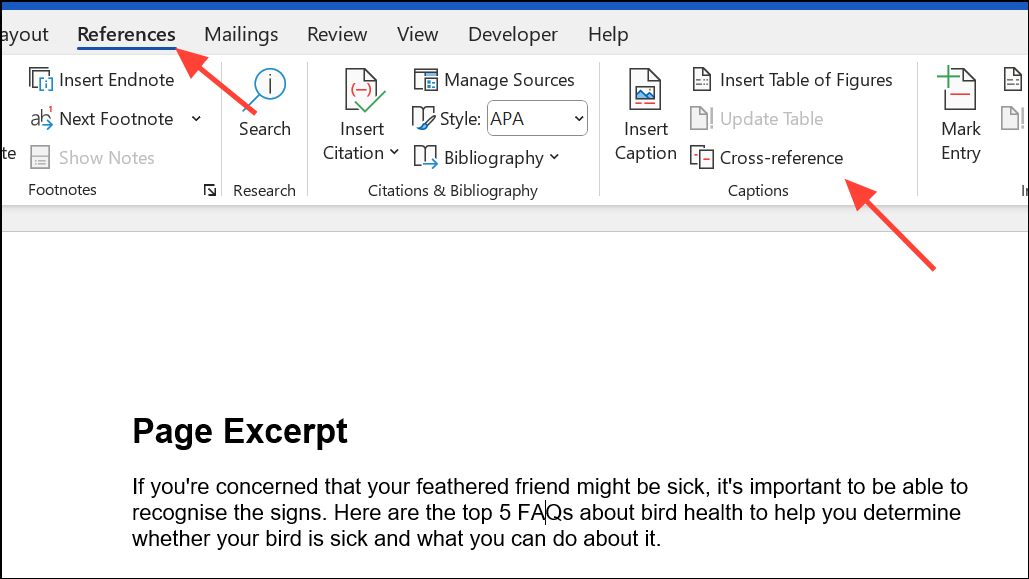
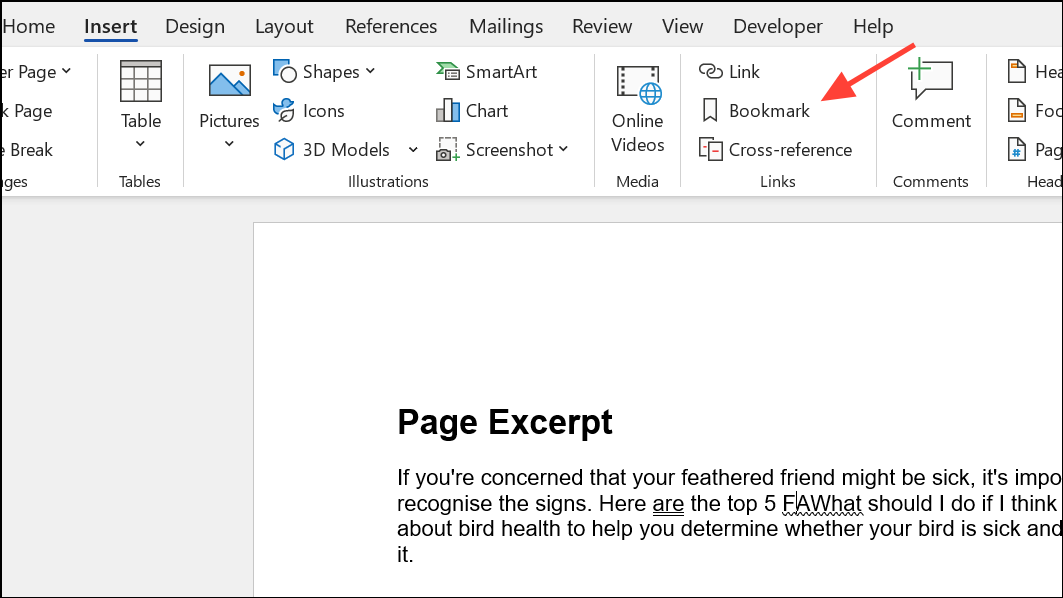
Step 3: Go to the References tab and click Cross-reference. In some versions of Word, you might find this under the Insert tab within the Links group.
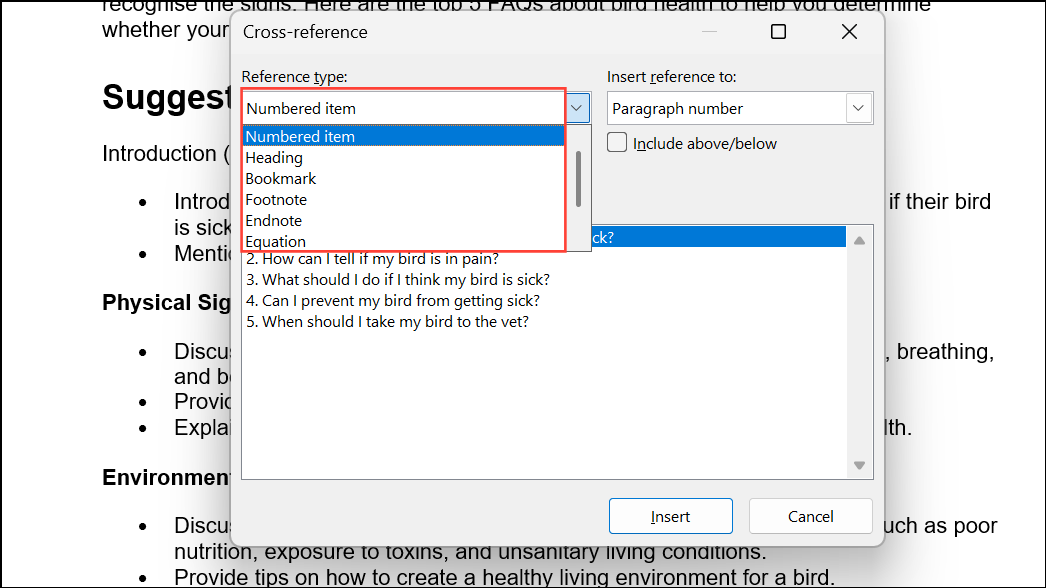
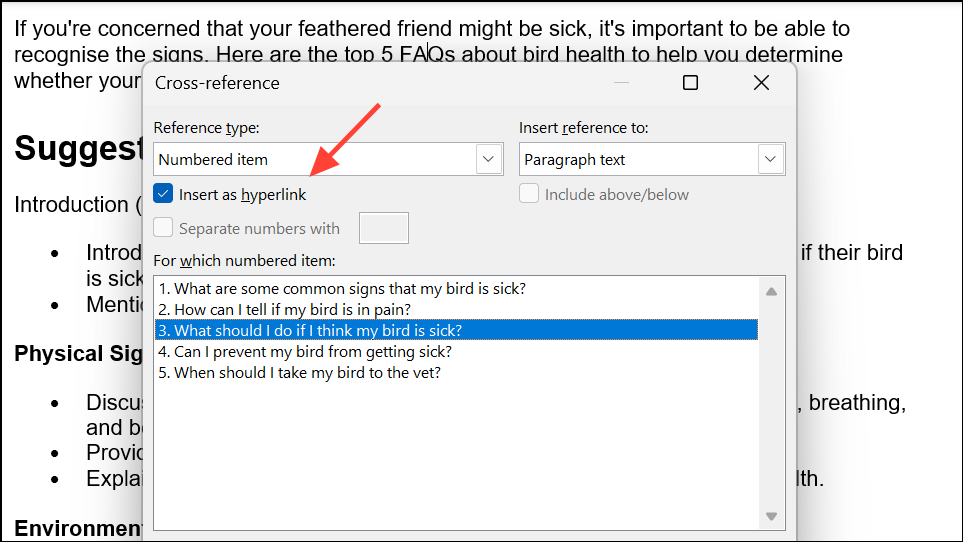
Step 4: In the Cross-reference dialog box, select the type of item you want to reference from the Reference type dropdown. Options include numbered items, headings, bookmarks, footnotes, endnotes, equations, figures, or tables. The list depends on what’s available in your document.
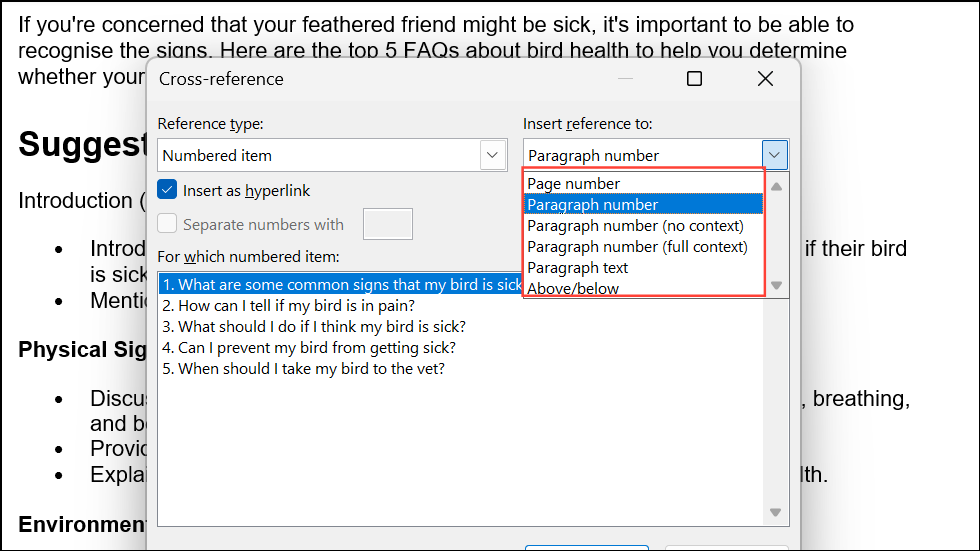
Step 5: Choose what information you want to insert using the Insert reference to dropdown. For example, you can insert just the page number, the full caption, or only the label and number (“Figure 2”).
Step 6: In the For which box, select the specific item you want to reference. This list shows all items of the chosen type.
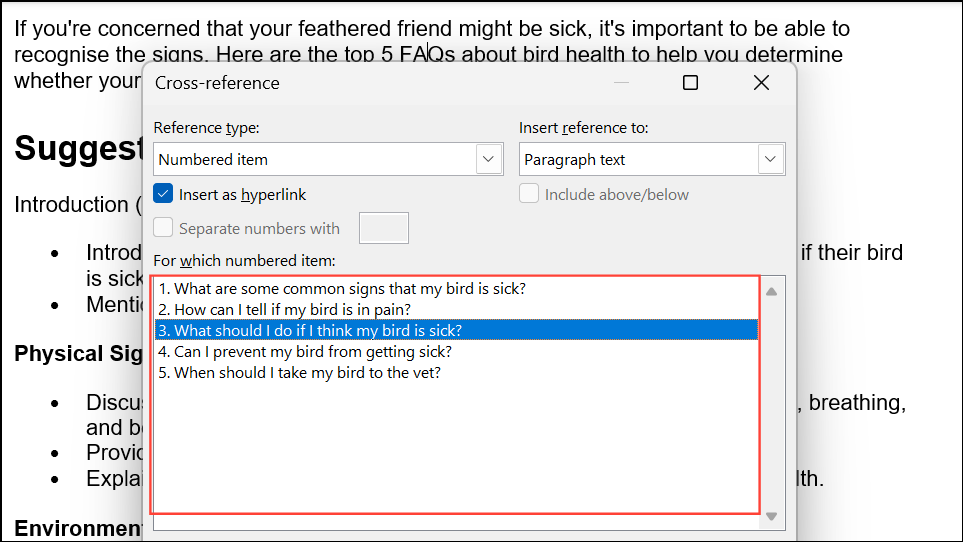
Step 7: To make the reference clickable, check Insert as hyperlink. This lets readers jump directly to the referenced item.
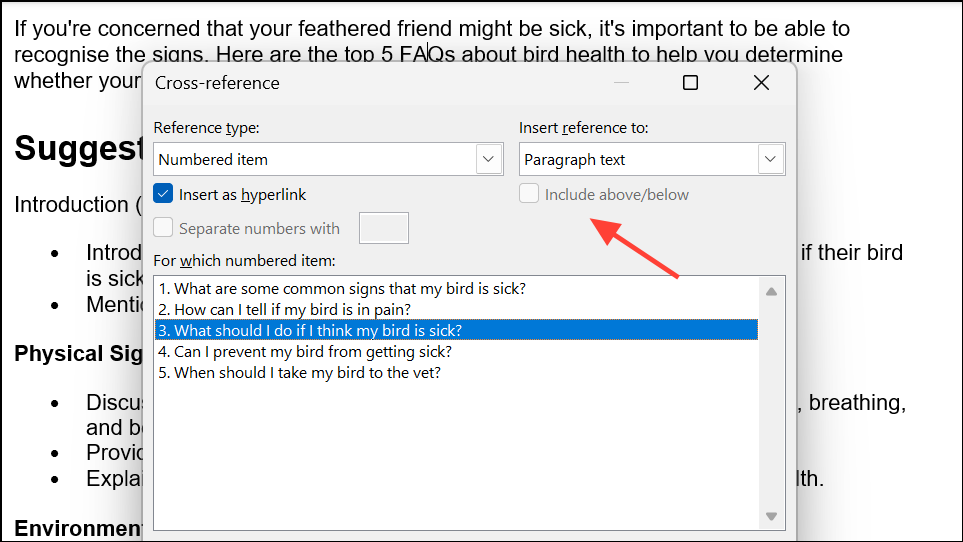
Step 8: If available, check Include above/below to display the relative position of the referenced item.
Step 9: Click Insert, then close the dialog box.
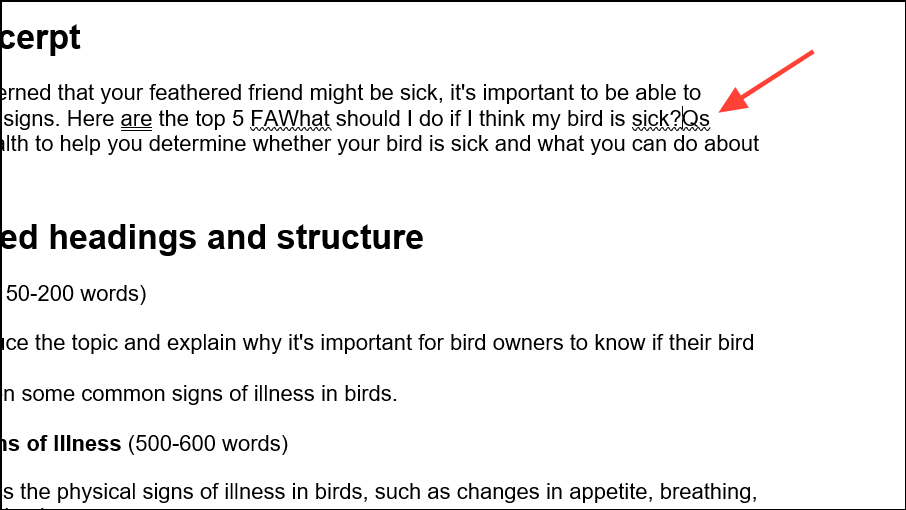
Word inserts the cross-reference as a field. If you later move or renumber the referenced item, the cross-reference updates automatically. To update all cross-references in your document at once, press Ctrl + A to select everything, then press F9.
Referencing Multiple Items or Customizing Field Codes
When referencing several items at once—such as multiple figures or tables—you can insert individual cross-references for each. To display only the number (not the full label), right-click the cross-reference, choose Toggle Field Codes, and add \# 0 after the reference ID. Then right-click again, choose Update Field, and manually type the desired label (such as “Figs.”) before the numbers. This approach is helpful for disciplines that require specific citation formats.
Speeding Up Cross-Referencing in Large Documents
In lengthy documents with hundreds of references, scrolling through lists in the Cross-reference dialog can be slow. To streamline this process:
- Use Bookmarks to mark key spots in your document. Add a bookmark via
Insert>Bookmark, name it, and reference it later.
- Apply Styles to headings and use Captions for figures and tables. Word’s cross-reference tool recognizes these elements, making them easier to find.
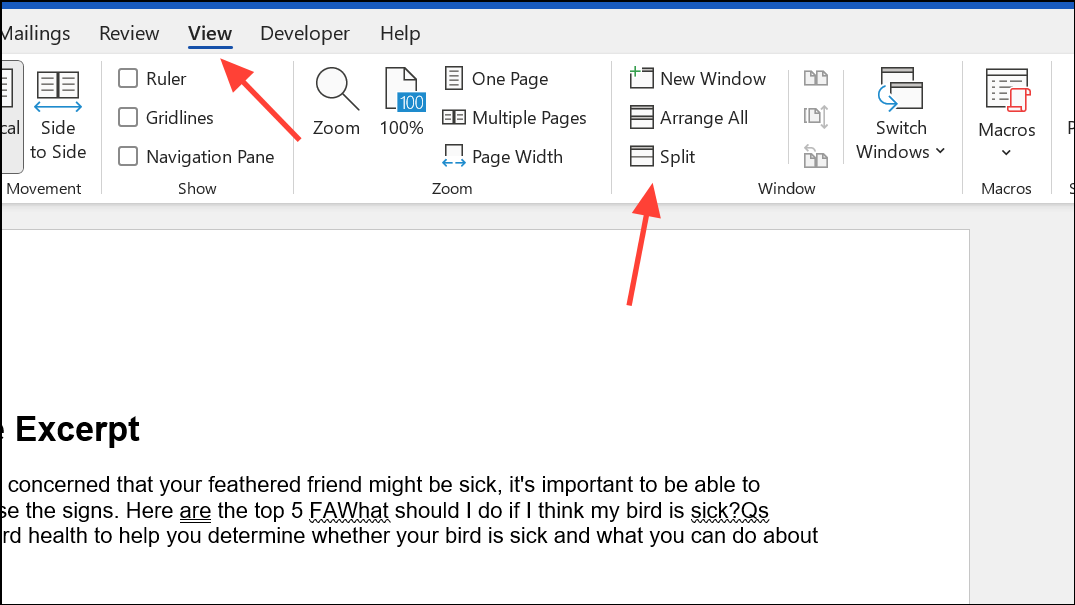
- Utilize Split View (
View>Split) to keep the reference point visible while you work elsewhere.
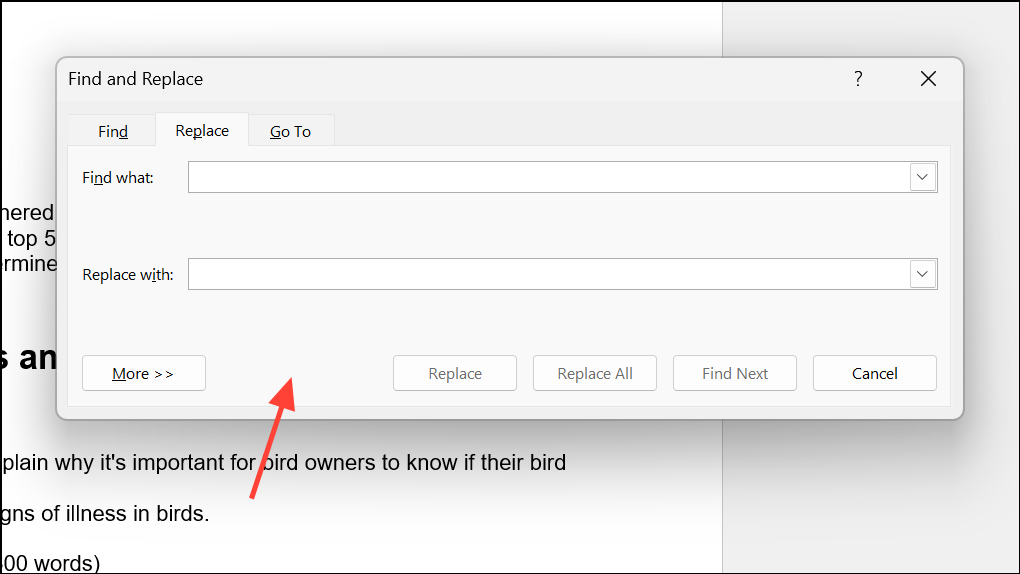
- Use Find and Replace (
Ctrl + F) to quickly locate reference targets.
While Word does not support copying a reference by right-clicking a list number directly, these techniques help manage references more efficiently in large files.
Troubleshooting the Cross-Reference Dialog
Sometimes, the Cross-reference dialog box may not appear, especially when using multiple monitors. If you click the Cross-reference button and nothing happens, try these solutions:
- Move the Word window to a different monitor and try again. The dialog may open off-screen due to monitor configuration.
- Press
Alt + Space, thenM, and use arrow keys to move the hidden dialog into view. - If the dialog remains hidden, close all Word windows and reopen your document.
- Check if hiding or showing the Windows taskbar affects the dialog’s visibility.
These steps can restore access to the Cross-reference dialog without restarting your computer.
Cross-references in Word make documents easier to navigate and keep references accurate as your content evolves. With these methods, you can save time and reduce manual edits, especially in complex or lengthy files.