When trying to make plans that involve more than two people in your personal life, it can be a headache to get the time right that’s convenient for everyone. But if you throw a small team into the mix that needs to plan a meeting or an event, it can be an outright disaster.
To help fix this very problem, many calendars exist that can help you schedule events, like, Google Calendar. But if you find these calendars somewhat hard to get a hang of, When2Meet is the perfect choice for you.
What is When2Meet and Is it Right for You?
When2Meet is a simple web-based polling calendar that you can use to coordinate events and meetings for a large number of people. It uses an extremely simple interface cutting down all the bells and whistles that might keep you away from trying out other calendars.
You can select the dates and times that suit you for the event and invite other participants to do the same. Once you create the event for particular dates, participants can select their availability from those dates only. This lets you reach a consensus for a time that’s convenient for everyone from the desired dates.
When2Meet offers basic polling features only that help you schedule an event. You can poll for events 1:1 or with a large group, but that’s about it. It isn’t like other calendars that let you add a meeting room within the calendar event itself. It’s simply a place for reaching a consensus.
While its simplicity will be the winning point for many, it might also be the reason why it’s not the right fit for you.
If you’re a student trying to decide on a date for a group assignment, freelancers, or a small team, the calendar will suit you just fine. But if you want any advanced features, like Google Calendar integration, repeat events or availability, confirmation emails with event details, etc., you will find none of them in When2Meet, and it’ll be better to look elsewhere.
Using When2Meet
Using When2Meet to coordinate an event is a two-part job. First, you’ll need to create the event and invite the participants. Then, everyone can input their available times – like a vote in a pill – and you can find the time that suits everyone.
Create a When2Meet Event
To start, go to When2Meet.com.
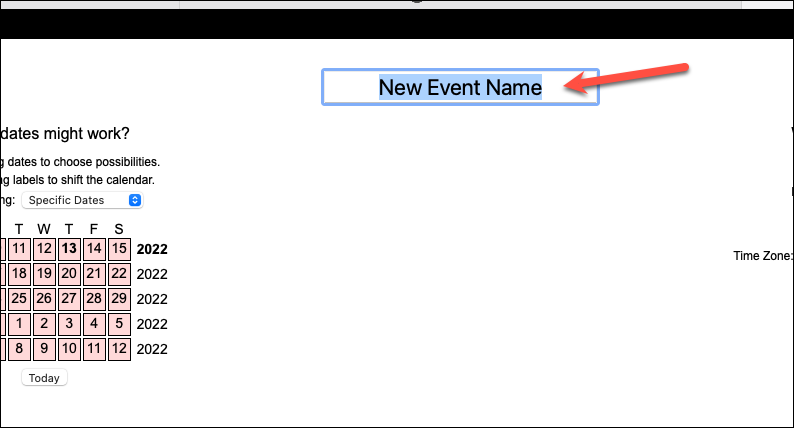
Then, enter a name for your event in the ‘New Event Name’ field.
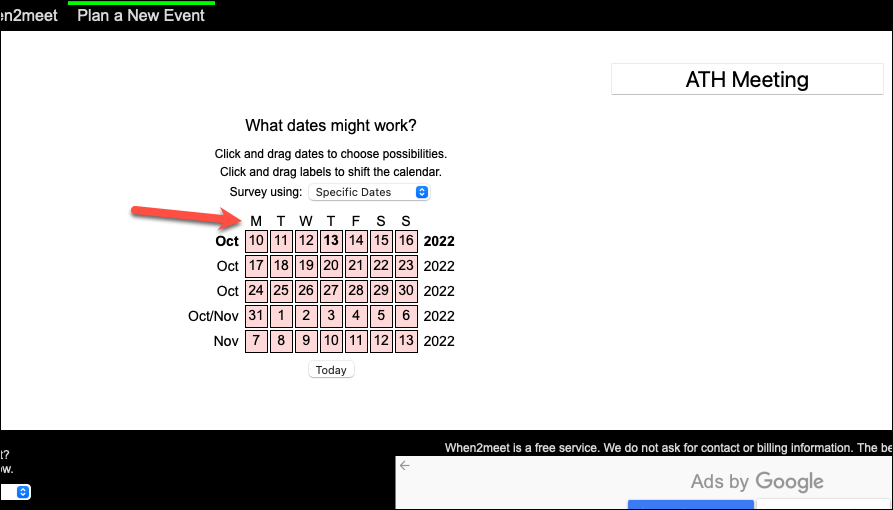
Next, you have to select the date(s) from the calendar. The calendar starts from the current week so it might look different than the usual calendar you normally see. You can drag the calendar up and down to view the weeks before and after. Place your cursor on the months on the left and scroll up and down.

The week also starts on a Sunday. But if you prefer to start the week on Monday, you can drag the calendar left or right by placing the cursor on the weekdays at the top.
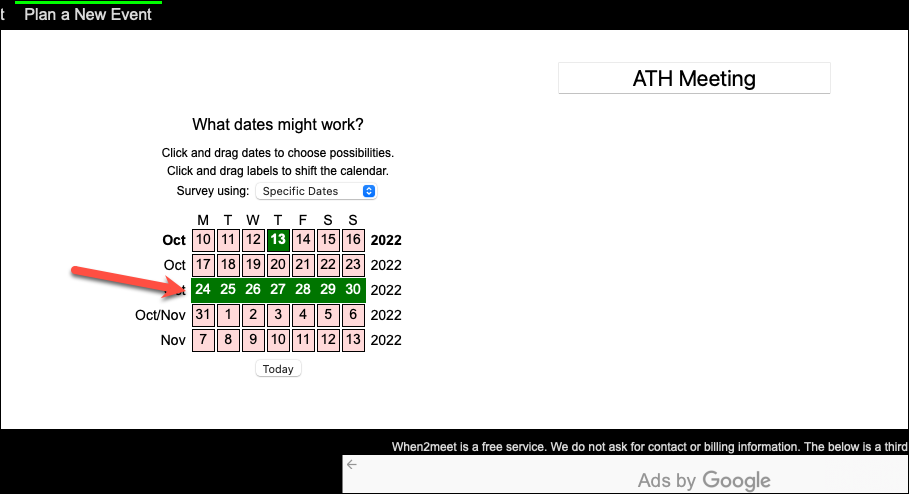
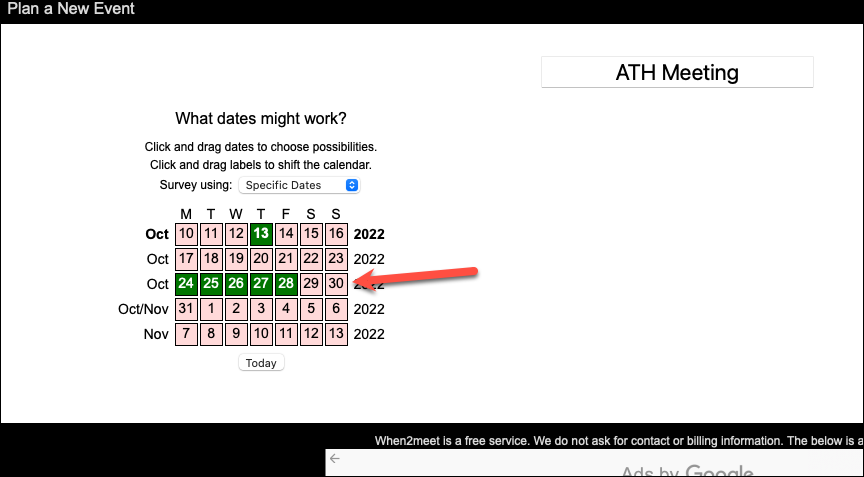
Now, select the possible dates for the event that might work for you. You can choose a single or as many dates as you want. Click the individual dates to select them or drag the cursor across the calendar to select dates in continuity. The dates you select will be highlighted in green.
You can scroll the calendar down to select any available dates in the upcoming months. As far as I can tell, there’s no limit on how far ahead you can go or how many dates you can select. But remember to choose your dates carefully as you cannot edit them once you have created the event. You’ll have to start over with a new event instead. If you select any dates by mistake, click or drag across them again to unselect them.
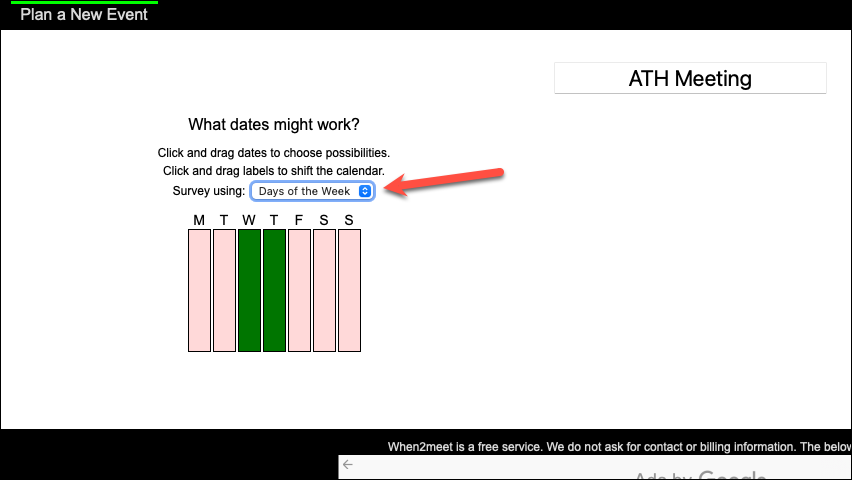
Instead of specific dates, you can also select ‘Days of the Week’ view from the drop-down menu. This view is helpful if you want to plan a recurring meeting on the same day of the week and want to determine the group’s preferable day.
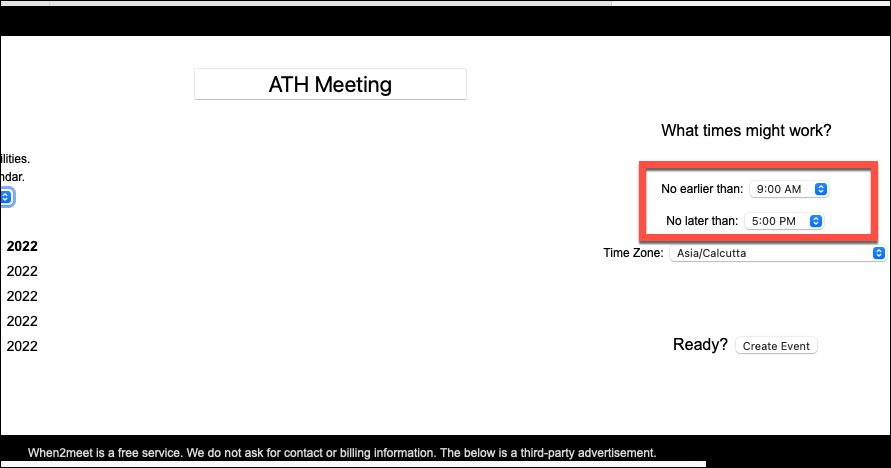
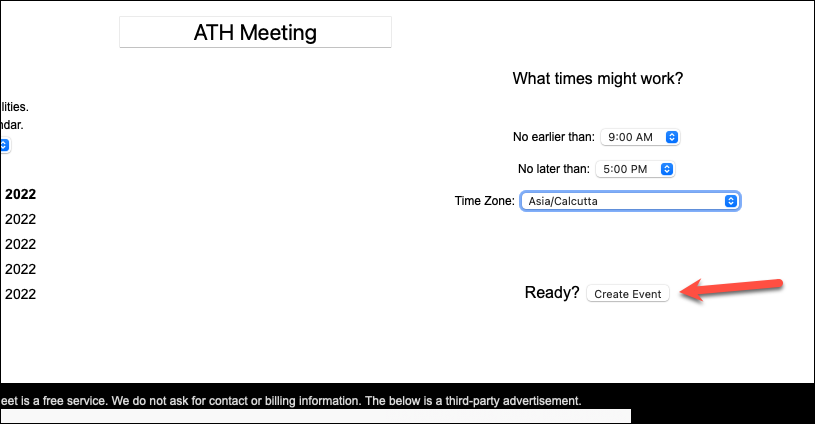
Once you have selected the dates/ days, select the time range that will work. You’ll be able to select specific available times in the next step. Here, you can define a particular range like 9:00 AM to 5:00 PM within which to schedule the event. Select the start and end time from the respective drop-down menus next to ‘No Earlier Than’ and ‘No Later Than’.
If you chose ‘Specific Dates’, you can also select your time zone and other participants will be able to select theirs. This option won’t be available with the ‘Days of the Week’ view since it expects all participants to be in a single time zone.
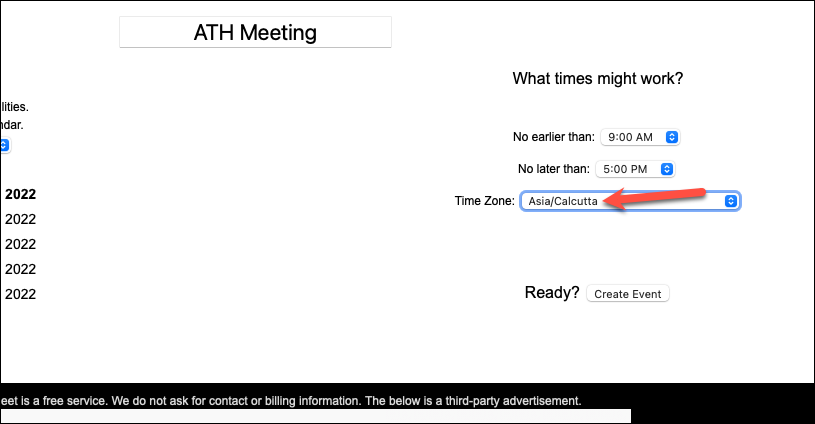
Once all the parameters are defined, click ‘Create Event’.
Invite Participants to the Event
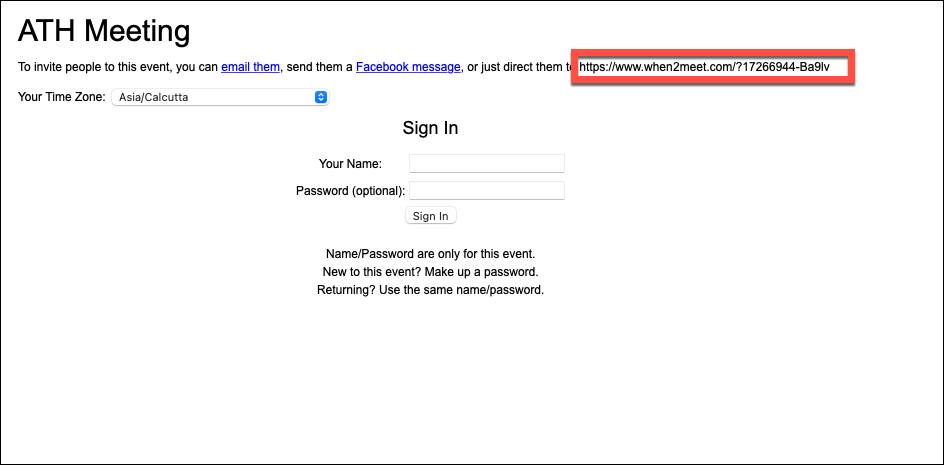
Once you create the event, it will generate a unique link for the event. You’ll need this link any time you want to view the details, so make sure to save it.
Now, you can either first send the invitations to the other participants and then vote on the time you’ll be available, or do it in the reverse order. It won’t matter since it updates any changes you make to your time availability in real time.
To send an invitation, you can click the ’email them’ option to send an email from the system mail app, the ‘Facebook message’ option, or copy the link and send it through other means.
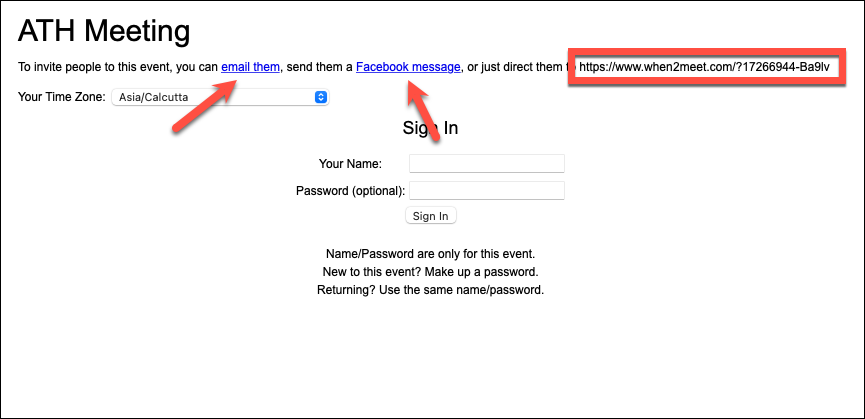
Share the event link with others and ask them to mark their availability for the event.
Signing in to the Event
Once the event is created and you have sent invitations, the next steps will be the same for everyone. It doesn’t matter if you created the event or were invited.
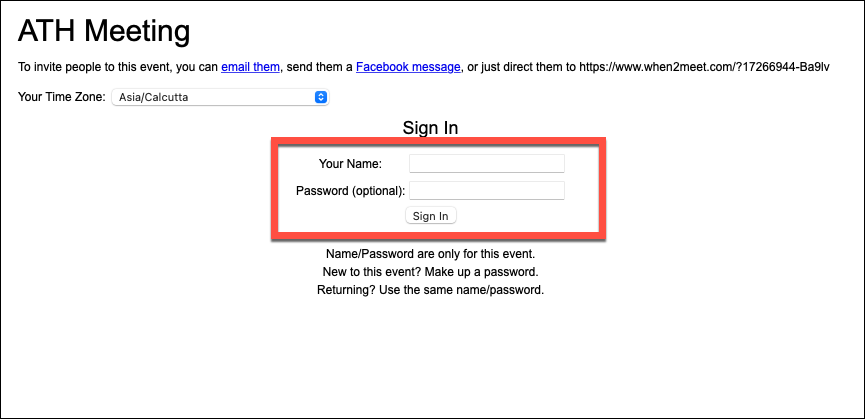
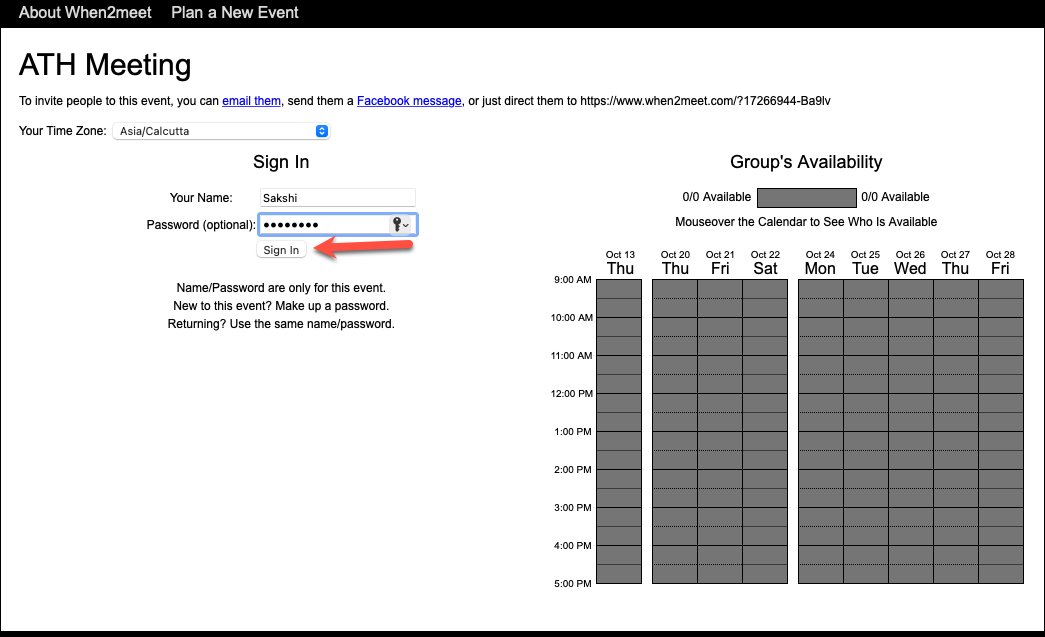
Use the link to navigate to the event page. Then to mark your time availability, you’ll need to sign in. Again, it doesn’t matter if you are the creator or an invited participant. Enter the sign-in information in the respective fields and click the ‘Sign-in’ button after entering the information.
You’ll see that the sign-in information requires you to enter only your name and not the email address, and a password, which too, is optional.
Now, you might find this peculiar but let me explain the logic behind this. The sign-in information on When2Meet is discardable because it’s only for one event. It’s great for users who want to preserve their anonymity or don’t want to go through the hassle of creating an account on a site for such tasks. But it’s also the reason why there are no confirmation emails with event details or other app integrations.
Coming on to the matter of the password. Now you might be inclined to not create a password as it is optional and enter just your name. While you can do it, we’d suggest you create one since, without the password, anyone with access to the link can sign in using your name. If they sign in with your name, they can also edit your available time slots. So, to prevent any such mix-up, it’s better to create a password, even a simple one.
Though the usernames and passwords are discardable, you can save them using a Password Manager and use them again for all future When2Meet events.
Now, enter your name and password every time you want to edit your availability. You don’t need to enter this information to see the group’s availability.
Marking your Availability
Once you sign in, a date and time grid similar to the group grid visible on the right of the window will appear on the left. This is where you can mark your availability.
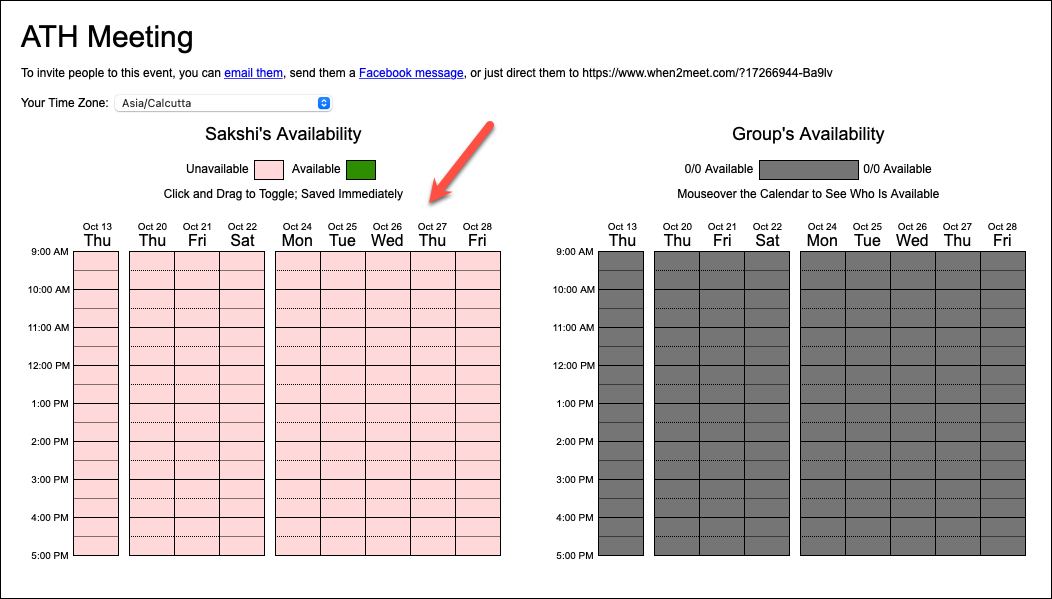
Marking your availability is simple. All you need to do is click and drag on the grid. There’s no extra step for saving your changes; all changes are saved automatically.
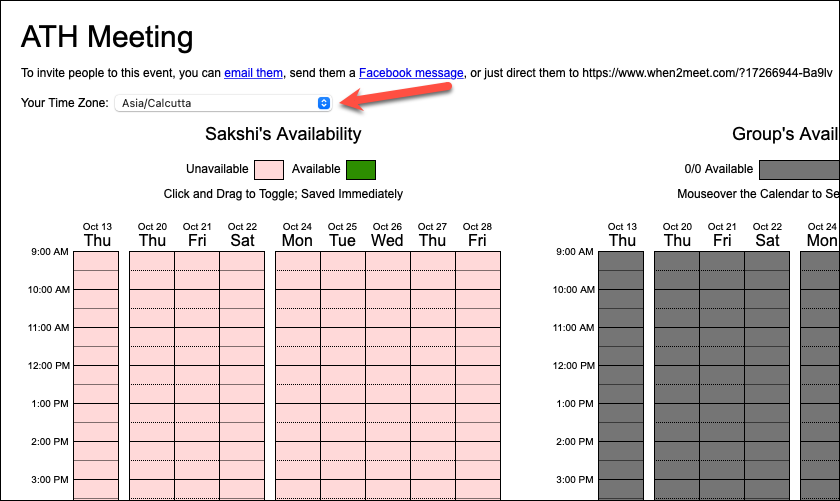
Before marking your availability, make sure that the time zone displayed in the upper-right corner is correct. If it isn’t, you can select it from the drop-down menu.
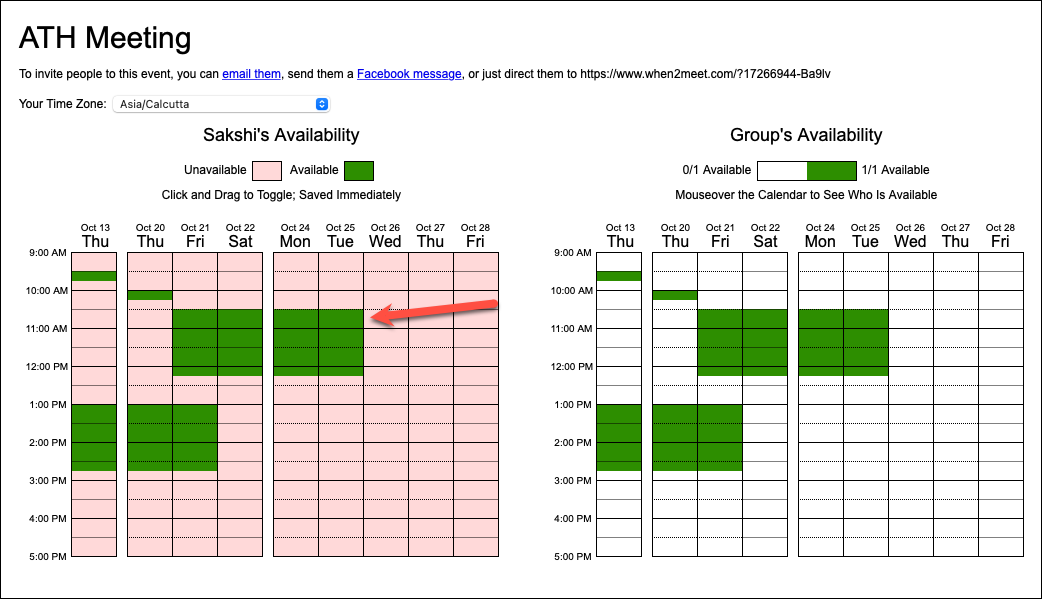
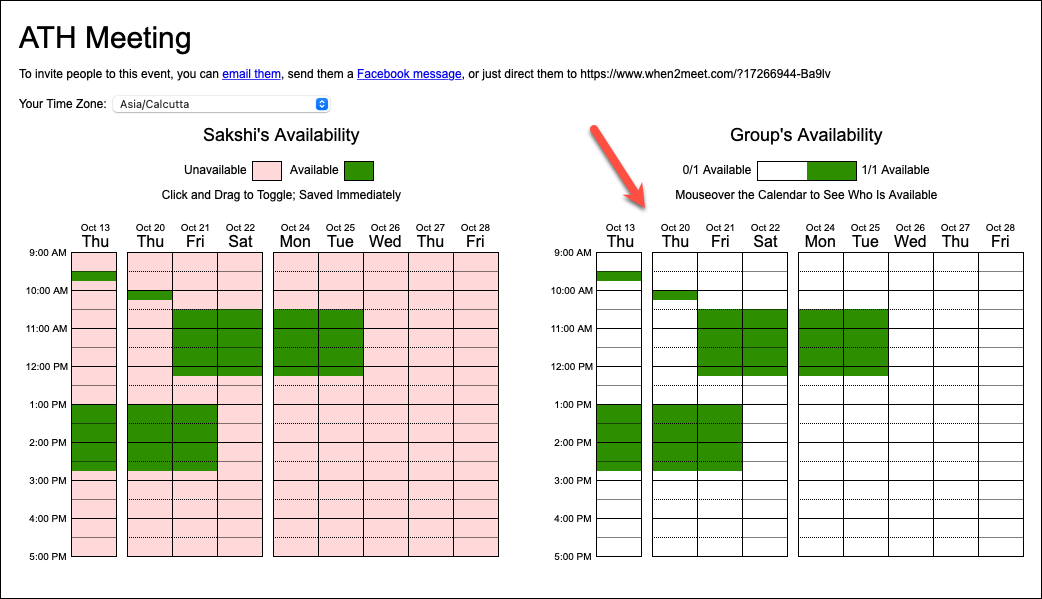
Now, you can either click the blocks to make your availability. Clicking marks a 15-min window at a time for a particular date. To mark larger chunks of time, you can click and drag horizontally and vertically. The times you’ve marked as available will appear in green.
If you mark a bad time accidentally or you’re no longer available at that time now, simply click or click and drag along that time to unmark it.
Finding the Right Time from the Group Grid
When people mark their available time, you can see it in the group grid. The grid will show the users’ availability in varying shades of green.
The grid will be grey in the beginning when no one has marked their availability.
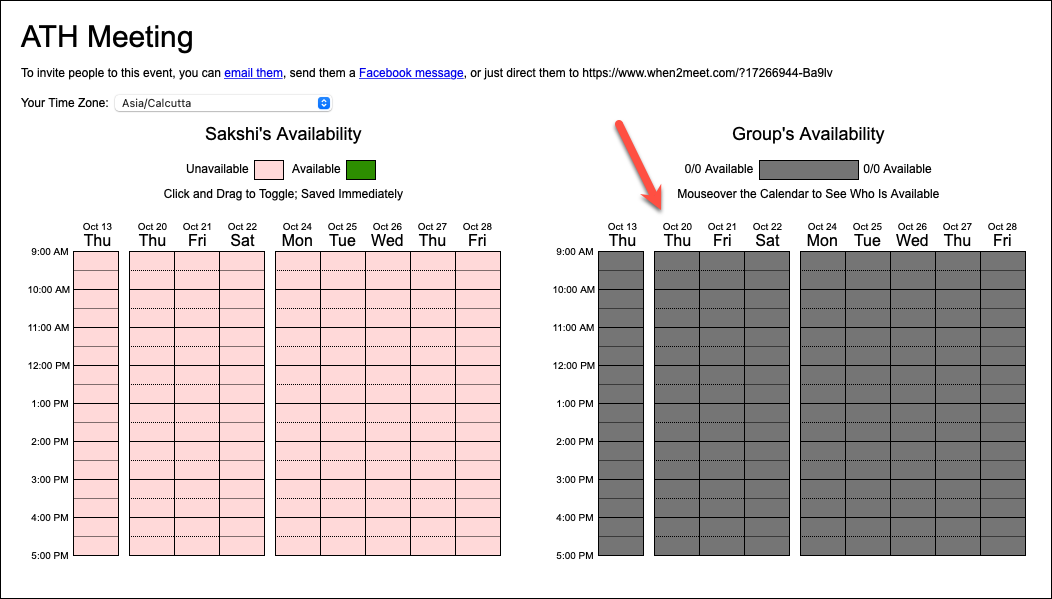
That is if you are the first person who’s voting in the event, before your vote, the grid will be grey. But as soon as you mark your availability, the group grid will change to reflect your input.
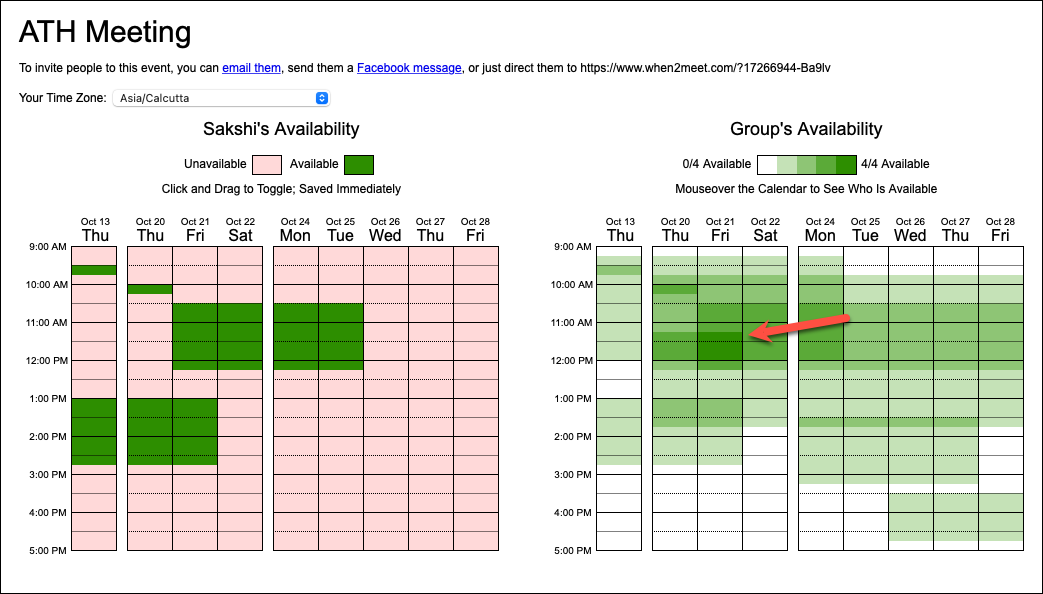
But as the number of participants who’ve marked their availability increases, the number of shades of green in the grid increase, going from lightest to darkest to indicate the number of available people.
The darkest shade of green indicates the maximum number of people available at that time and white indicates zero people available.
For example, in a group of four people, if 4/4 people are available at a certain time, that will be marked by the darkest green. Then, a lighter shade will indicate where 3/4 people are available, then a further lighter shade will indicate where 2/4 people are available, and so on.
But if there is no time when all 4 users are available, the darkest shade of green will indicate where 3/4 people are available. You can see the highest number of people available at the same time from the bar chart above the grid.
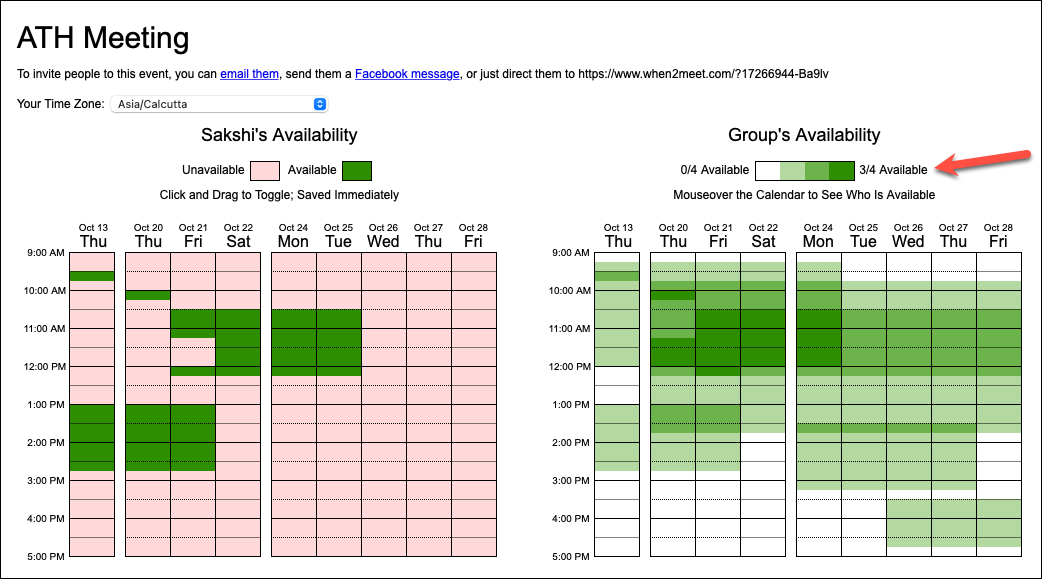
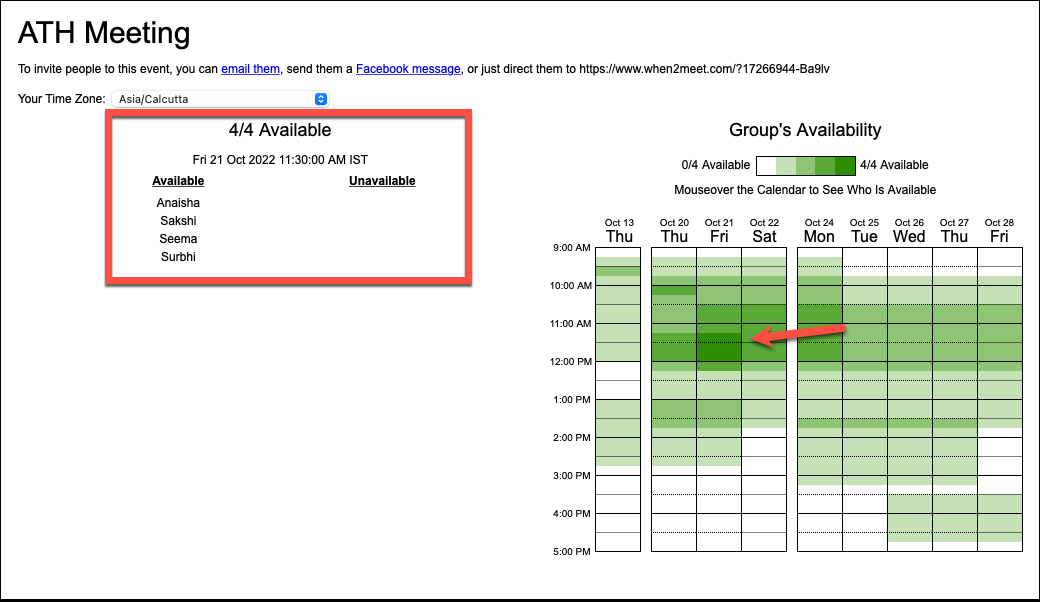
To decide the time for your event, find the darkest green blocks. You can also move the cursor on the grid to see a detailed breakdown of participants’ availability on the left part of the screen.
And that’s it. You now have an ideal time for your event which is suitable for most (or, if you’re lucky, all) people in the group.
There you go. It’s that simple to find out the perfect time for your meeting or event for a large group of people using When2Meet. There’s no need to guess the perfect time or have a back-and-forth conversation in the group chat with no concrete results to reach a consensus. You can simply let democracy take over.