
PFN_LIST_CORRUPT is one of the most common occurring BSOD (Blue Screen of Death) errors. Though there are a variety of reasons that could bring up the issue on your computer, the most common problems are either a faulty driver or interference from a third-party app installed on your computer.
Moreover, the issue can also be caused due to physically damaged RAM or storage drives. However, it is usually software-based and hence, easily resolvable.
1. Check RAM and Hard Drive Physically
The first and foremost is to check for any physical damage to the components on your PC. If you have recently physically reinstalled RAM and/or secondary storage devices on your computer, make sure they are properly connected to the motherboard.
Additionally, also make sure the motherboard, along with the WiFi card, is not damaged. This will completely eliminate the possibility of issues arising due to a damaged component on your PC.
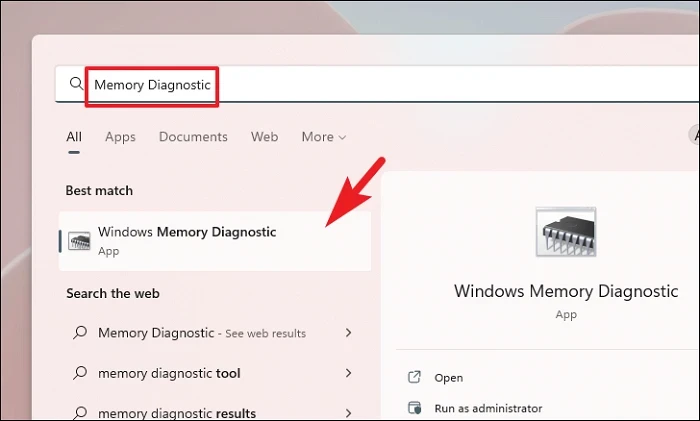
To ensure there is no physical issue with the memory, you need to run Windows Memory Diagnostic.
To run the Windows Memory Diagnostic, head to the Start Menu and type Memory Diagnostic to perform a search. Then, from the search results, click on the ‘Windows Memory Diagnostic’ tile to proceed.
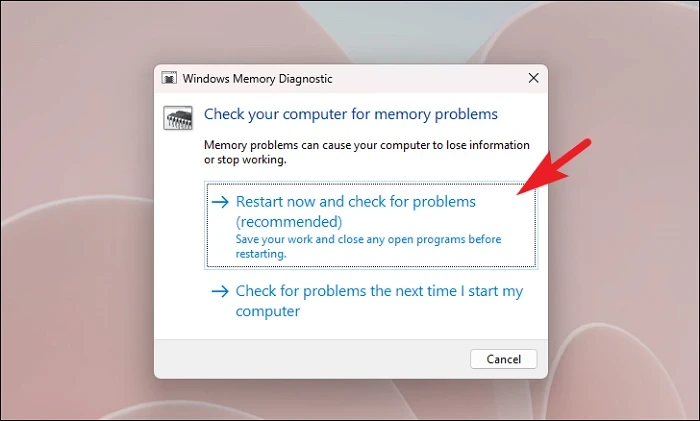
Then, either click on the ‘Restart Now and check for the problems’ option to restart the PC immediately or click on the ‘Check for the problems the next time I start my computer’ option based on when you are comfortable with performing these checks.
If there are no hardware issues, proceed with the fixes below.
2. Update Windows
This might seem like a very elementary method but if you have not updated your PC for quite some time, this could be all it takes to resolve the issue. Windows Updates also carry driver updates that are crucial for components of your PC to work efficiently.
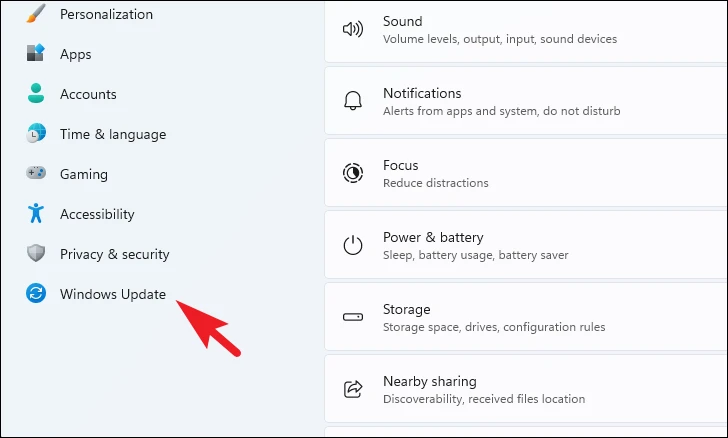
First, head to the Start Menu and click on the ‘Settings’ app tile to proceed. Alternatively, press the Windows+I keys together on your keyboard to open the app.

After that, click on the ‘Windows Update’ tab from the left sidebar of the window to proceed.
Now, if updates are available, click on the ‘Download & Install/Restart Now’ button from the top right.

Sometimes Windows also segregates driver updates as optional updates that you need to manually install on your computer.
To check the optional updates, click on the ‘Advanced Options’ tile to proceed.
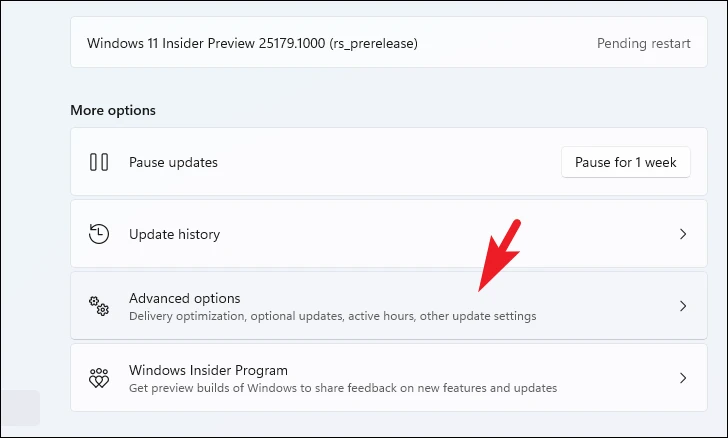
After that, click on the ‘Optional updates’ tile to continue.
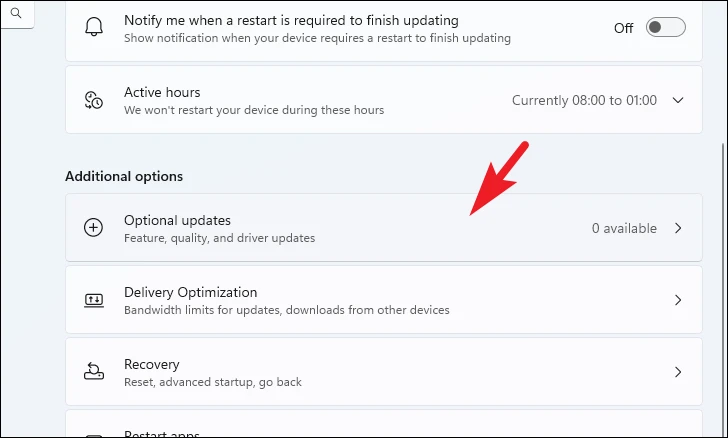
Next, click on the ‘Install All’ button to download and install all the updates on your computer if there are any available. Then check if it resolved the issue.
3. Run DISM and SFC Scan
Deployment Image Servicing and Management scans will check and repair the existing operating system files installed on your device along with other system files.
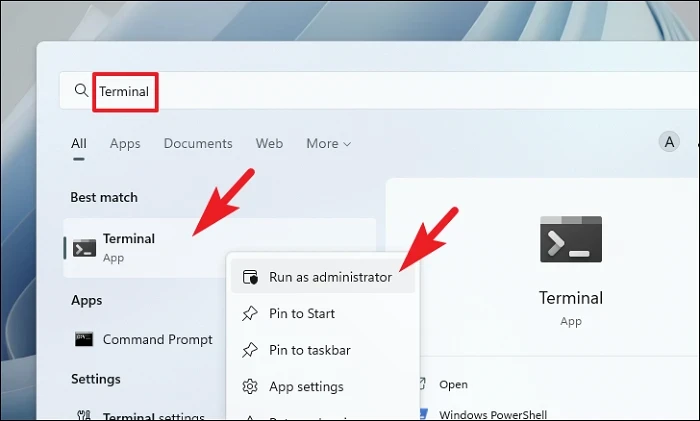
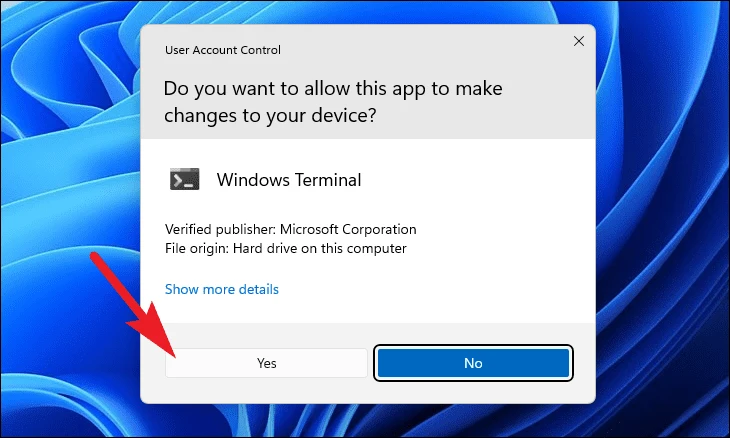
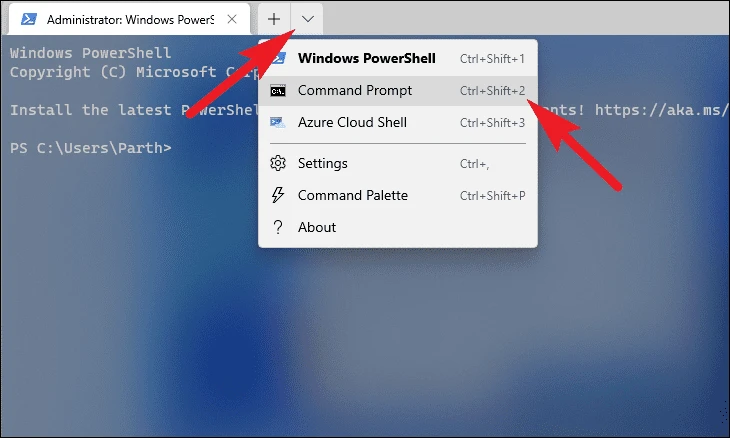
Head to the Start Menu and type Terminal to search for it. Then, right-click on the ‘Terminal’ tile and choose the ‘Run as administrator’ option to proceed.
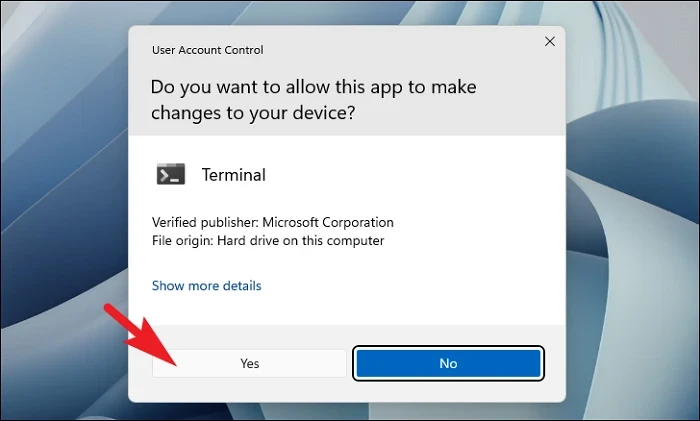
Next, if you are not logged in with an admin account, enter the credentials for one. Otherwise, click on the ‘Yes’ button to proceed.
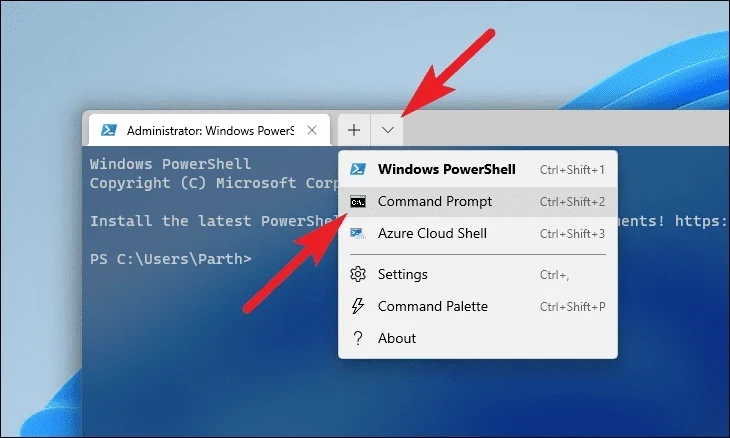
After that, click on the ‘chevron’ (downward arrow) icon and then click on the ‘Command Prompt’ option from the menu.
Then type or copy+paste the below-mentioned command and hit Enter on your keyboard. This will restore the currently installed OS image on your device.
DISM/Online/Cleanup-Image/RestoreHealth
Once completed, type or copy+paste the following command to check and repair the System files on your PC.
SFC/ scannow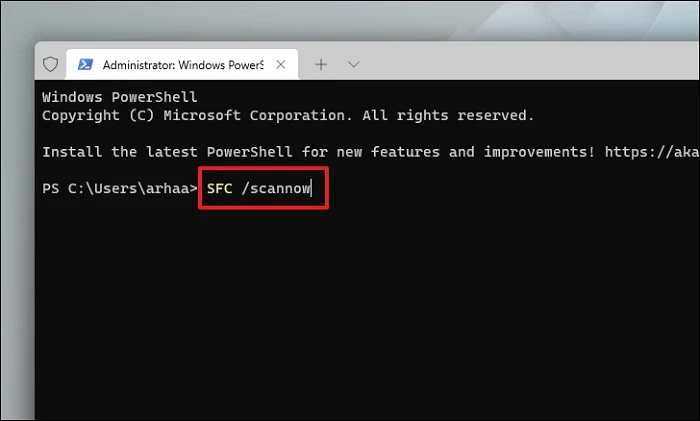
Wait until the SFC scan is complete which can take a while. Any solutions found will be automatically applied. Close Command Prompt once it completes and then restart your PC. Then, check if the PFN List corrupt error was resolved.
4. Rebuild Boot Configuration Data
Typically responsible for a proper boot of your computer, this method can also find and resolve any anomalies in the startup process of your computer. These anomalies could be the ones creating the issue
To rebuild BCD on your PC, you will need to access the Advanced Startup Repair tool. Turn on your PC, and at the first sign of boot, press and hold the ‘Power’ button for 10 seconds to force shut down. You can also unplug your PC if you are on a desktop system.
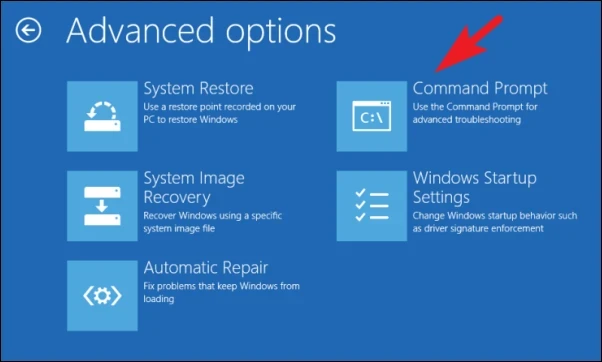
Repeat this process three times and on the fourth time, let your PC restart as usual. The Advanced Startup Repair tool will automatically kick in and you will be greeted by a blue screen. Click on the ‘Troubleshoot’ tile to proceed.

After that, click on the ‘Advanced Options’ tile to continue.

Next, click on the ‘Command Prompt’ tile.
After that, type or copy+paste the below-mentioned commands one at a time and hit Enter on your keyboard after entering each one of them to execute them.
bootrec /FixMbrbootrec /RebuildBcdbootrec /ScanOsbootrec /FixBoot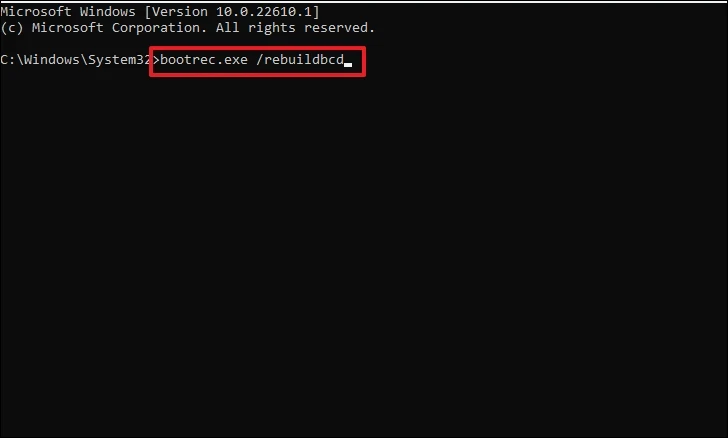
Once you have executed all commands, reboot your PC again and check if the problem persists.
5. Run a CHKDSK Scan
CHKDSK scan will check your hard disk for bad physical sectors and logical errors as well. This will help you pinpoint problems with your secondary storage device.
First, head to the Start menu and type Terminal to perform a search for it. After that, right-click on the ‘Terminal’ tile and choose the ‘Run as administrator’ option to proceed.

Then, enter credentials for admin on the UAC (User Account Control) screen if not logged in with an admin account. Otherwise, click on the ‘Yes’ button to proceed.
After that, click on the chevron (downward arrow) and then choose the ‘Command Prompt’ option to continue. This will open the Command Prompt in a separate tab.
Next, type or copy+paste the below-mentioned command and hit Enter on your keyboard to execute the command.
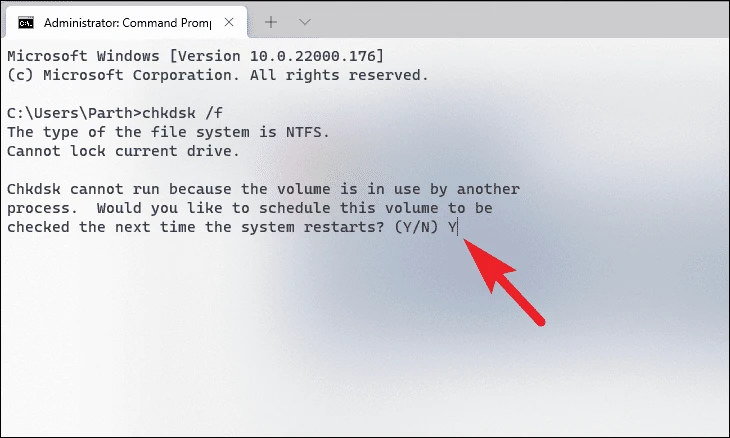
chkdsk /f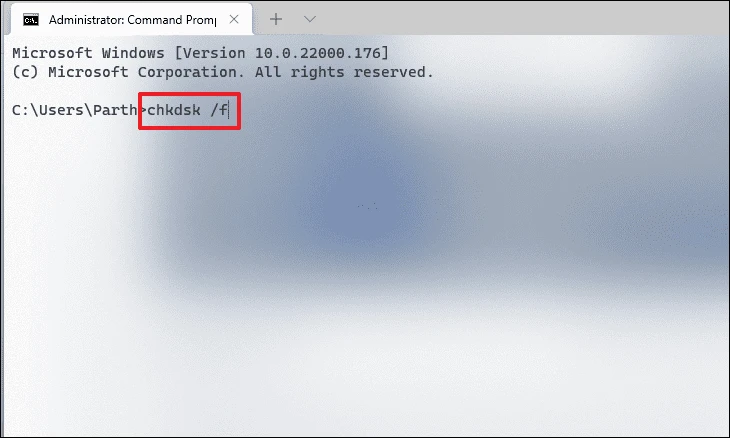
After that, press the Y key to schedule the scan to be initiated when you boot up your PC next time.
6. Disable Microsoft One Drive
Many users have been able to resolve the issue by simply disabling Microsoft One Drive on their Windows PC.
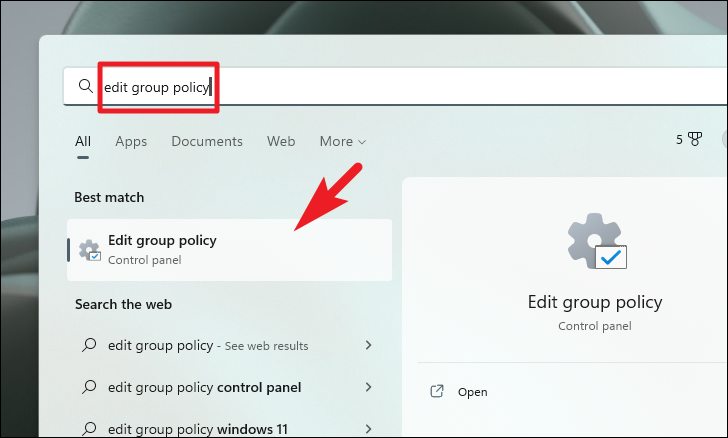
First, head to the Start Menu and type ‘Edit Group Policy’ to perform a search. Then, from the search results, click on the ‘Edit Group Policy’ tile to continue.
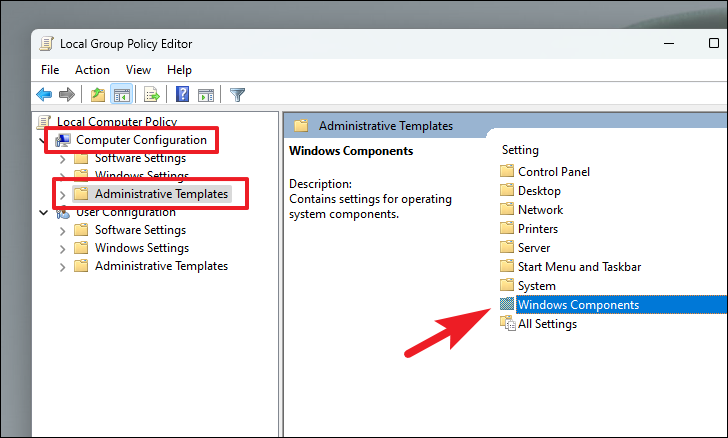
Now, on the left sidebar, click on the ‘Computer Configuration’ tab and then head to the ‘Administrative templates’ folder. Then, from the right section, click on the ‘Windows Components’ folder to proceed.
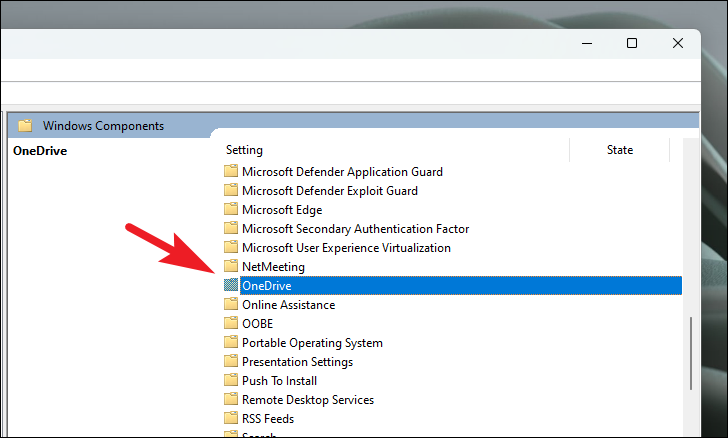
Now, locate the ‘OneDrive’ folder from the list and double-click on it to continue.
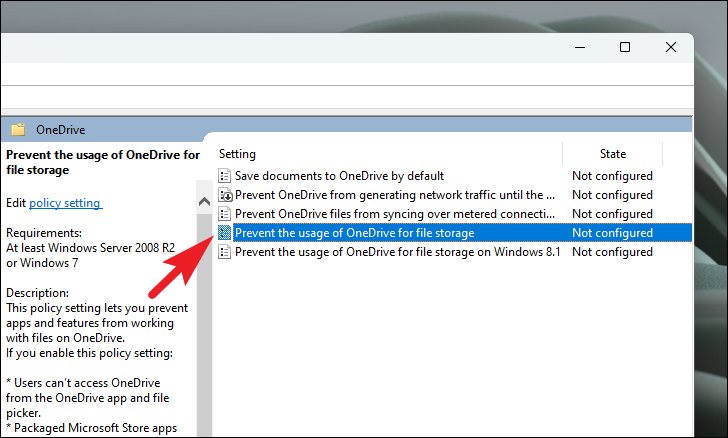
Next, double-click on the ‘Prevent the usage of OneDrive for file storage’ setting. This will bring an overlay window to your screen.
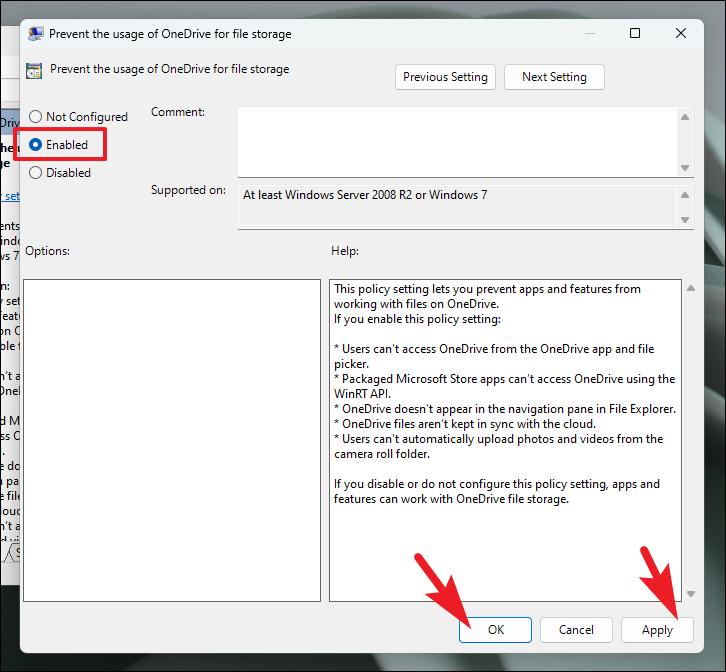
From the overlay window, click on the radio button preceding the ‘Enabled’ option and then click on the ‘Apply’ and ‘OK’ buttons to confirm and close.
7. Boot into Safe Mode
When you boot your PC in safe mode, all the services except Microsoft services are stopped. Most of the third-party software and even some of the drivers are not loaded at all in order to help you determine if the problem is caused by an interfering program.
To boot your PC in safe mode, turn on your computer, and at the first sign of boot, press and hold the physical power button for thirty seconds or until the computer shuts down.
Repeat the process thrice, and let the computer boot up completely on the fourth boot-up. Windows will now automatically load the WinRE (Windows Recovery Environment).
In case you are greeted by an ‘Automatic Repair’ screen, click on the ‘Advanced Options’ button present in the bottom left section to continue.
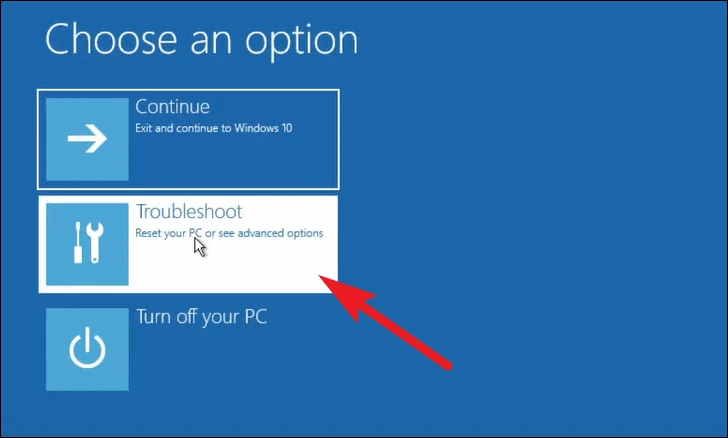
After that, on the ‘Choose an option’ screen, click on the ‘Troubleshoot’ tile to proceed.
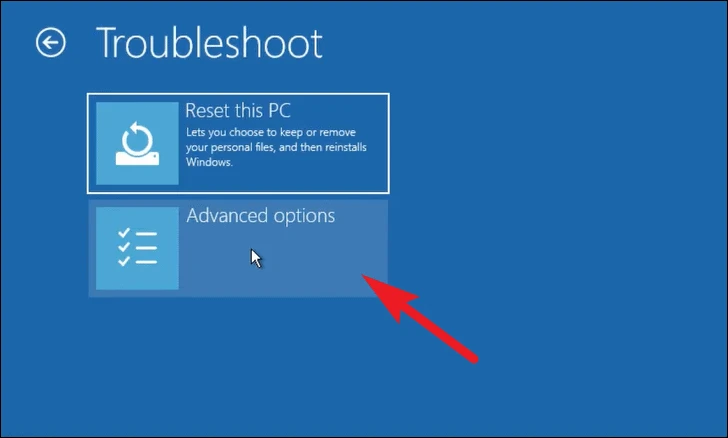
Next, on the ‘Troubleshoot’ screen, locate and click on the ‘Advanced Options’ tile to continue.
After that, from the next screen, locate and click on the ‘Startup Repair’ option from the grid of options present on the screen.
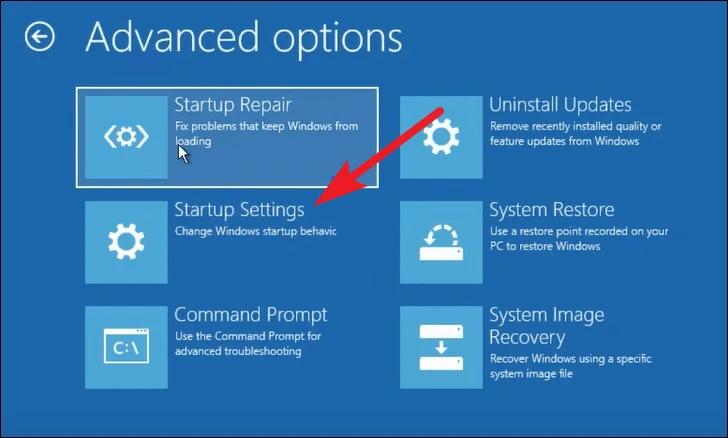
Now, on the next screen, Windows will list the actions taken by the operating system in order to initiate the Startup Repair on your computer. Read the list carefully before starting and click on the ‘Restart’ button to proceed.

If you are not facing any issues in the Safe Mode, the issue is caused due to a third-party program and/or service. Enable them one by one to check which one is causing the issue.
Many users have also run into this issue while playing games such as Valorant. While most of the time it’s because of a driver issue (we have listed the fix above), it can also be because of overclocking. To fix it, reduce the overclocking settings and see if the issue persists while gaming.
PFN List Corrupt Error is definitely annoying when it suddenly interrupts your work routine. However, using the above-mentioned methods you can easily resolve it and use your computer interrupt-free.


