
Video conferencing apps have been our saviors during the pandemic. There are many apps out there, but finding the one that’s perfect for you can be tough. There are just too many. Do you just stick with the convenient options dominating the market, or do you shop around for other options?
Well, it’s always best to explore your options, isn’t it? You never know what you might find. Let us introduce one such option you’ll definitely find interesting: Whereby.
What is Whereby?
Whereby is a video meeting platform, but it’s not just another video meeting app. With a web app that doesn’t require you to download or install any app, it makes it really convenient for even new users to use it. But what makes it stand apart from the crowd is the fact that it creates a personalized meeting link that you can reuse forever. Talk about making it easy to use even for novices.
But don’t worry, a reusable meeting room does not compromise the security in any way. If you want, you can lock the room so no guests can enter without permission.
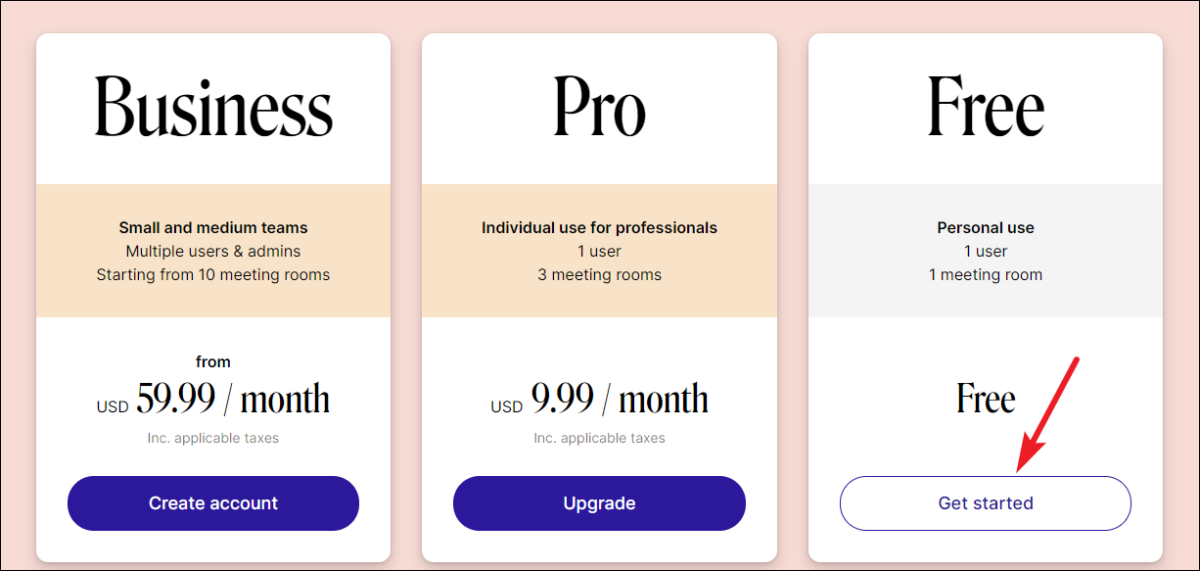
Whereby offers three plans: Business, Pro, and Free. The first two subscriptions cost $59.99 and $9.99 per month, respectively. You can first try a free account and upgrade to a paid subscription at any point later on.
The free plan has limited options. You can only have 1 room, and there cannot be more than 4 participants in a meeting. But if you don’t need it for professional purposes or to connect with a large number of people, it’d be the perfect choice for you.
It includes features like chat, screen sharing, emoji reactions, and picture-in-picture. It even has integrations for apps like Google Drive, Miro Whiteboard, Trello boards, and YouTube, so you can also share content from these apps in the meeting.
With Pro and Business plans, you get more features like meeting recordings, more participants (up to 50), and much more.
How to Use Whereby
As Whereby doesn’t require an app download, all you need to use it is go to the web app and dive right in.
Creating an Account
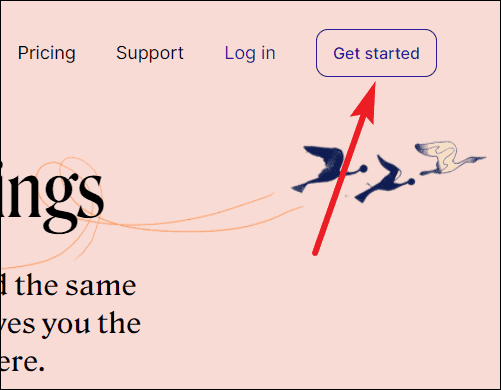
Go to whereby.com and click on ‘Get Started’ to create an account.
Enter your name and work email, or use your Google or Apple ID to sign up. If you use your email to sign up, you will have to enter a code you receive on said email to complete the signup. It’ll also ask for the code every time you log in as a substitute for a password.

Then, choose a plan to get started. For this guide, we’re creating a free plan.
Once you sign up and choose a plan, you’ll have to create your meeting room. This will be your meeting room – the one with the link that’ll never expire.

With a free or Pro account, you get to create a personal room that looks like whereby.com/yourname. But with a Business account, you can have a personalized domain that looks like companyname.whereby.com. As we’re creating a free account in this guide, the meeting link would resemble the former.
You don’t have to necessarily choose your name as the name for the room. It’s more of an example that it can be anything you want it to, as long as it’s not taken.
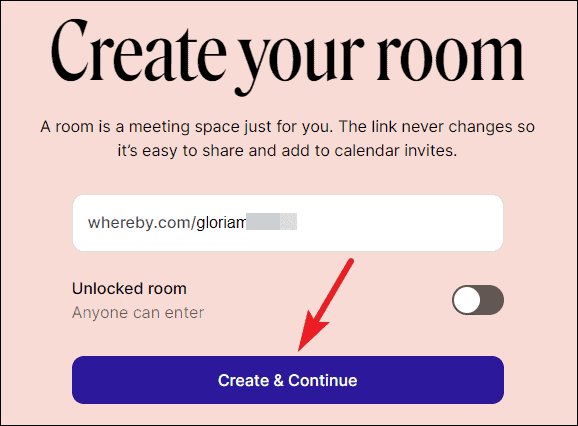
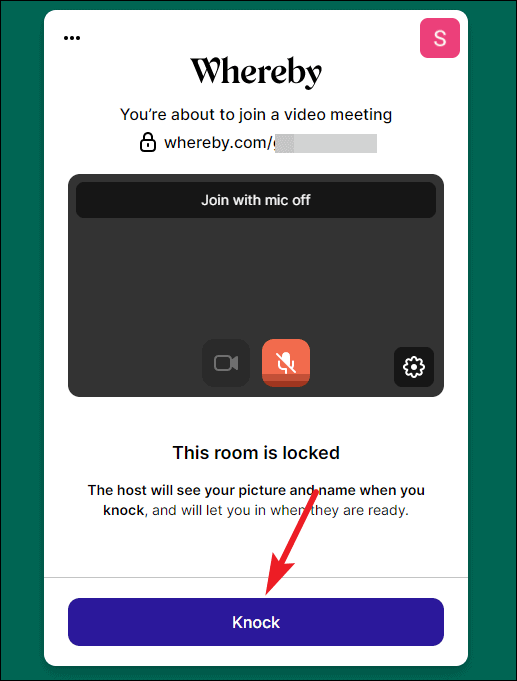
Enter a name for your personal room. Then, before you proceed, review whether you want your room to be locked. When a room is locked, no guests can enter without knocking first, i.e., they’d require permission to enter. This is the better choice from security point of view.
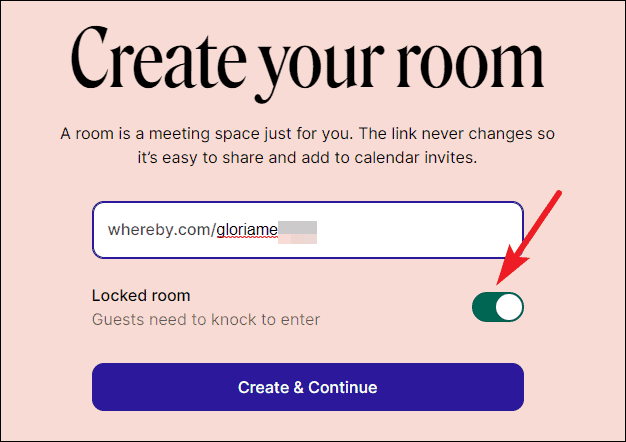
But if you don’t want it to be locked, just click the toggle to unlock it. You can change it later at any time. Finally, click the ‘Create & Continue’ button.
Hosting Meetings and Joining Other Rooms
When you click the button, it’ll take you to the page to join your room for a meeting. If you don’t want to host a meeting right away, click the back button and you’ll reach the dashboard.
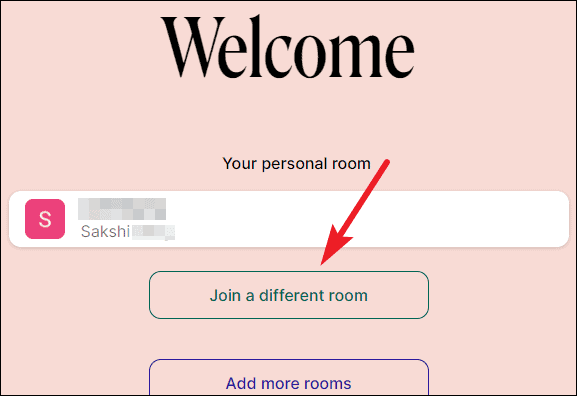
You can join your room for a meeting at any time from the dashboard by clicking the room name.

To join someone else’s room for a meeting on Whereby, click the ‘Join a different Room’ button.
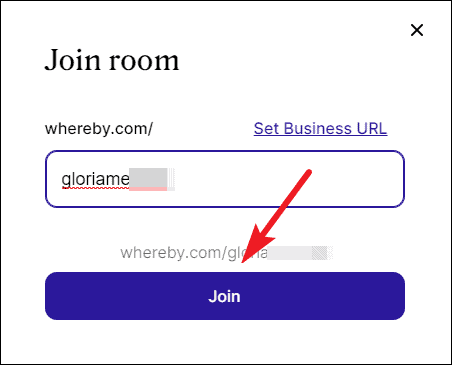
Then, enter the name of the room in the textbox and click the ‘Join’ button.
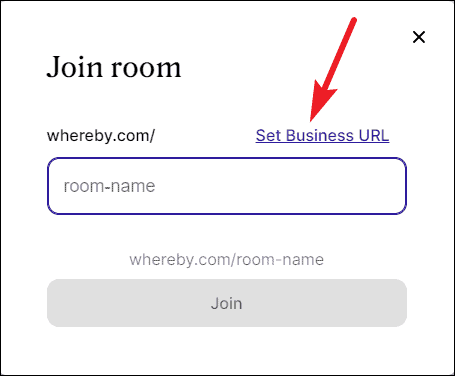
To join a room with a Business URL, click on the ‘Set Business URL’ option.
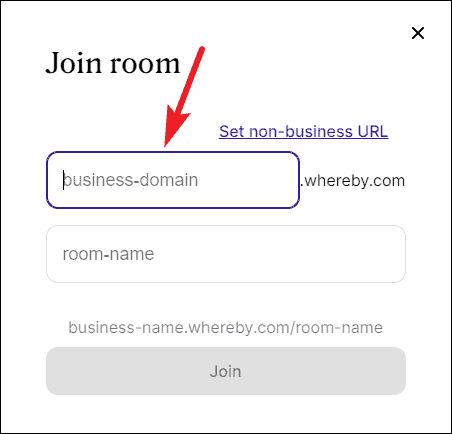
You’ll then be able to enter the business domain, and the name of the room within that business domain.
The next step would depend on the type of room, i.e., whether it is locked or unlocked. For a locked room, click the ‘Knock’ button. You’d enter the waiting room and join the room when the host lets you in. Otherwise, you’d enter the meeting right away.
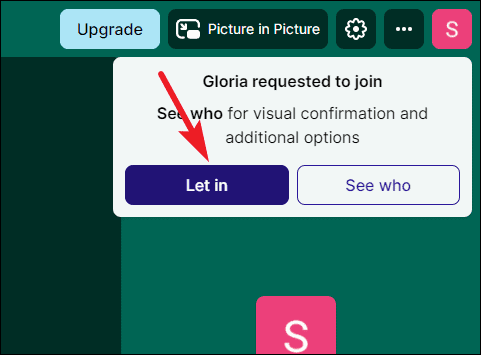
When someone knocks on your room, you get a notification that <Person’s Name> has requested to join. You can either click the ‘Let In’ button to let them in based on just their name.
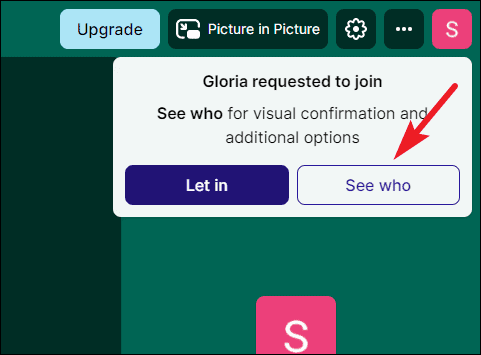
Or you can click the ‘See who’ option to get a visual confirmation if you’re not sure who it is.
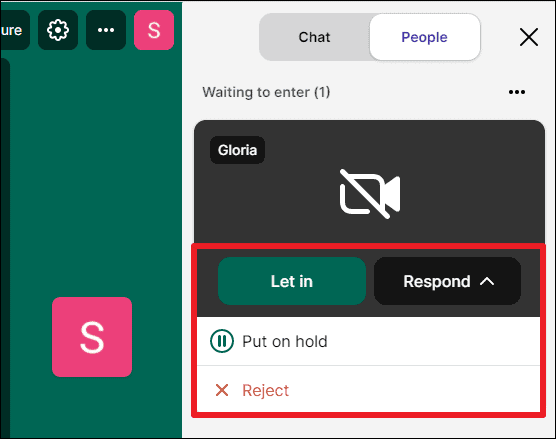
If they have their camera on, you’ll be able to see their video before letting them in. Click the ‘Let In’ button to approve. If you aren’t sure, you can ‘Reject’ them or ‘Put them on hold’. Click the down-arrow next to ‘Respond’ and select one of these two options.
Whereby is a great app for video meeting that offers everything a video conferencing app should but doesn’t stop there. Its personal room URL is a nice touch which packed with ease of use, and a neat interface would make it a perfect choice for you.