
Under usual circumstances, you interact with your Apple Watch using the touchscreen. However, there can be situations when you are not able to use the touchscreen but at the same time wish to use the Apple Watch.
Fortunately, if you own an Apple Watch SE, Series 6 or later, you can enable and set up the Assistive Touch feature on it, which will allow you to use your Apple Watch via gestures of your wrist.
Moreover, the Assistive Touch feature also offers you a certain level of flexibility in customizing the gestures you wish to use for navigating around in the watch.
However, before you dive into your Apple Watch settings and set up Assistive Touch, let’s first understand what is Assistive Touch and how it enables you to use the watch hands-free.
What is Assistive Touch and How it Functions?
Assistive Touch on Apple Watch allows you to use the Apple Watch without interacting physically with the screen. The Apple Watch majorly relies on the gyroscope and the accelerometer to track the wrist gestures that allow you to navigate around and interact with the Apple Watch.
Though the feature is designed mainly for users with limb differences, anyone having a compatible Apple Watch can enable and use it as per their need and preference.
However, as mentioned earlier Assistive Touch feature only works with Apple Watch SE, Series 6, or later.
Enable and Set Up Assistive Touch on your Apple Watch
You can enable and set up the Assistive Touch feature from both of your devices, the Apple Watch as well your paired iPhone. Fortunately, both the devices have an identical process to turn on the Assistive Touch. With a single exception of on your iPhone, the settings can be tweaked using the Watch app, while on the Watch the setting is accessed using the Settings app.
For this guide, we will enable and set up the Assistive Touch using the Apple Watch.
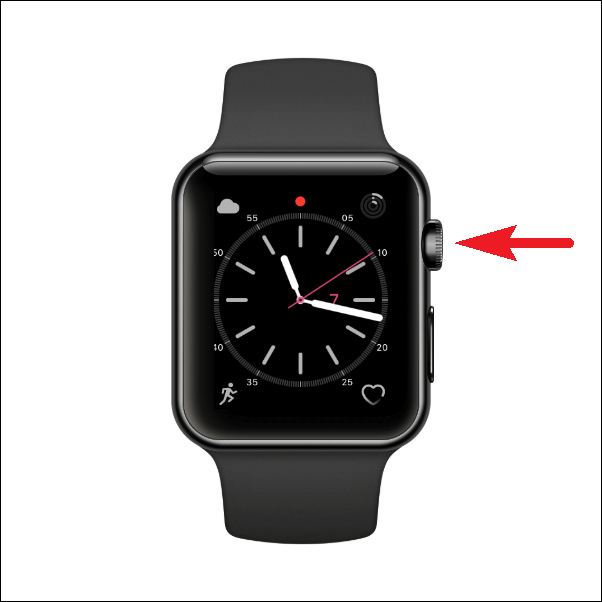
To do so, first, head to the home screen of the Apple Watch by pressing the ‘Crown/Home Button’, if not already there.
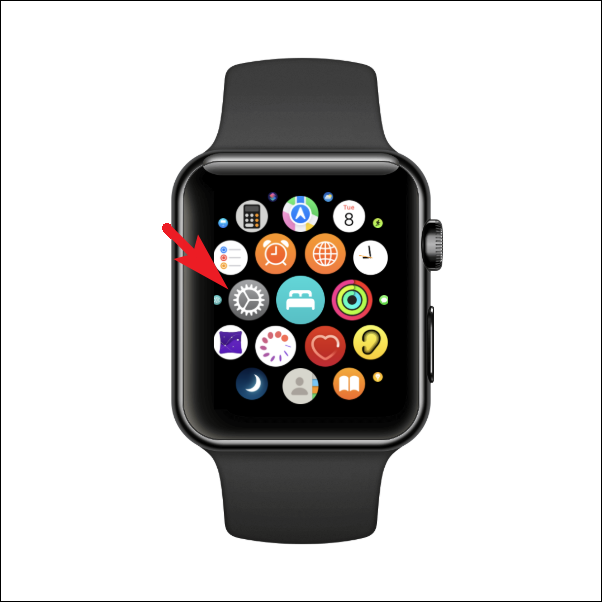
After that, locate and tap on the ‘Settings’ app either from the grid or from the list of apps present on your screen to continue.
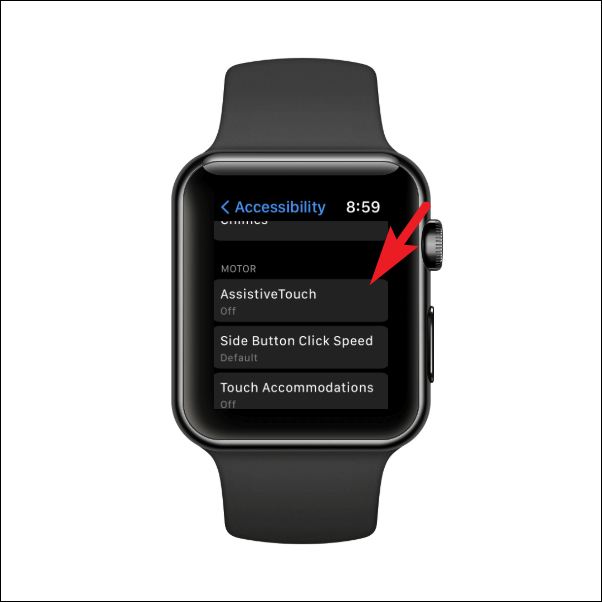
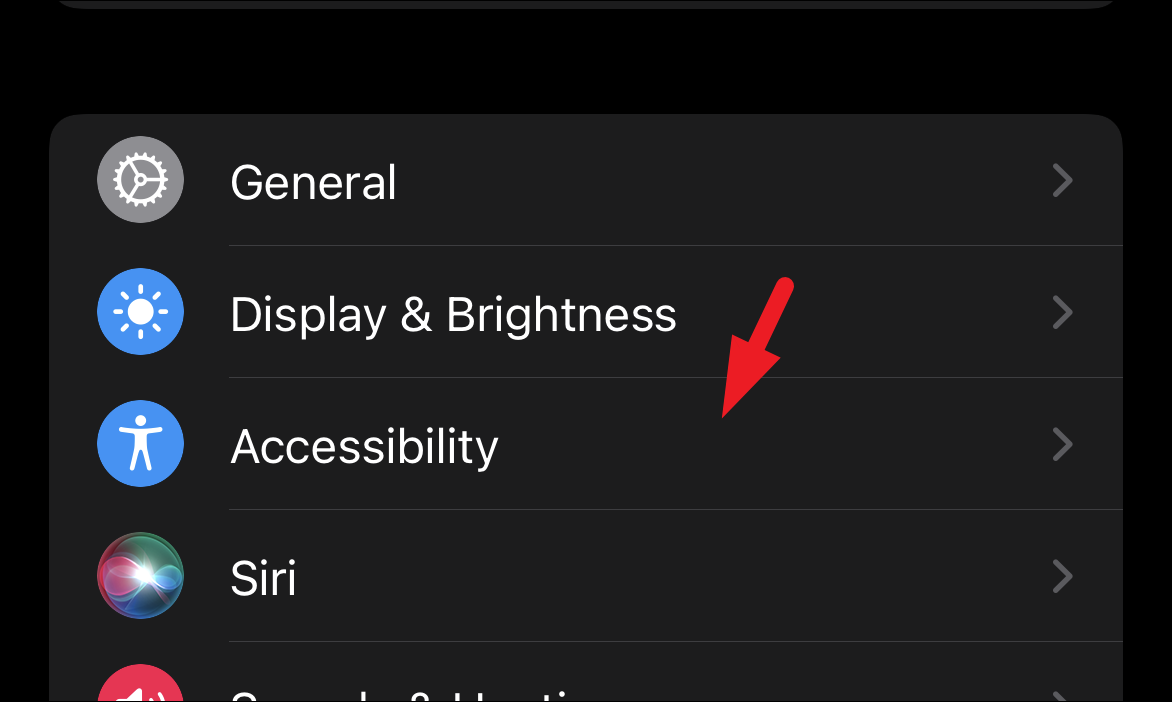
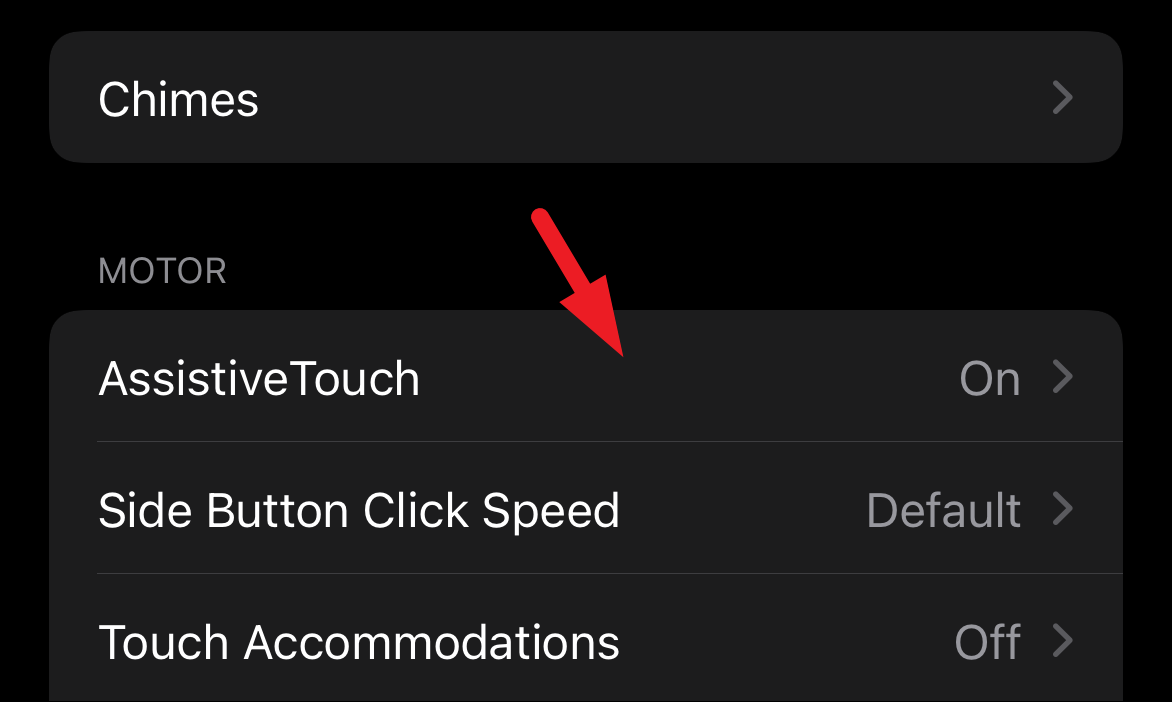
Next, scroll down on the screen to locate the ‘Accessibility’ option and then tap on it to continue.

Now, scroll down till you locate the ‘Motor’ section on the ‘Accessibility’ page and then tap on the ‘Assistive Touch’ tile present right underneath it.
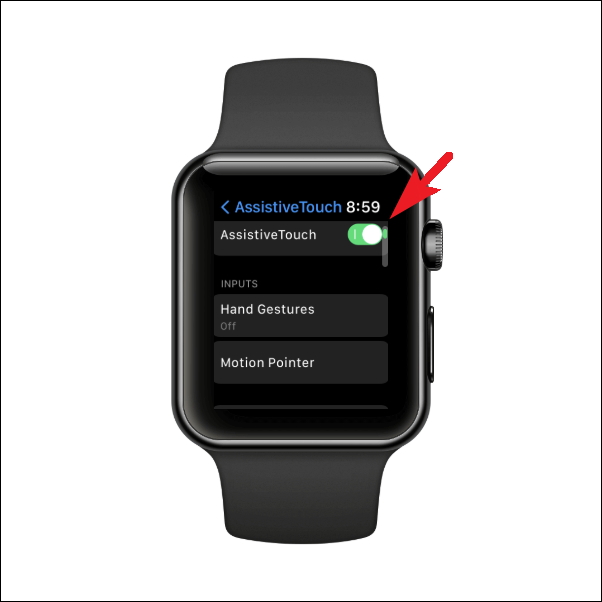
After that, locate the ‘Assistive Touch’ option on the screen, and tap on the following toggle switch to bring it to the ‘On’ position.
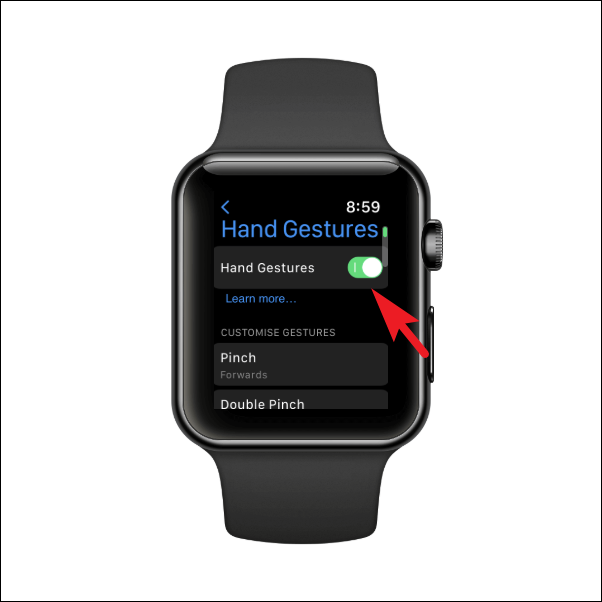
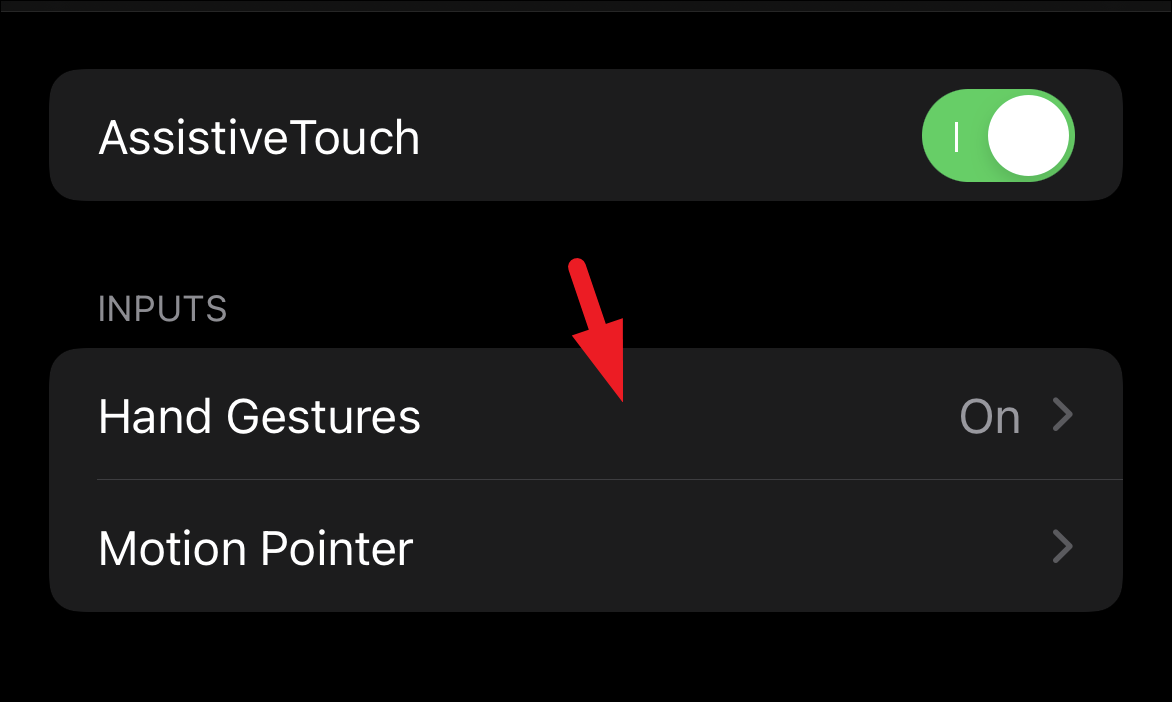
Next, scroll down to the ‘Inputs’ section and tap on the ‘Hand Gestures’ tile to proceed.

After that, on the next screen, locate the ‘Hand Gestures’ option and tap on the following toggle switch to bring it to the ‘On’ position.
That’s it, you have now enabled and set up the Assistive Touch feature on your Apple Watch and it will now respond to your hand gestures along with the touch input.
Use Assistive Touch Gestures on Apple Watch
However, in order to use the feature efficiently, it is imperative that you know which gesture performs what action. Hence, below is the list of default gestures that you can use to interact with your Apple Watch hands-free:
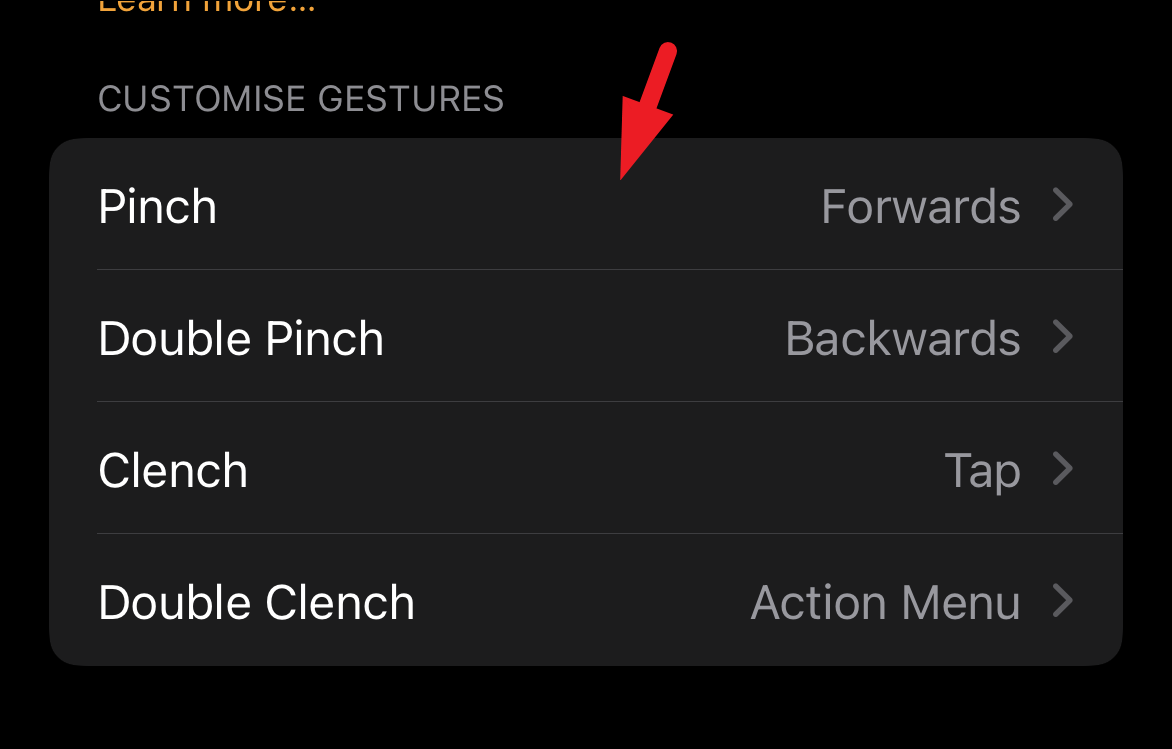
- Pinch: Move focus to the next item in the grid/list visible on the screen.
- Double-Pinch: Move focus to the previous item in the grid/list visible on the screen.
- Clench: Perform Tap action.
- Double-Clench: Bring up the Action Menu. The Action Menu provides you with a host of action which you can perform handsfree just by selecting an option. (For eg. scrolling right/left, pressing the Crown, rotating the Crown, etcetera.)
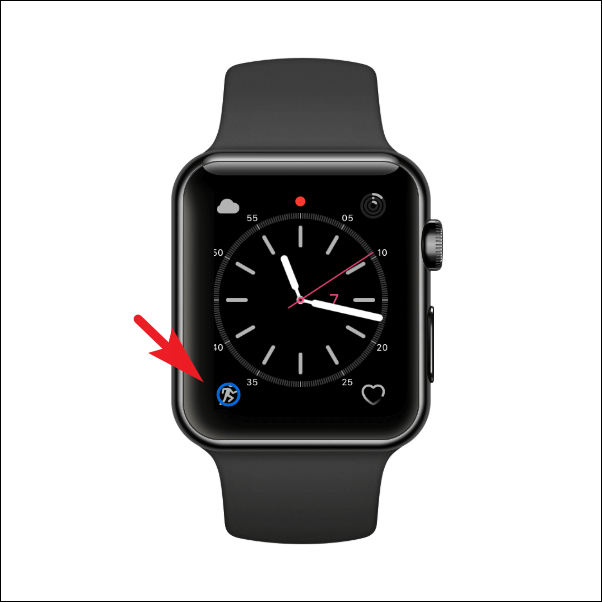
Now in order to use the Assistive Touch, you will have to activate it every time your watch face lights up. The default activation gesture is double-pinch.
After you have enabled Assistive Touch along with hand gestures on your Apple Watch, whenever your watch face lightens up, you will see a blue ring light up along with it. Then, double-pinch with your index finger and thumb to activate the Assistive Touch on your Apple Watch.
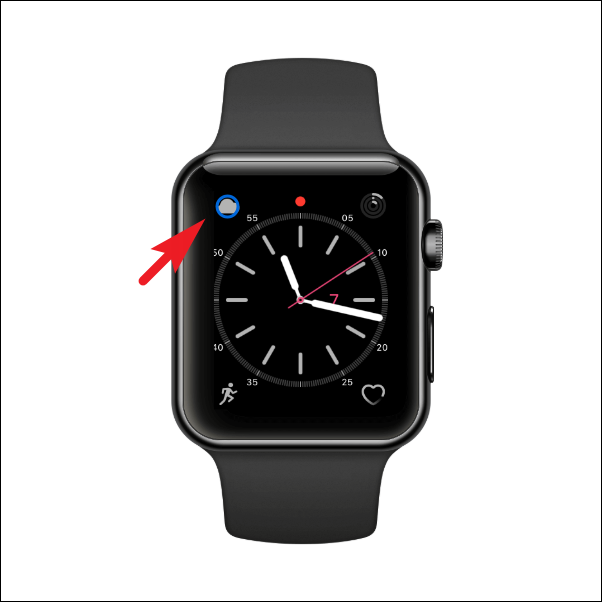
Once activated, you will feel haptic feedback on your wrist along with a selection ring displayed on the watch face.
To navigate around the watch face, perform a pinching gesture using your index finger and thumb to move to the next item, similarly, if you wish to move to the previous item, perform a double-pinch gesture with your hand.
To head to the home screen, perform the ‘double-clench’ gesture with your wrist after activating the Assistive Touch. This will bring up the Action Menu on your watch screen.
Then, by default, the cursor focus will be on the ‘Press Crown’ option on the Action Menu. Now, perform a ‘single clench’ action to confirm the selection.
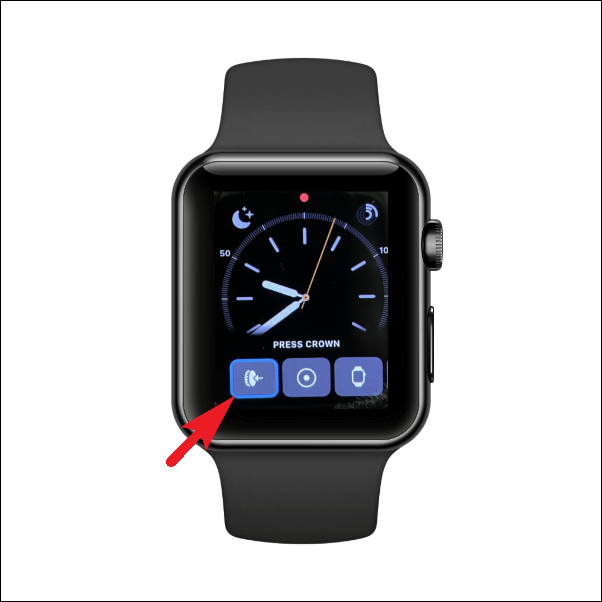
You will be now taken to the home screen on your Apple Watch.

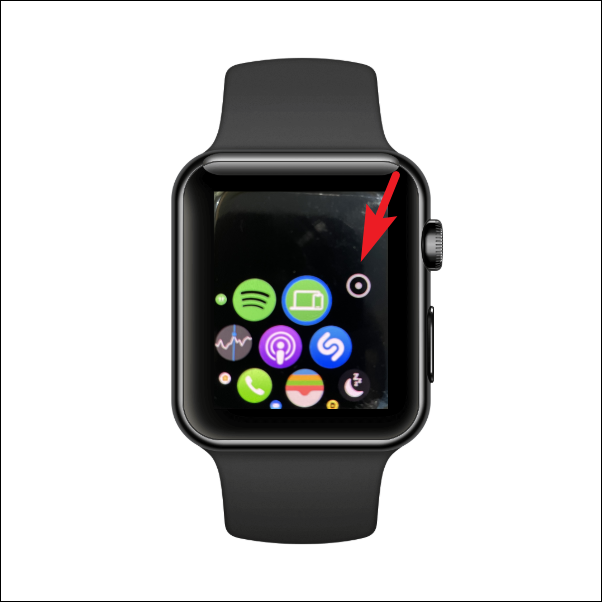
You can also use a motion pointer to navigate around the screen and click on the items. It is a much faster way than individually moving the focus from item to item on any particular screen. The motion pointer uses the in-built gyroscope to move the pointer across the screen.
To activate the Motion Pointer, perform a double-clench action using your wrist after activating the Assistive Touch on your watch. Next, perform the pinching gesture to move the cursor to the next time till you reach the ‘Motion Pointer’ option. Then, to confirm the selection perform the ‘single-clench’ gesture.
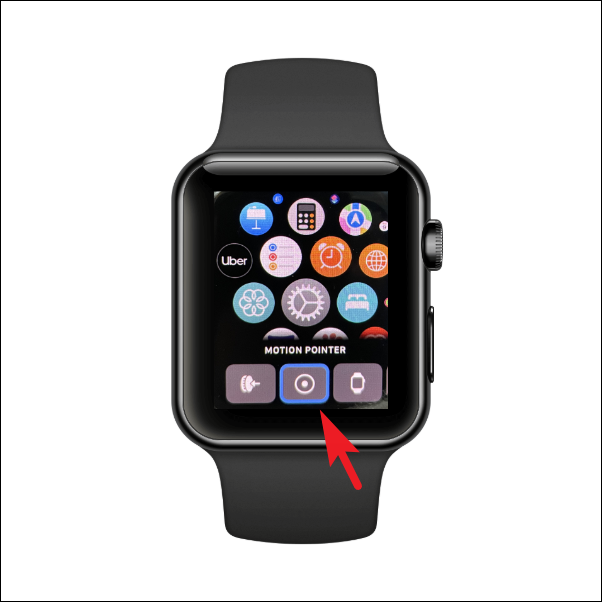
You will now see a circular pointer on your screen. Next, tilt your wrist up, down, or sideways to move the pointer in the respective direction. To confirm a tap on an item, hold your wrist for a while till the circular line completes one rotation around the pointer.
Customize Assistive Touch Settings from your Paired iPhone
You can also customize Assistive Touch settings such as the gestures, color of the selection ring, and much more. However, customizing the setting will be much more convenient on your paired iPhone rather than doing so on the Apple Watch.
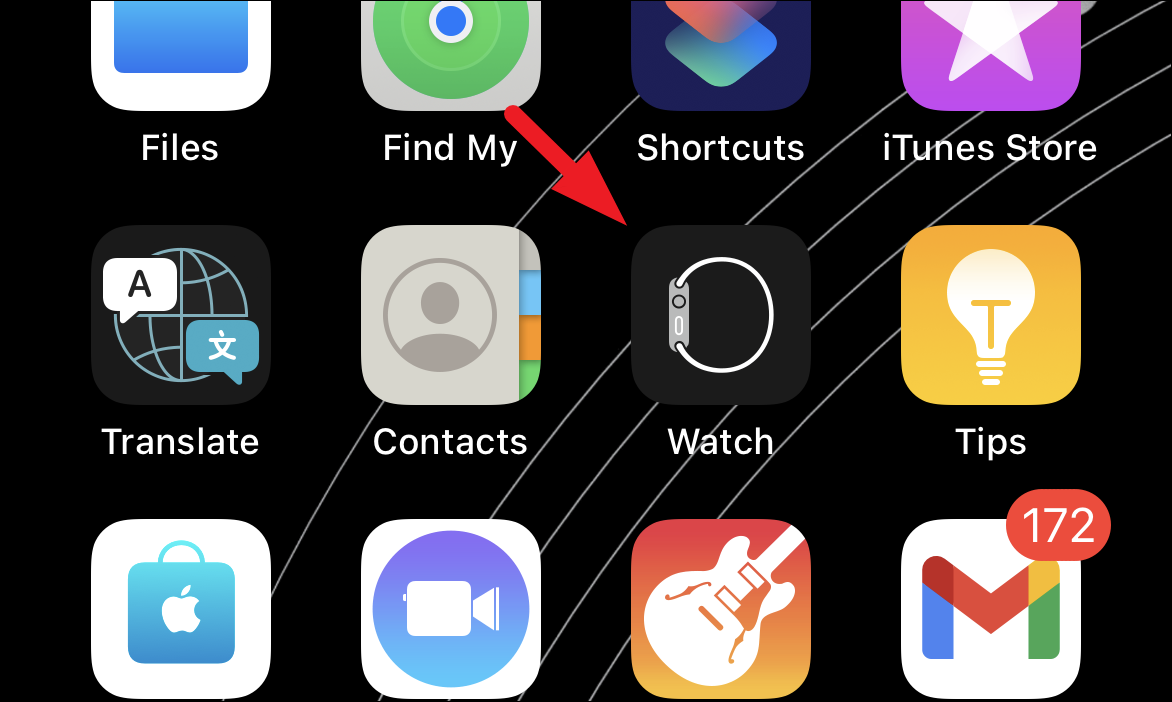
To customize the Assistive Touch settings, head to the Watch app either from the home screen or from the app library on your paired iPhone.
On the next screen, locate and tap on the ‘Accessibility’ option to continue.
Now, on the ‘Accessibility settings’ screen, locate the ‘Motor’ section and then tap on the ‘Assistive Touch’ tile to proceed.
If you wish to change the default gestures, tap on the ‘Hand Gestures’ tile present under the ‘Inputs’ section to continue.
After that, all the gestures supported by the Apple Watch will be visible under the ‘Customize Gestures’ section.
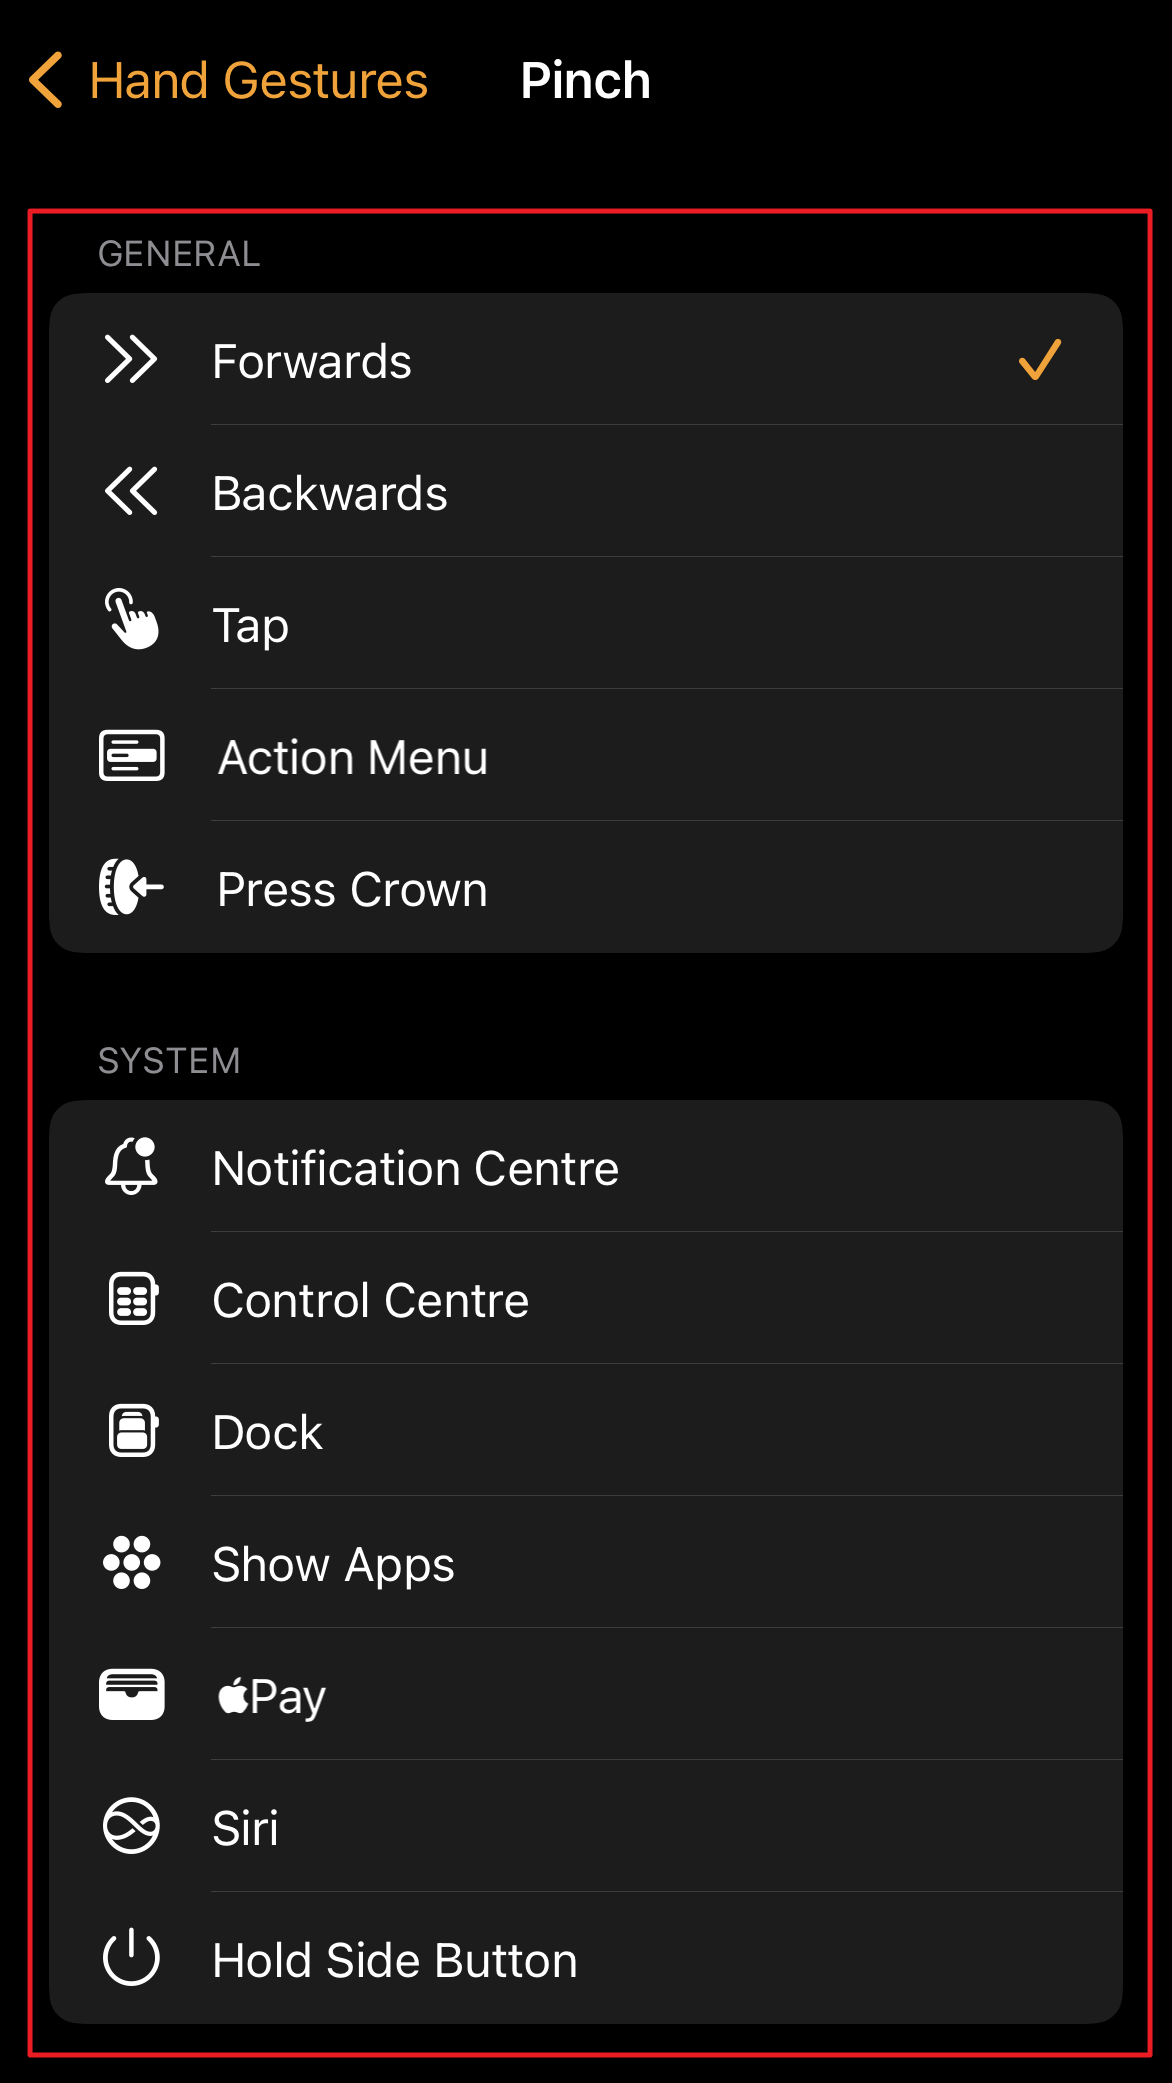
Now, to customize the action performed by a gesture, tap on its respective tile to proceed. For example, here we are changing the action for the ‘Pinch’ gesture.
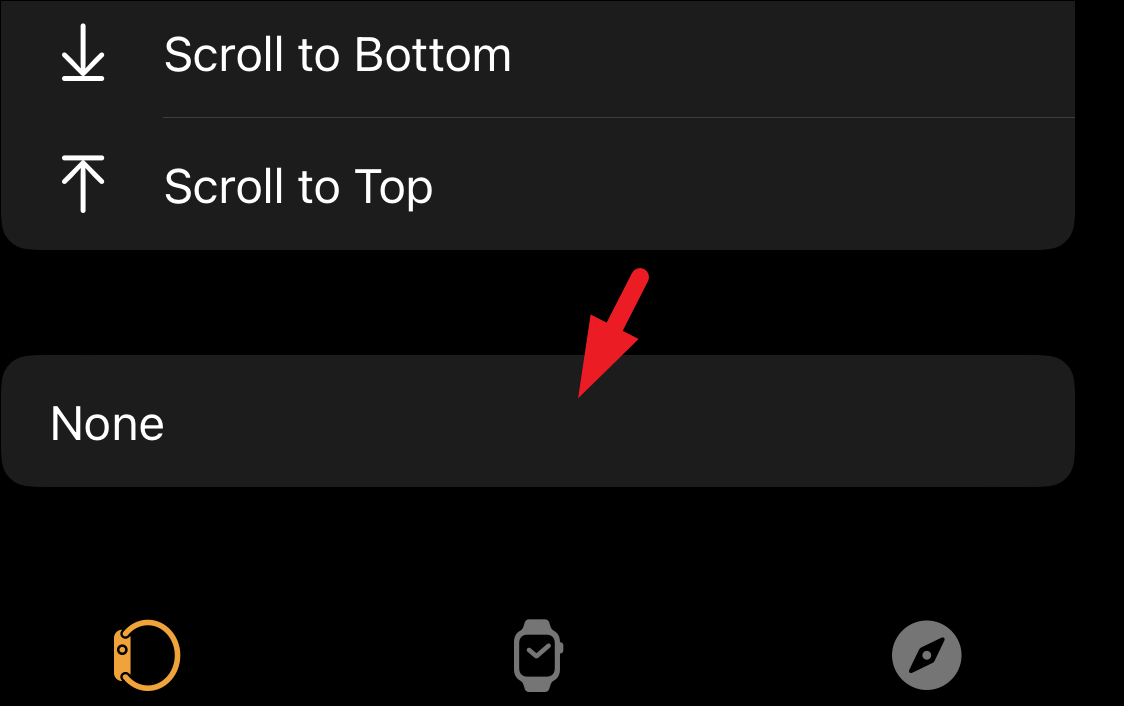
Then, select one of the preferred actions from the list to assign it to the gesture.
In case you do not wish to assign any action to the gesture, scroll down to the bottom of the page and tap on the ‘None’ tile to do so.
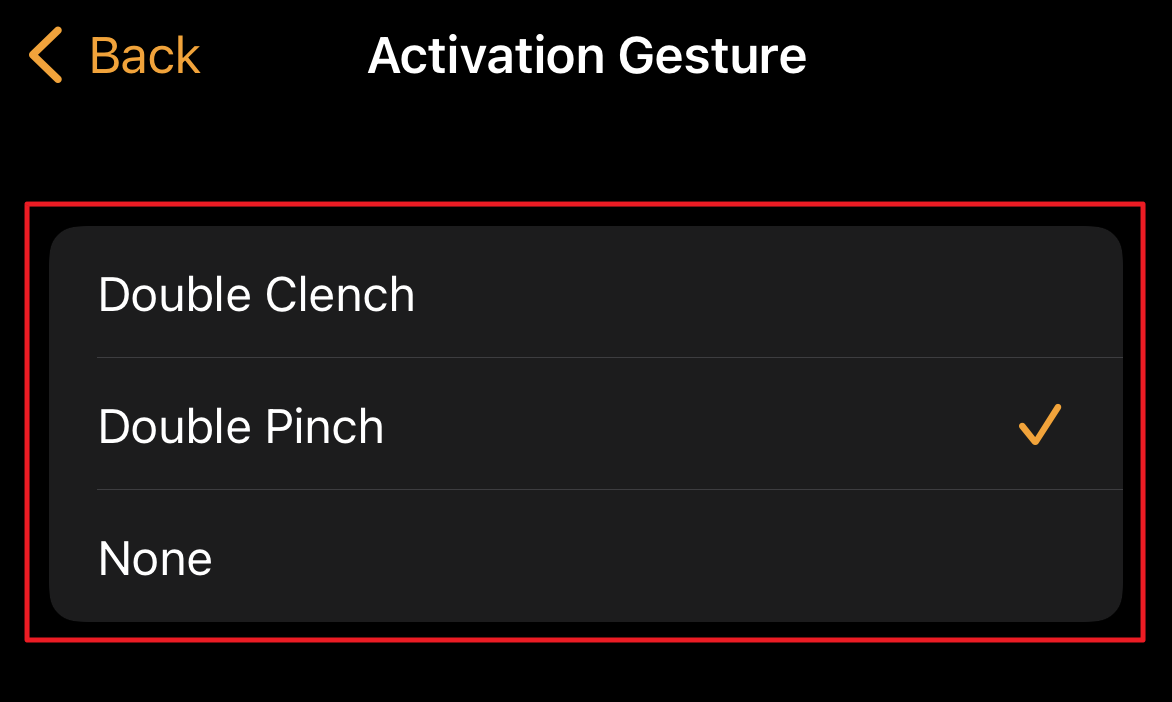
If you wish to change the ‘Activation Gesture’, locate and tap on the ‘Activation Gesture’ tile present on the ‘Hand Gestures’ screen to proceed.

After that, tap to select your preferred gesture from the list that will activate the Assistive Touch on the watch. The changes will be applied immediately.
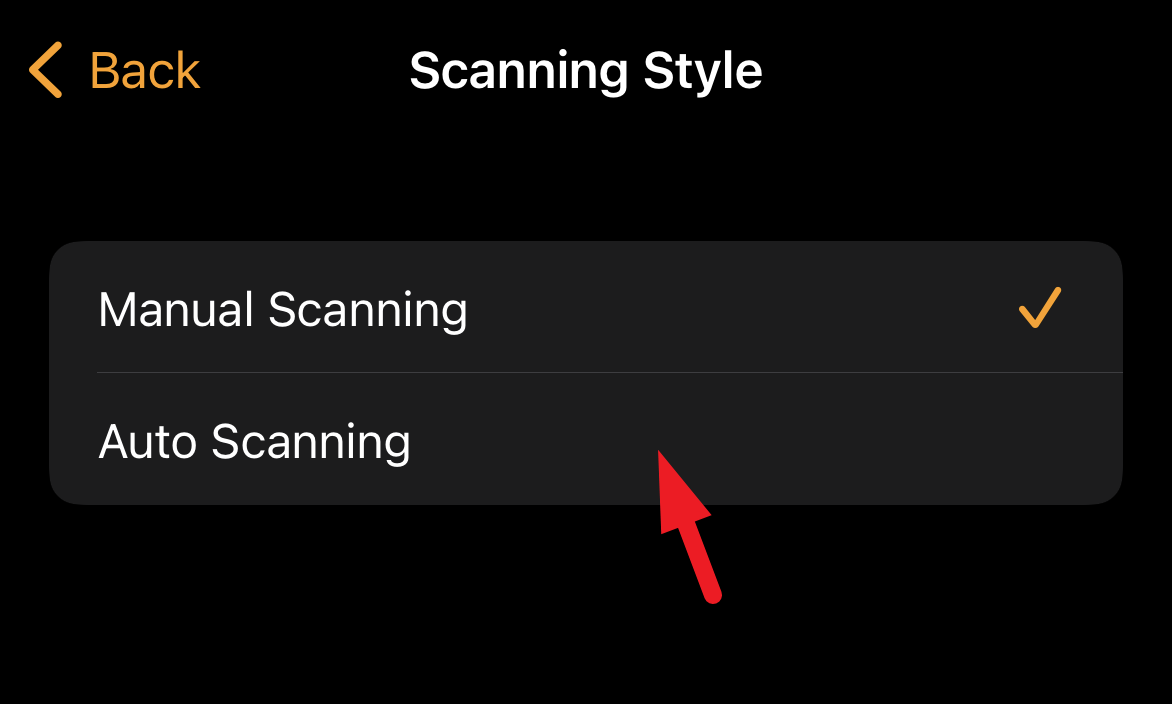
You can also change the scanning mode on your Apple Watch when using the Assistive Touch. Apple Watch offers two modes of scanning the screen, ‘Manual’ and ‘Automatic’. In ‘Manual’ mode you will have to manually move the focus to the next item, whereas in ‘Automatic’ mode, the watch will automatically move the focus to all interactive items on the screen for your convenience.
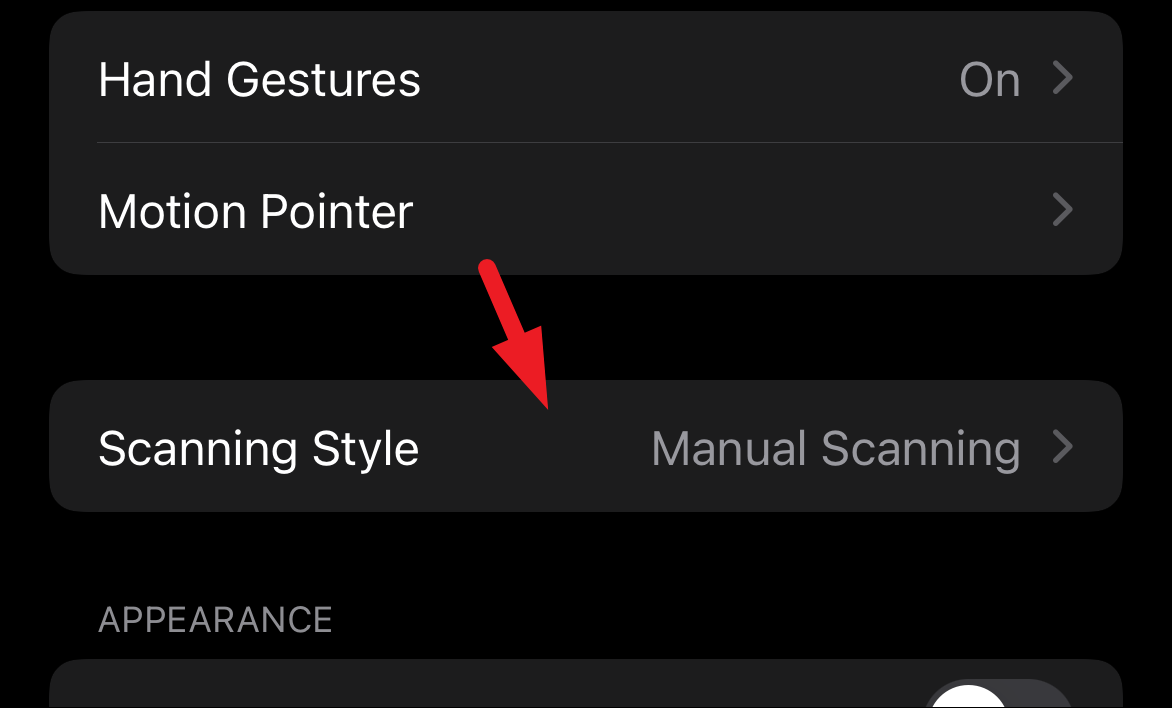
To change the scanning style, head to the ‘Assistive Touch’ screen, locate the ‘Inputs’ section and then tap on the ‘Scanning Style’ tile.
On the next screen, tap on the ‘Auto Scanning’ option to apply it immediately.
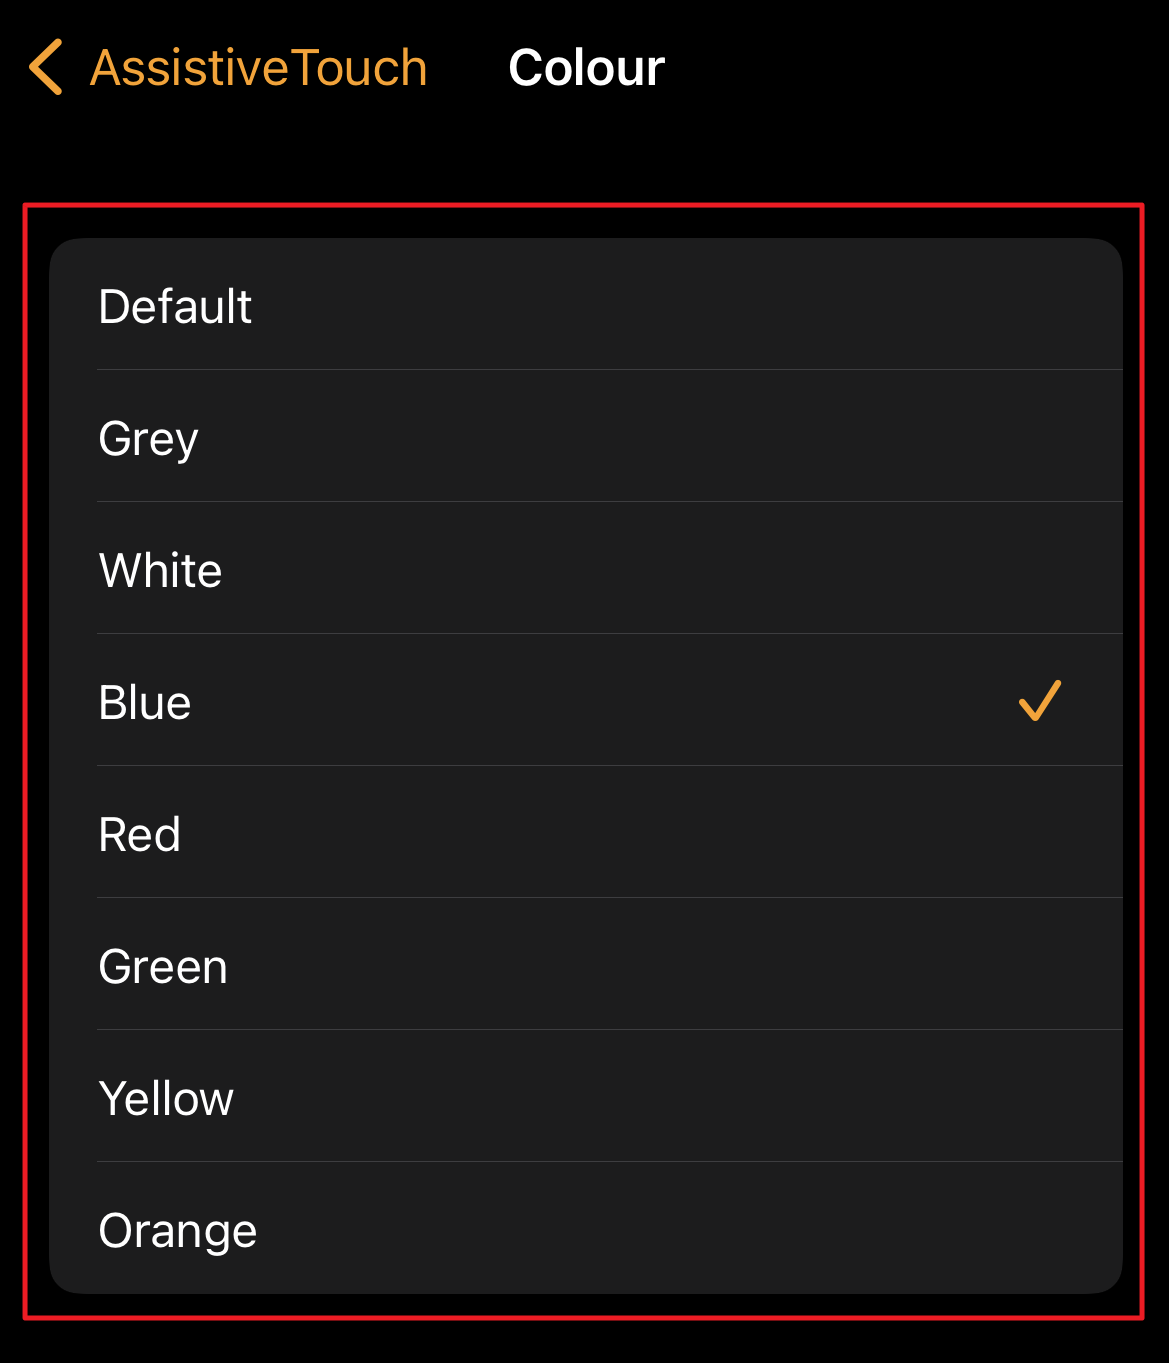
If you wish to change the selection ring color, first, from the ‘Assistive Touch’ settings screen. Then, locate the ‘Appearance’ section and tap on the ‘Colour’ tile present right beneath it.
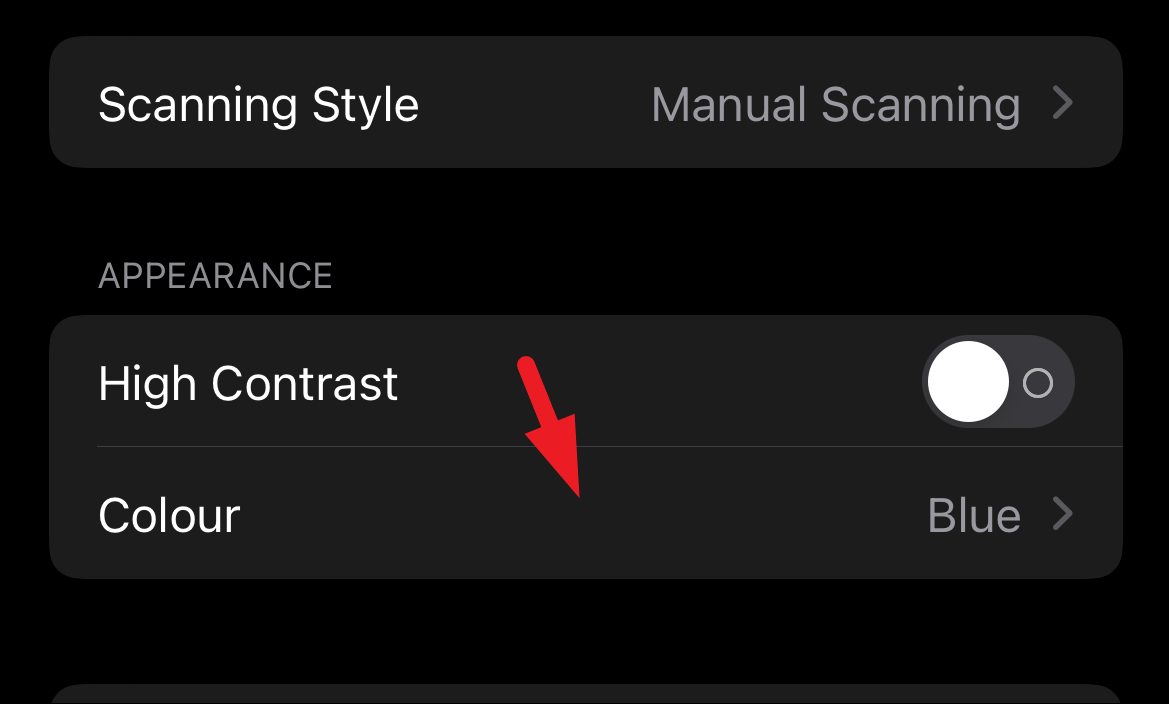
After that, tap to select your preferred color from the list of options. The changes will be applied immediately.
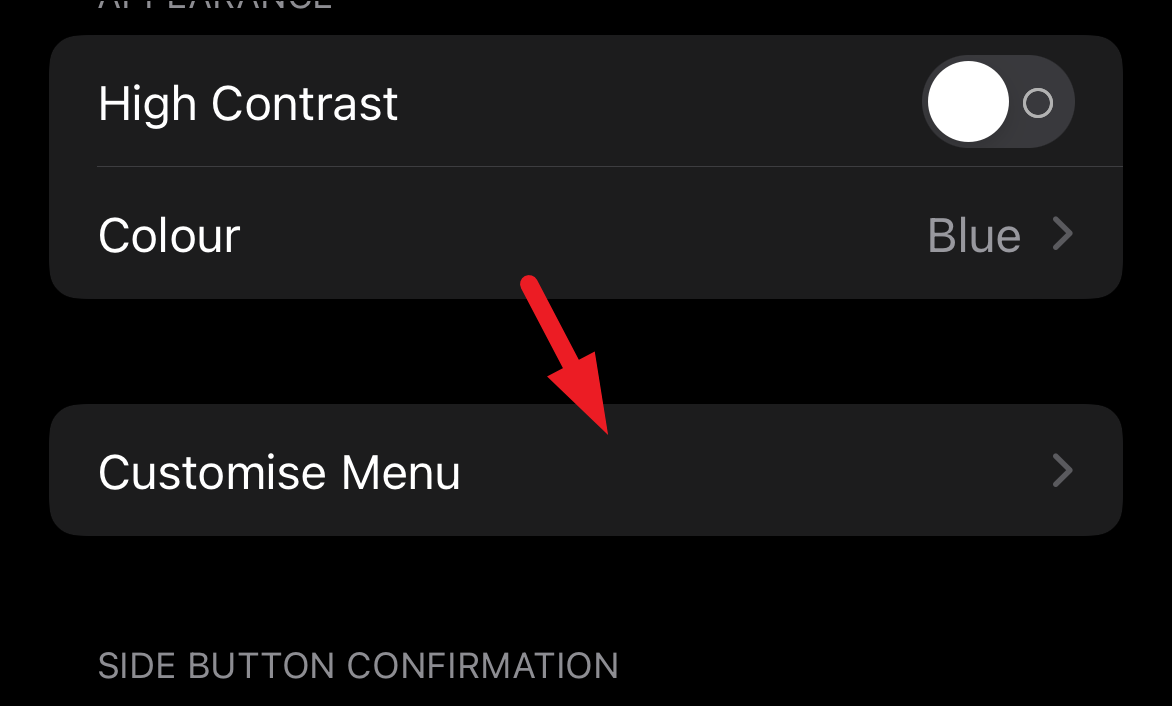
You can also change the position of the Action menu on your Apple Watch screen according to your preference.
To change the position of your Action menu, from the ‘Assistive Touch’ settings screen, locate and tap on the ‘Customize Menu’ tile to continue.
On the next screen, locate the ‘Position’ section and tap on your preferred option from the list. The settings will be applied immediately.

On the same screen, you can also change the scrolling speed if you have enabled the ‘Automatic scanning’ option.
To do so, locate the ‘Autoscroll Speed’ section and tap to select your preferred speed.

There you go folks, this is how you can use your Apple Watch hands-free and customize the Assistive Touch according to your preference.