People playing Apex Legends on a high-end PC may have already noticed a cap on FPS put by the game even on hardware capable of pushing more. We aren’t sure yet if this is intentionally done by Respawn, but thanks to the community members we now know how to get past the 144 FPS cap.
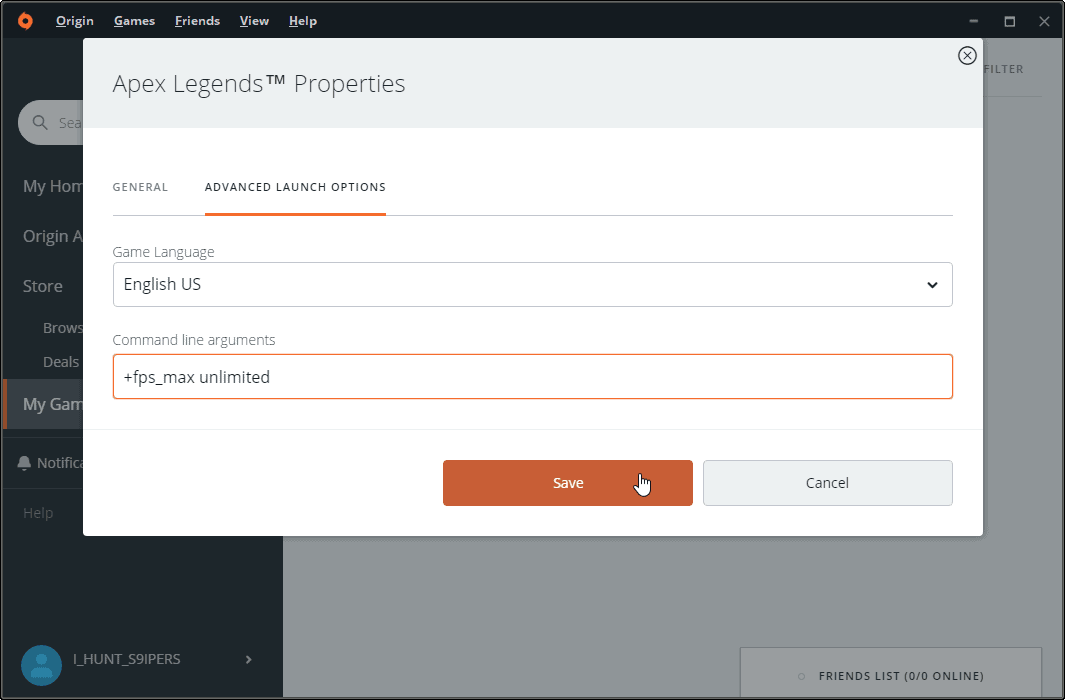
According to the experts, you can unlock full FPS in Apex Legends by putting the +fps_max unlimited command in Origin’s advanced launch options for the game.
How to remove 144 FPS cap in Apex Legends
- Open Origin on your PC, then select My Game Library from the left panel.
- Right-click on Apex Legends, select Game properties, then click the Advanced Launch Options tab.
- Type +fps_max unlimited command in the Command line arguments field and save it.
That said, let’s find out how to get the maximum FPS for Apex Legends on any PC. This guide is for machines powered by an Nvidia Graphics card, but see if you can replicate similar settings on an AMD Radeon card as well.
Best settings to boost FPS in Apex Legends FPS
To get the maximum FPS in Apex Legends on your PC, we’ll change some settings in the Nvidia Control Panel, in-game video configuration, and turn off some Windows features.
Configure Nvidia Control Panel
Open NVIDIA Control Panel on your PC from the Desktop, and go to Manage 3D settings » Program Settings tab. Click Add button, and select Apex Legends from the list of programs installed on your PC, then add the selected program.
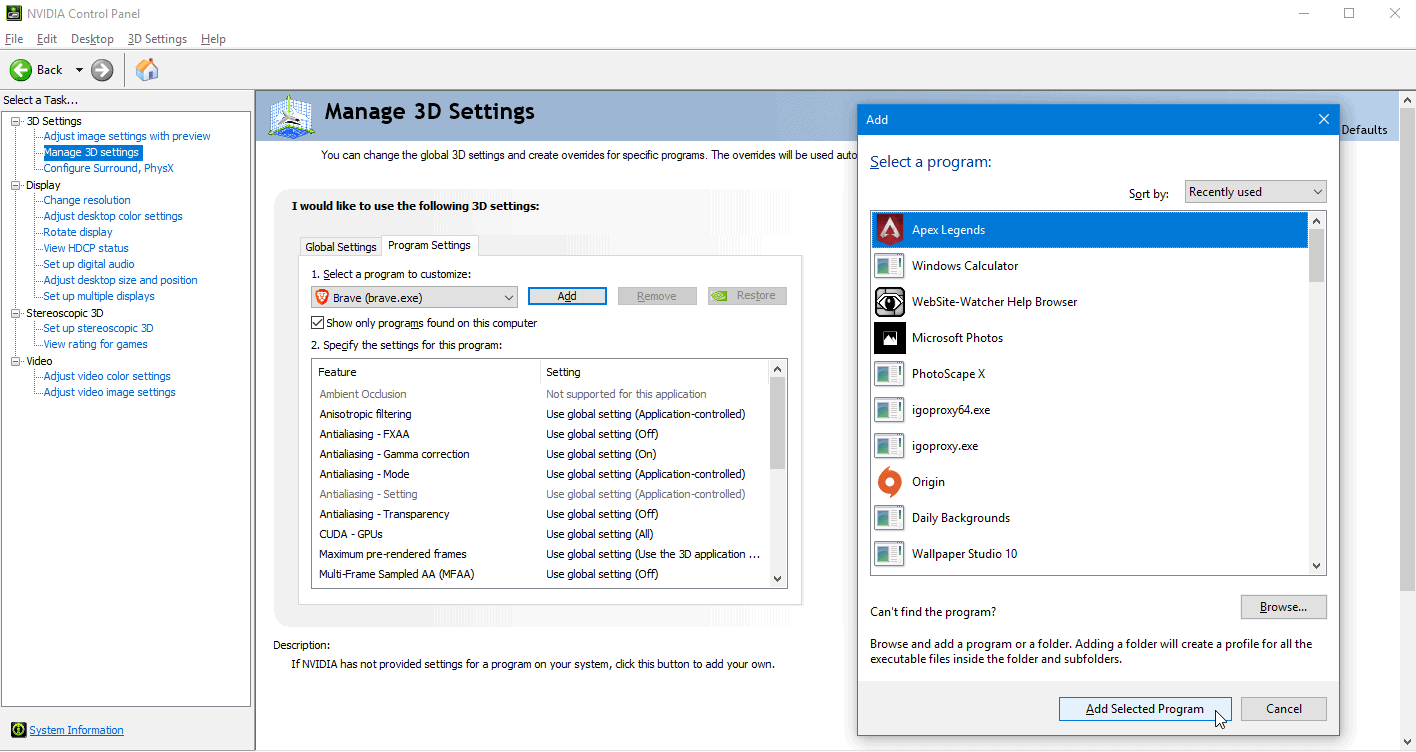
TIP: If you can’t find Apex Legends on the list, click the Browse button, go to the game’s installation directory and select r5apex.exe file.
Once you’ve added Apex Legends to NVIDIA Control Panel, configure its settings as displayed below. Some of these settings will be similar to the global settings in control panel, but you should still customize it.
| Feature | Setting |
| CUDA – GPUs | [Your GeForce Graphics Card] |
| OpenGL Rendering GPU | [Your GeForce graphics card] |
| Power Management Mode | Prefer maximum performance |
| Threaded optimization | On |
| Virtual Reality pre-defined frames | 1 |
| Maximum pre-rendered frame | 1 |
Click on the Apply button after you’ve made the changes mentioned above in the Nvidia Control Panel.
Change Apex Legends video configuration

Open Apex Legends on your PC, then click the gear icon on bottom right of the main screen and select Settings.
To change graphics settings inside the game, click the Video tab and set the configuration settings to the values displayed below.
| Setting | Value |
| Display Mode | Full Screen |
| Aspect Ratio | Select the (native) option |
| Resolution | Select the (native) option |
| Field of view | 80 or 90 |
| V-Sync | Disabled |
| Adaptive Resolution FPS Target | 0 |
| Anti-aliasing | None |
| Texture Streaming Budget | Low [2-3 GB VRAM] or Medium [3 GB VRAM] |
| Texture Filtering | Bilinear |
| Ambient Occlusion Quality | Disabled |
| Sun Shadow Coverage | Low |
| Sun Shadow Detail | Low |
| Spot Shadow Detail | Disabled |
| Volumteric Lighting | Disabled |
| Dynamic Spot Shadows | Disabled |
| Model Detail | Medium |
| Effects Detail | Medium |
| Impact Marks | Low |
| Ragdolls | Medium |
Note: the above mentioned settings are meant for increasing FPS and the game’s performance. It’s not very graphics friendly. If you have a mid-high tier graphics card and you prefer detailed graphics over FPS, then enable some of the detail settings that we disabled for FPS.
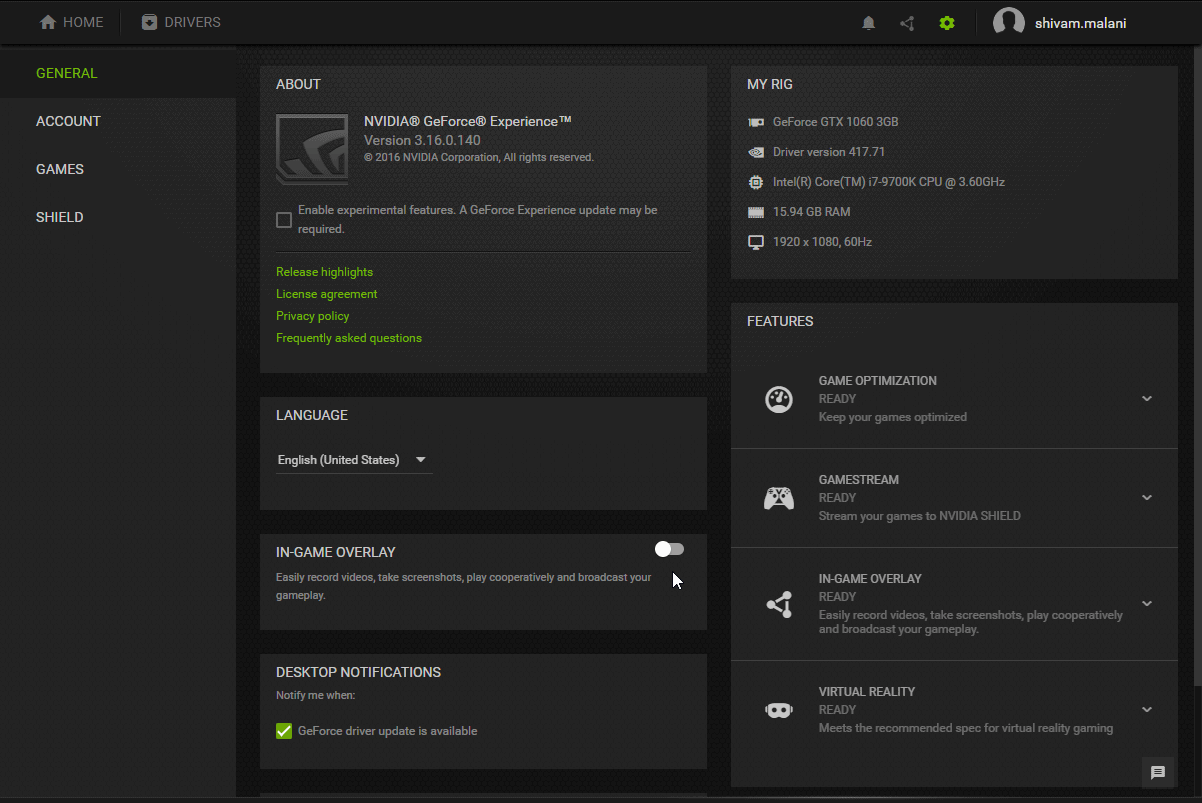
Disable in-game overlay in the Geforce Experience app
Open the Geforce Experience app on your PC and go to its Settings by clicking the gear icon on the toolbar. Now make sure that the In-Game Overlay is disabled.
Disable Game Bar and Game Mode in Windows 10 settings
Unless you use the Game Bar and Game Mode features in Windows 10, you should disable these features to ensure maximum performance while games on your PC.
Go to Windows Settings » Gaming and turn off the toggle switch for the Game bar. Then click Game Mode on the left panel, and turn it off as well.
We were able to get around 178 FPS in Apex Legends on our PC using the above-mentioned settings. Let us know about yours in the comments section below.