
USB printers typically install automatically when connected to a Windows 11 device, but driver compatibility issues or missing drivers can prevent this process from completing. When Windows 11 displays messages like Driver is unavailable or fails to detect your printer, a manual installation is required to restore printing capability and avoid workflow interruptions.
Manual Installation Using Windows 11 Settings
Step 1: Connect the USB printer directly to your Windows 11 computer and power it on. Ensure the cable is securely attached and use a different USB port if the printer is not recognized.
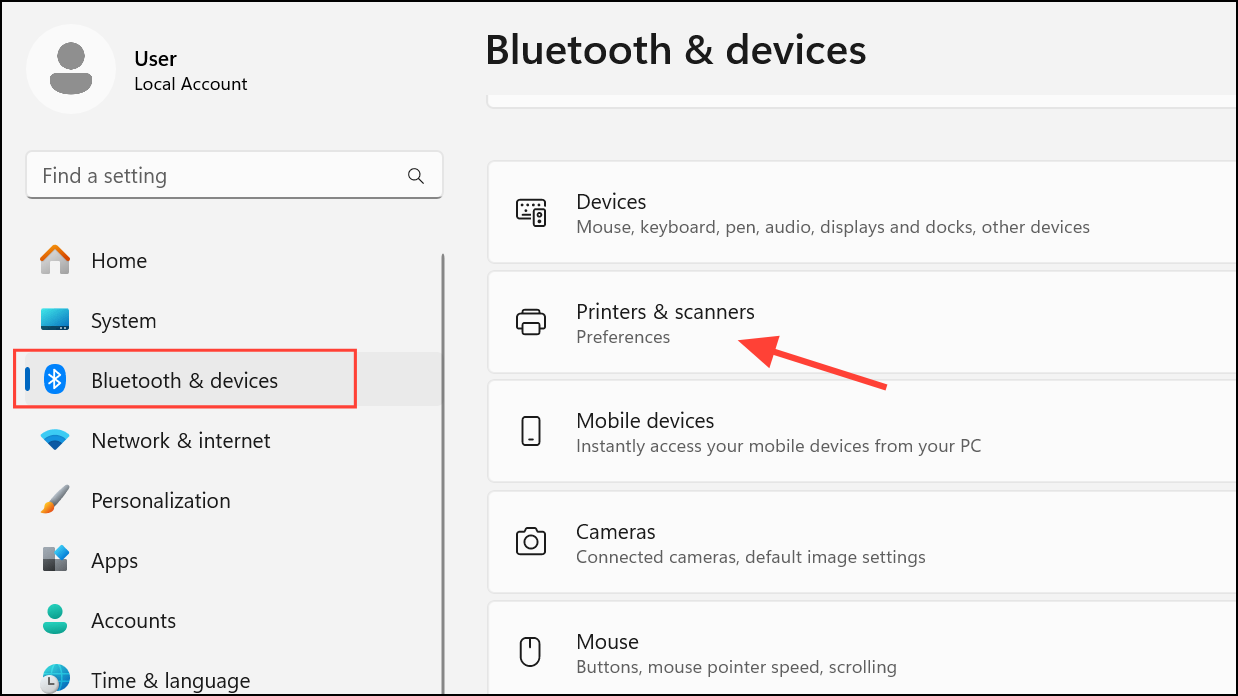
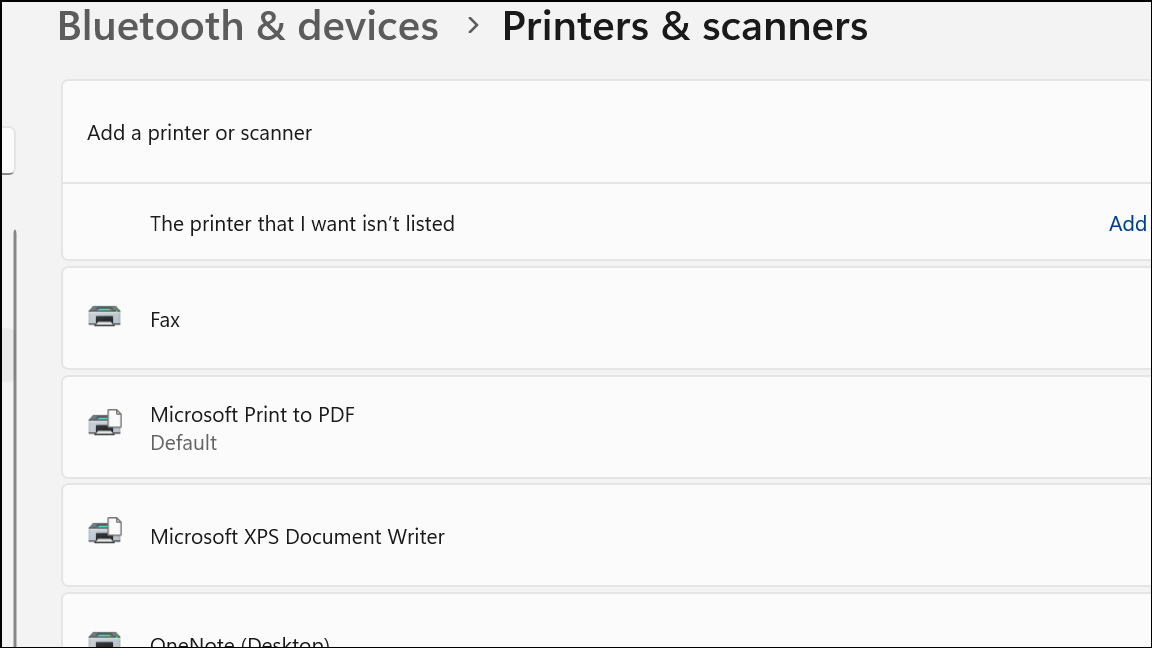
Step 2: Open the Settings app by pressing Win + I. Navigate to Bluetooth & devices > Printers & scanners. This section lists all printers currently installed on your system.
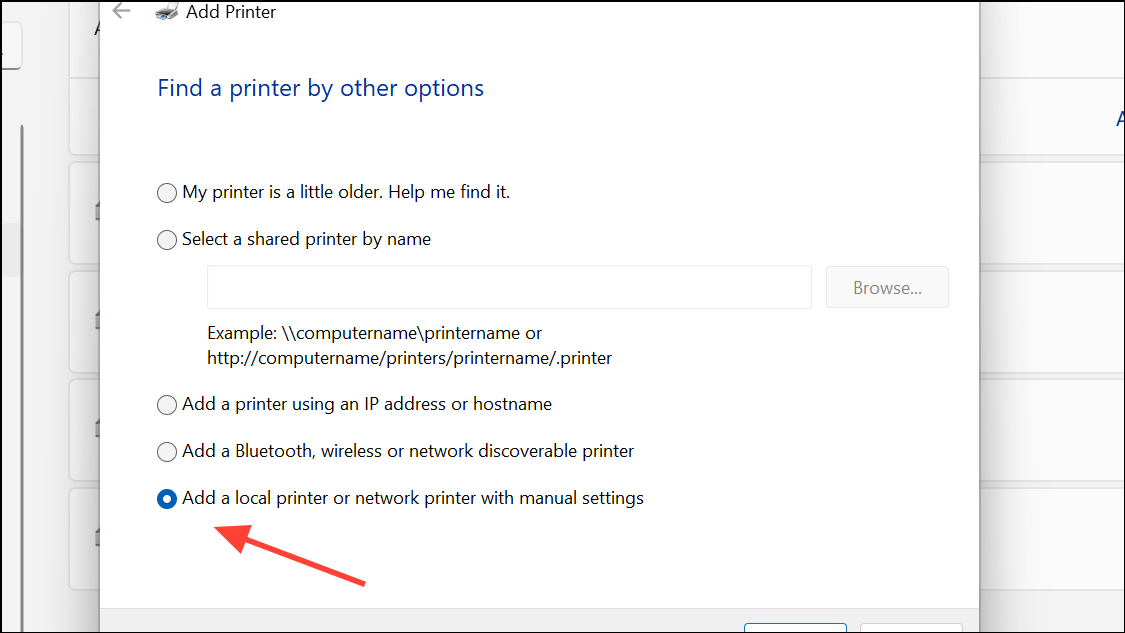
Step 3: If your printer is not listed, select Add device near the top of the window. Windows 11 will search for available printers. Wait a few moments for the list to populate. If your device still does not appear, look for the Add manually or The printer that I want isn’t listed option, and select it. This advanced setup lets you specify the connection method.

Step 4: In the manual add wizard, choose Add a local printer or network printer with manual settings. Click Next to continue. On the next screen, select the appropriate port. For most USB printers, select the port labeled USBxxx (where xxx is a number). If you are unsure, unplug and replug the printer to see which port appears.
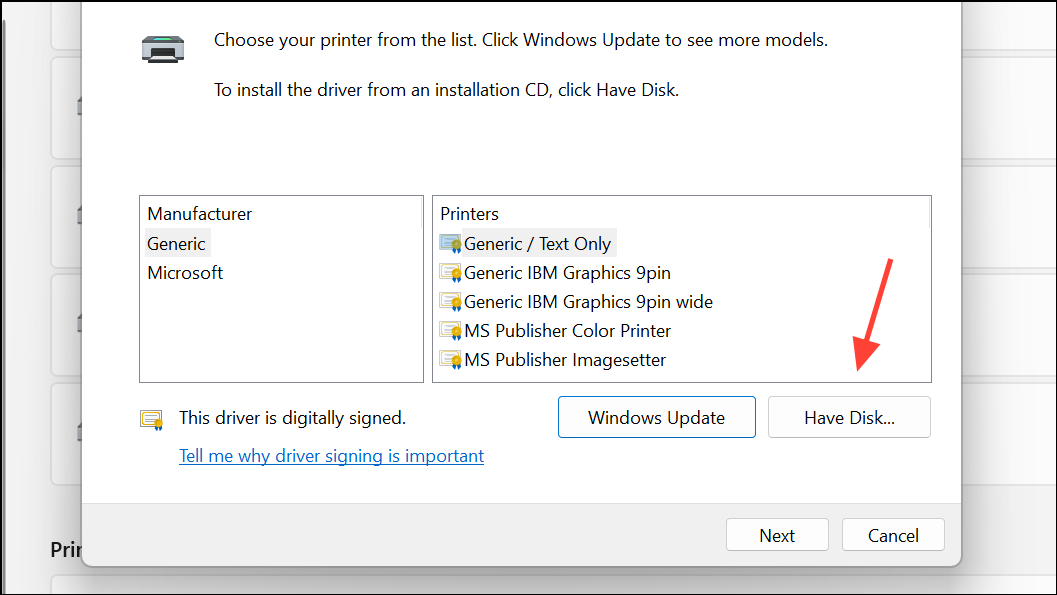
Step 5: Choose your printer manufacturer and model from the list. If your printer is not listed, click Windows Update to refresh the list of available drivers. This step can take several minutes. If the driver remains unavailable, click Have Disk and browse to the location where you downloaded the driver from the manufacturer’s website. Using the exact driver for your printer model avoids compatibility problems and restores full functionality.
Step 6: Assign a name to your printer. This can be the default name or any identifier you prefer. Click Next to proceed.
Step 7: Decide whether to share the printer with other devices on your network. For most home users, select Do not share this printer to keep the device private. Click Next.
Step 8: On the final screen, click Print a test page to verify that the printer works as expected. If the test page prints, click Finish to complete setup. The printer now appears in your Printers & scanners list and is ready for use in any application.
Alternative Method: Installing Drivers Directly from Manufacturer
When Windows 11 cannot locate a compatible driver, downloading and installing the latest driver from the printer manufacturer’s website often resolves the issue. This approach is especially important for older printers or models not included in Windows’ built-in driver database.
Step 1: Visit the official support page for your printer brand (for example, HP, Canon, Epson, Brother, etc.). Search for your exact printer model and download the recommended Windows 11 or Windows 10 driver package. Avoid using third-party driver sites to reduce the risk of malware or compatibility issues.
Step 2: Run the downloaded installer and follow the prompts. The installer may ask you to disconnect and reconnect the printer during setup. This step ensures the correct driver is associated with your device.
Step 3: After installation, return to Settings > Bluetooth & devices > Printers & scanners to confirm the printer appears without errors. If the printer status displays Driver is unavailable, restart your computer to refresh device recognition.
Step 4: Print a test page or document to confirm that printing works. If you still encounter errors, try removing the printer and repeating the manual installation steps above, specifying the newly installed driver.
Troubleshooting Common Issues
- If the Add device button in Printers & scanners is unresponsive or hangs, restart the Print Spooler service. Open
services.msc, locate Print Spooler, right-click, and select Restart. - Check Windows Update for pending updates, as new drivers or fixes may be available. Open Settings > Windows Update and click Check for updates.
- If the printer still fails to install, disconnect other USB devices to rule out power or port conflicts. Try a different USB cable if available.
- For ARM-based Windows 11 PCs, use the built-in Windows Add Printer wizard instead of the manufacturer’s installer, as some ARM drivers are not supported.
- Remove any previously failed printer installations before retrying. Go to Printers & scanners, select the problematic printer, and click Remove.
Manual installation of a USB printer in Windows 11 streamlines the setup process when automatic detection fails, restores printing functionality, and reduces downtime caused by missing or incompatible drivers. Keep your drivers up to date and periodically check for new releases from your printer manufacturer to maintain reliable operation.
Manual setup resolves most stubborn USB printer issues in Windows 11, letting you get back to printing without unnecessary delays. If problems persist, consider reaching out to the printer manufacturer’s support for model-specific guidance.