Power in Project Slayers 2 comes from two places, and neither of them is a shop. Damage accessories drop from a handful of bosses at low rates, and your weapon gets its real jump from a reforge that is paid for in dungeon points rather than Wen. Farm both efficiently and the grind collapses from days to a few focused sessions.
Quick answer: Farm Nezura, Gyorei, Reaper and Water Trainee Sabito for the five Duelist pieces, use !spawn set to reset-warp between kills, then reforge your weapon at Forgotten Ruins for 90,000 dungeon points.
The five-piece Duelist meta set and its stats
All five pieces share the Duelist class tag, so they stack cleanly on a damage build. Four are Mythic; the mask is Legendary but carries the highest flat damage number of the group.
| Item | Rarity | Damage | Health / Stamina |
|---|---|---|---|
| Bamboo Muzzle | Mythic | +1, 1.01x factor | +105 / +80 |
| Stone Haori | Mythic | +1, 1.02x factor | +100 / +80 |
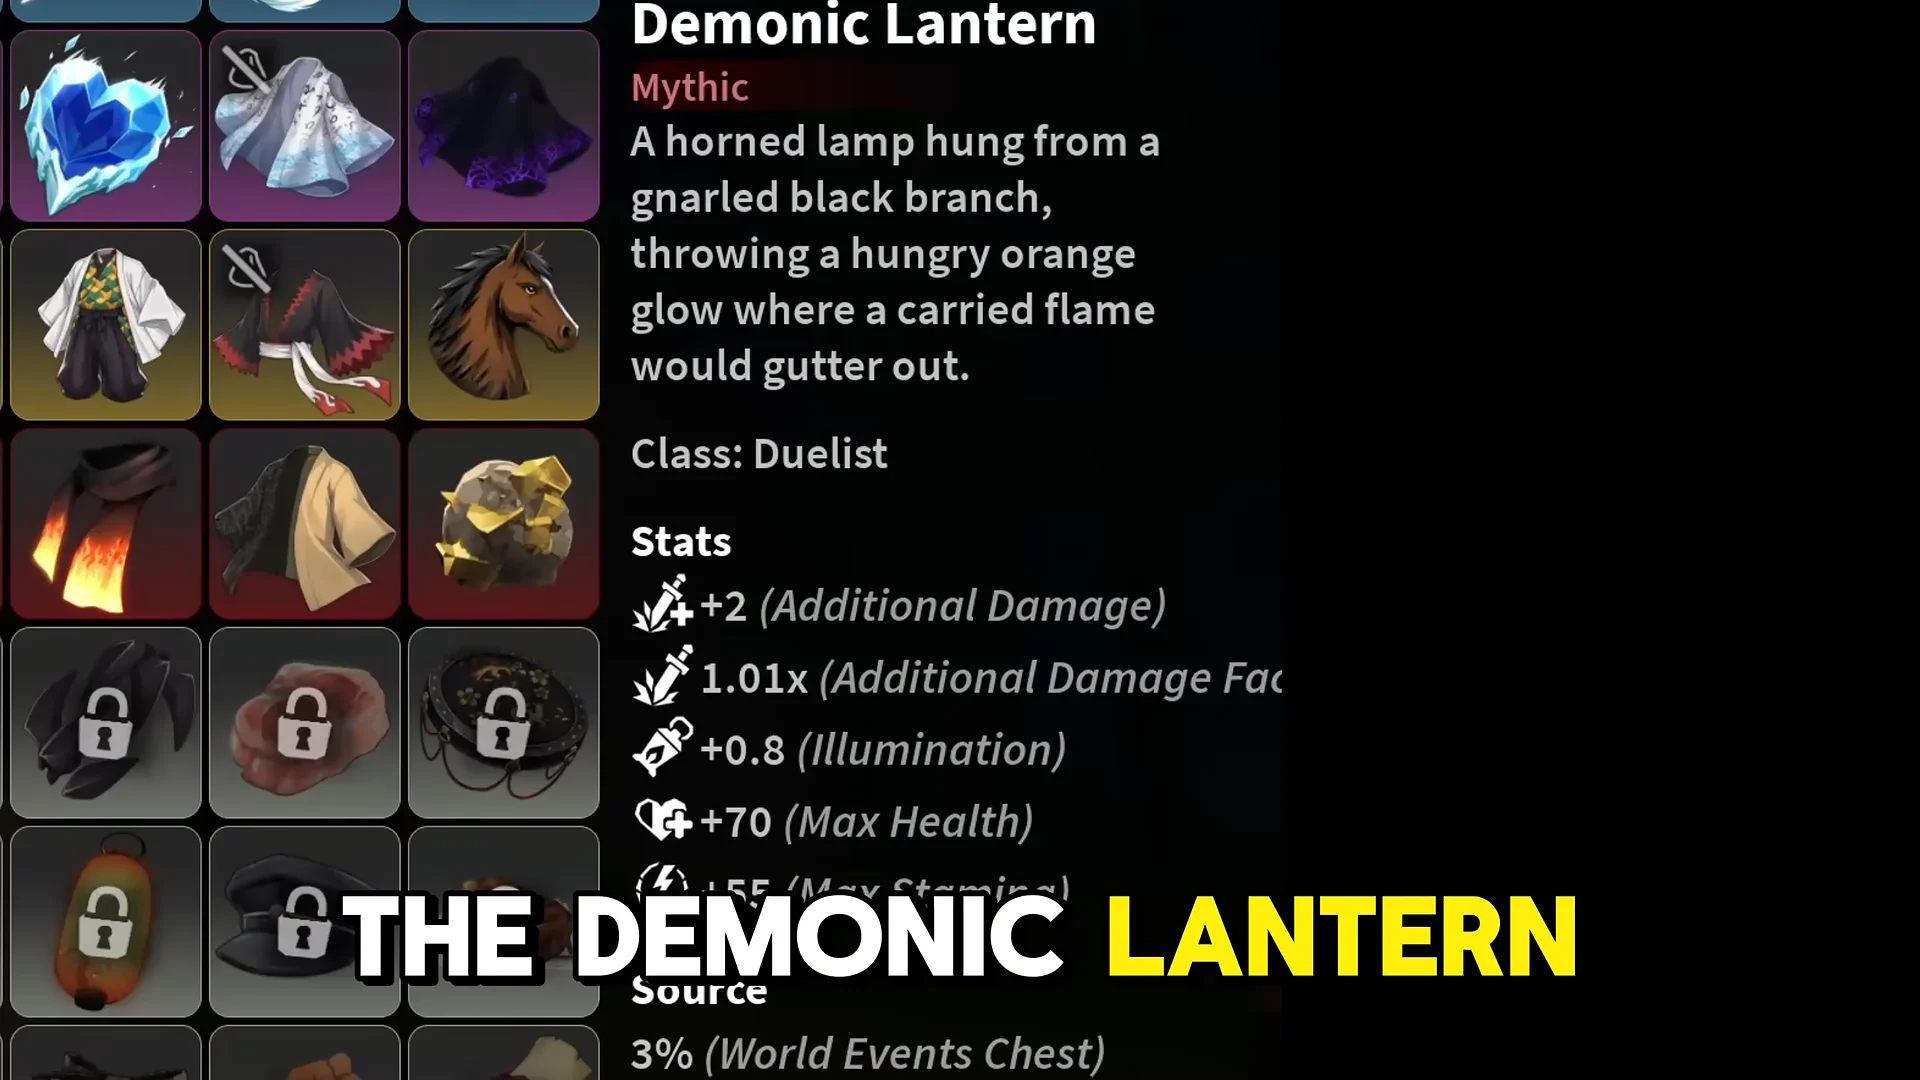
| Demonic Lantern | Mythic | +1, 1.01x factor | +70 / +60 |
| Reaper’s Outfit | Mythic | +1, 1.01x factor | +120 / +90 |
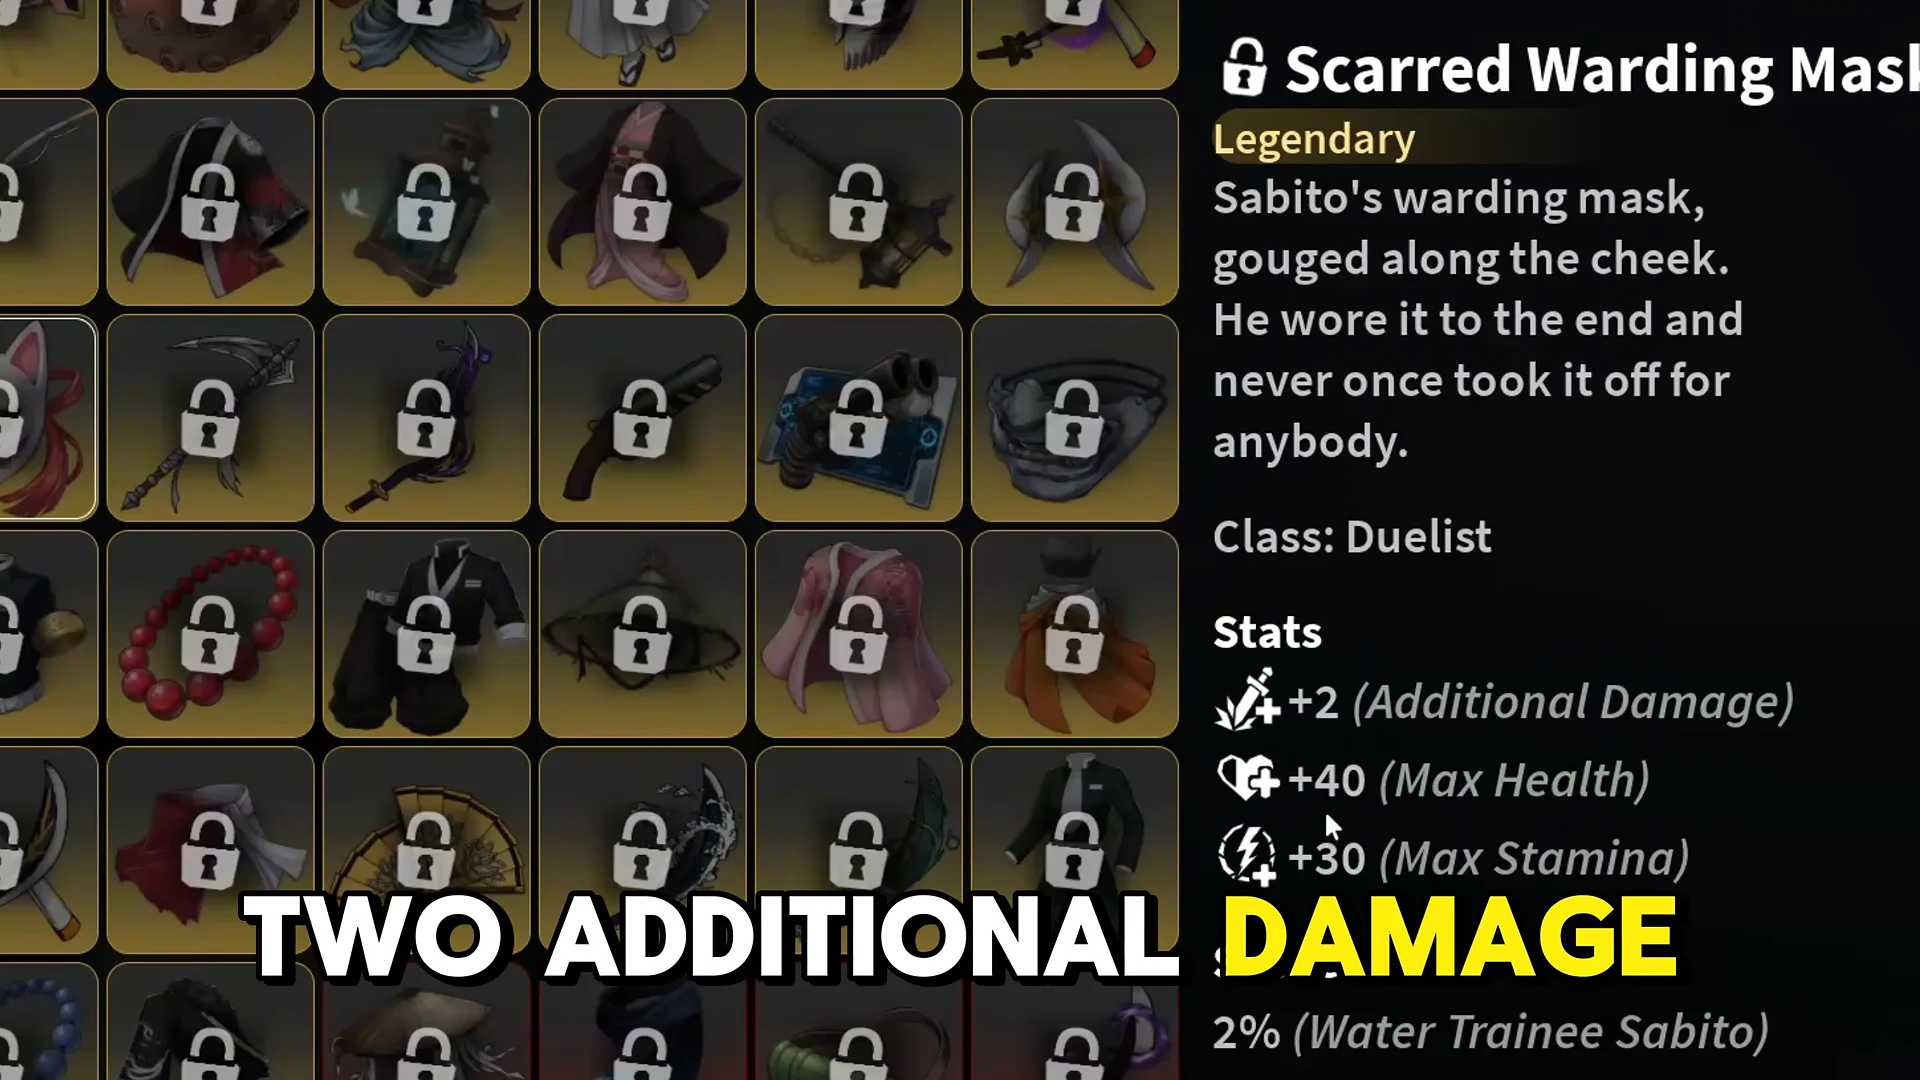
| Scarred Warding Mask | Legendary | +2 | +40 / +30 |
The Reaper’s Outfit also carries a 1.1x health regen multiplier, and the Demonic Lantern adds +0.8 Illumination, which is genuinely useful when you are hunting a boss that only appears after dark.
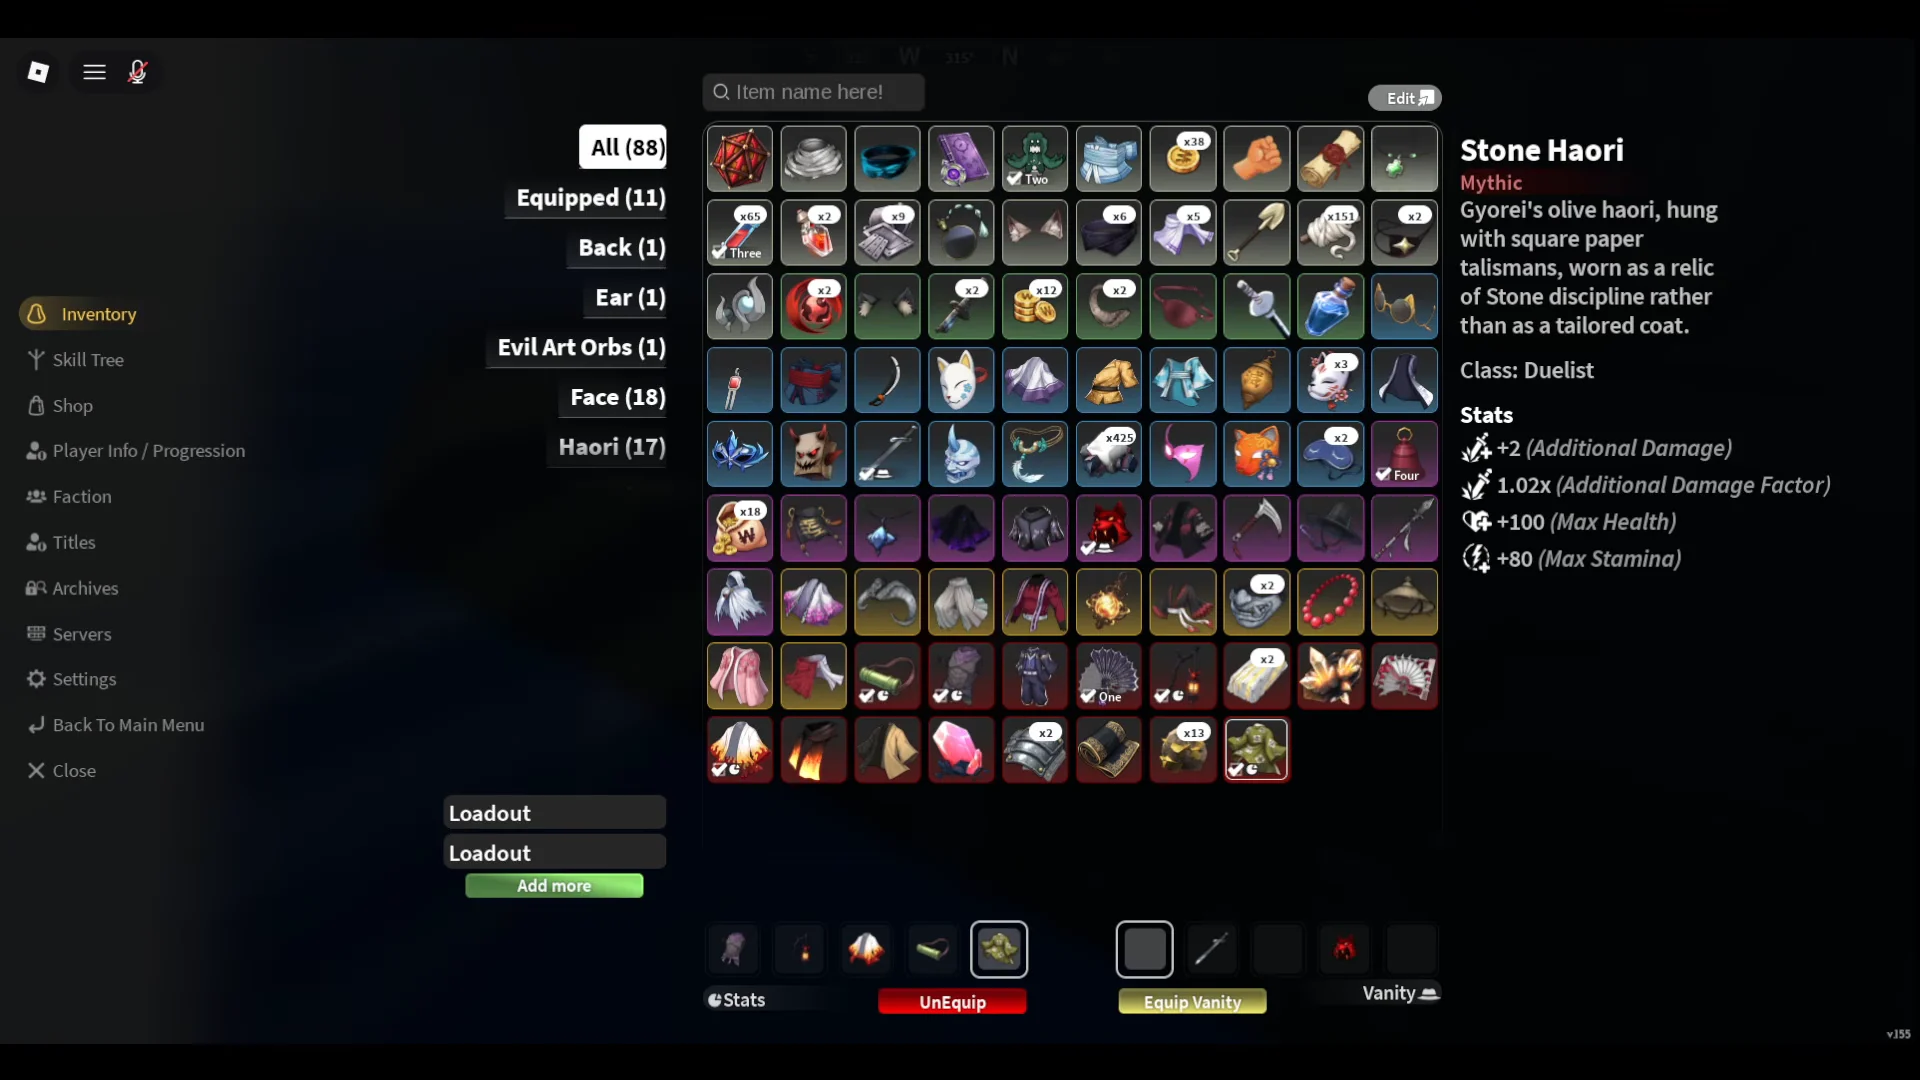
Two damage stats show up on these items and they are not the same thing. Additional damage is a flat bump that applies every hit. The additional damage factor is a multiplier that only matters in specific calculations. For a straightforward damage build, chase the flat number first and treat the factor as a bonus.
If the Red Oni Mask from the Ugi Ugiwara dungeon is still out of reach, the Scarred Warding Mask covers the same damage slot. The Red Oni version only adds extra health and stamina on top.
Where each piece drops and the boss locations
| Item | Source | Drop rate | Area |
|---|---|---|---|
| Bamboo Muzzle | Nezura (World Boss) | 3% | Forgotten Ruins side |
| Stone Haori | Gyorei | 3% | Stone Sanctuary |
| Reaper’s Outfit | Reaper (World Boss) | 3% | Bamboo Grove |
| Scarred Warding Mask | Water Trainee Sabito | 2% | Bamboo Grove paths |
| Demonic Lantern | World event and boss chests | 3% | Map-wide |
Respawn timers are short enough that repeat attempts are the whole strategy. World bosses come back in roughly five minutes; mini bosses take about two.
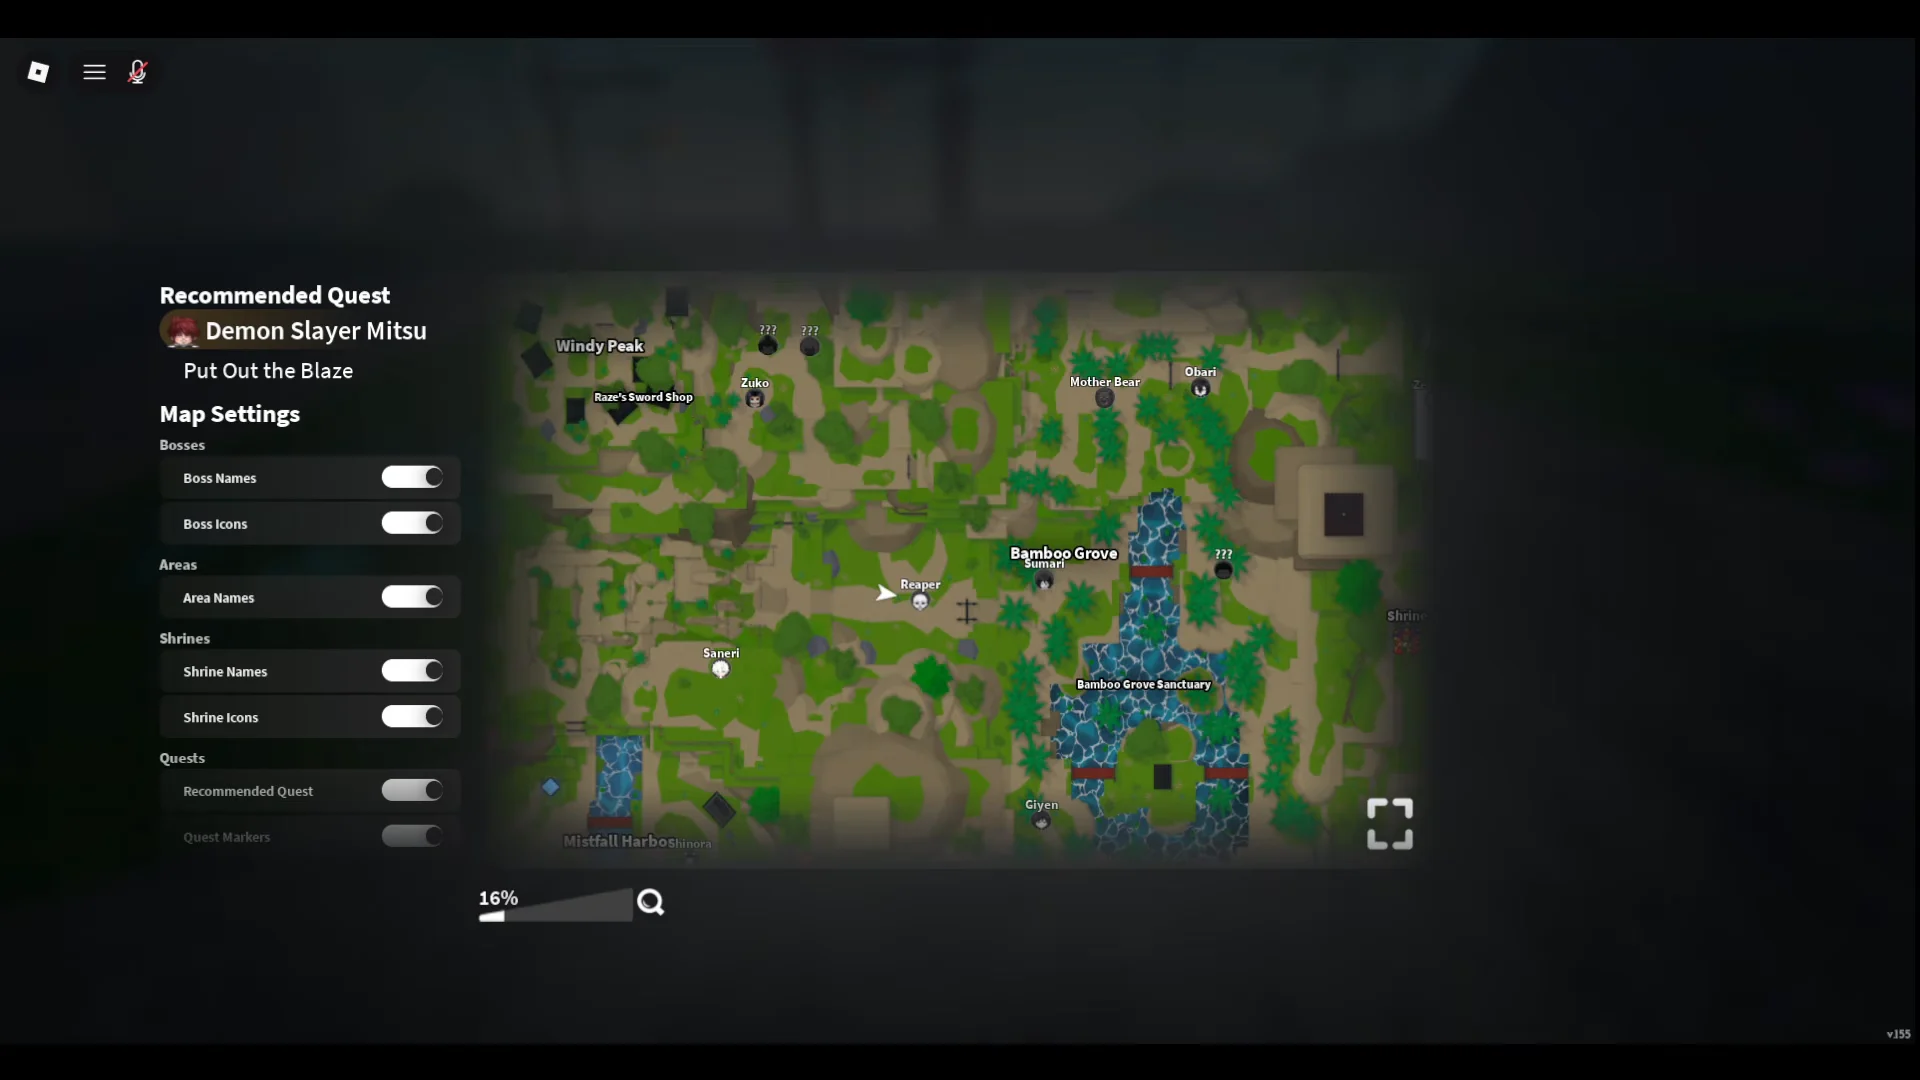
Reaper (Bamboo Grove, night only)
Reaper is the one with a hard condition attached. The shrine in Bamboo Grove shows a “Come back at night” prompt during the day, and the boss only materializes after dark. Fast travel to Windy Peak Shrine and drop down into the Bamboo Grove to reach it. The Reaper’s Outfit comes out of the chest, not the body, so always open it.
Nezura (between Forgotten Ruins and Final Selection Plains)
Nezura can be found in the wilderness separating the Forgotten Ruins from Final Selection Plains. From the shrine, cross the bridge and travel south toward the Butterfly Estate for the simplest route. As a world boss, it has about 3,000 HP, and the 3% rate means you should prepare for plenty of serious fights.
Gyorei (Stone Sanctuary, near Hidden Mist Village)
Gyorei stands in a courtyard at Stone Sanctuary. Fast travel to the Hidden Mist Village Shrine, move toward the Thunder trainer’s area, then climb the cliffs until the pagoda comes into view. Because Gyorei is always present, this location doubles as the anchor point for the reset trick below.
Water Trainee Sabito (Bamboo Grove paths)
Sabito is the easiest farm on the list. He is a mini boss with roughly 600 HP, parked along the Bamboo Grove routes heading toward Hidden Mist Village, and he drops a Common Chest on defeat. At a 2% rate and a two-minute respawn, brute repetition works better here than any optimization.
Demonic Lantern (chest drop, no fixed boss)
The lantern has no dedicated owner. It appears as a rare roll from world event chests and higher-tier boss chests, which means you are already farming for it every time you open a chest on the rotation above. Do not build a separate trip around it.
Farm two bosses at once with the !spawn set reset trick
The real time sink is travel. Reaper only exists at night, Gyorei is always up, and the two are on opposite sides of a mountain. Setting your spawn point at one of them turns the walk back into a single button press.
!spawn set. A Spawn Set prompt appears on screen, which is your confirmation that the anchor took.You know the loop is working when the respawn drops you at Stone Sanctuary rather than the default start point. From there the cycle repeats: kill Gyorei, travel to Reaper at night, reset back.
V2 gear: reforging weapons and armor at Forgotten Ruins
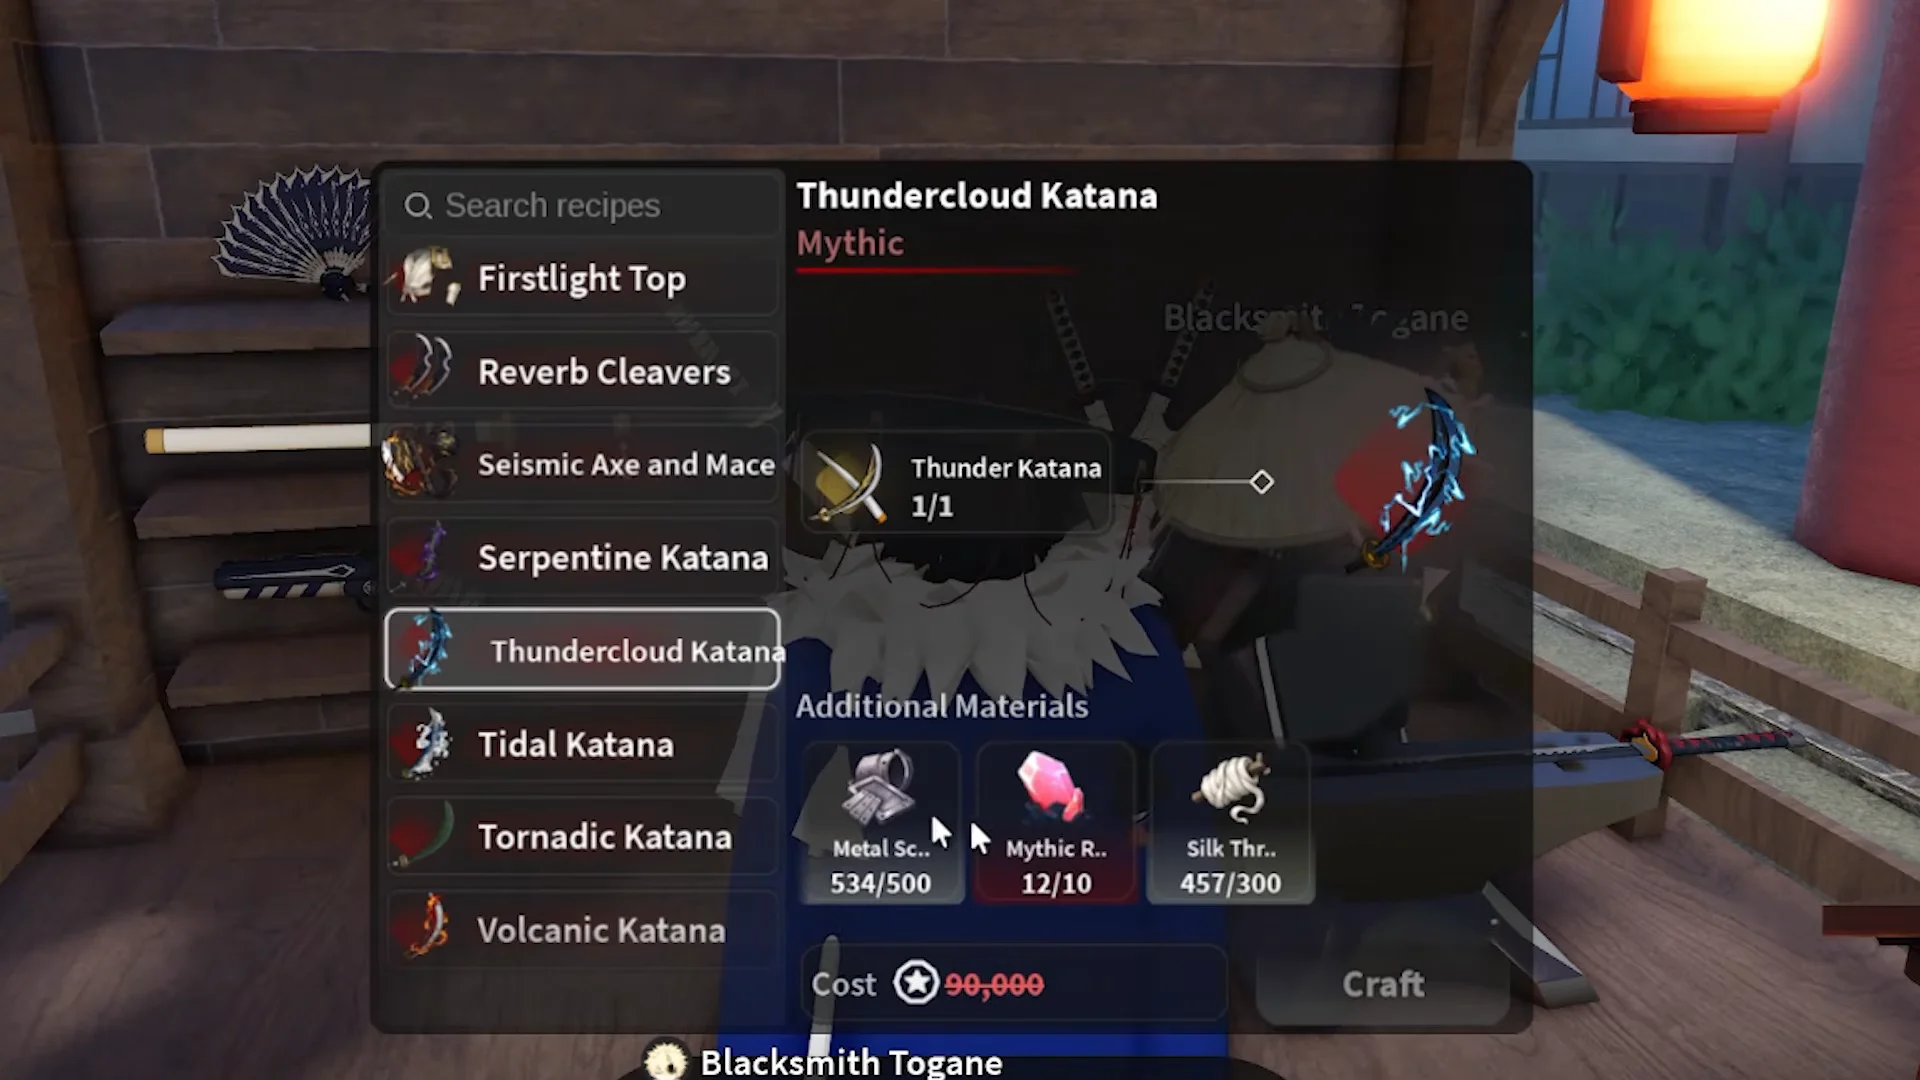
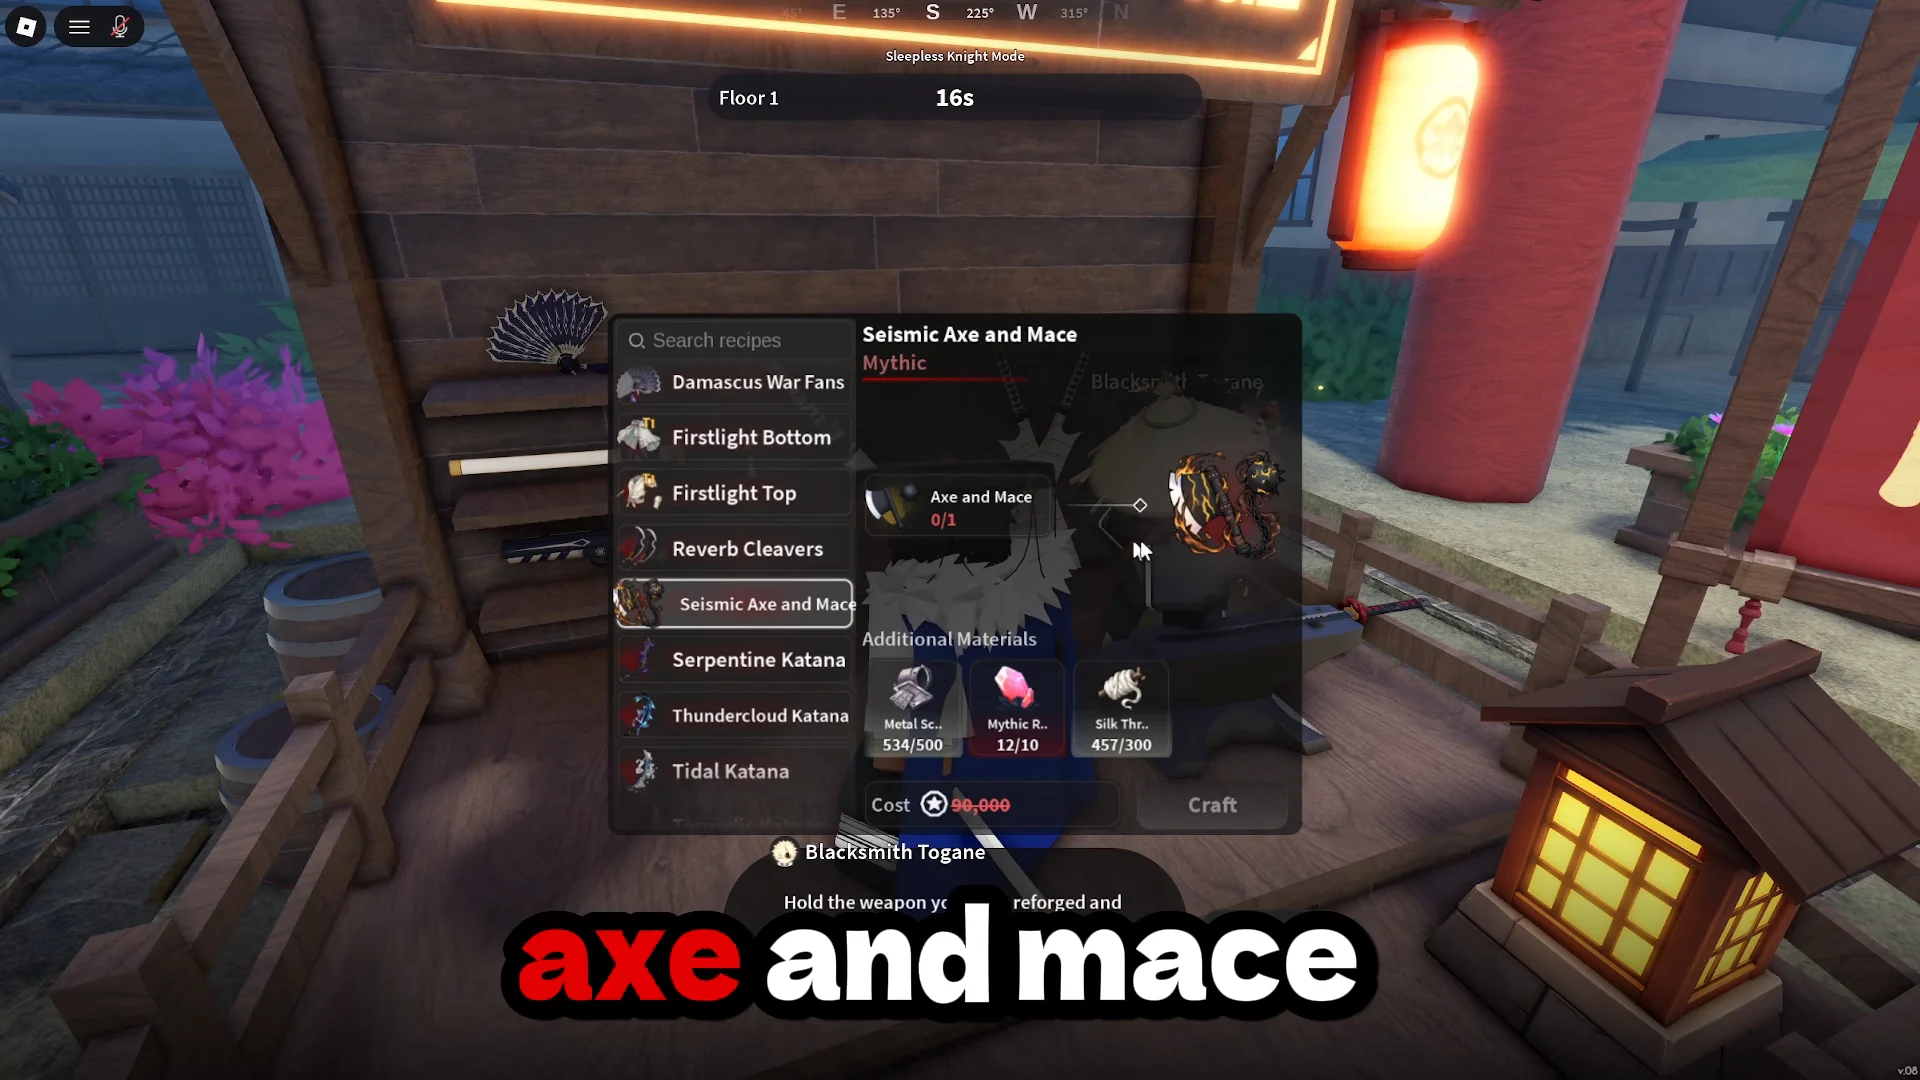
Accessories amplify your weapon’s existing output, making the reforge the set’s payoff. To create any V2 katana, claw, gauntlet, or armor piece, use the dungeon forge and spend dungeon points. Wen is irrelevant here, so players who show up with plenty of it may still see the recipe locked.
| Requirement | Amount | Where it comes from |
|---|---|---|
| Dungeon points | 90,000 | Dungeon runs at Forgotten Ruins |
| Metal Scraps | 500 | Chests or Ginzo, the material vendor |
| Silk Thread | Varies by recipe | Chests or Ginzo |
| Mythic Refinement Ore | 10 | Point exchange or Mythic salvage |
| Base item | 1 | Must be in your inventory |
Every V2 recipe on the forge board
| Category | V2 recipes |
|---|---|
| Katanas | Thundercloud, Tidal, Volcanic, Tornadic, Serpentine, Butterfly |
| Heavy weapons | Seismic Axe, Seismic Mace, Reverb Cleavers |
| Fist weapons | Damascus Claws, Damascus Gauntlet |
| Armor | Firstlight Top, Firstlight Bottom |
Damascus gear improves equipment you already possess instead of introducing different weapon types. Firstlight armor uses the blades’ same point-and-material requirements. The required base item must be in your inventory for each recipe; for example, the Butterfly Katana requires an Insect Katana before it can be completed.
Unlock the Forgotten Ruins dungeon
How to farm 90,000 dungeon points
Dungeon waves are the source of points. Start a run by using the hub’s book, and bring potions because the amount earned depends on how far you progress before dying. Clearing 10 waves alone and arriving at Floor 11 gives about 2,592 points, making Floors 60 to 70 the practical range for earning 90,000 points in one haul.
After each floor, choose from buff cards. For a score-focused run, take Trophy and Greater Trophy ahead of survival options, because advancing deeper is what increases the payout.
Dungeon points also function as shared currency in the area. Changer Zeni accepts them for items and Wen, while opening the Ouwiigahara Chest beside him requires 30,000 points. Spending points there reduces the amount available for reforging.
Getting 10 Mythic Refinement Ore
- Point exchange: one Ore costs 30,000 dungeon points, while ten Ores cost 300,000 in addition to the recipe price.
- Salvage: Denzo’s quest must be completed before salvaging becomes available; afterward, Mythic-rarity gear can be dismantled into Ore.
- Ginzo, the material vendor north of the hub, restocks Metal Scraps and Silk Thread without chest hunting.
Salvaging is dramatically cheaper if boss farming has left you with a pile of unwanted Mythic drops, which it usually has by the time you are chasing V2.
Craft the V2 item and confirm it worked
There is a second confirmation worth checking. Take the finished V2 weapon back to the blacksmith on the main map and the matching V3 recipe becomes visible, asking for the V2 weapon, 1,000 Silk Thread, 1,000 Metal Scraps, a large cash payment and a weapon-specific schematic found out in the world. If that entry is showing, the reforge registered correctly.
Materials are shared between the gear and weapon tracks, so decide early which slot is holding you back. A cheap accessory on a reforged blade outperforms a perfect Mythic roll on a V1 weapon, and the boss rotation keeps feeding both piles while you decide.