Network connectivity stalls, frequent Wi-Fi drops, or persistent DNS errors often trace back to misconfigured network settings, outdated drivers, or conflicting software. Resetting network settings in Windows 11 restores all network-related components to their original state, removing saved Wi-Fi profiles, custom DNS, proxy settings, and VPN configurations. This process is a direct way to resolve stubborn network issues without reinstalling the operating system or losing personal files.
Reset Network Settings Using Windows Settings
Windows + I. This shortcut opens the main configuration hub for your system.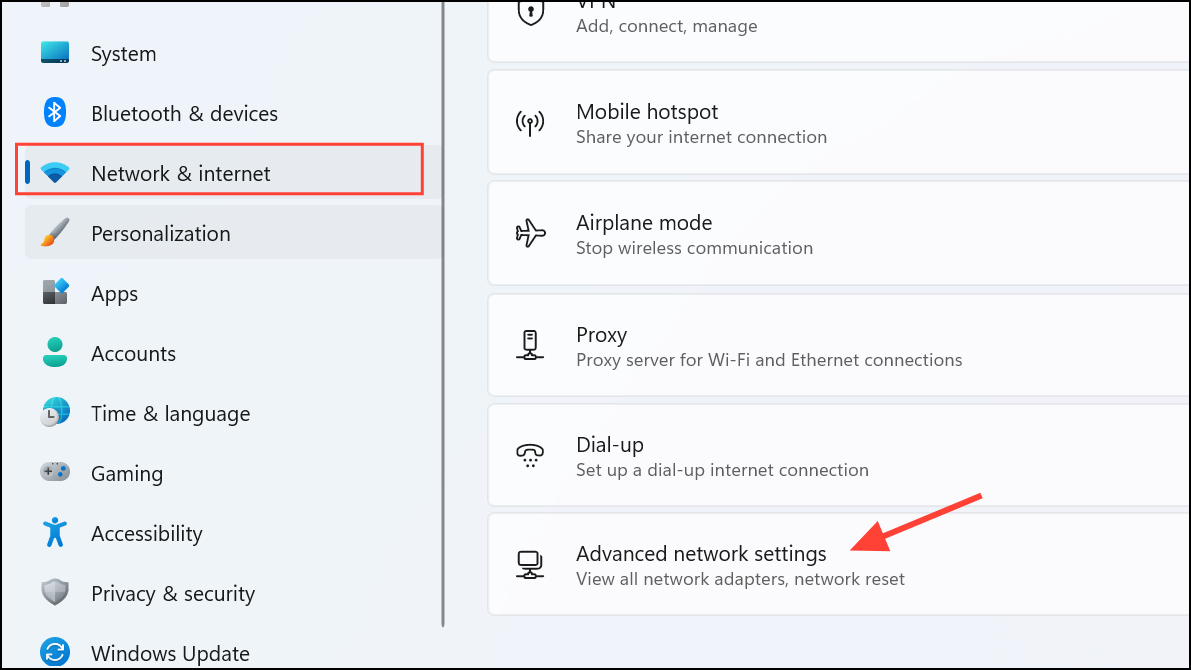

Following the reset, reconnect to your Wi-Fi networks by selecting them from the available list and entering their passwords. If you use VPN or custom DNS settings, reconfigure them as needed. For static IP requirements, manually set the IP address and DNS entries via the network adapter properties.
Reset Network Settings Using Command Prompt
For users who prefer command-line tools or need to automate the process, resetting network settings via Command Prompt provides granular control over individual network components.
Start key, type cmd, right-click Command Prompt, and select Run as administrator.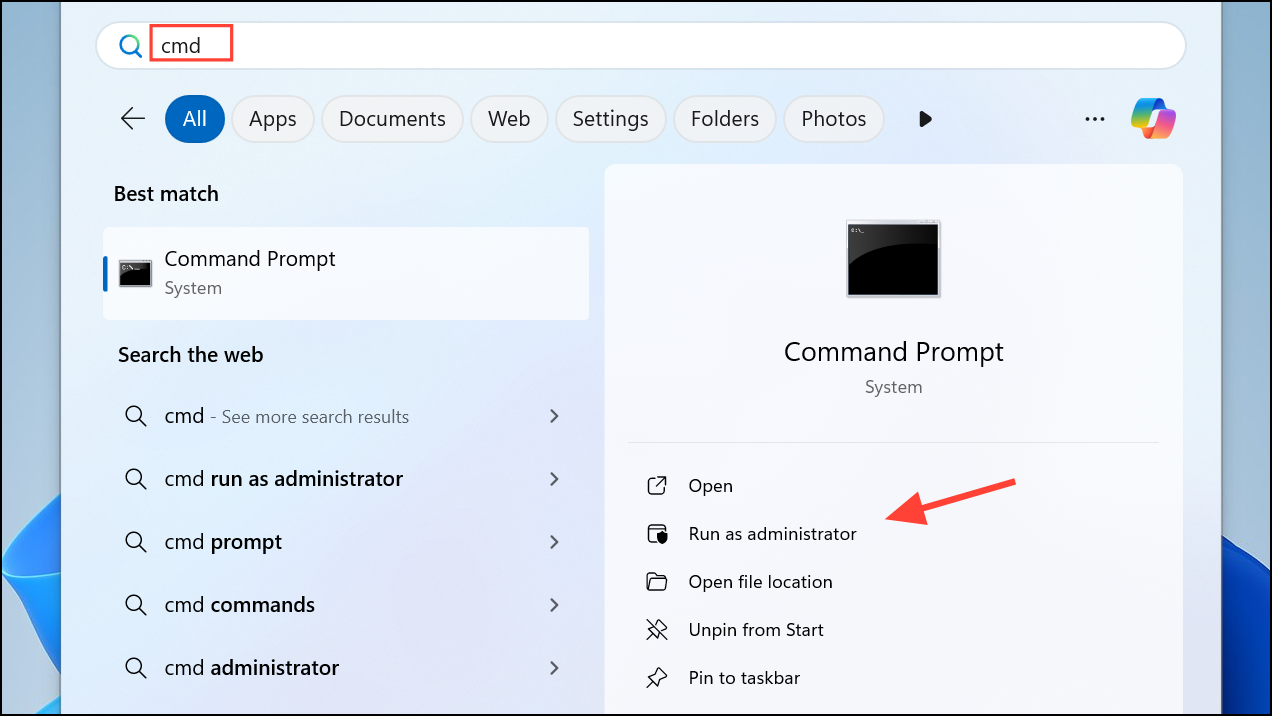
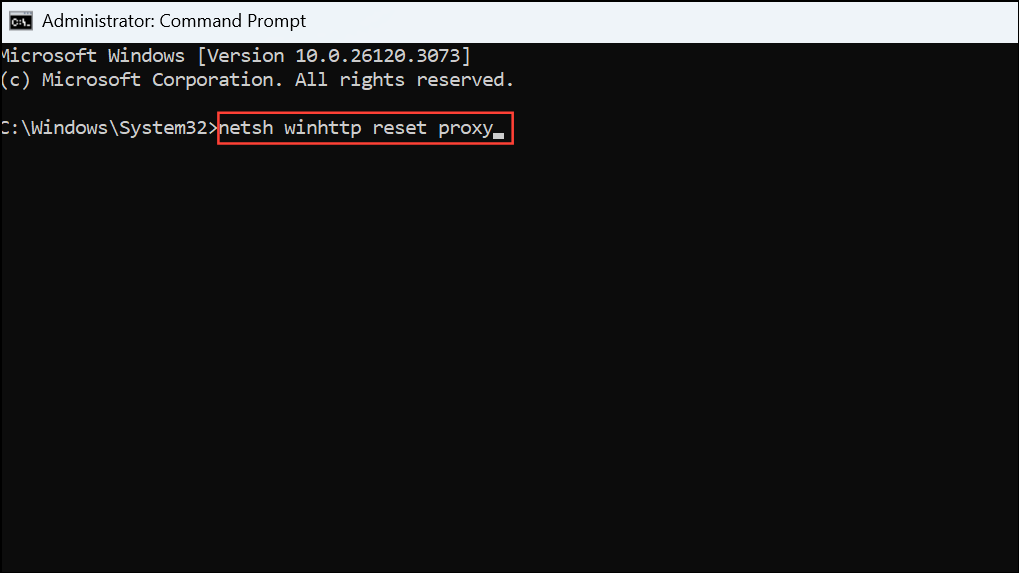
Enter after each. These commands reset proxy settings, Winsock (Windows Sockets API), TCP/IP stack, and clear DNS cache:netsh winhttp reset proxy
netsh winsock reset catalog
netsh int ip reset all
ipconfig /flushdns
This method is especially useful for advanced users, IT professionals, or when scripting network repairs across multiple systems.
Reset Network Adapter via Device Manager
If the above methods do not resolve the issue or you suspect a specific adapter is malfunctioning, you can uninstall and reinstall the network adapter through Device Manager.
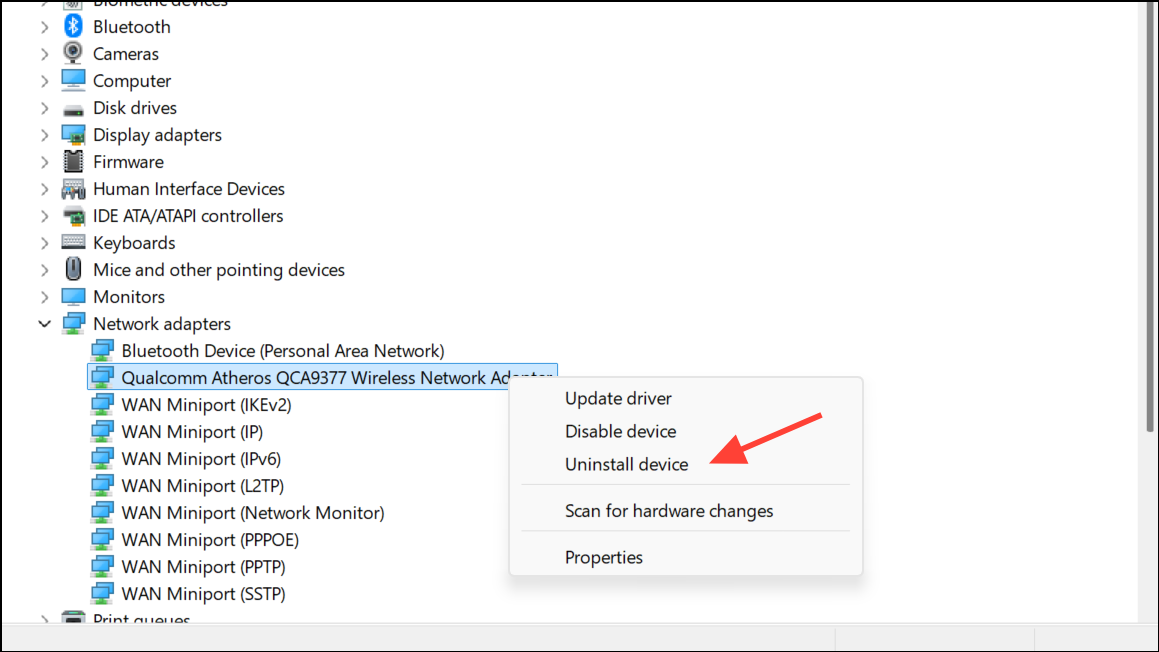
This approach can fix driver corruption or persistent adapter-specific errors when a full network reset is not desired.
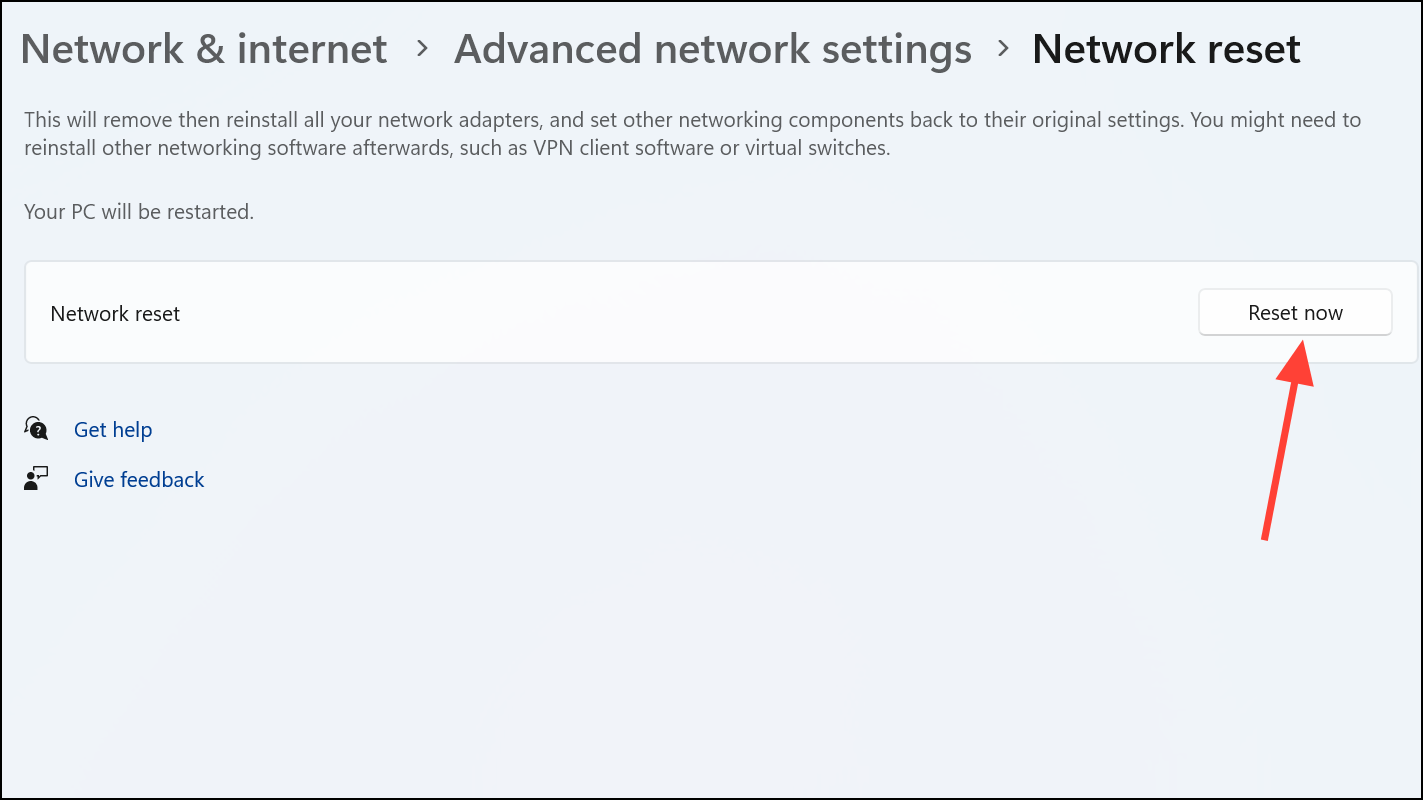
What Happens When You Reset Network Settings?
Resetting network settings in Windows 11 removes all network adapters and reinstalls them, erasing saved Wi-Fi networks, custom DNS, static IPs, proxy configurations, VPN settings, and firewall rules. Bluetooth device pairings and shared network drives may also be cleared, requiring reconnection or reconfiguration. This “clean slate” approach resolves issues caused by misconfigured settings, outdated drivers, or conflicting software. After the reset, you must rejoin Wi-Fi networks, re-enter passwords, and restore any custom network settings or VPN software as needed.
Backing Up and Restoring Wi-Fi Profiles
Since network reset deletes all saved Wi-Fi networks, backing up your profiles can save time if you frequently connect to multiple wireless networks.
netsh wlan export profile folder="C:\WiFiBackup" key=clear
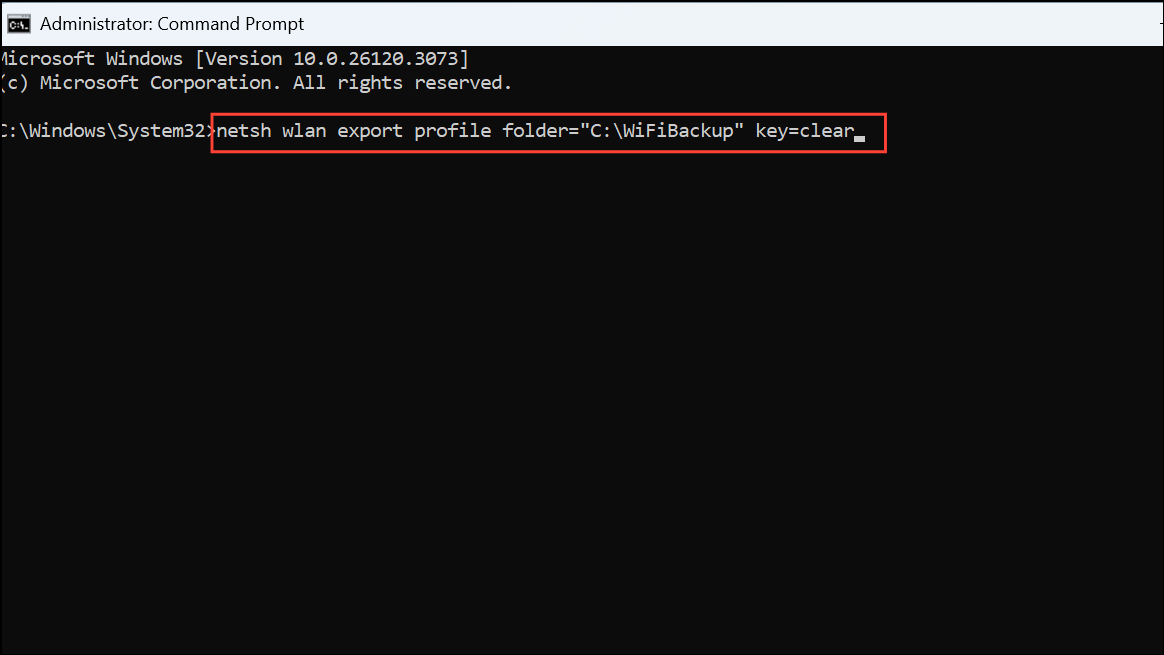
This exports all saved Wi-Fi profiles, including passwords, as XML files to the backup folder.
for %f in ("C:\WiFiBackup\*.xml") do netsh wlan add profile filename="%f"
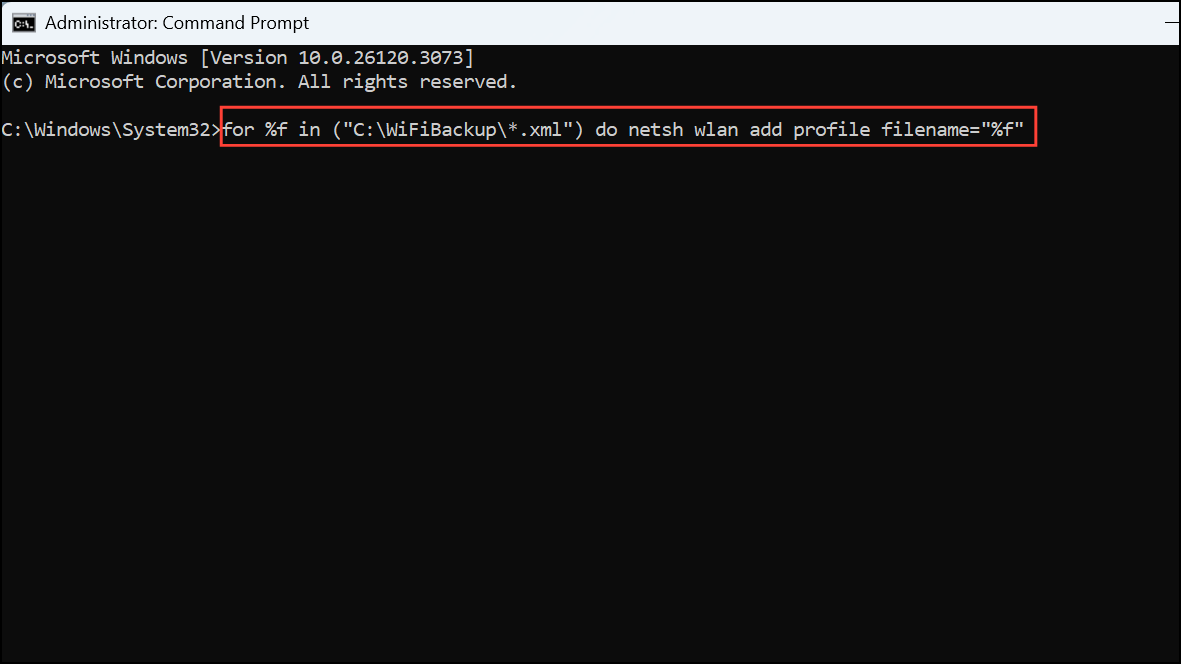
This command imports all saved Wi-Fi profiles back to your system, allowing you to reconnect without re-entering each password.
Resetting network settings on Windows 11 is a reliable way to resolve persistent connectivity problems, restore default configurations, and simplify troubleshooting. Always back up important network profiles before resetting, and be prepared to reapply custom settings after the process completes.