Slayers 2 drops you into a large world with very little direction, and the map is the fastest way to work out where you are and where you are supposed to go next. It is not bound to a keyboard shortcut in an obvious place — it lives behind the mini-map, and clicking it opens a full-screen view with zoom, display filters, fast-travel shrines, and custom waypoints.
Quick answer: Select the mini-map at the screen’s top-right to bring up the full map; that view contains the zoom controls, filters, shrines, and markers.
How to open the full map in Slayers 2
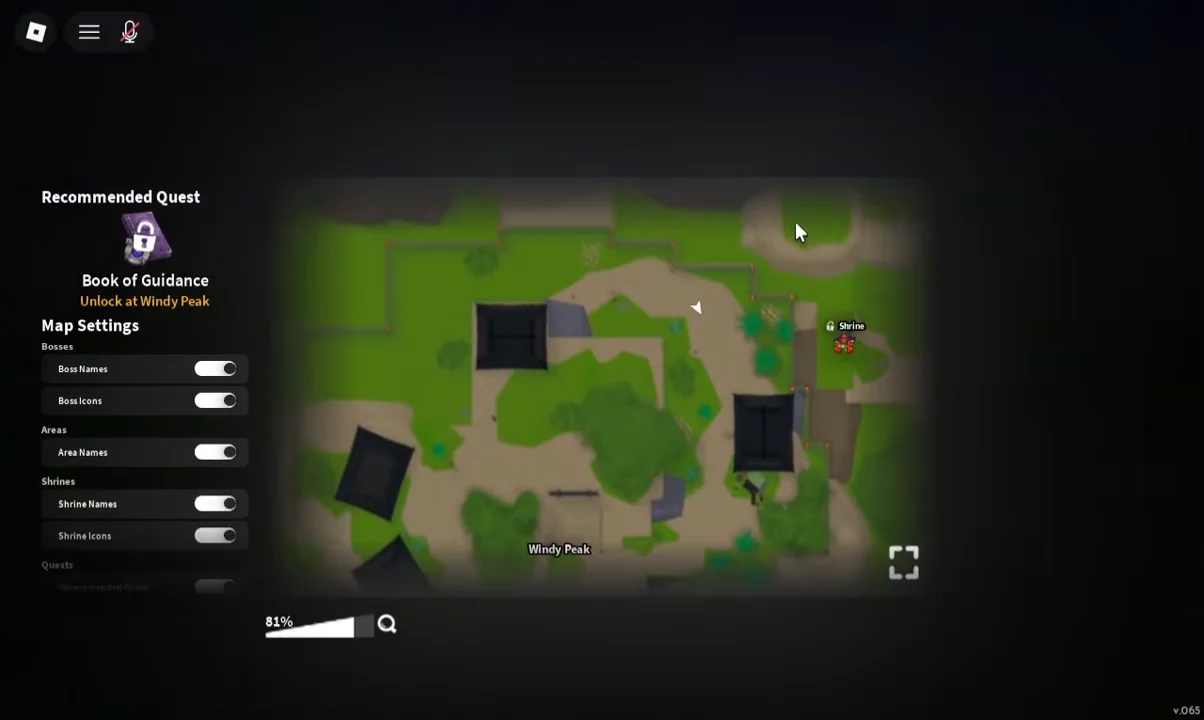
Zoom out to see roads, cities, and unexplored areas
The zoom slider sits at the bottom left of the map screen and runs from 0% to 100%. Dragging it down pulls the view back from your local area to the wider world, exposing the road network between regions, the named cities, and a scattering of question marks.
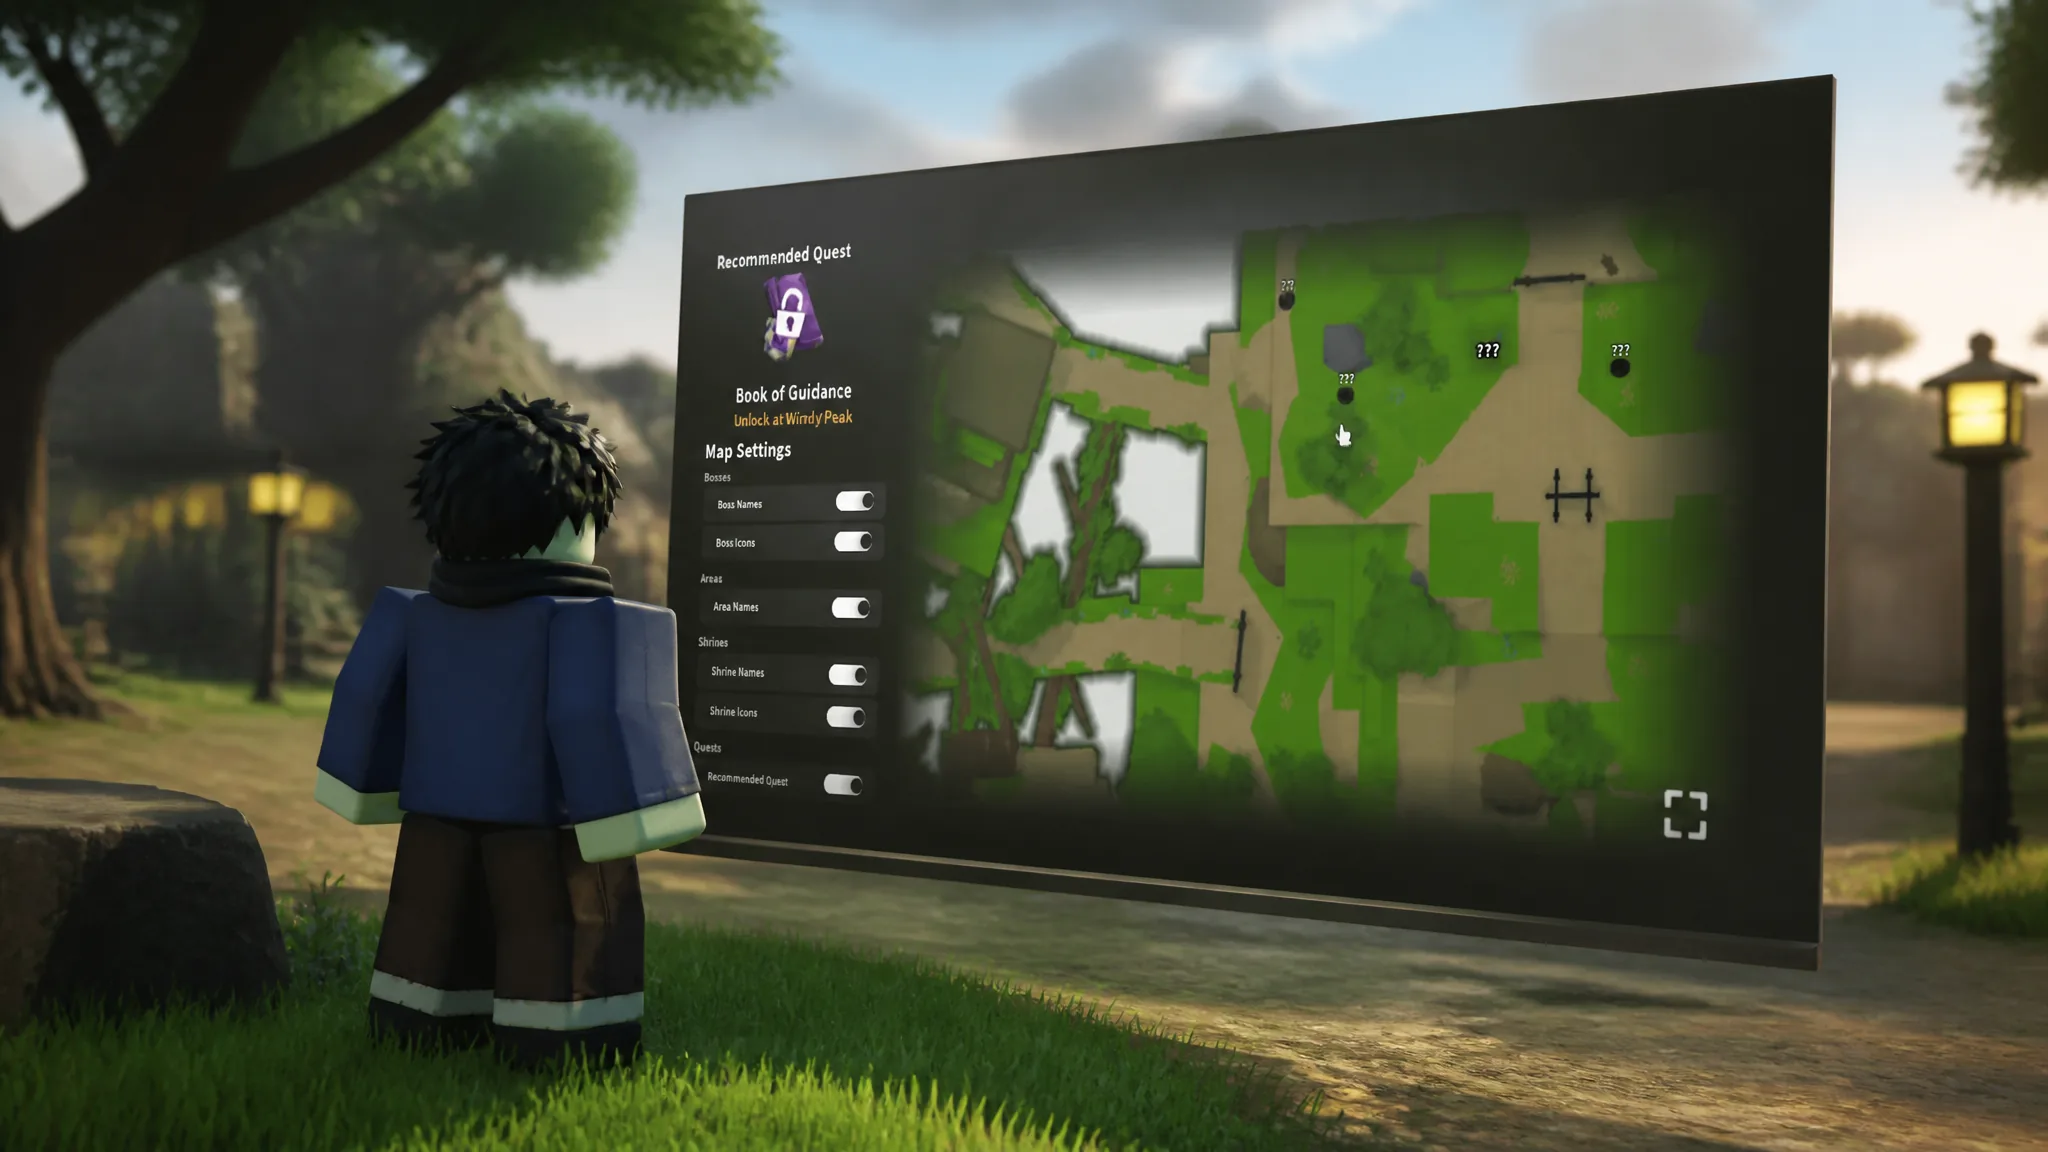
Those ??? entries are points of interest you have not discovered or unlocked yet. They are useful as route planning targets — if a question mark sits along the road you are already walking, it costs almost nothing to detour and reveal it.
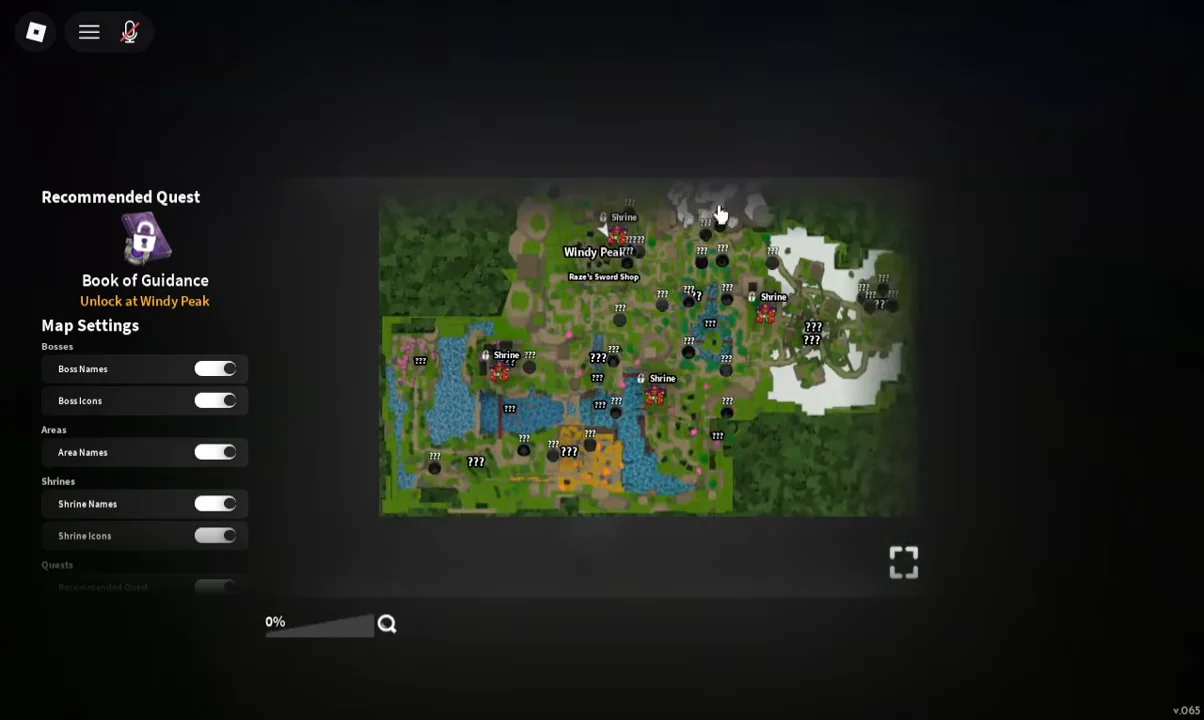
Map settings: filter bosses, areas, and shrines
The left side of the map screen holds the Map Settings panel. Each toggle controls one layer of information, so you can strip the map back to just what you need — shrine icons only when you are planning travel, boss names only when you are hunting drops.
| Toggle | Controls |
|---|---|
| Bosses | Boss markers on the map |
| Boss Names | Text labels for each boss |
| Boss Icons | Boss marker graphics |
| Areas | Region markers |
| Area Names | Text labels for regions |
| Shrines | Shrine markers |
| Shrine Names | Text labels for shrines |
| Shrine Icons | Shrine marker graphics |
There is also a Recommended Quest option tied to the quest section of the map. Turning it on highlights the NPC you should be visiting for your current level, which matters most in the mid-game when quest chains start spreading across multiple regions. The Book of Guidance, obtained from the Recover the Lost Pages quest, performs the same job of pointing you at your next progression step.
Unlock shrines for fast travel with Wen
Shrines are the fast-travel network, and they are bought rather than discovered. Click a shrine icon on the map and a confirmation window appears — unlocking the Bamboo Grove Shrine, for example, prompts with 10,000 Wen. Confirm the purchase and that shrine becomes a permanent travel destination.
Several regions have their own shrine, including Hidden Mist, Misfall, the Butterfly Estate, and the snow region. Buying them early is the single biggest time saver in the game, since almost every quest chain asks you to walk back to a hub you have already visited.
Unlock the shrine nearest to a farming area before you start a long grind session, not after. It shortens every return trip and every run back after a defeat.
Place a custom marker on the map
Clicking anywhere on the map that is not an icon brings up a Place a marker here? prompt. Confirm it and that spot becomes a waypoint you can navigate toward, which is the practical way to track a trainer, a chest location, or an NPC the game has not given you a quest arrow for.
Markers pair well with the distance indicators that appear in the world. Numbers such as 111m or 439m float above nearby targets and count down as you approach, so a marker plus a distance readout is usually enough to find an unmarked location without wandering.
How to confirm the map is working
- The map opened correctly if the full-screen view appears with your current area named at your position.
- A toggle is working if the matching labels or icons disappear from and reappear on the map immediately.
- A shrine unlocked if the Wen prompt closes after you confirm and the shrine becomes selectable as a travel destination.
- A marker was placed if the waypoint stays visible on the map after you close and reopen the screen.
Once you have the mini-map click committed to muscle memory, the map stops being a menu you check occasionally and becomes the main routing tool. Filter it down to shrines while you are travelling, switch to bosses when you are farming, and buy shrine access as soon as you can afford it.