
Windows 11 automatically installs drivers for connected devices to ensure hardware functions properly. However, automatic driver installations can sometimes introduce incompatible or buggy drivers, causing device malfunctions or system instability. Disabling this feature allows you to manually manage driver installations, ensuring you use versions that best suit your needs and avoid unexpected issues.
Disable Automatic Driver Installation Using Settings
Step 1: Press Windows + i to open the Settings app. In the left sidebar, click System.
Step 2: Scroll down on the right panel and select About.
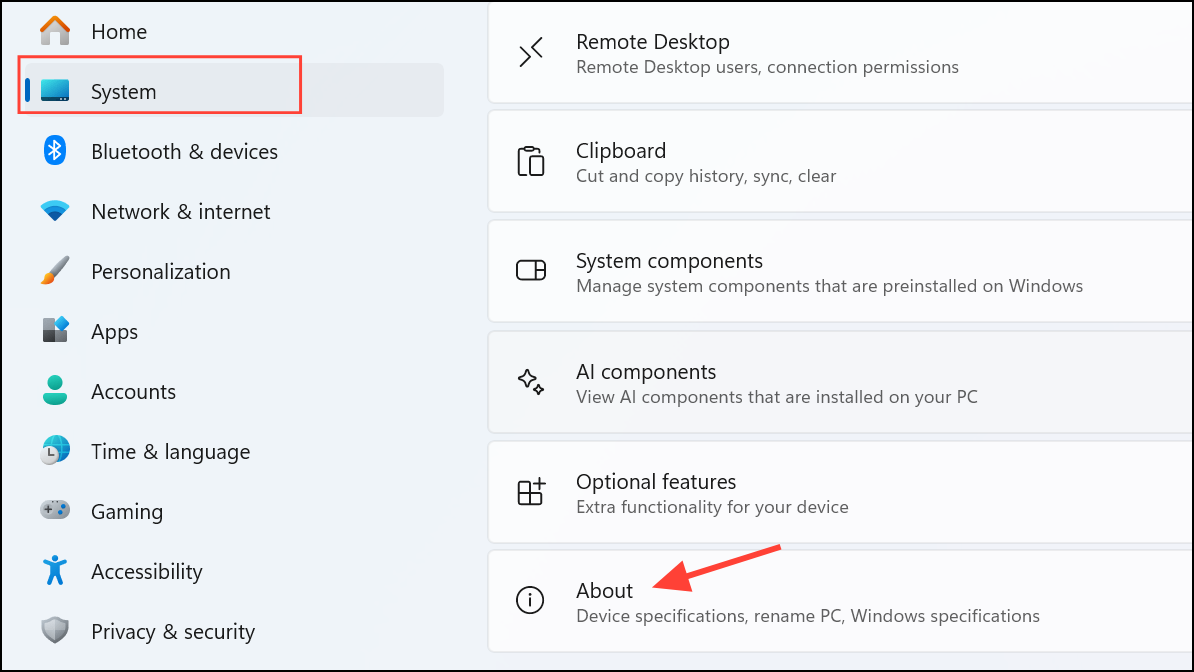
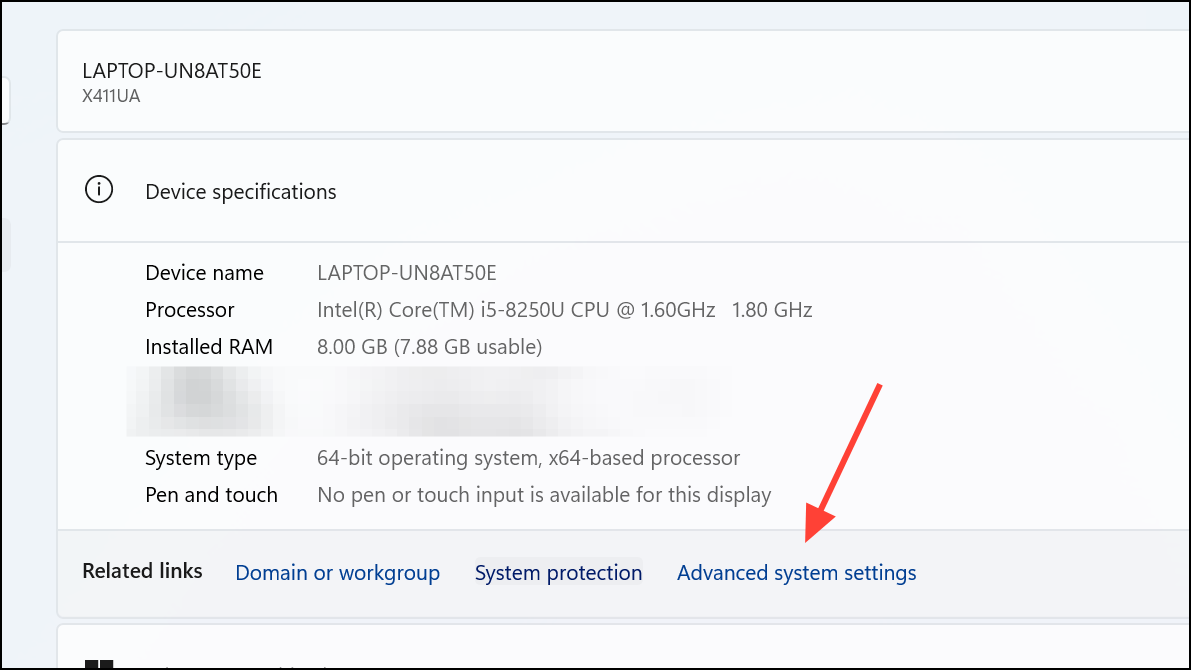
Step 3: Under the “Device specifications” section, click on Advanced system settings. This action opens the System Properties window.
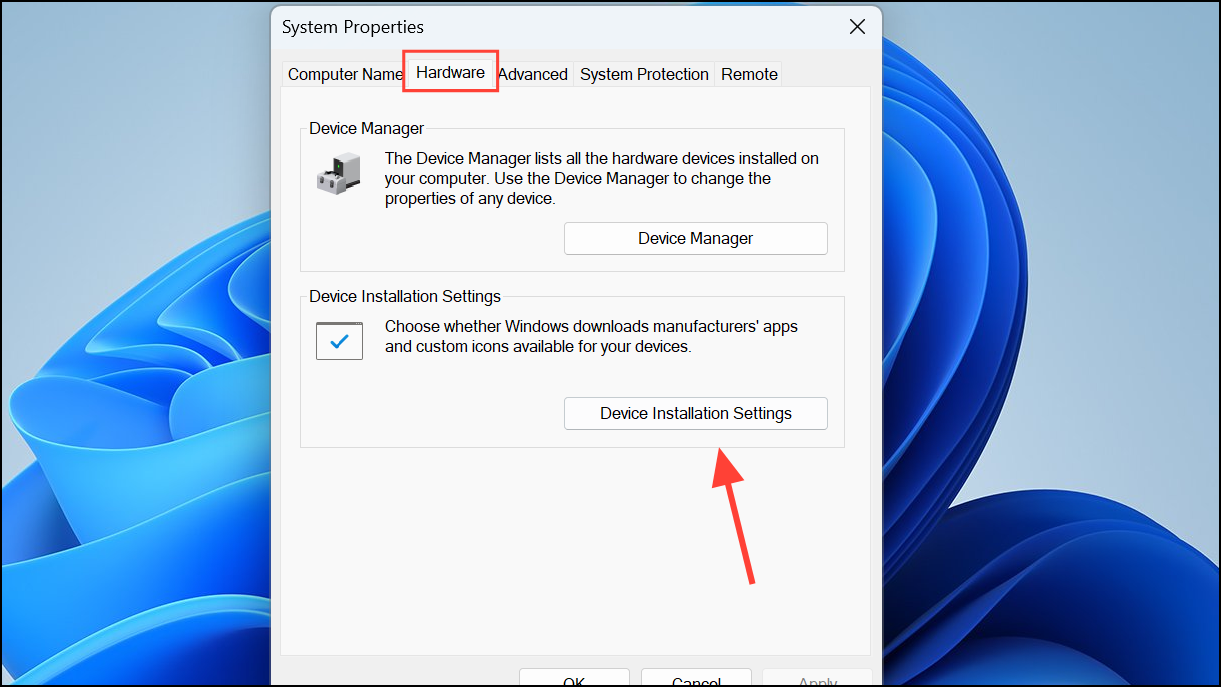
Step 4: In the System Properties window, switch to the Hardware tab.
Step 5: Click the Device Installation Settings button. A prompt will appear asking if you want Windows to automatically download driver software and realistic icons for your devices.
Step 6: Select No (Your device might not work as expected) to prevent Windows from automatically installing drivers.
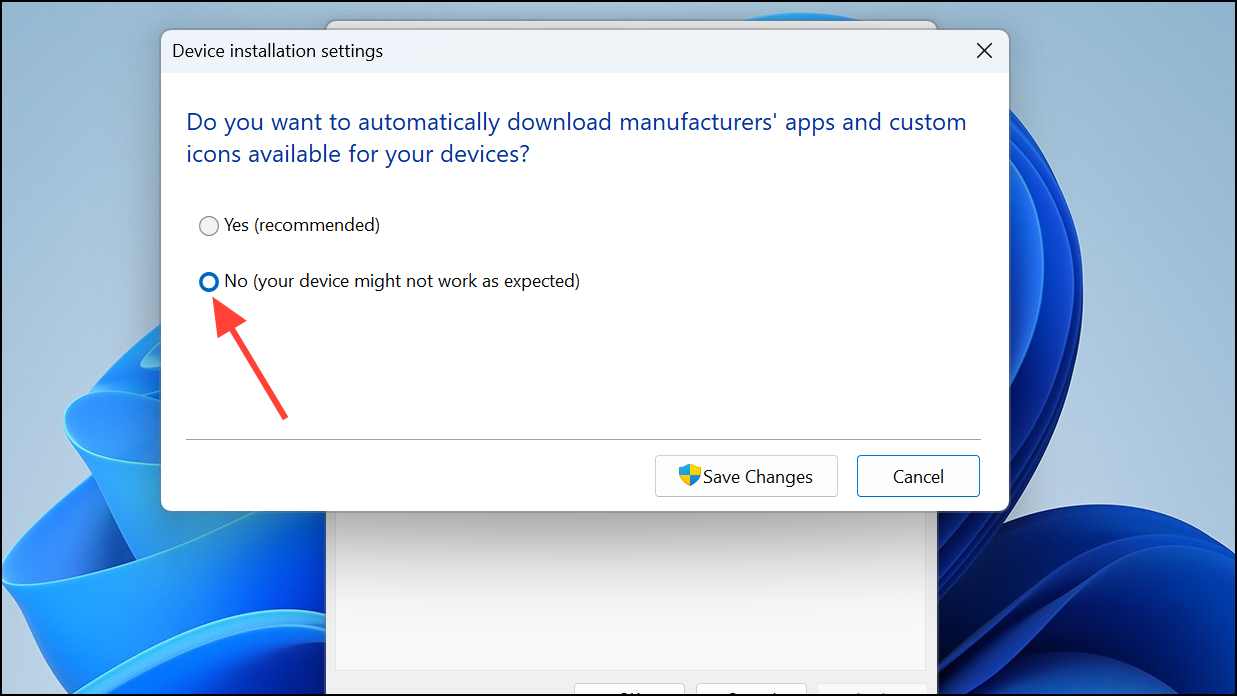
Step 7: Click Save Changes and then OK to apply the settings.
This method stops Windows 11 from automatically downloading and installing drivers for new devices. You will need to manually install drivers when connecting new hardware.
Prevent Automatic Driver Updates Using Local Group Policy Editor
This method provides more control over driver updates but is available only on Windows 11 Pro, Enterprise, and Education editions.
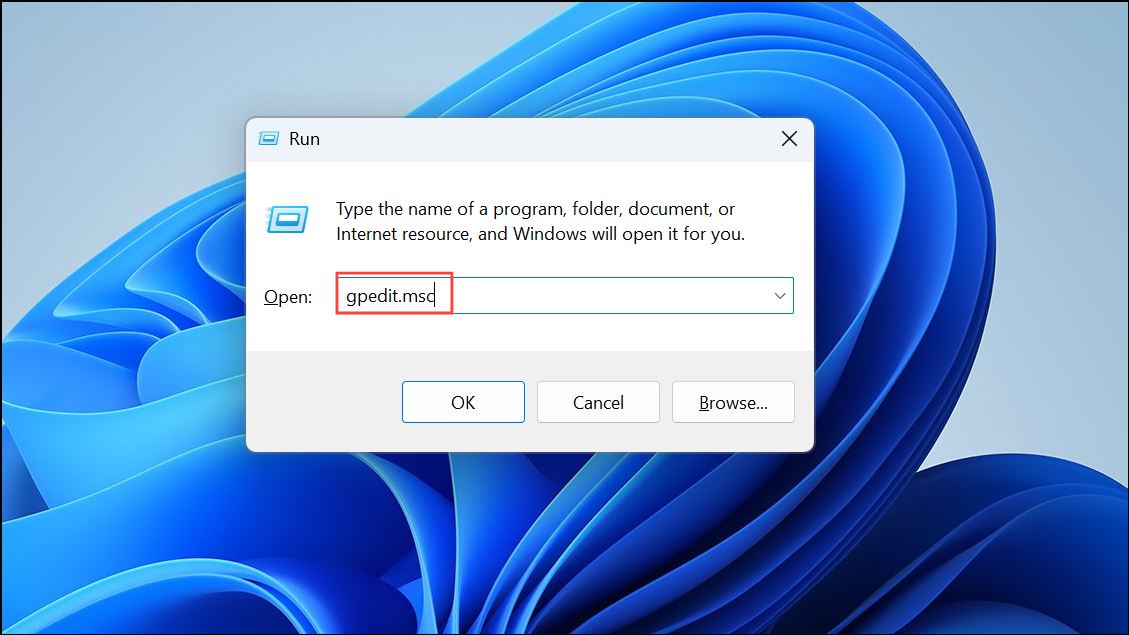
Step 1: Press Windows + R to open the Run dialog box. Type gpedit.msc and press Enter to launch the Local Group Policy Editor.
Step 2: In the left pane, navigate to:
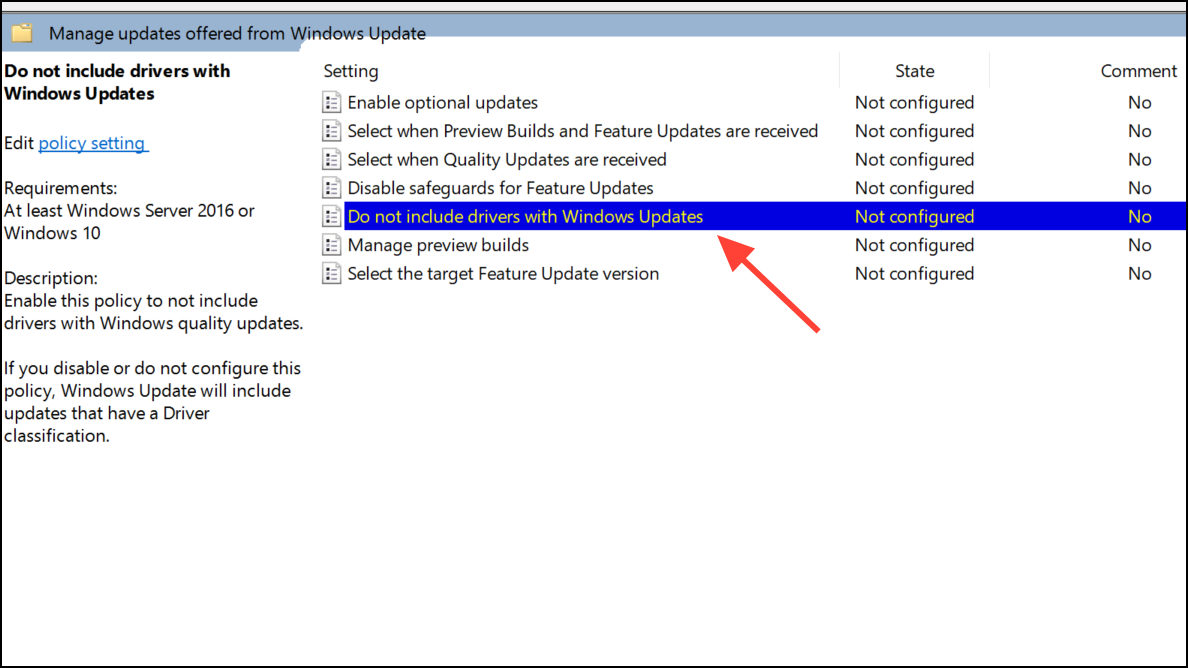
Computer Configuration > Administrative Templates > Windows Components > Windows Update > Manage updates offered from Windows Update

Step 3: In the right pane, locate and double-click the policy named Do not include drivers with Windows Update.
Step 4: Select the Enabled option. This setting instructs Windows Update to exclude driver updates during system updates.
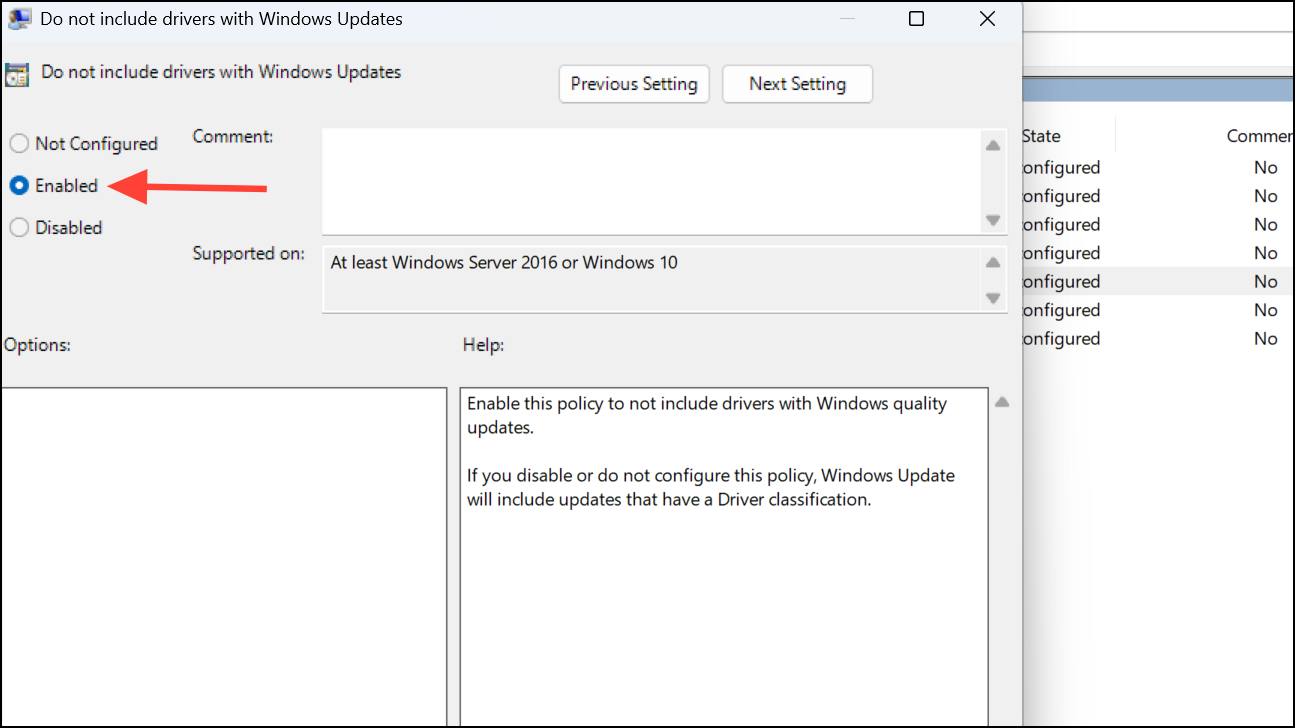
Step 5: Click Apply and then OK to save the changes.
After completing these steps, Windows Update will no longer install driver updates automatically. You can revert this setting by selecting Not Configured and applying the changes.
Disable Automatic Driver Installation via Registry Editor
This method is suitable for Windows 11 Home users or those who prefer using the Registry Editor. Modifying the registry requires caution, as incorrect changes can affect system stability. Always back up your registry before proceeding.
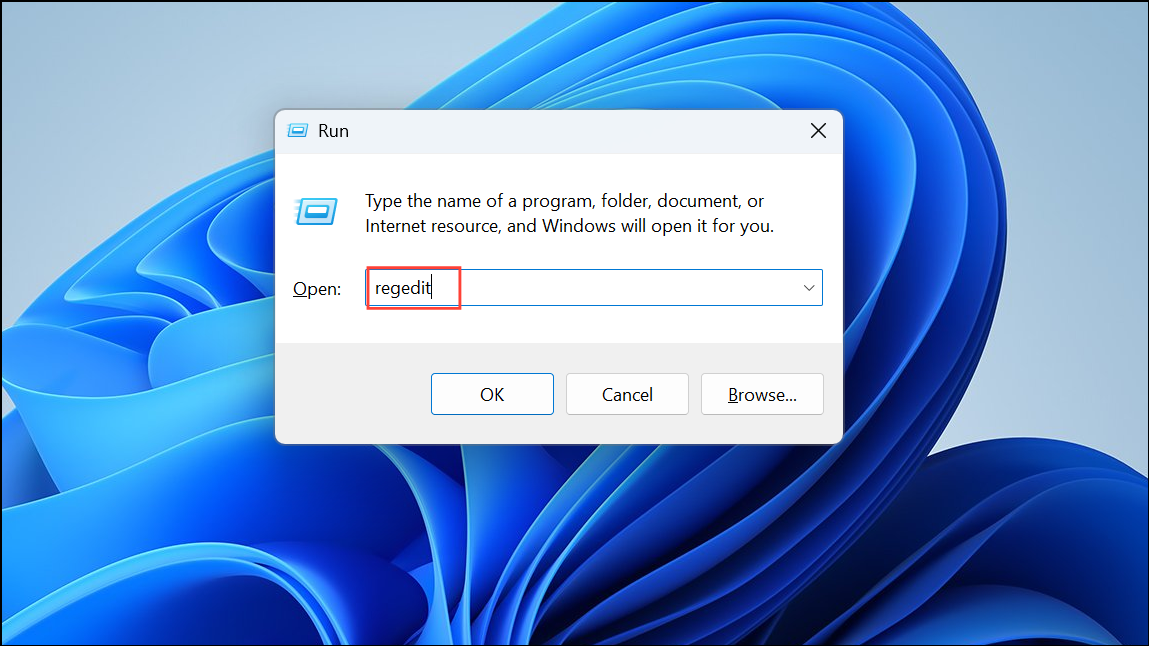
Step 1: Press Windows + R to open the Run dialog. Type regedit and press Enter to open the Registry Editor. If prompted by User Account Control, select Yes.
Step 2: In Registry Editor, navigate to the following path:
HKEY_LOCAL_MACHINE\SOFTWARE\Microsoft\Windows\CurrentVersion\DriverSearching
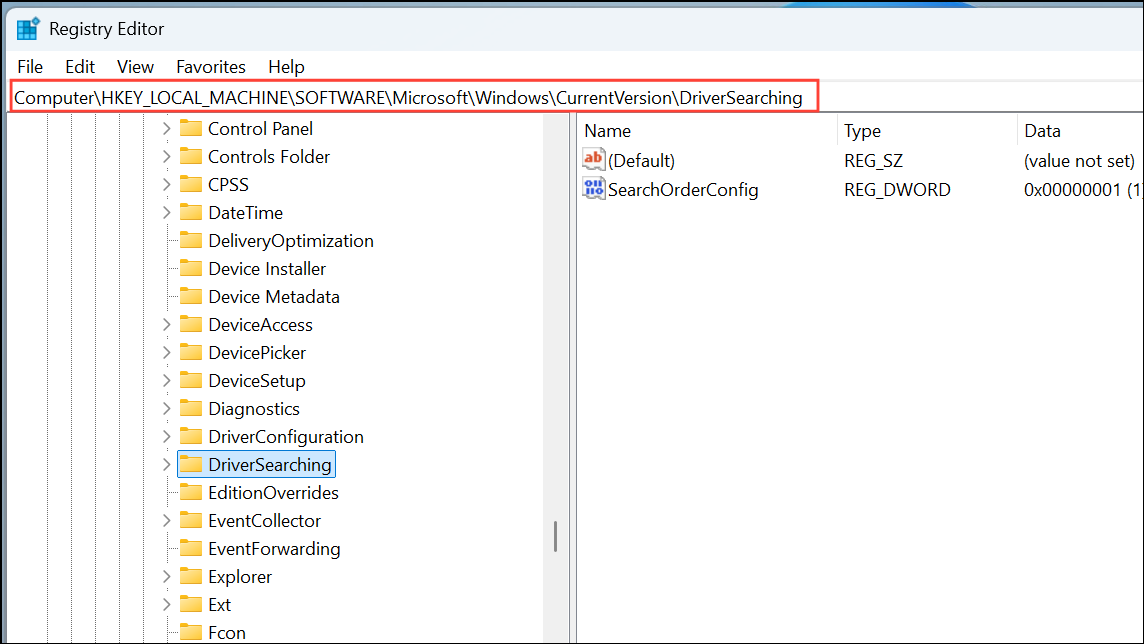
Step 3: In the right pane, locate the DWORD value named SearchOrderConfig. If it does not exist, create it by right-clicking in the right pane, selecting New > DWORD (32-bit) Value, and naming it SearchOrderConfig.
Step 4: Double-click SearchOrderConfig and change its value data from 1 to 0. Click OK to save.
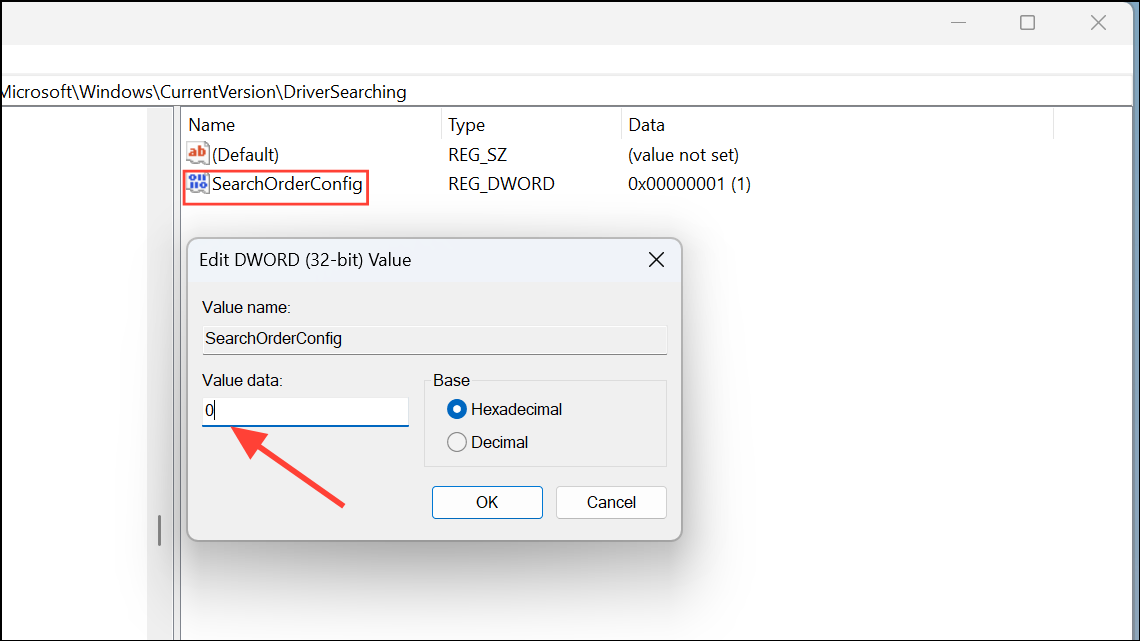
Step 5: Close Registry Editor and restart your computer to apply the changes.
This change prevents Windows 11 from searching for and installing device drivers automatically during updates. To restore automatic driver installations, set the SearchOrderConfig value back to 1 and restart your PC.
Disabling automatic driver installations requires you to manually manage driver updates to maintain device functionality and security. Regularly check your device manufacturer's website for the latest driver versions and create system restore points before making significant changes to your system. This approach helps avoid conflicts caused by incompatible or buggy drivers and gives you full control over your hardware's performance.