The $GetCurrent folder is a hidden folder that sits in the root of your C:\ drive after a Windows upgrade. It holds log files and, in many cases, leftover installation files from the most recent update. On a tidy system it stays small, but if setup files are still hanging around it can balloon to roughly 3.5GB or more, which is usually why people notice it in the first place.
What the $GetCurrent folder is in Windows 11 and 10
Windows creates $GetCurrent during the upgrade process. Inside you’ll typically find subfolders such as Logs, media, and SafeOS, which store records of how the last update ran along with the files used to install it. The folder is harmless and does not interfere with any other process on your PC.
The reason it grows is the leftover installation data. Once an upgrade finishes, those setup files are no longer needed, but they don’t always get cleaned out right away. Windows is supposed to remove this kind of update leftover automatically within 30 days, though in practice the folder often lingers well past that window.

Is it safe to delete the $GetCurrent folder?
Yes, as long as your latest Windows Update has finished installing and you don’t need the log files. Deleting it won’t harm your system or stop it from working. There is one trade-off worth knowing: once the folder is gone, it can’t be used for a rollback. So make sure Windows is running well before you remove it.
Two quick checks confirm it’s safe to delete:
| Check | What to look for |
|---|---|
| File dates | Open the folder and look at the Date modified field. If the files are older than about a month (often 6–12 months), the upgrade is long finished. |
| Log result | In the Logs subfolder, open PartnerSetupCompleteResult.log. It should read that the operation completed successfully. |
| Update status | Open Windows Update settings and confirm there are no pending or in-progress updates. |
If you’re not desperate for the space, there’s no harm in leaving the folder alone. But if it’s well past the 30-day mark and still taking up room, you can clear it yourself.
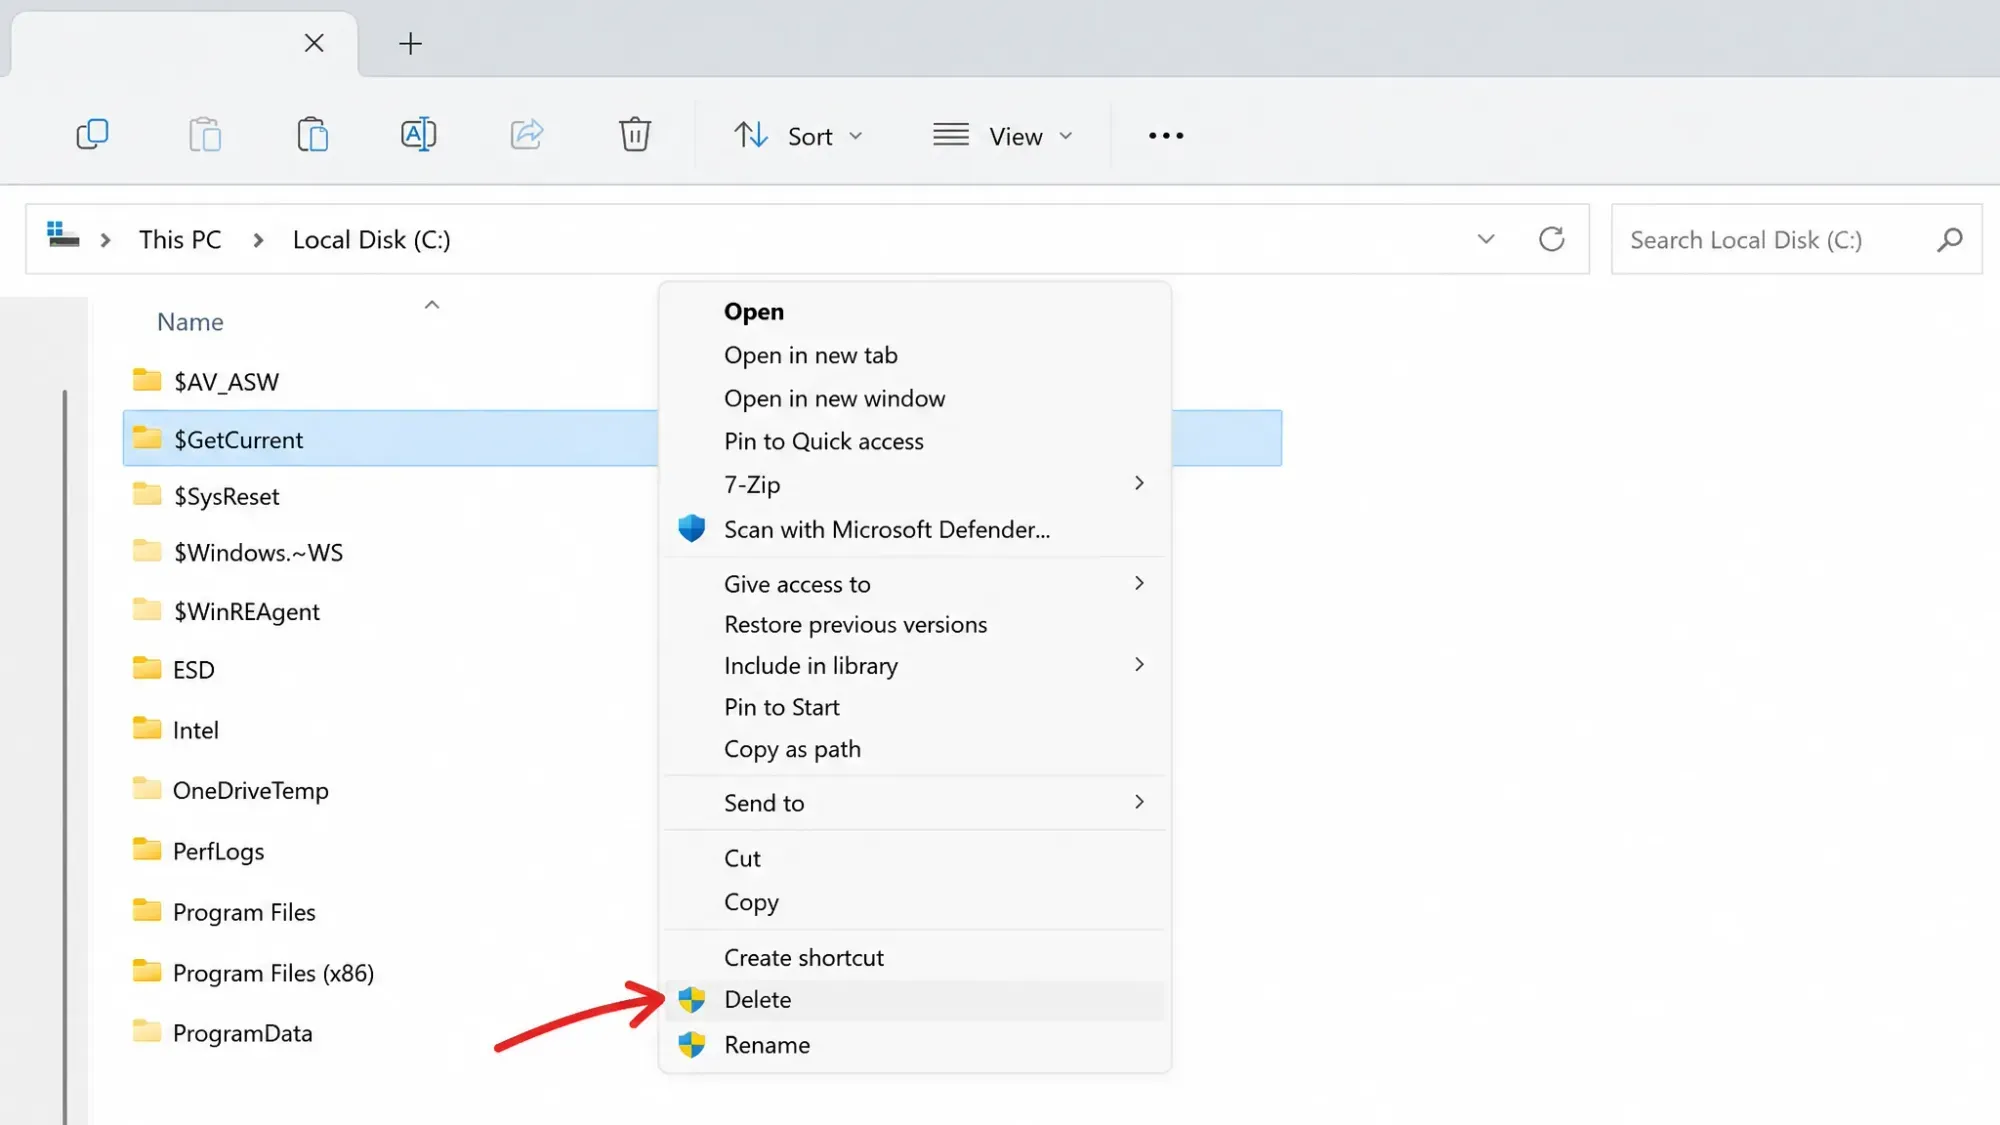
Delete the $GetCurrent folder using File Explorer
The folder is hidden by default, so you’ll need to reveal it first.
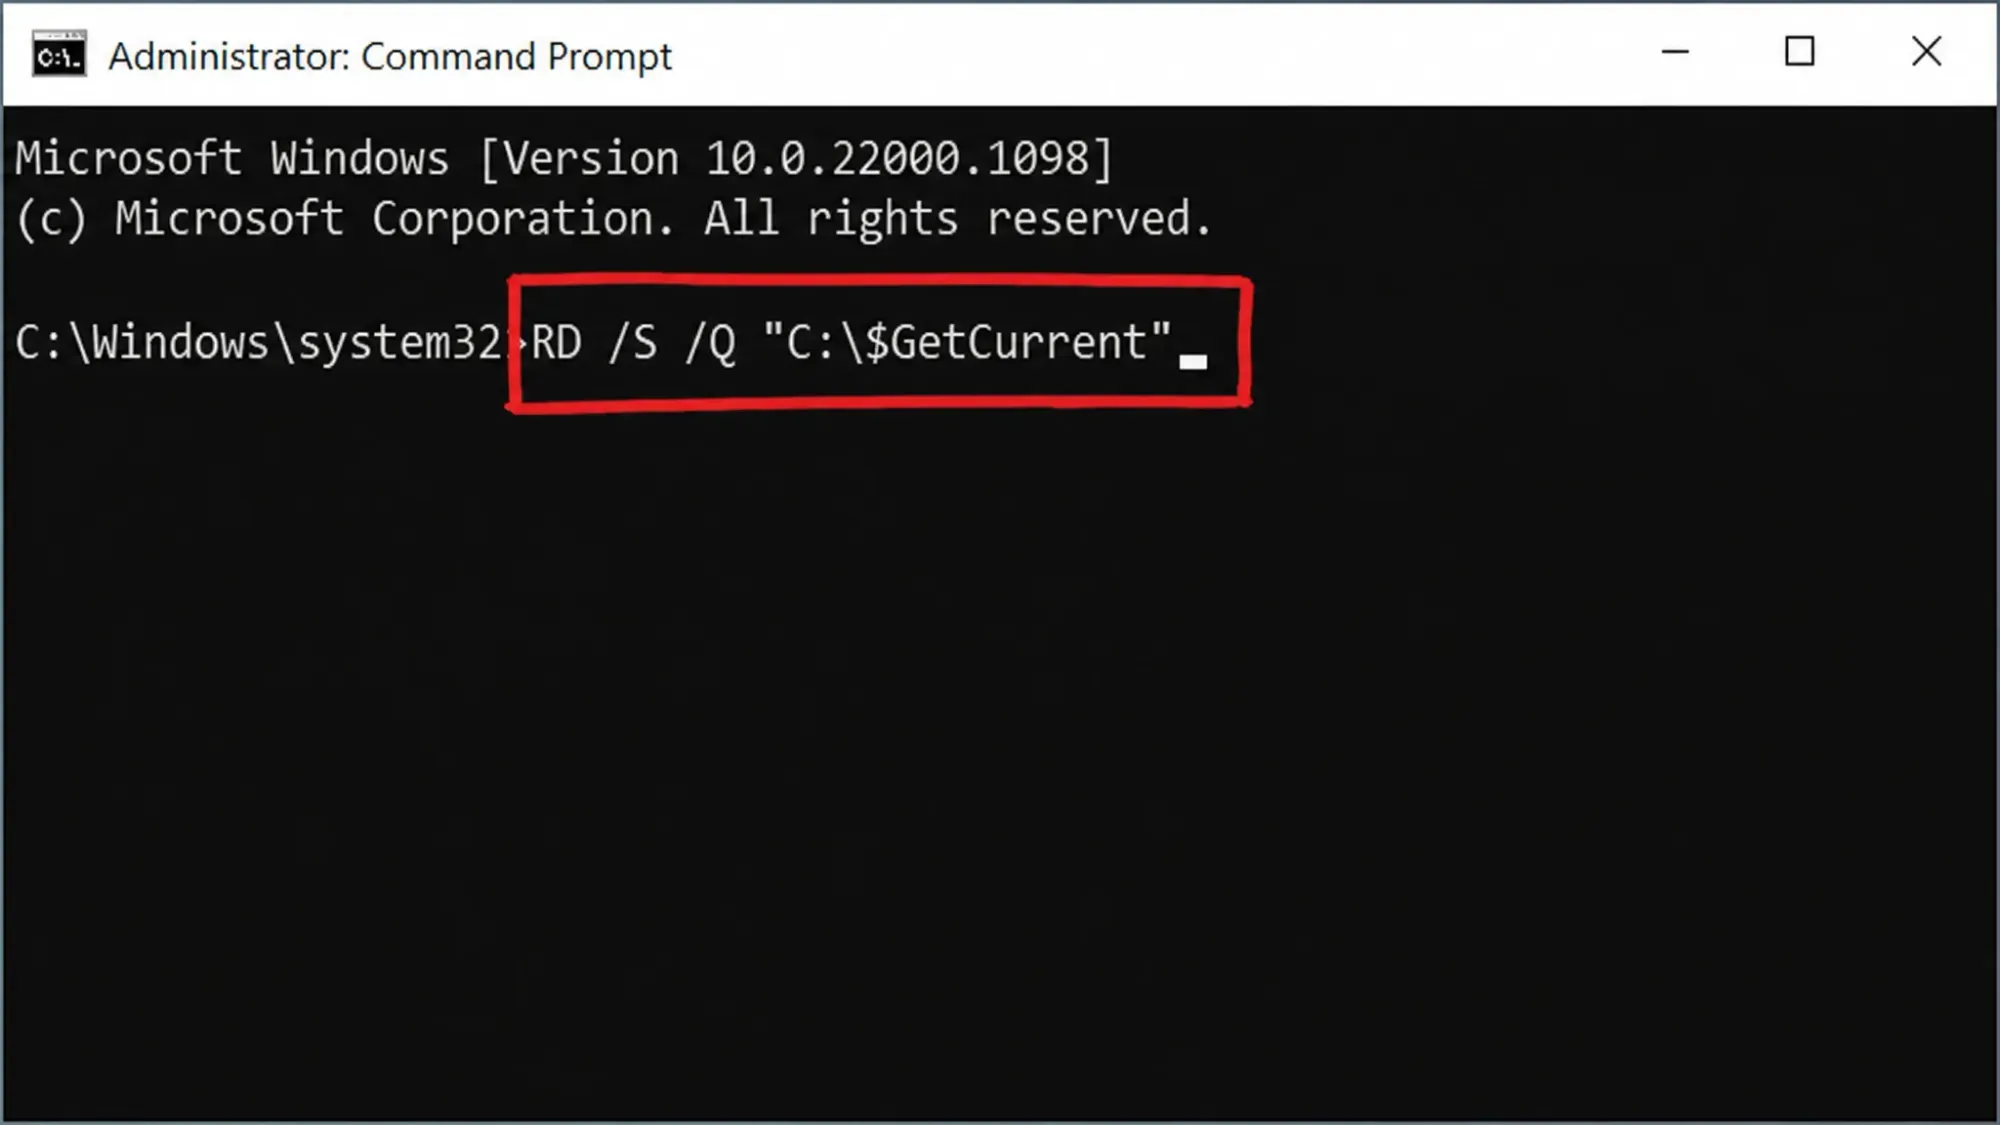
Delete the $GetCurrent folder using Command Prompt
If you prefer the command line, this removes the folder and its contents in one go without sending it to the Recycle Bin.
RD /S /Q "C:\$GetCurrent"
What to do if the $GetCurrent folder won’t delete
If the space doesn’t come back after deleting, look in the Recycle Bin first, since File Explorer deletions land there until you empty it. If the folder refuses to delete entirely, that almost always means an update is still pending.
To clear that blocker, finish installing the outstanding update or remove any pending updates from Windows Update settings, then try again. Rebooting after clearing a stuck update often frees the folder. Deleting from Safe Mode is another fallback if the folder is locked. Even if Windows later needs those files for an update, it will simply download them again.
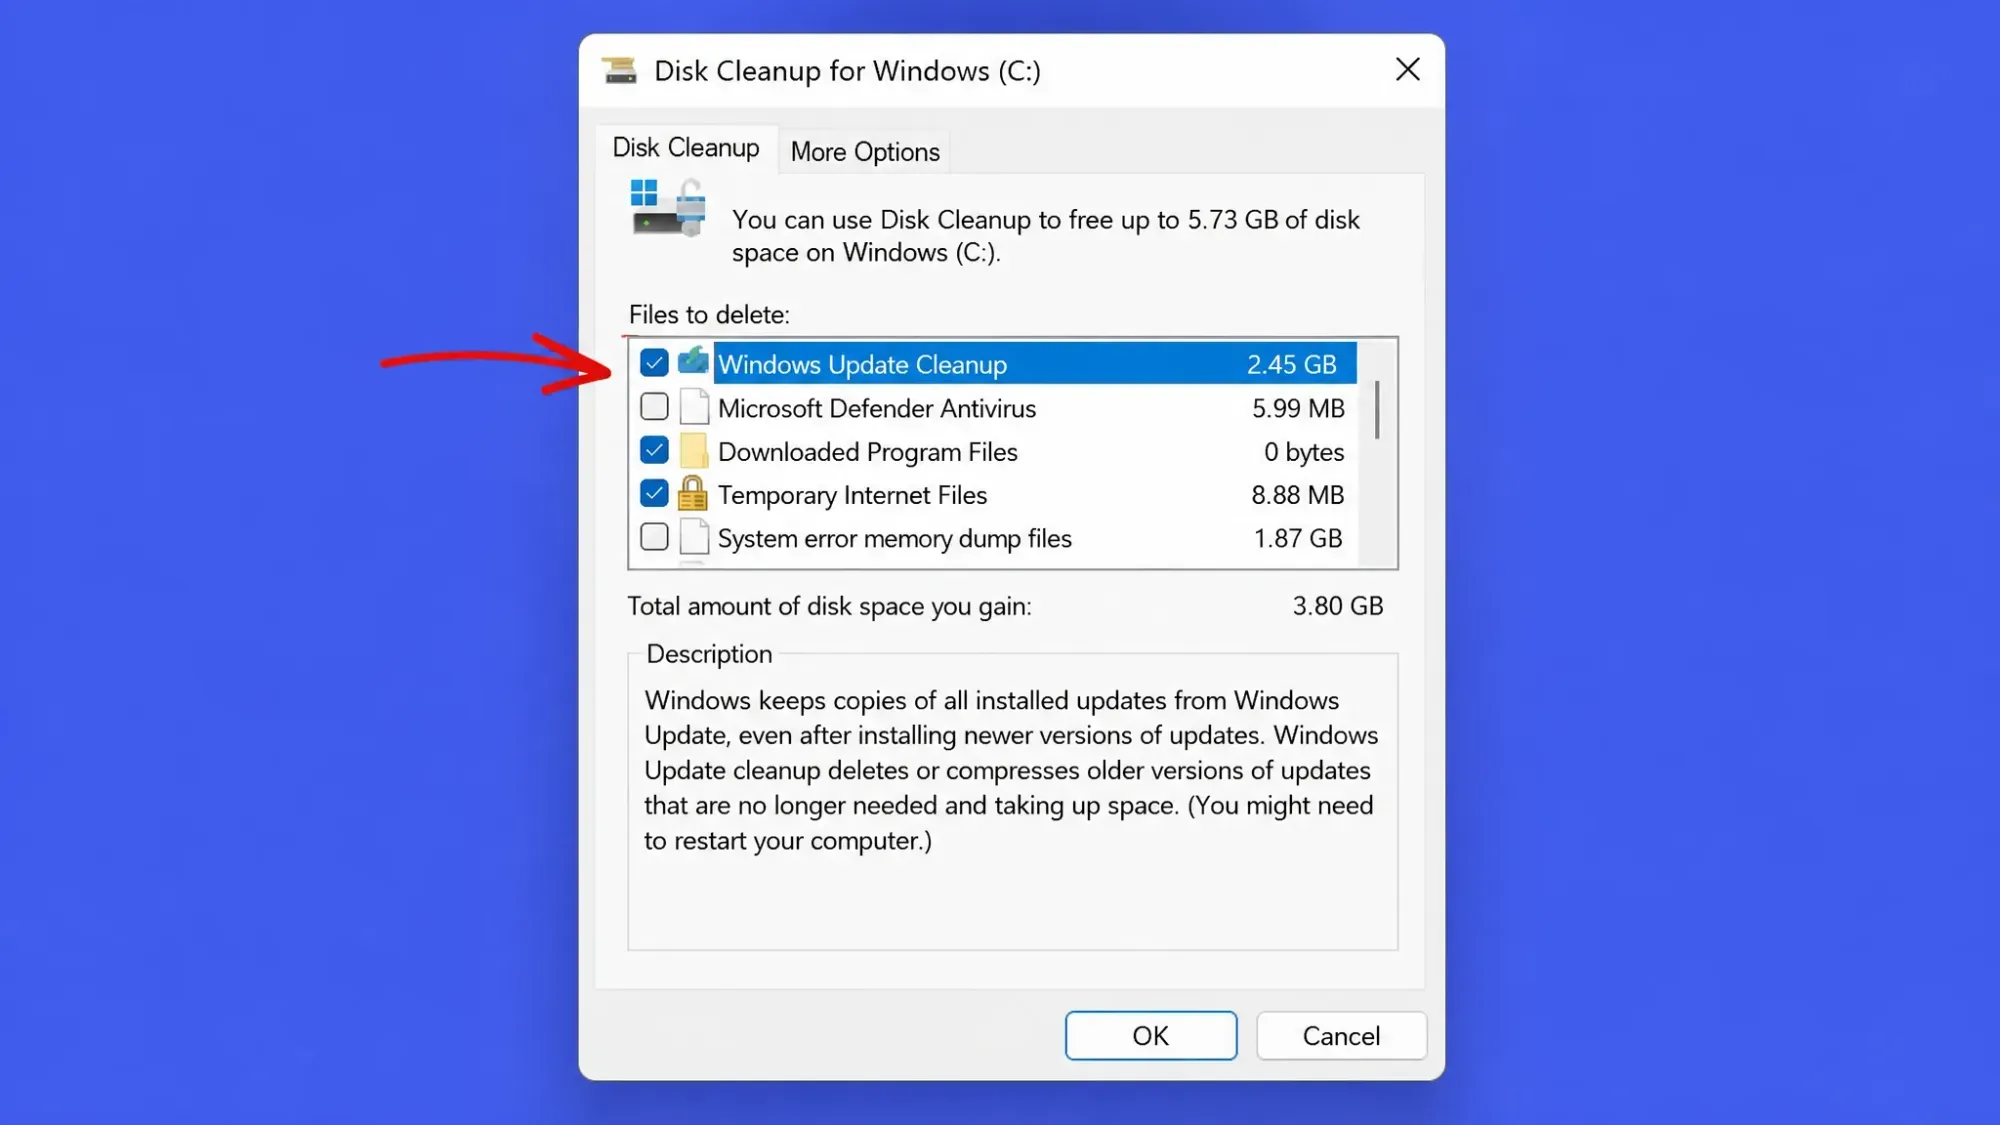
Remove other Windows update leftovers with Disk Cleanup
The $GetCurrent folder isn’t the only upgrade leftover that builds up. You may also see $WINDOWS.~BT and $WINDOWS.~WS folders in your C:\ drive, and these usually take up far more space. Disk Cleanup handles these well.
Win + R to open Run, then enter the command below, replacing [Drive Name] with the drive you want to clean.
c:\windows\SYSTEM32\cleanmgr.exe /d[Drive Name]
To automate repeat cleanups, Disk Cleanup also accepts command-line switches.
| Switch | What it does |
|---|---|
| /d <driveletter> | Selects the drive to clean. Can’t be combined with /sagerun:n. |
| /sageset:n | Opens a dialog to choose which cleanup tasks to run and saves them to a registry key. Set n to any value from 0 to 65535. |
| /sagerun:n | Runs the tasks saved under that /sageset profile across all drives. |
Storage Sense is another built-in option. It won’t delete Windows update files directly, but it can clear temporary files and the Recycle Bin, which may include items like the $GetCurrent folder. Open Settings > System > Storage, turn on Storage Sense, then use Configure Storage Sense and Clean now to run it.
Bottom line: , the $GetCurrent folder is a leftover from the upgrade process, not something Windows needs day to day. Once your latest update is installed and there are no pending downloads, clearing it frees several gigabytes with no effect on how your PC runs, just remember you give up the rollback files in exchange for the space.