
Windows 11 requires a system disk using the GPT (GUID Partition Table) partition style and Secure Boot enabled, but many Windows 10 installations run on the older MBR (Master Boot Record) format. Attempting to upgrade directly will result in compatibility errors and block the installation. Migrating from MBR to GPT and then upgrading to Windows 11 lets you take advantage of the new operating system’s features without losing your data or reinstalling your applications.
Upgrade Using MBR2GPT and Windows 11 Installation Assistant
This method uses Microsoft’s built-in MBR2GPT tool to convert your disk partition style in-place, then upgrades your system to Windows 11. It preserves your files and applications, but you should always back up critical data before making partition changes.
Step 1: Back up your important files and create a system restore point. Although this process is designed to keep your data, disk operations always carry some risk. Use Windows Backup, OneDrive, or copy files to an external drive.
Step 2: Check if your hardware supports Windows 11. Open Settings > Update & Security > Windows Update and review the PC Health Check tool results. Verify that Secure Boot and TPM 2.0 are available in your UEFI firmware.
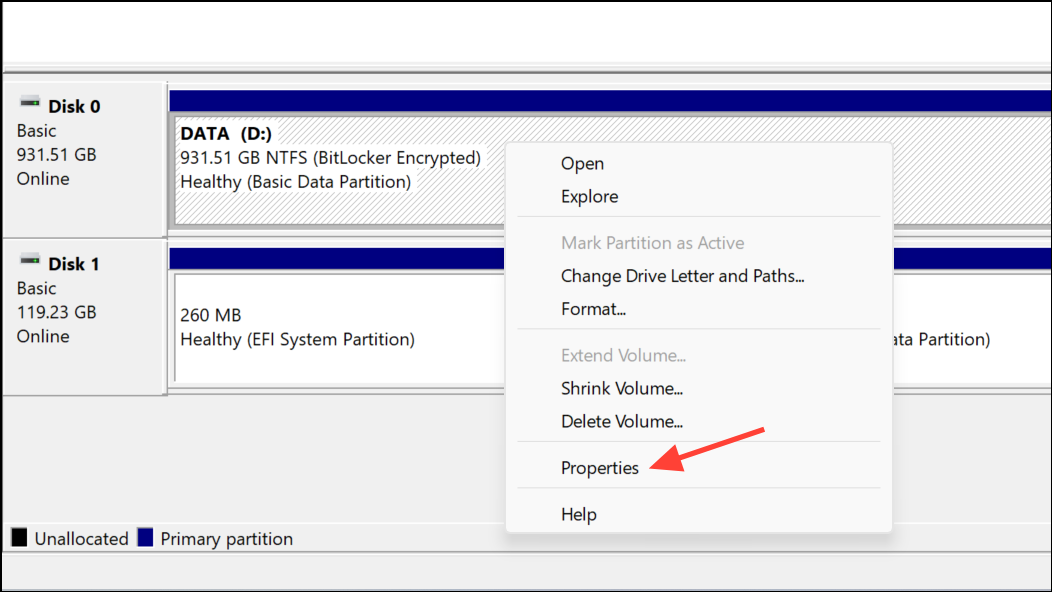
Step 3: Confirm your disk is MBR. Press Win + X and select Disk Management. Right-click your system disk, choose Properties, and check the Volumes tab for "Partition style."
Step 4: Open Command Prompt as Administrator. Press Win + S, type cmd, right-click Command Prompt, and select Run as administrator.
Step 5: Run the MBR2GPT tool to validate the disk. Enter:
mbr2gpt /validate /allowFullOS
This checks if your disk is eligible for conversion without making changes.
Step 6: If validation is successful, convert the disk by running:
mbr2gpt /convert /allowFullOS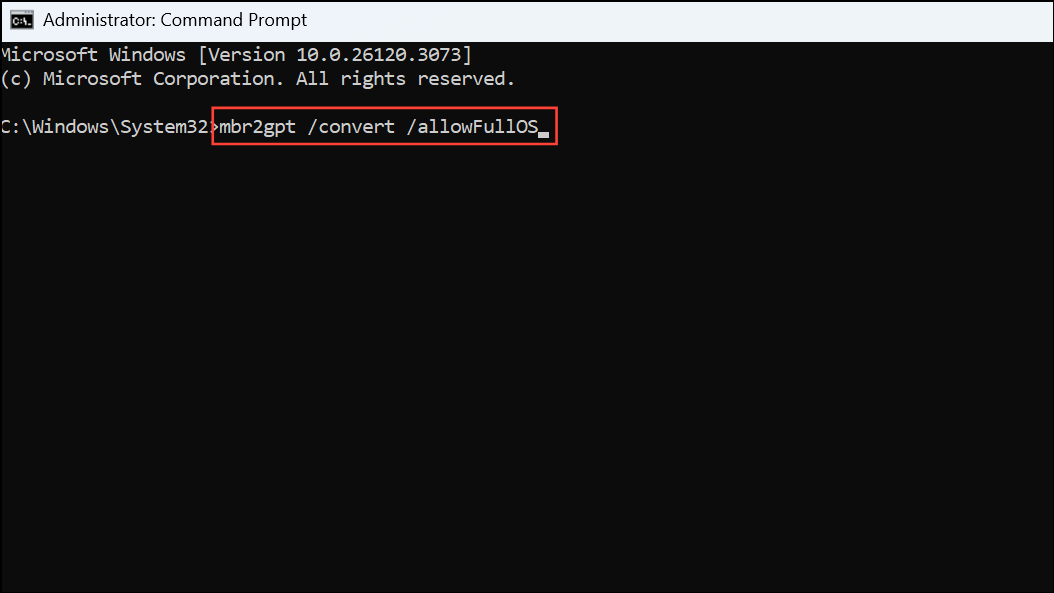
This command converts your system disk from MBR to GPT. Wait for the process to finish.
Step 7: Restart your PC and enter your motherboard’s UEFI/BIOS settings (usually by pressing Del, F2, or Esc during boot). Switch the firmware mode from Legacy/CSM to UEFI. Also, enable Secure Boot if it’s not already active.
Step 8: Boot into Windows 10. Download and run the Windows 11 Installation Assistant from Microsoft’s official website. Follow the prompts to begin the upgrade. The installer will now detect a compatible GPT disk and proceed without blocking the installation.
Step 9: Complete the Windows 11 setup. Your files and applications should remain in place. After setup, review your system settings and reconfigure any preferences as needed.
Alternative Method: Clean Install with Data Backup
If the MBR2GPT tool fails or if your system is not eligible for in-place conversion, you can perform a clean installation of Windows 11 after backing up your data. This method erases all applications and settings, so it’s less convenient but ensures a fresh start.
Step 1: Back up your files to an external drive, network location, or cloud storage. Make a list of installed applications and note any product keys you’ll need for reinstallation.
Step 2: Create a Windows 11 bootable USB drive using the Media Creation Tool from Microsoft’s website. Insert the USB drive into your PC.
Step 3: Restart your computer and enter the boot menu (usually F12 or Esc). Select the USB drive to boot from.
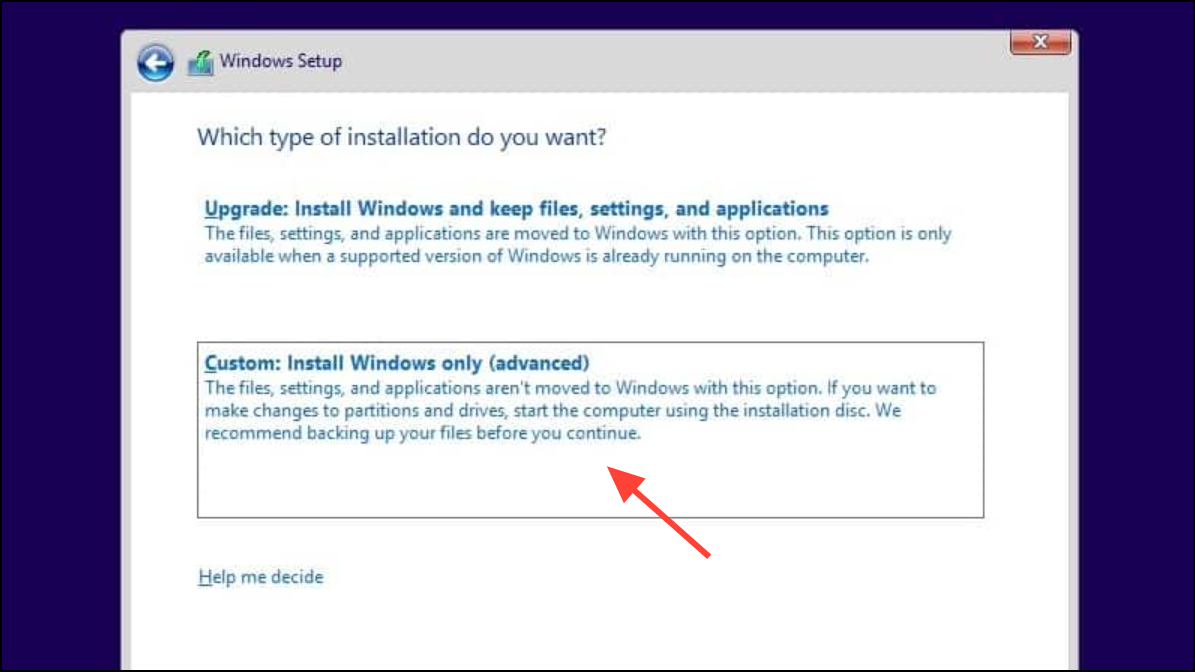
Step 4: During Windows 11 setup, choose Custom: Install Windows only (advanced). On the partition screen, delete all partitions on the system disk, then click New to create a new partition. Windows Setup will automatically use GPT.
Step 5: Complete the Windows 11 installation. After setup, restore your files from backup and reinstall your applications.
Switching from MBR to GPT and upgrading to Windows 11 unlocks new features and improved security, all while keeping your data safe if you follow the right process. Always back up your files before making system changes, and enjoy the benefits of your updated system.