
Microsoft Teams is one of the forerunners in the Workstream Collaboration ecosystem. Plenty of organizations and institutes use it to work and teach remotely. But when you’re attending video meetings and classes, things can get pretty boring, even embarrassing sometimes.
That’s where visual effects come in. A virtual background or visual effect can come handy in a lot of different situations. Whether you want something funny to break the ice and flush out the boredom, you want to hide your messy background, or you just can’t do without a good filter, there’s something for everyone. Let’s dive right in!
Using Background Effects in Microsoft Teams
Being able to blur or replace your background is one of the highly in-demand features in the world of video conferencing apps. Whether your background is messy, or it’s too much of a distraction for the meeting, these background effect features can always help you.
Microsoft Teams has a ‘Background effects’ feature that lets you change your background. It doesn’t require a green screen or advanced system requirements. All you need is the Microsoft Teams desktop app to use background effects.
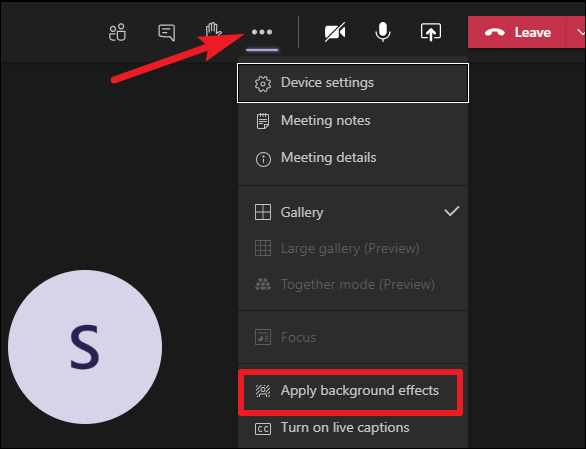
Just go to the meeting toolbar in the meeting window and click on the ‘More actions’ icon (three dots). Then, select ‘Apply Background effects’ from the menu.
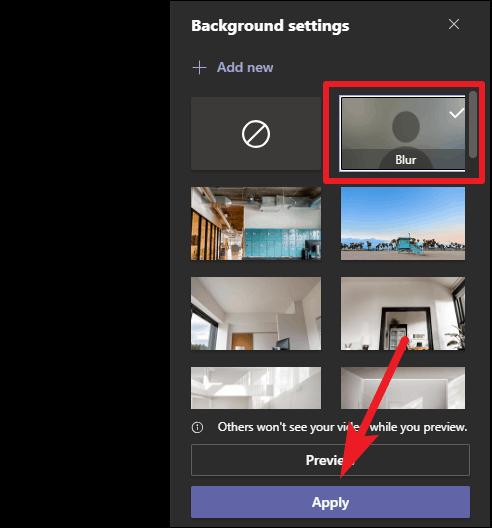
The background settings panel will open on the right side of the meeting window.
To blur your background, select the tile for ‘Blur’ from the options, and click on the ‘Apply’ button.
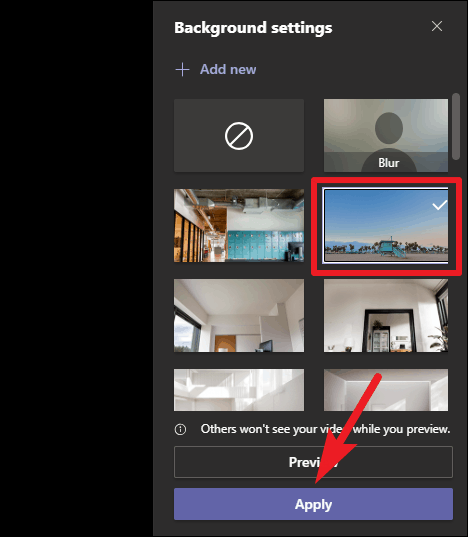
The background effects feature in Microsoft Teams also offers a lot of options for preset virtual backgrounds like a beach, mountain landscape, and many more. To replace your background with one of these images, select the tile for the one you want. Then, click on the ‘Apply’ button.
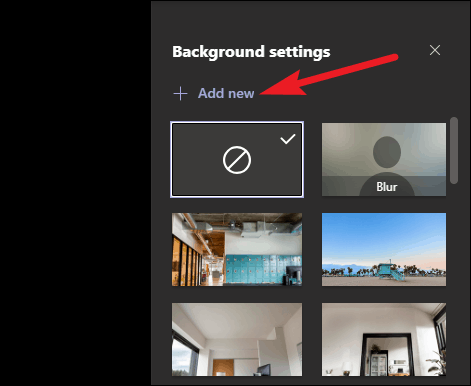
If you neither want to blur nor replace your background with any of the preset images in Microsoft Teams, there’s another option. You can select an image from your computer and use it to replace your background instead.
Click on the ‘Add new’ button towards the top of the background settings panel. An Open dialog box will appear. Go to the location of the image, and select it. Then click on the ‘Apply’ button.
Apart from these standard background effects, Microsoft Teams also offers an innovative new feature, dubbed as the ‘Together Mode’. You can use this mode when there are 5 or more people in the meeting to get an illusion of being in the same physical space, like an auditorium.

The Together Mode is only available on the desktop app right now. You need to turn on the latest meeting experience on the latest version of the app to use it. The Together Mode only has the auditorium view currently, but other views like a cafe and a conference room are in the works. You can learn more about the Together Mode here.
Using Filters in Microsoft Teams
Who can say no to a good filter on a video call? Certainly not me. And if you’re anything like me, you also love using these filters. Ranging from funny to aesthetically pleasing, they can inject life into any stale meeting session. They are also helpful for people who are otherwise insecure about turning their video on.
Although Microsoft Teams doesn’t offer inherent functionality to use filters in a meeting like Zoom, you can use a virtual camera app like Snap Camera for it. All you need to do is download the desktop app, and you can use the Snapchat filters in your Microsoft Teams meeting.

We have a detailed guide on How to Use Snap Camera in Microsoft Teams meetings. You can check it out if you’re interested in using filters in your meetings.
If you are the kind of person who looks for a silver lining in all situations, you might have found the one in video meetings. After all, if you were attending meetings in your office or classes in your school physically right now, you won’t be able to use any visual effects, now will you?