

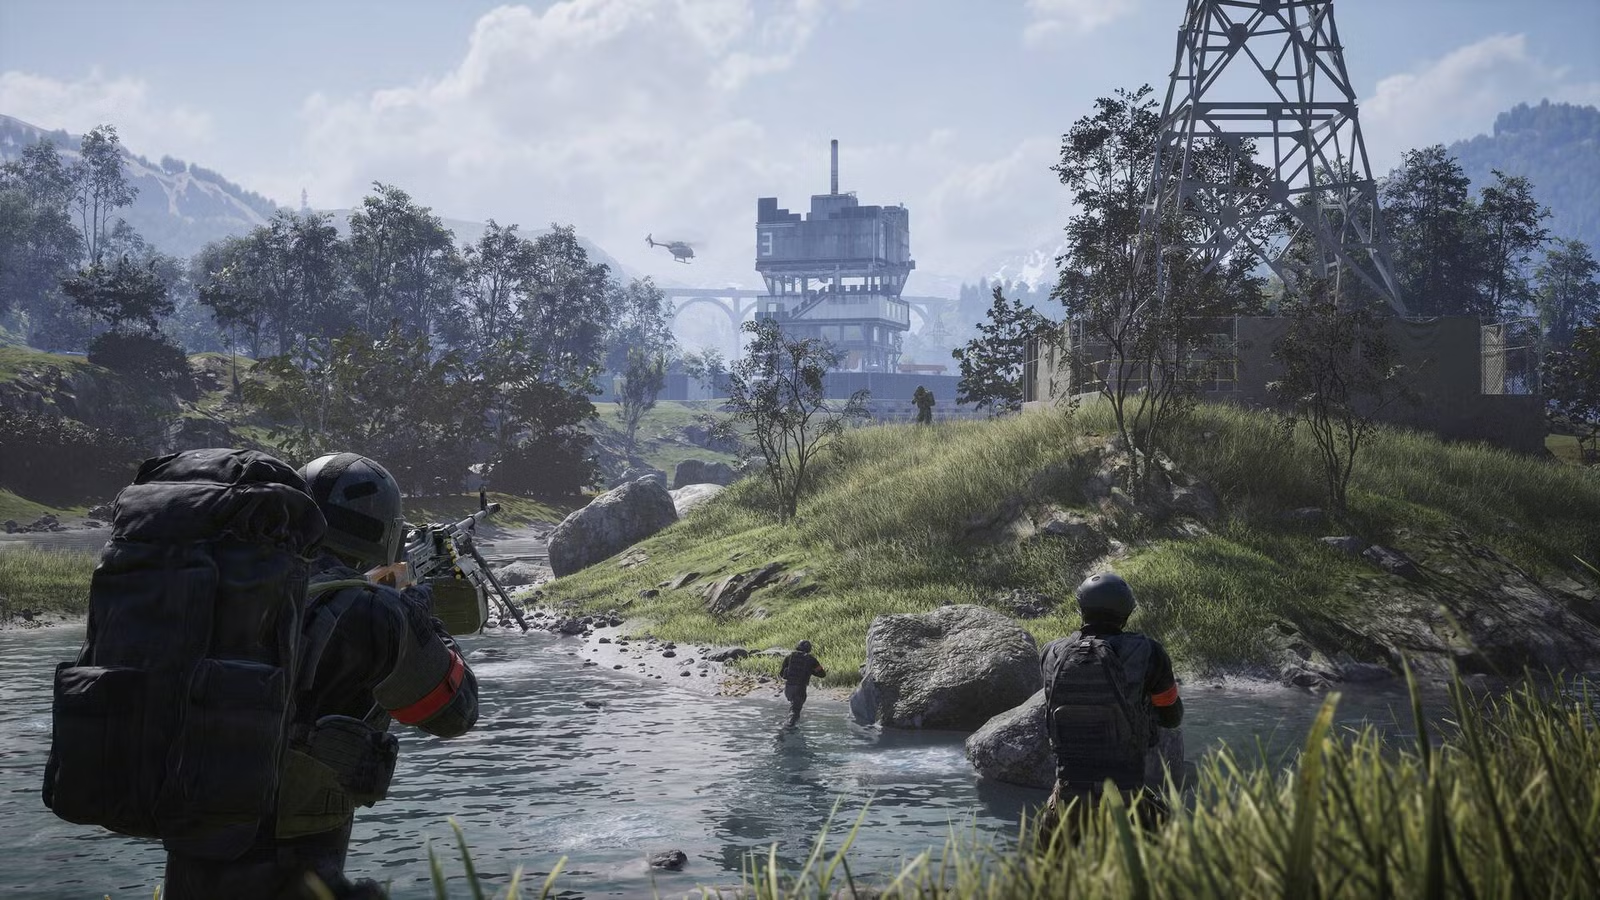
Bakurani is a river-valley map, and almost none of its ground ever settles a match. It runs the King of the Hill mode, so the whole battlefield spans a little over sixteen kilometres across, but the fight collapses onto a single circle 500 metres in radius with an 85-metre scoring core at its heart. That circle moves between three fixed spots on the valley floor, and the terrain around each one — apartment blocks, a factory ringed with shipping containers, wooded ridges and open sunflower fields — decides how you approach it.
Quick answer: Bakurani has three play areas the objective rotates through — Default, Farmland and Lumberyard — and Default is drawn twice as often as the other two. Win by keeping more bodies inside the Control Zone than the other factions, stack the roaming Hot Zone for a double count, and capture drill towers to collect the key code. The first faction to 100 match points takes the game.
The valley floor holds a town of apartment blocks and a residential quarter, a factory hemmed in by containers, and a hill town on higher ground. A bridge crosses one rise, a quarry is cut into the forest, wooded lumber hills and lumberyard stands spread to the south-east, and a marshy market swamp sits low near the river that runs along the north. Dry scrubland opens up east and west, and six drill towers stand across the whole thing. The ridges are steep on both sides, which leaves the flat valley road as the only sustained way across — fast, but the obvious place to be caught.
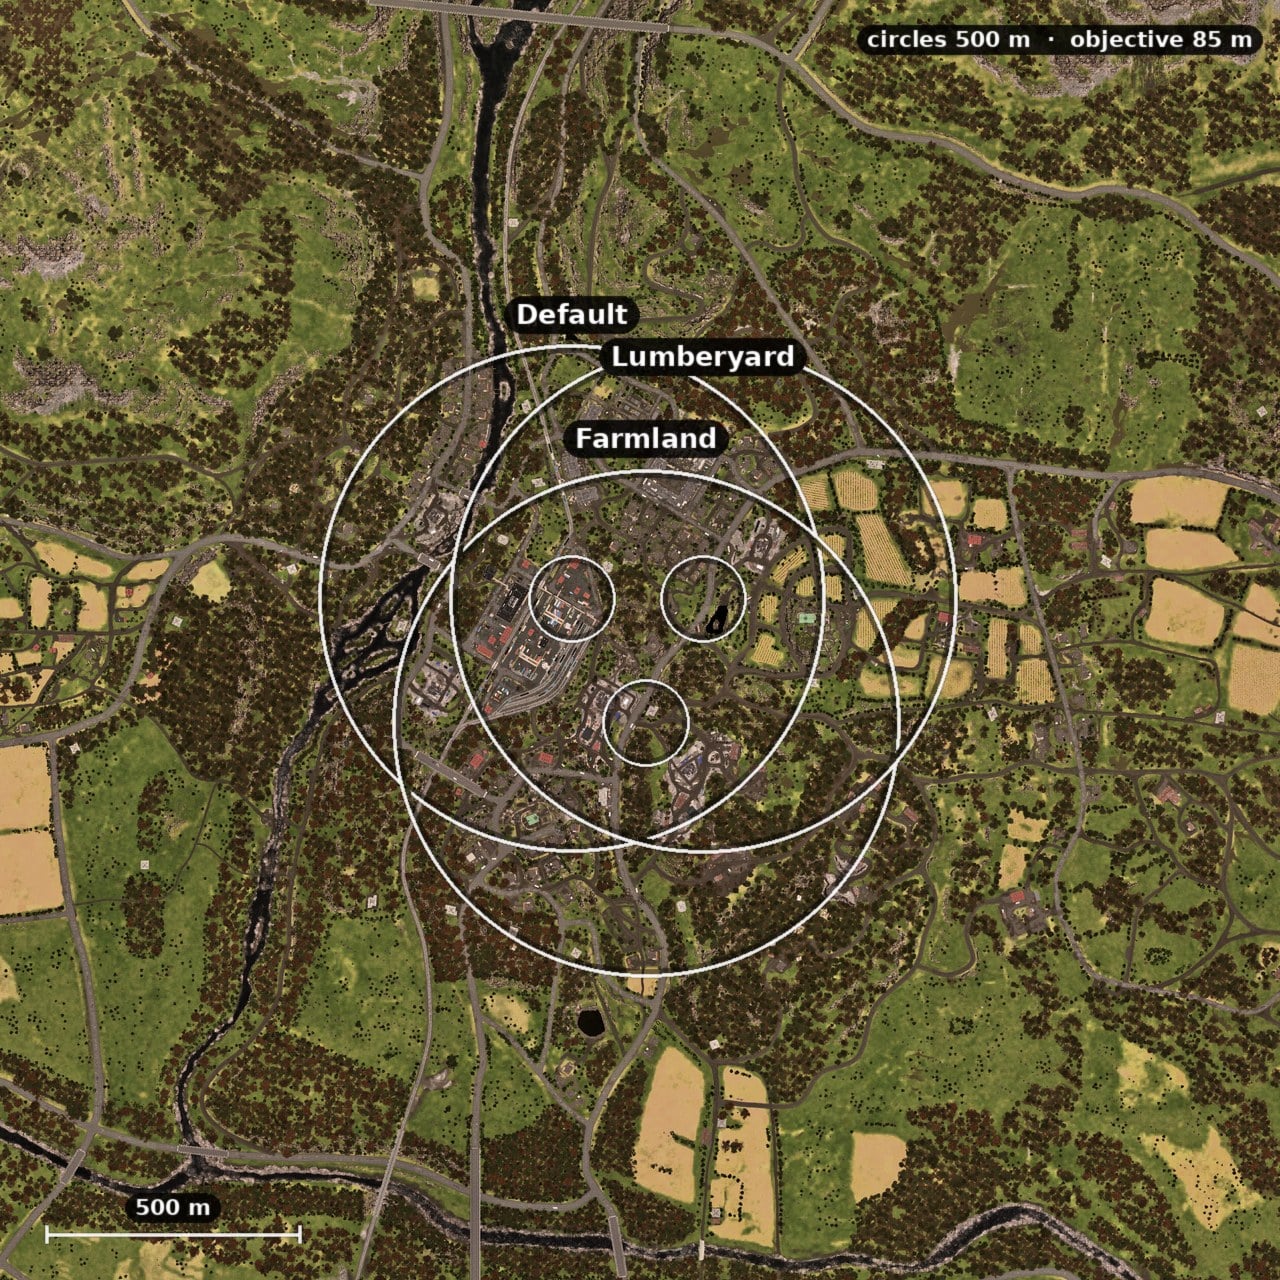
The play area rotation on Bakurani
Every play area defined on Bakurani is in the rotation — nothing is held out. All three share the same footprint, a 500-metre radius with an 85-metre objective core, and the two furthest-apart circles sit only about 285 metres from each other, so the fight never travels far across the map. What changes is how often each is chosen and the ground you cross to reach it.
| Play area | Position | Pick weight | Drill towers |
|---|---|---|---|
| Default | South-west of centre | 2× (most common) | 5 |
| Farmland | North of centre | 1× | 5 |
| Lumberyard | South-east of centre | 1× | 3 |
Default carries double the selection weight of the other two, so you will queue into it roughly half the time. Farmland and Lumberyard split the rest evenly.
Default
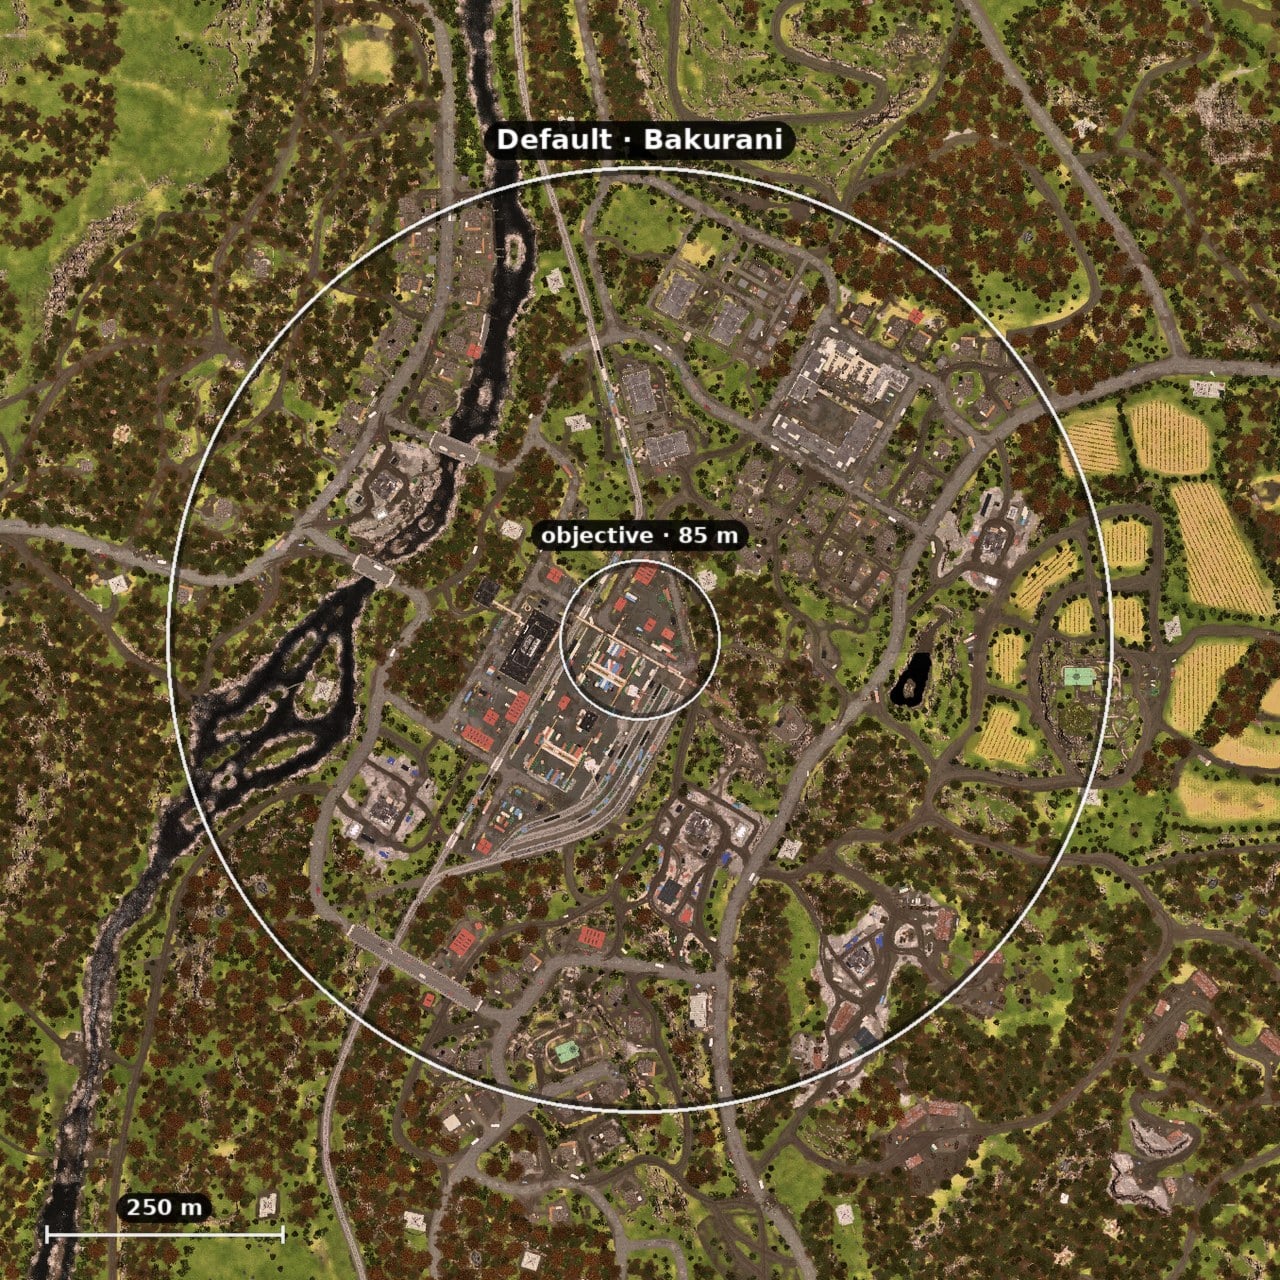
Default lands south-west of the map’s centre and is the circle you will see most. It is the most built-up of the three. Apartment blocks and a residential quarter sit on the valley floor, a factory ringed with containers anchors one side, and a hill town rises above with a bridge on the slope. The north river runs the top of the zone and a south-west branch cuts the lower edge, a market swamp turns the low ground boggy, and wooded slopes climb to the west. A sunflower church and the northern edge of the lumberyard bleed into it, with dry scrubland east and west on the open flanks. Five drill towers stand inside this one, so there is plenty of vertical cover and plenty of code to fight over.
Farmland
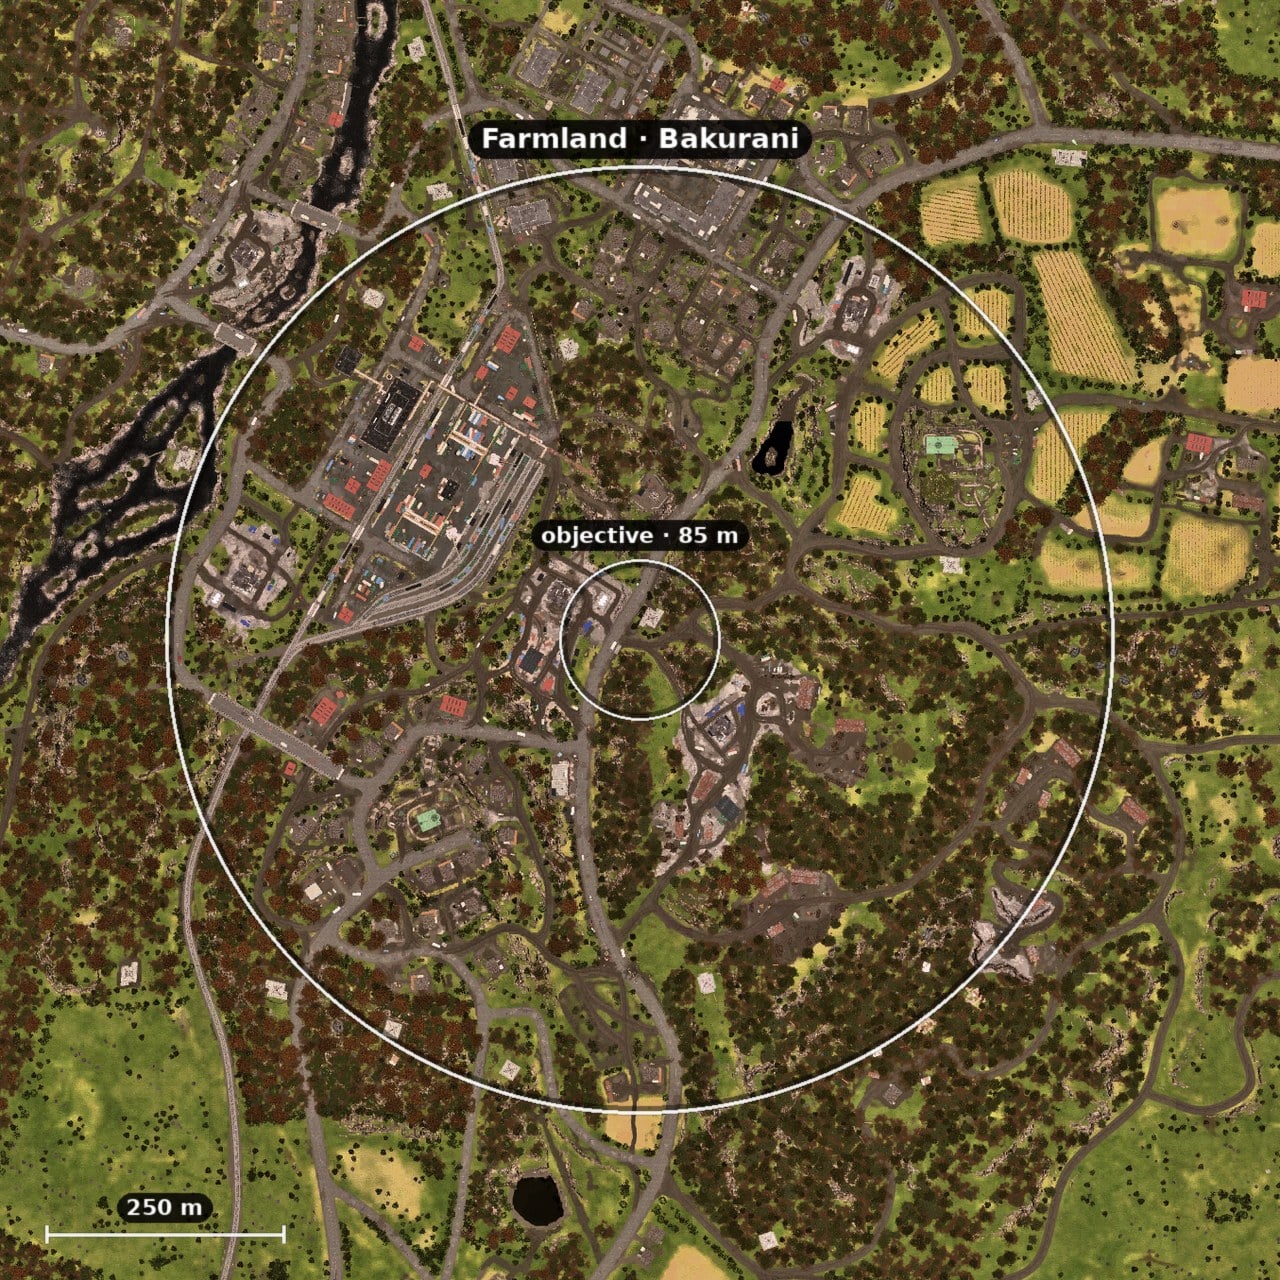
Farmland sits north of centre and is the most open circle of the three. Wide sunflower fields dominate the middle, with a church standing among them and more fields running south. Forested lumber hills and lumberyard stands close in from the edges, a quarry is cut into the woods, and a factory ringed with containers holds one flank. A hill town and a bridge give you the only real high ground, a residential strip edges the built-up side, and forest fills the south-east corner. Dry scrubland runs east and west. With cover thin across the open ground, the five drill towers here matter more than usual as places to fight from and to break sightlines.
Lumberyard
Lumberyard drops the objective south-east of centre, into the wooded lumber hills with the lumberyard’s north and south stands close around the core. Apartment blocks and residential ground give some hard cover, a factory ringed with containers holds one edge, and a marshy market swamp and the north river soften the low ground. Sunflower fields with a church spread through the middle, more fields run north and south, and scrubland opens east and west. It carries only three drill towers, the fewest of the three, so the key code comes together faster and the fight tends to concentrate around the tree line and the yard buildings.
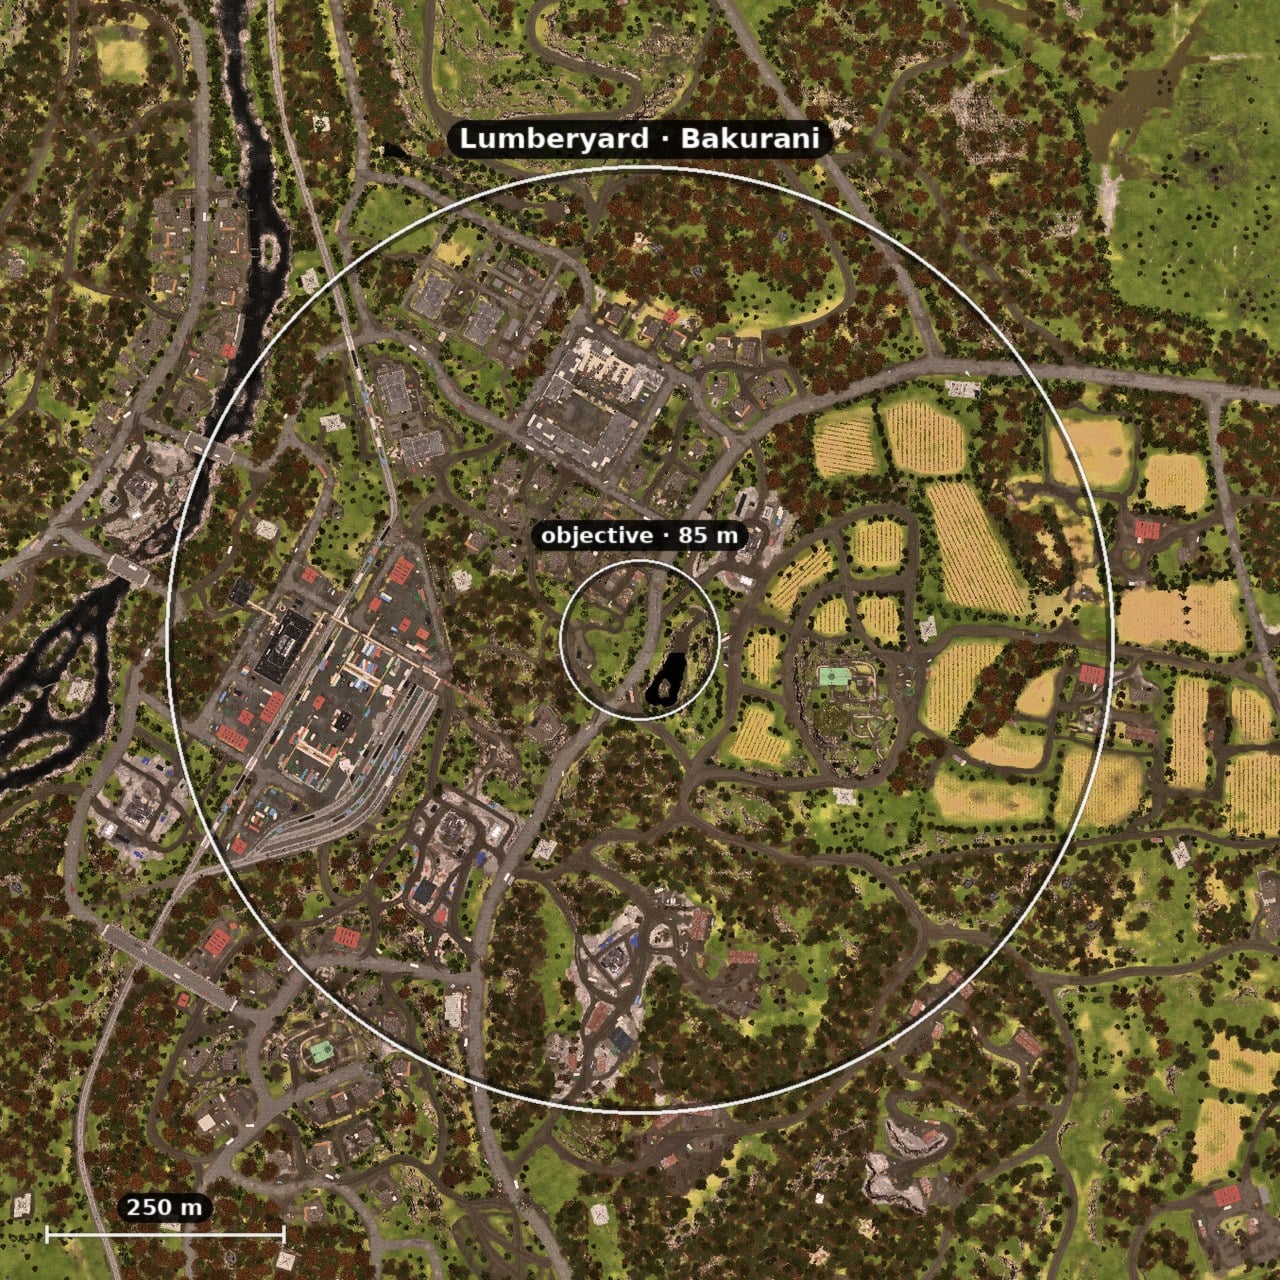
The Control Zone, drill towers and the Hot Zone
The whole match is decided inside the Control Zone. Every player standing in it adds one point to their faction’s count, and the faction with the highest count holds the zone. Hold it while the tick bar fills and you score a match point. The first of the three 33-player factions — Lonestar, Valkyra or Manticore — to reach 100 match points wins. Kills help, but presence is what scores, so pulling more bodies into the circle beats trading fire on its edge.
The Hot Zone is a smaller sub-zone that roams inside the Control Zone. Anyone standing in it counts as two players toward the faction count and earns extra cash for team actions. Because it shifts during the match, holding it is a moving problem — but ten players in the Hot Zone out-score nineteen who are only inside the wider circle, so it is the highest-value ground on the map and the most contested at any moment.
Drill towers are the part of the fight a team can steer. Get inside one to capture it, and it reveals a part of a longer key code. Collect every digit across the towers you hold and activate the tower, and you can swing the outcome of a match. Their roofs also spawn randomised helpful equipment, so climbing one is worth the loot — at the cost of exposing yourself on the way up. Which towers are live changes with the play area, from five each on Default and Farmland down to three on Lumberyard.
Playing the approach
There is no respawn countdown here. When you go down and bleed out, you come back at your headquarters, and the real cost of dying is the trip back to the Control Zone. On Bakurani that punishes a bad route hard, because the flat valley road is the fastest way in and also the easiest place to be ambushed. Budget cash for transport as well as your weapon, and agree a drop-off point with your driver or pilot before you set off — every trip to the zone is a risk you are choosing to take.
The most direct line in is rarely the safest. If enemy recon are holding sightlines or laying traps on the obvious approach, take a flank through the scrubland or the tree lines instead. Keep in mind that local chat carries to both friendly and enemy players nearby, so watch what you say on the way in and use it to bait when you can. Lean on the ping wheel to call for ammo, a revive or a pickup at your position, and check the mini-map for downed allies and faction requests you can answer for extra cash.
The short version: for a match on Bakurani: expect Default more often than not, read which play area the circle has picked before you commit to a route, and treat the drill towers as both cover and the path to the key code. Then get bodies into the Hot Zone and keep them there, because that is where the points and the cash come twice as fast.





