Microsoft Store apps function like any other app in your system. However, they are not stored like any other app when installed. By default, the installation location of Microsoft Store apps is not visible.
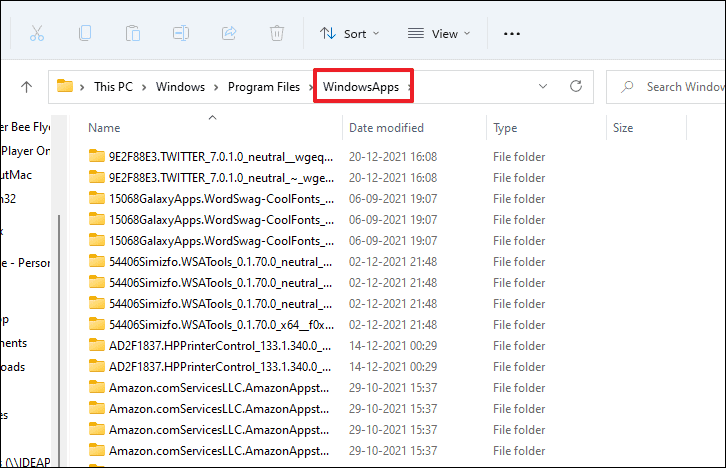
Apps downloaded from the Microsoft Store are saved in a folder called ‘WindowsApps’ inside the ‘Program Files’ directory of your Windows installation drive. This folder is hidden by default on every Windows system but it’s fairly easier to unhide and access the contents of it.
For the uninitiated, unhiding a hidden folder might feel like tinkering with essential files and probably causing harm to the system files. However, that is not the case; many hidden folders are usually maintained by the system and are hidden because either they contain information too technical for a typical user, or have crash reports and diagnostics data that is again not very useful to a layman user.
To unhide the WindowsApps folder that contains the Microsoft Store apps’ installation files, open ‘This PC’ by double-clicking on the shortcut present on your desktop. Alternatively, you can also press the Windows+E keys together on your keyboard to open it.

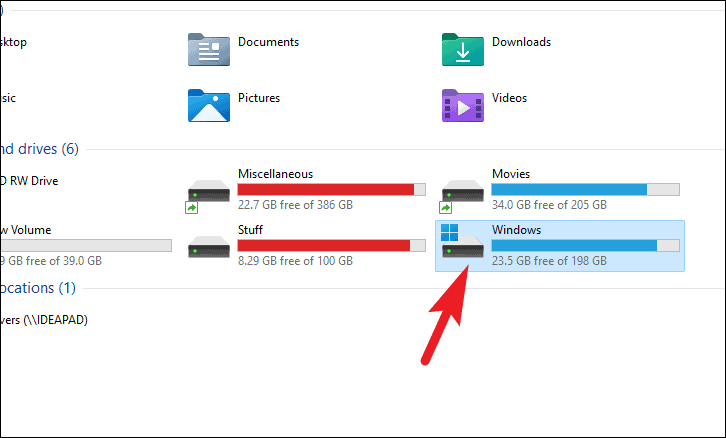
Then, double-click on your Windows installer drive to open it.
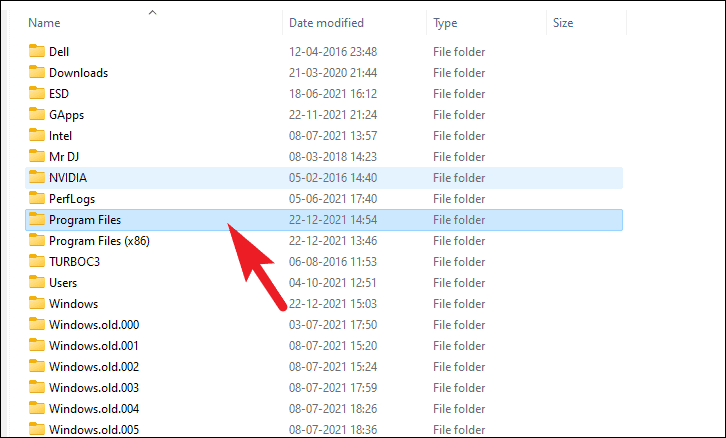
Next, locate the ‘Program Files’ folder from the list and double-click on it to open.
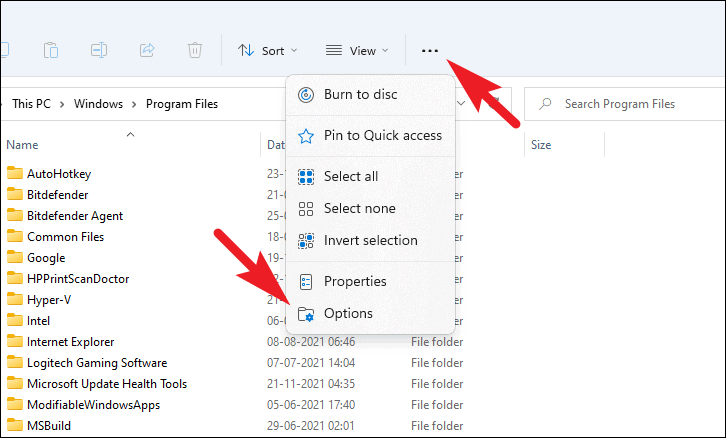
After that, from the ribbon menu of the window, click on the ellipsis icon (three horizontal dots). Then, click on the ‘Options’ option from the context menu. This will open a separate window on your screen.
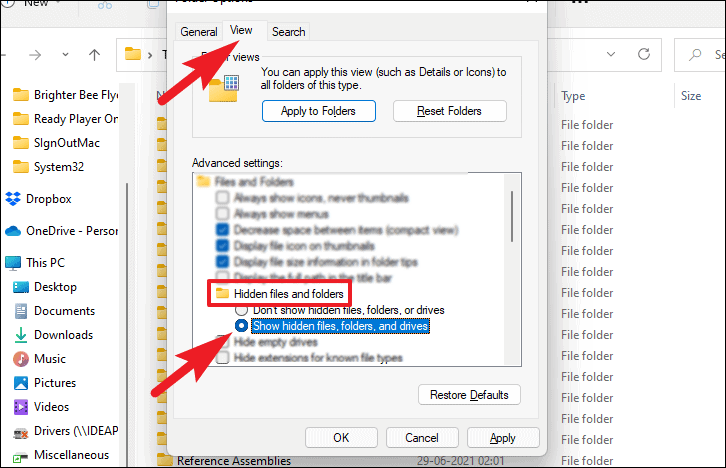
From the separately opened window, click on the ‘View’ tab and locate the ‘Hidden files and folders’ option under the ‘Advanced settings:’ section. Then, click on the radio button preceding the ‘show hidden files, folders, and drives’ label.
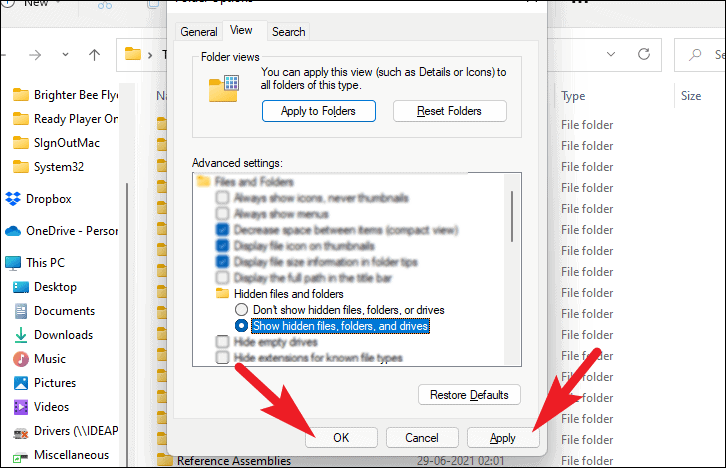
Next, click on the ‘Apply’ button to save the changes and then click on the ‘OK’ button to close the window.
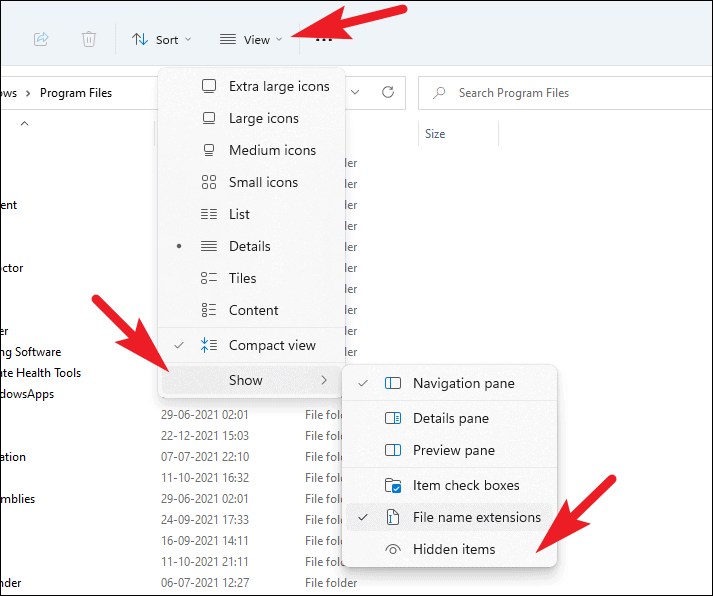
Alternatively, there’s also a simpler route to unhide the folders. From the ribbon menu on the ‘This PC’ window, click on the ‘View’ option. Then, hover over the ‘Show’ option from the context menu and click on the ‘Hidden items’ option.
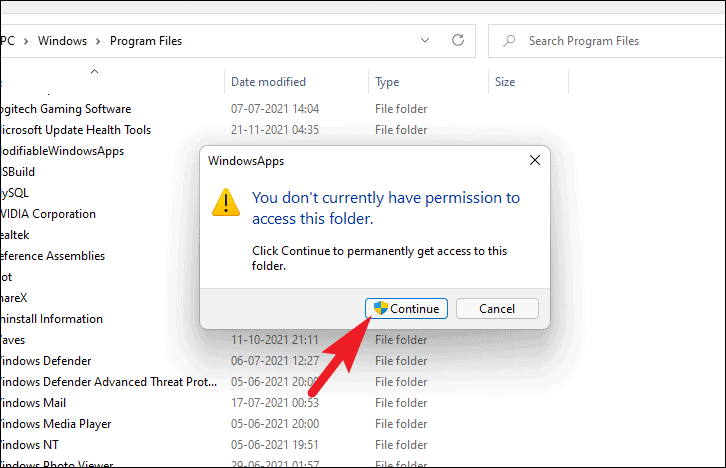
After that locate the ‘WindowsApps’ folder and double-click on it to continue.

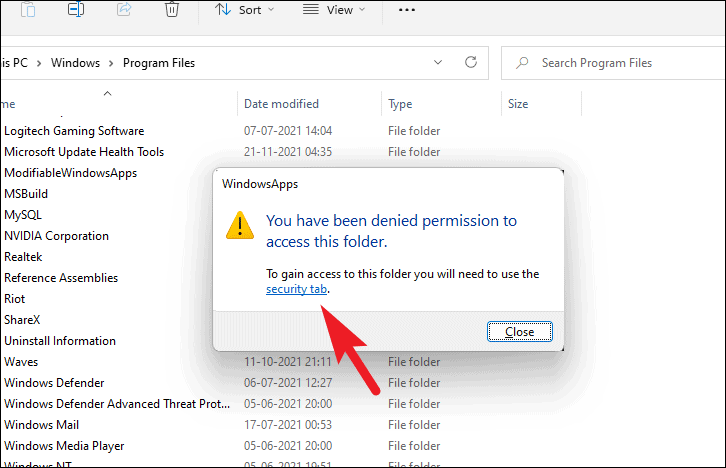
Then, a prompt will appear on your screen notifying you that you don’t have permission to access the folder. Click on the ‘Continue’ button present on the prompt.
Next, if the prompt reappears saying that you have been denied permission to access; click on the ‘security tab’ link to proceed further. This will open a separate window on your screen.
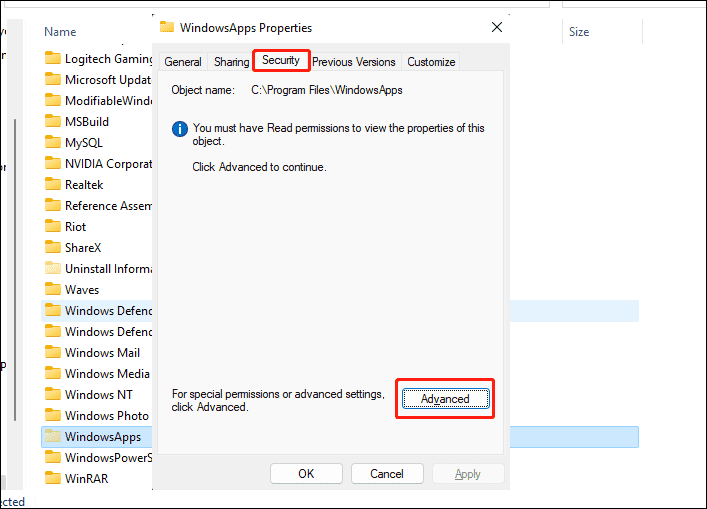
After that, from the ‘WindowsApps Properties’ window, click on the ‘Advanced’ button to tweak the permissions for accessing the folder. This will again open a separate window on your screen.
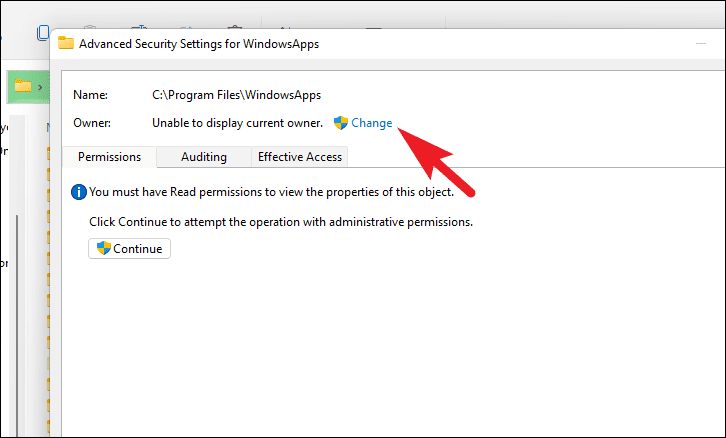
Then, from the ‘Advanced Security Settings’ click on the ‘Change’ button present right next to the ‘Owner’ label. This will open the ‘Select User or Group’
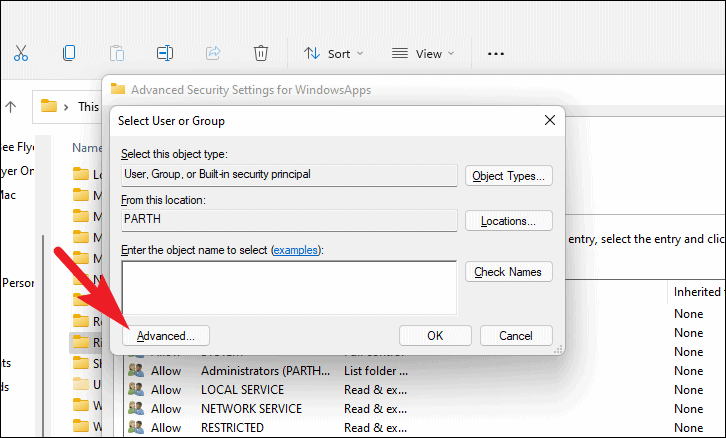
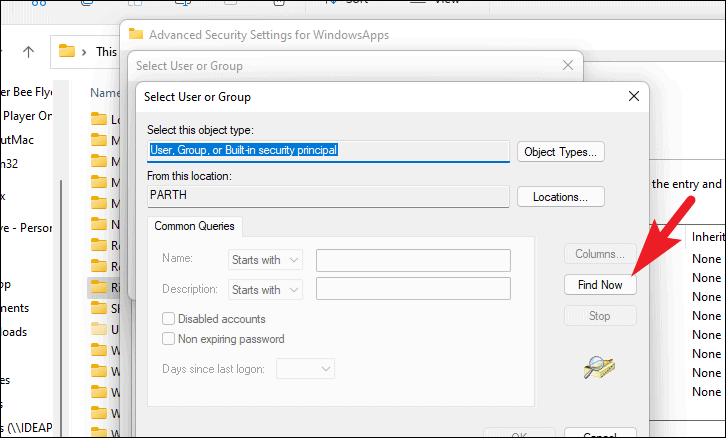
From the ‘Select User or Group’ window, click on the ‘advanced’ button present at the bottom left corner of the windowpane. This action will again bring up a separate window.
Now from the separately opened window, click on the ‘Find Now’ button to proceed. This will populate the list under the ‘Search’ section on the window.
After that, select your username/account name from the list and click on the ‘OK’ button to select the user and close the window.
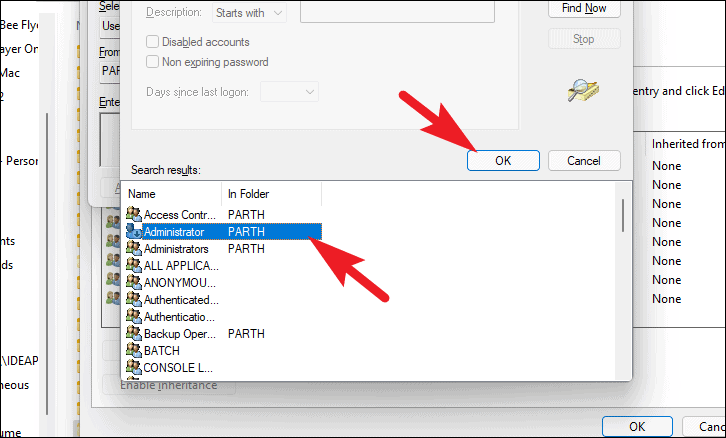
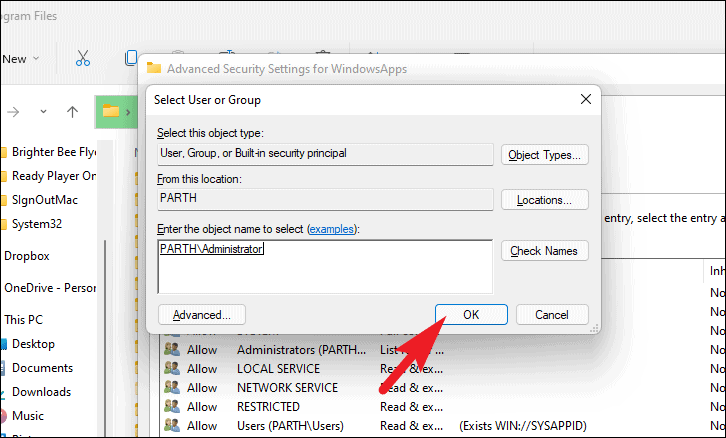
Next, on the ‘Select User or group’ click on the ‘OK’ button again to change the owner of the ‘WindowsApps’ folder and close the window.
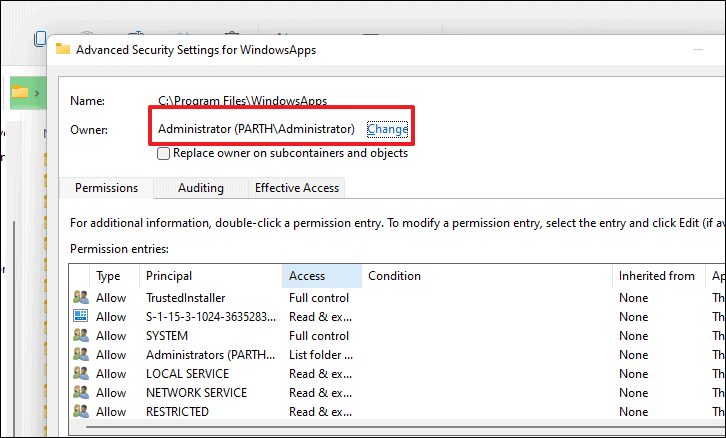
Now, on the ‘Advanced Security Settings’ window, you will be able to notice the change of ownership of the folder. Click on the ‘Apply’ button to save the changes and click on the ‘OK’ button to close the window.
Finally, double-click on the ‘WindowsApps’ folder, and it will now open up like a regular folder.