
Windows key on your keyboard not just helps you access the ‘Start Menu’ but is also a key constituent in most of the keyboard shortcuts, whether it be locking the Windows, launching system ‘Settings’ or ‘Run’ command amongst others. If the ‘Windows’ key fails to function, it will impede workflow and affect your Windows 10 experience.
In most cases, it’s fairly easy to fix the error that’s preventing the ‘Windows’ key from functioning. But before we move to the fixes, it’s imperative for you to understand the various issues that lead to the error with the ‘Windows’ key.
What Causes Windows Key to Stop Working?
There are various issues that prevent the Windows key from working. While some are hardware-related, others are related to software. We have listed some of the issues for your understanding.
- Damaged or Malfunctioning Hardware
- Windows Key is Disabled
- Windows 10 Game Mode is Enabled
- Outdated or Corrupted Drivers
All the issues discussed above are simple and quick to fix. We will walk you through the various fixes. Execute them in the sequence that they are mentioned for quick resolution of the error.
1. Check Hardware
Whenever facing issues with the ‘Windows’ key, check for hardware issues. Check if the keyboard connections and proper and the ‘Windows’ key presses as usual. There is a good chance that something might be stuck under it, thereby preventing it from functioning effectively. Clean the space under the keys using a mild blower and check if the ‘Windows’ key starts functioning.
If the Windows key is still now functioning, try using a different keyboard altogether. Now, check if the Windows key works. If yes, there was a problem with the keyboard itself, and replacing it would do the job. If no, there is a bug or system settings that are leading to the error, hence, move to the next fix.
2. Run Keyboard Troubleshooter
Windows has built-in troubleshooters to identify and fix issues in your computer. In this case, since you are facing trouble with the ‘Windows’ key, ‘Keyboard Troubleshooter’ comes to your aid.
To run the ‘Keyboard Troubleshooter, press WINDOWS + I to launch the ‘Settings’ and then click on the ‘Update & Security’ option.
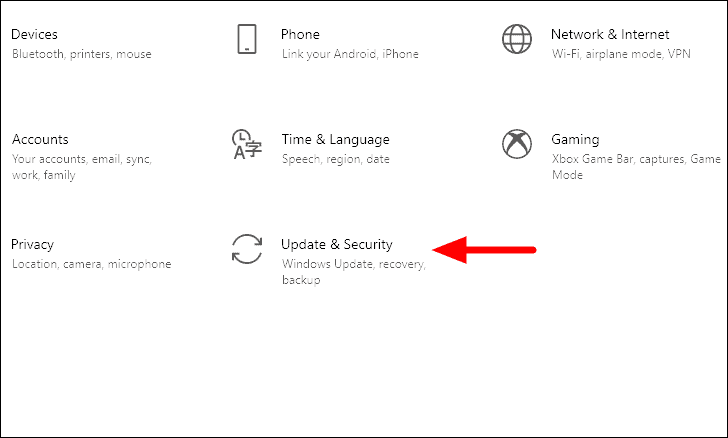
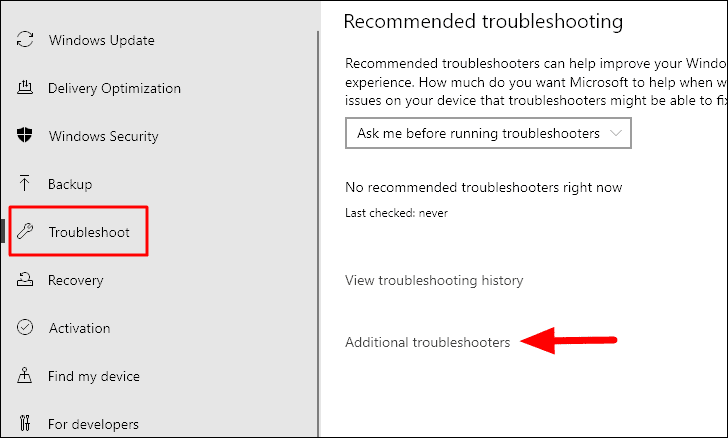
In the ‘Update & Security’ settings, you will find various tabs displayed on the right. Select ‘Troubleshoot’ from the list and then click on ‘Additional troubleshooters’ on the right.
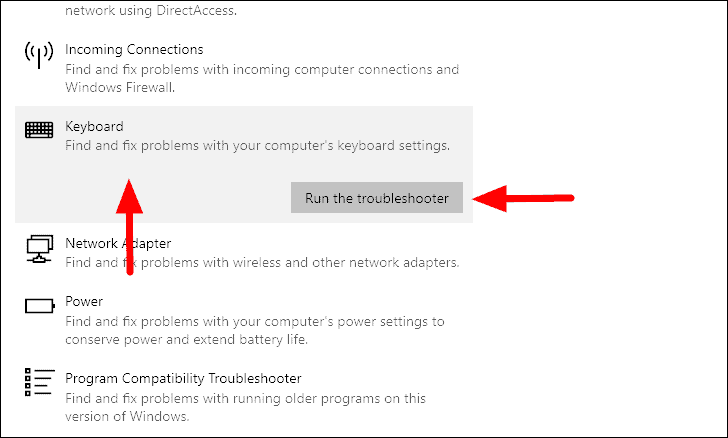
Scroll down and locate the ‘Keyboard’ troubleshooter and click on it. The ‘Run the troubleshooter’ option will now appear on the screen, click on it to run the troubleshooter.
Windows will now scan the system for any issues that are affecting the performance of the keyboard and fix them. Once the issues are fixed, check if the ‘Windows’ key starts working fine now.
3. Disable Game Mode on Windows 10
Game Mode in Windows 10 ensures the smooth running of high-end games by allocating additional resources such as the GPU. However, the mode tends to affect the keyboard settings and in some cases, disable the ‘Windows’ key altogether. It disables certain keys to ensure that you don’t lose the game progress by pressing one accidentally.
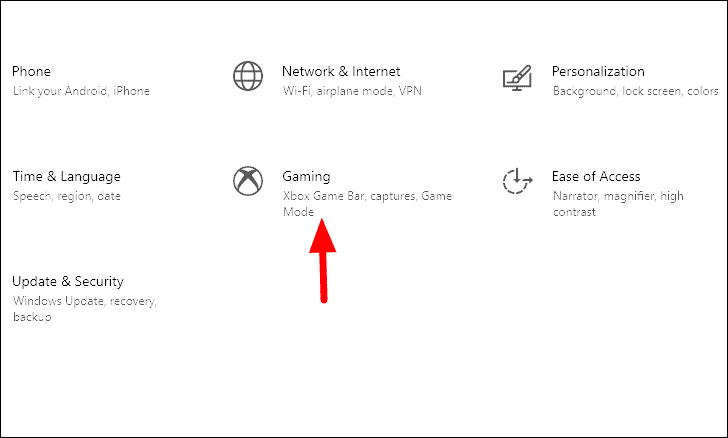
To disable Game Mode on Windows 10, launch the system ‘Settings’ either by using the WINDOWS + I keyboard shortcut or from the ‘Start Menu’. In the settings window, click on the ‘Gaming’ option to open it.
Once you are in the ‘Gaming’ settings, select the ‘Game Mode’ tab from the left and then click on the toggle at the right under ‘Game Mode’ to disable the setting.
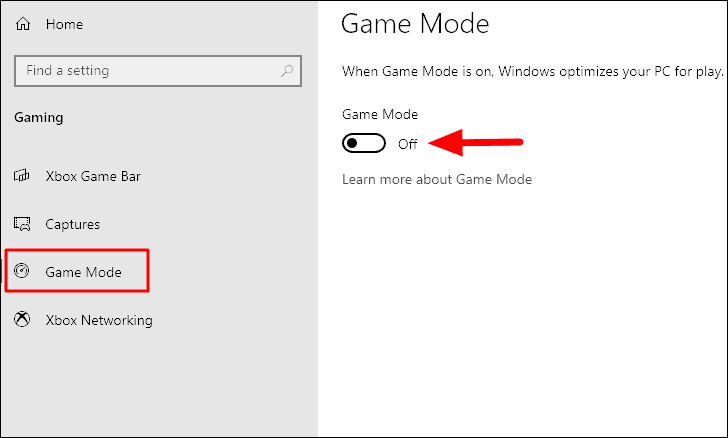
After you have disabled the ‘Game Mode’, check whether the ‘Windows’ key starts to work fine. If not, move to the next fix.
4. Disable Filter Keys
Filter keys are a built-in feature in Windows that helps make typing easier by ignoring the repeated pressing of a key. This helps people with hand tremors type effectively but the feature can affect the functioning of the ‘Windows’ key. Therefore, disabling the ‘Filter Keys’ might help fix the error.
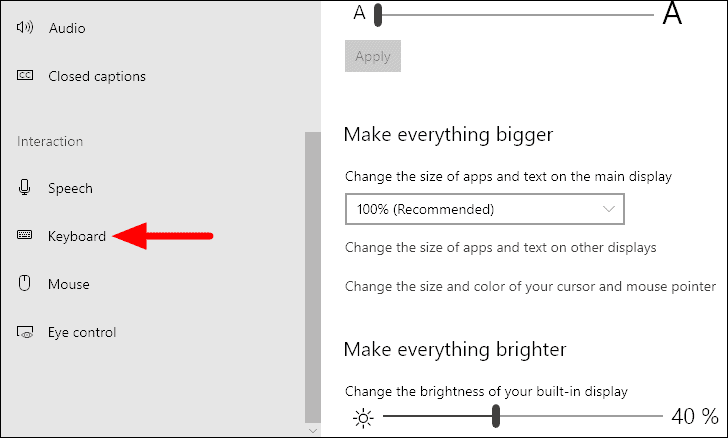
To disable ‘Filter Keys’, select the ‘Ease of Access’ settings on the system ‘Settings’ screen that you launched earlier.

Scroll down through the list of the tabs on the left and select ‘Keyboard’ under the ‘Interaction’ section.
In the ‘Keyboard’ settings, locate the ‘Use Filter Keys’ option and click on the toggle under it to disable the feature.
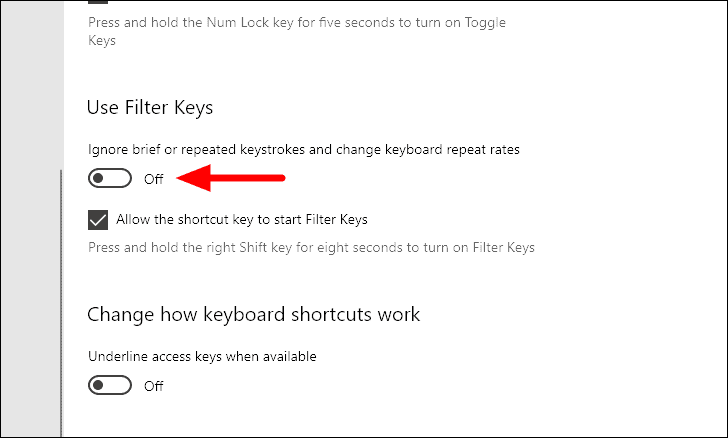
After the feature has been disabled, you should be able to use the ‘Windows’ key without any hindrance whatsoever.
5. Enable Windows Key in Registry
The Registry editor has the option to restrict the functioning of various features including the keys on your keyboard. If none of the above fixes have resolved the error, it’s time to make some changes to the Registry. However, you must that any mistake while making the changes or modifying other settings without prior experience can severely affect the system and even render it useless. Therefore, execute the following steps with great caution.
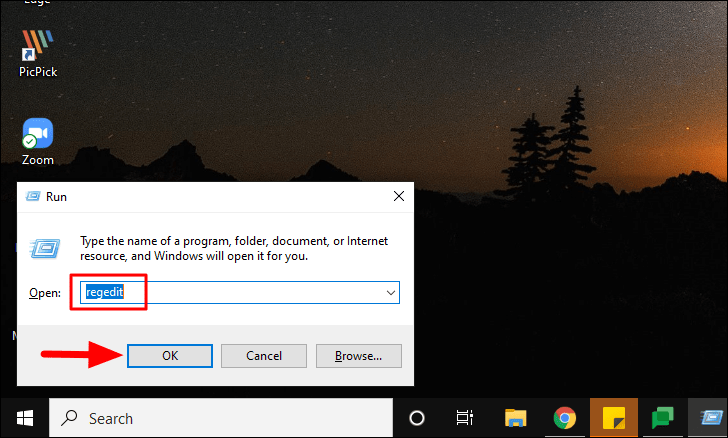
To enable the Windows key in Registry, press WINDOWS + R to launch the ‘Run’ command. Next, enter ‘regedit’ in the search box and either click on ‘OK’ or press ENTER to proceed. Click ‘Yes’ on the confirmation box that appears next.
In the ‘Registry Editor’, either navigate to the following address or paste it in the address bar at the top and then press ENTER.
Computer\HKEY_LOCAL_MACHINE\SYSTEM\CurrentControlSet\Control\Keyboard LayoutIn the ‘Keyboard Layout’ folder, you will find the ‘ScanCode Map’ registry file on the entry, right-click on it and select ‘Delete’ from the context menu. Click ‘Yes’ on the confirmation box that appears.

Once you have made the changes to the registry, restart the computer and check if you are able to use the ‘Windows’ key. Also, the ‘ScanCode’ entry will not be present on every computer, based on the settings. Hence, if you cannot locate it, it’s not leading to the error, therefore move to the next fix.
6. Enable Start Menu in Registry
If you are able to use the Windows key for the keyboard shortcuts but unable to access the ‘Start Menu’, the ‘Start Menu’ must be enabled in the registry. Also, since we will again be making changes to the Registry, pay extra attention to each step and ensure no scope of error.
Launch the ‘Registry Editor’ as discussed in the last fix, and then either navigate to the following address or paste it in the address bar at the top and press ENTER.
Computer\HKEY_CURRENT_USER\SOFTWARE\Microsoft\Windows\CurrentVersion\Explorer\Advanced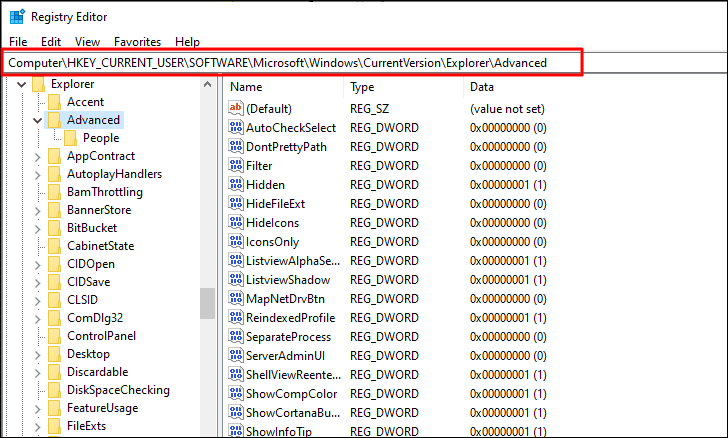
Next, right-click on the open space, hover the cursor over ‘New’, and then select ‘DWORD (32-bit) Value’ from the context menu.
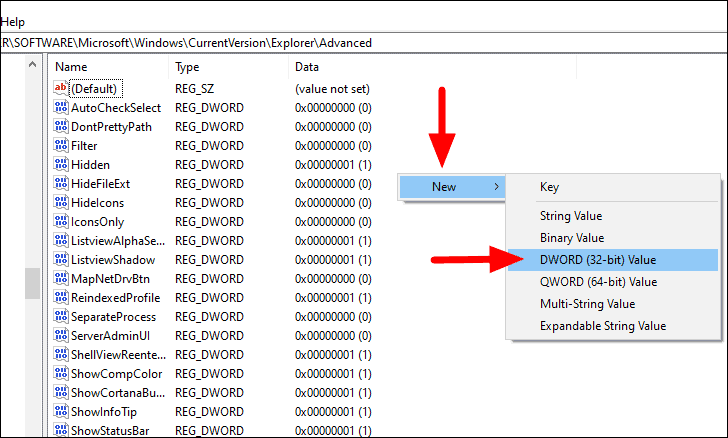
Enter the name of the, ‘EnableXamlStartMenu’.

After you have created the key, close the registry editor and restart the computer. Now check if pressing the ‘Windows’ key launches the ‘Start Menu’.
7. Re-register All the Apps with Powershell
If any of the apps are conflicting with the system settings, it may lead to prevent ‘Windows’ key from functioning. Therefore re-registering all the apps with PowerShell is the ideal solution.
To re-register the app, search for ‘Windows PowerShell’ in the ‘Start Menu’, right-click on the search result, and then select ‘Run as administrator’ to launch the app.

In the ‘Windows PowerShell’ window, enter the following script and press ENTER.
Get-AppXPackage -AllUsers | Foreach {Add-AppxPackage -DisableDevelopmentMode -Register “$($_.InstallLocation)\AppXManifest.xml”}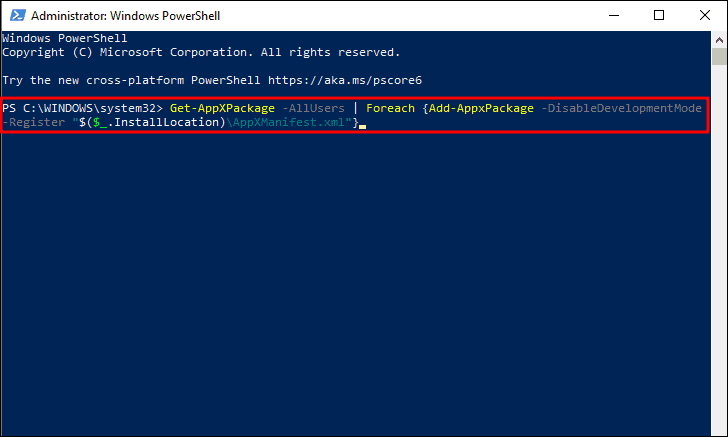
After the script has been executed, restart the computer and check if the ‘Windows’ key is working. If not, move to the next fix.
8. Run Full System Scan
In some cases, the ‘Windows’ key may stop working if the system is infected by malware. Running a ‘Full Scan’ with ‘Windows Security’or any other third-party antivirus.
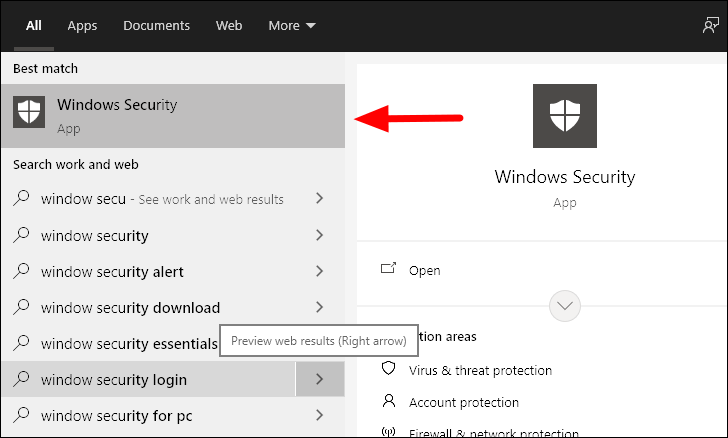
To run a scan, search for ‘Windows Security’ in the ‘Start Menu’ and then launch the app from the search results.
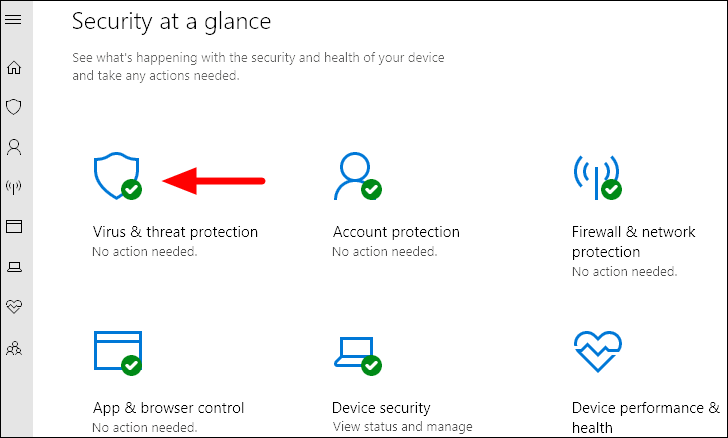
In ‘Windows Security’, select the ‘Virus & threat protection’ option.
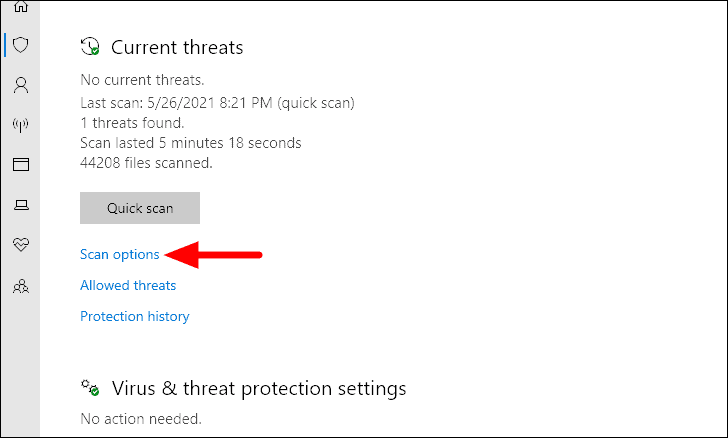
You will now find the ‘Quick scan’ option on the screen. However, we plan to run a full scan, hence, click on ‘Scan options’ to view the other options.
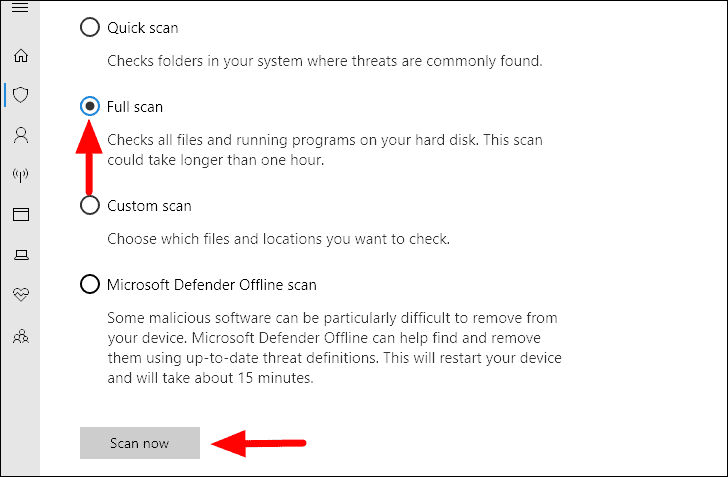
You will now find three other scan options, check the one for ‘Full scan’ and then click on ‘Scan now’ at the bottom.
The scan will start immediately and you can view its progress as well.
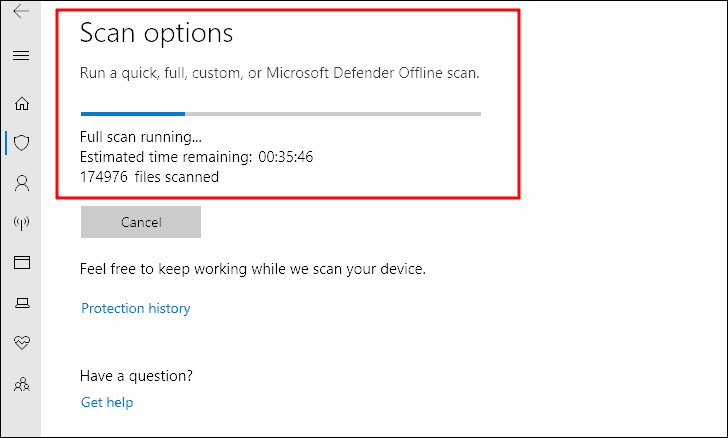
While the scan is in progress, you can continue working on the system. Once the scan is complete, you will be informed if any threats were found and eliminated.
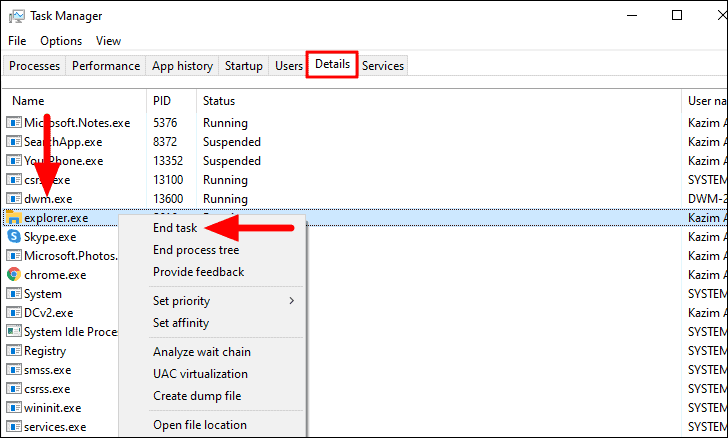
9. Restart the Windows/File Explorer
If you have been unable to fix the issue with the Windows key yet, it’s time you restart the ‘explorer.exe’ process. This fix has worked for a lot of users, so it’s worth giving a shot.
To restart, press CTRL + ALT + DEL and then select ‘Task Manager’ from list of options. In the ‘Task Manager’, go to the ‘Details’ tab and locate the ‘explorer.exe’ process. Right-click on it, and then select ‘End task’ from the context menu.
Click on ‘End process’ on the confirmaton box that pops up.
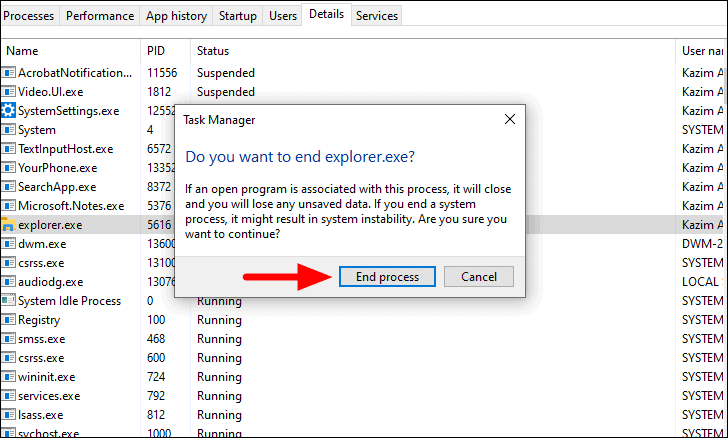
Once the process is ended, the screen will go black for a while and you might not be able to view the taskbar. It’s normal and part of the process. Again press CTRL + ALT + DEL and launch the ‘Task Manager’.
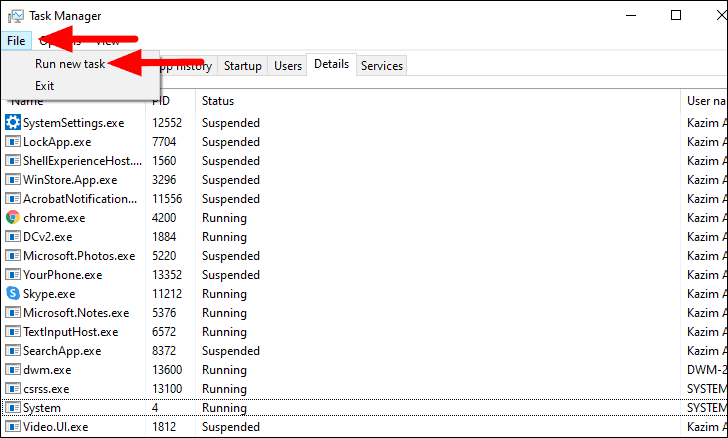
In the ‘Task Manager’ screen, click on ‘File Menu’ at the top-right corner and select ‘Run new task’
In the ‘Create new task’ box, enter ‘explorer.exe.’ in the text box and click on ‘OK’ at the bottom.
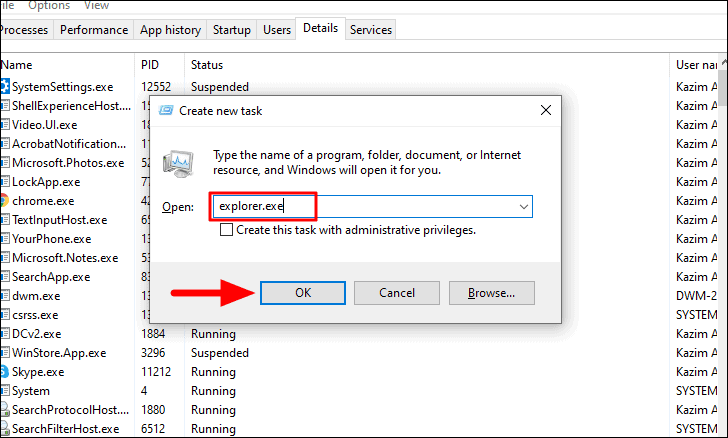
Once the process is back up and running, check if the Windows key starts functioning.
10. Reinstall Keyboard Drivers
Corrupt drivers may also sometimes lead to issues with the keyboard. In case, the error has not been fixed yet, it’s time you run reinstall the drivers. The process may sound complicated but it’s pretty straightforward and quick.
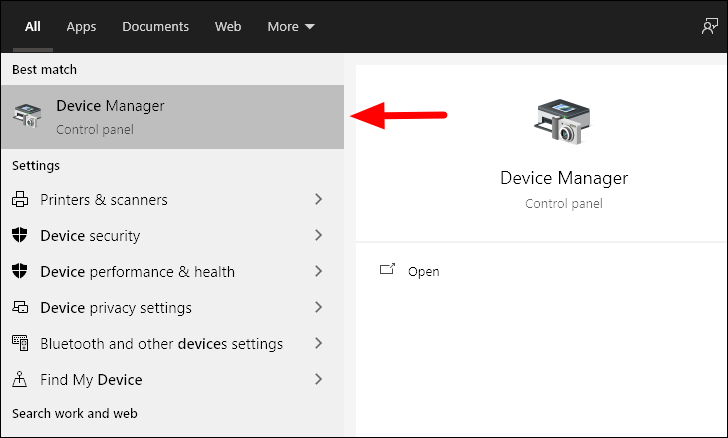
To reinstall keyboard drivers, search for ‘Device Manager’ in the ‘Start Menu’ and then click on the search result to launch the app.
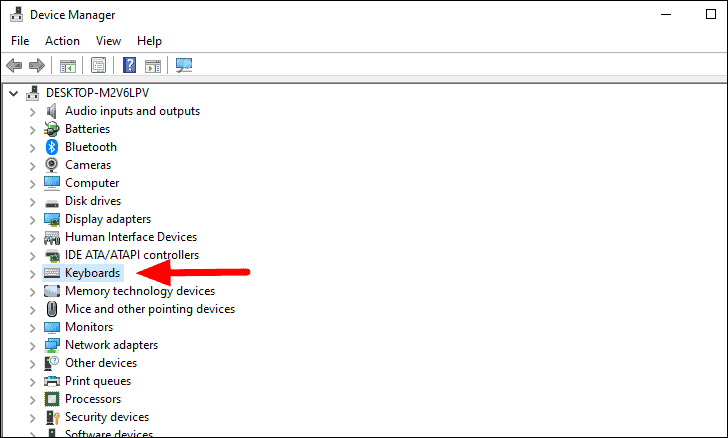
Next, locate the ‘Keyboards’ options and double-click on it to expand.
Now, right click on the keyboard driver and select ‘Unistall device’ from the menu.
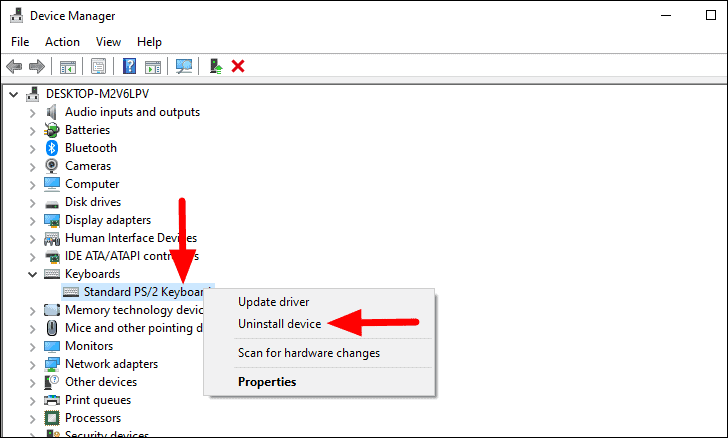
If you are using an external keyboard, just unplug and plug it back in. While in the case of built-in keyboards for laptops, restart the computer to reinstall the driver. Now, check if the Windows key starts functioning.
11. Run SFC Scan
The SFC scan is used to repair Windows System files that might be corrupted. It’s an effective fix and you must execute it, in case none of the others have worked.
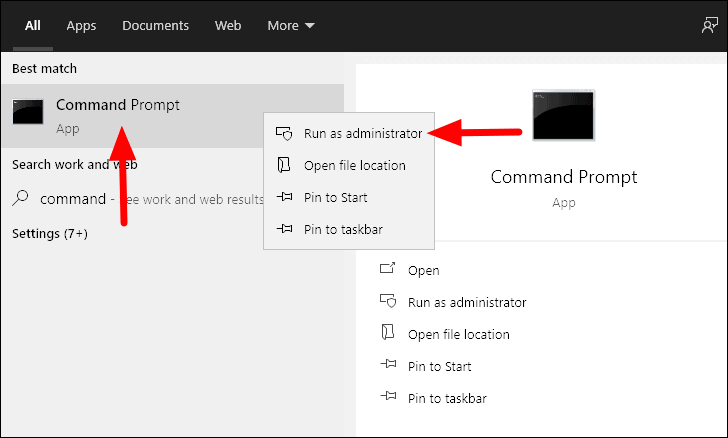
To run the SFC scan, search for ‘Command Prompt’ in the ‘Start Menu’, right-click on the search result, and then select ‘Run as administrator’ from the menu.
In the command prompt window, type or paste the following command, and then press ENTER.
sfc /scannowThe scan will start immediately and will take a couple of minutes to complete.
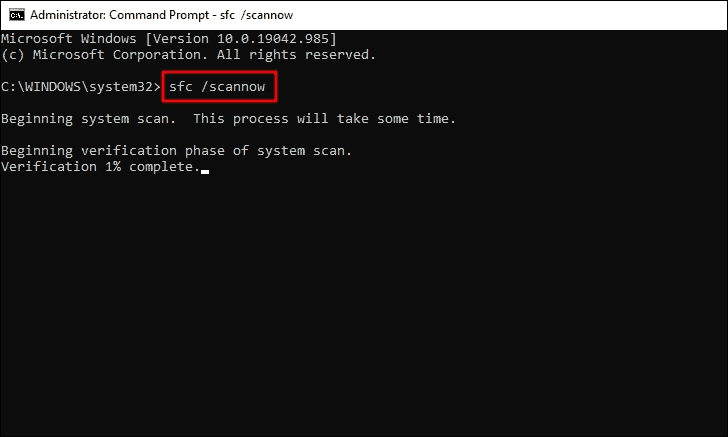
Once the scan is completed, the error should be fixed. If not, move to the last fix.
12. Run DISM Tool
The last fix you have is to run the DISM (Deployment Image Servicing and Management) tool. It is an administrator-level command that checks the health and repairs Windows image.
To run the DISM tool, launch the ‘Command Prompt’ with administrator access as discussed in the previous fix. Next, type or paste the following command and then press ENTER.
DISM /online /cleanup-image /restorehealth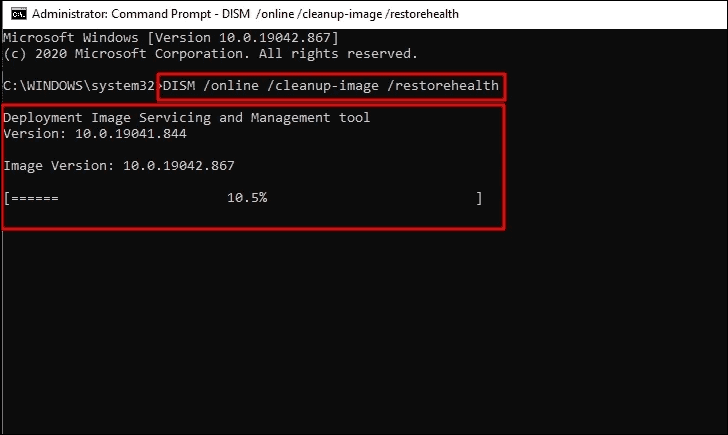
The scan will start immediately and take some time to complete. Also, it may appear stuck at times, but don’t close and allow it the time to complete.
The ‘Windows’ key on your keyboard must be working fine, after having executed these fixes. The fixes discussed above cover almost all the issues and one of them definitely fix the error for you.


