
Realtek audio drivers play a crucial role in enabling communication between your Windows 11 operating system and audio components. However, many users have reported experiencing various audio issues recently, including glitches, audio cutting out, or no sound at all. While frustrating, these problems are often related to driver or software issues rather than hardware failures, making them relatively straightforward to troubleshoot and resolve.
Before diving into solutions, it’s helpful to understand some common causes of Realtek audio driver problems:
- Outdated, incompatible, or corrupted drivers
- Incorrect audio settings
- Disconnected output devices
- Wrong audio output selected
- Disabled audio services
Let’s explore several effective methods to address these Realtek audio driver issues on Windows 11.
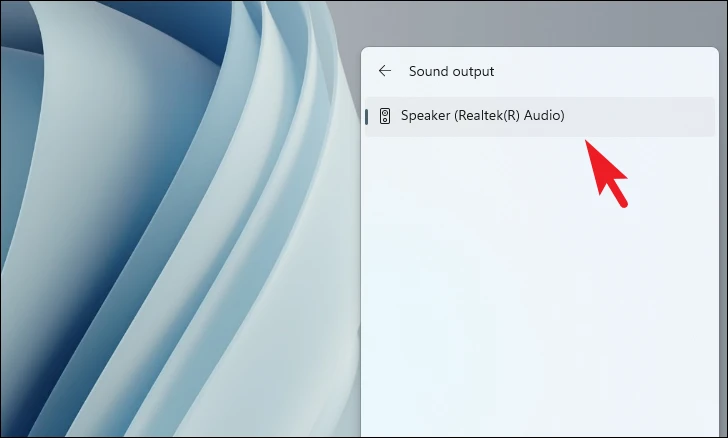
Verify correct audio output is selected
A simple but often overlooked issue is having the wrong audio output device selected. To check this:
- Click the volume icon in the taskbar
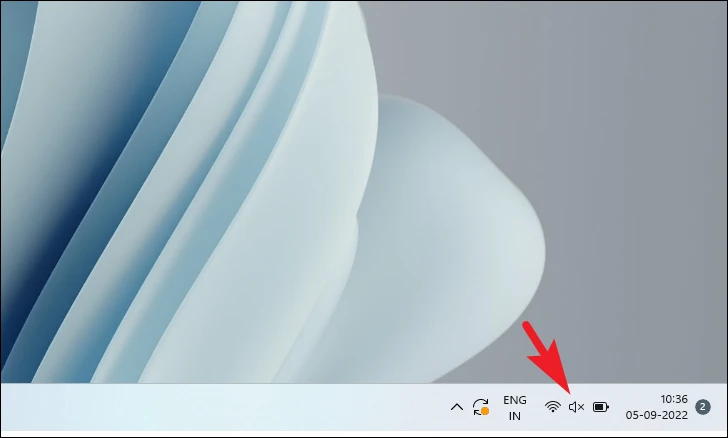
- Click the “Sound output” button next to the volume slider
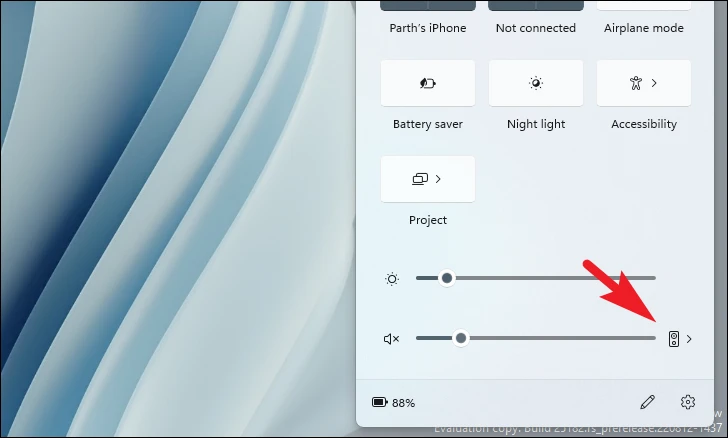
- Ensure the correct output device is selected from the list
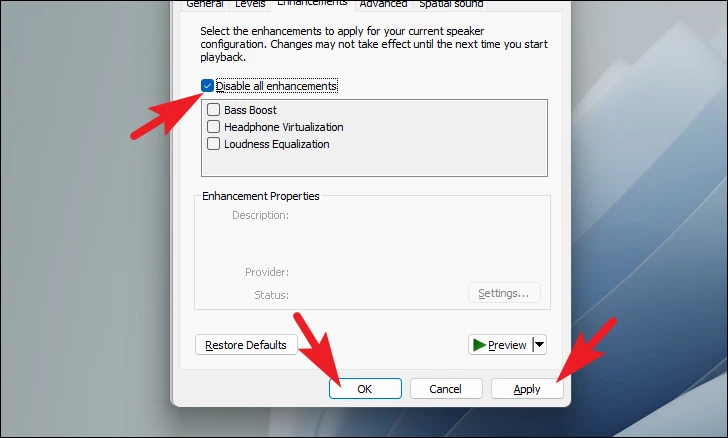
Enable audio device and disable enhancements
Sometimes the desired audio device may be disabled or audio enhancements could be causing issues. To check and adjust these settings:
- Open Settings by pressing Windows + I
- Navigate to System > Sound
- Click “More sound settings”
- In the Sound window, right-click your audio device and select “Enable” if it’s disabled
- Select the device and click “Properties”
- Go to the “Enhancements” tab
- Check “Disable all enhancements”
- Click Apply and OK
Run the audio troubleshooter
Windows 11 includes a built-in audio troubleshooter that can automatically detect and fix common problems:
- Open Settings (Windows + I)
- Go to System > Troubleshoot > Other troubleshooters
- Find “Playing Audio” and click “Run”
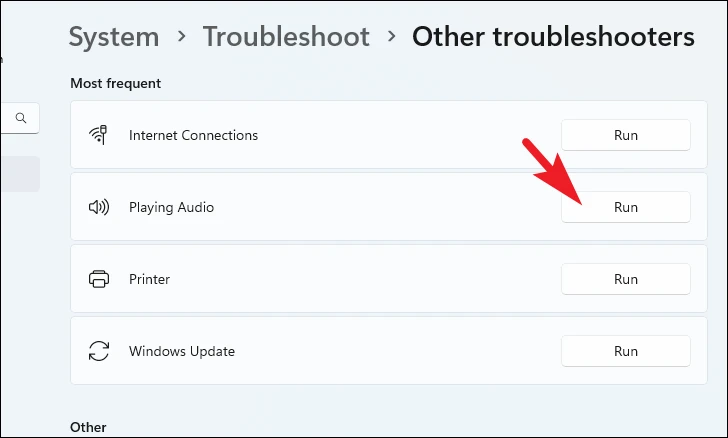
- Follow the on-screen instructions to complete the troubleshooting process
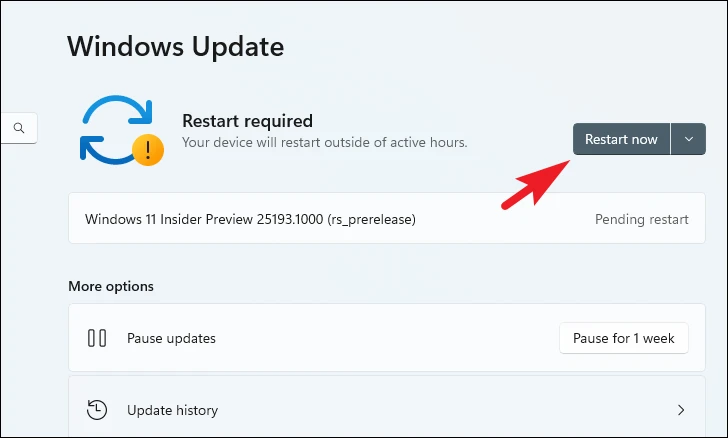
Update Windows
Ensuring your system is up-to-date can often resolve driver-related issues:
- Open Settings
- Go to Windows Update
- Click “Check for updates” or “Download & install” if updates are available
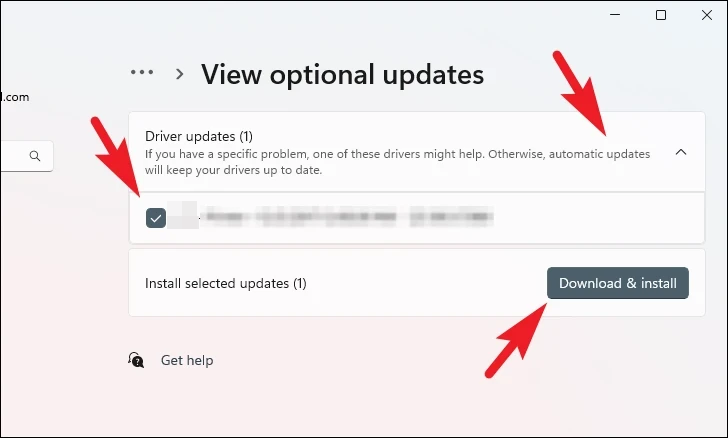
Update Realtek audio driver
Updating the Realtek audio driver can be done through multiple methods:
Using Windows Update
- Open Settings > Windows Update > Advanced options
- Click on “Optional updates”
- Select any available Realtek audio driver updates
- Click “Download & install”
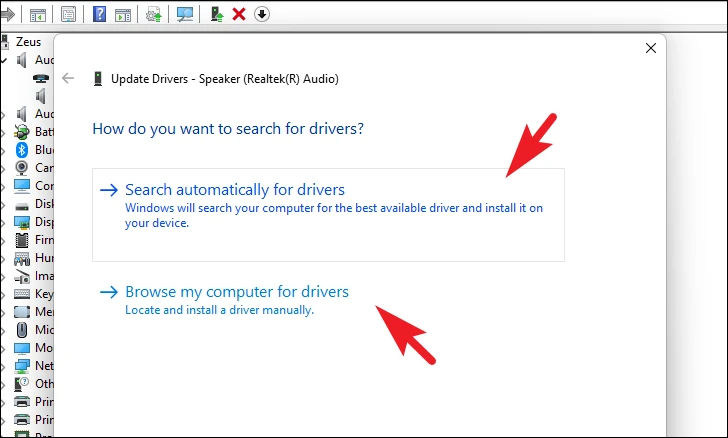
Using Device Manager
- Open Device Manager
- Expand “Audio inputs and outputs”
- Right-click on your audio device and select “Update driver”
- Choose to search automatically or browse your computer for drivers
Force update by uninstalling and reinstalling
- In Device Manager, right-click the audio device and select “Uninstall device”
- Restart your computer
- Windows should automatically reinstall the driver
- Check for optional updates in Windows Update to ensure you have the latest version
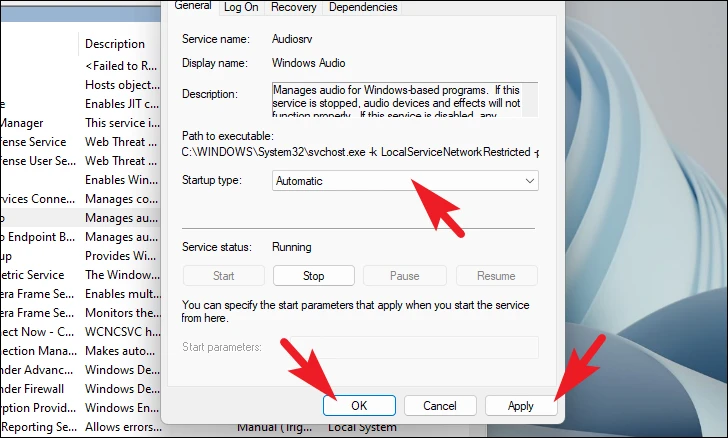
Enable audio services
Disabled audio services can cause sound issues. To re-enable them:
- Press Windows + R, type “services.msc”, and press Enter
- Find “Windows Audio” service
- Double-click it and set “Startup type” to “Automatic”
- If not running, click “Start”
- Click Apply and OK
Perform a system restore
If the issue started after a recent software change, you can try rolling back to a previous system state:
- Open Control Panel
- Go to Recovery > Open System Restore
- Choose a restore point from before the audio issues began
- Follow the prompts to complete the restore process

Reset your PC
As a last resort, you can reset Windows 11 while keeping your personal files:
- Go to Settings > System > Recovery
- Under “Reset this PC”, click “Reset PC”
- Choose “Keep my files”
- Select “Cloud download” for a fresh Windows image
- Review settings and click “Reset”
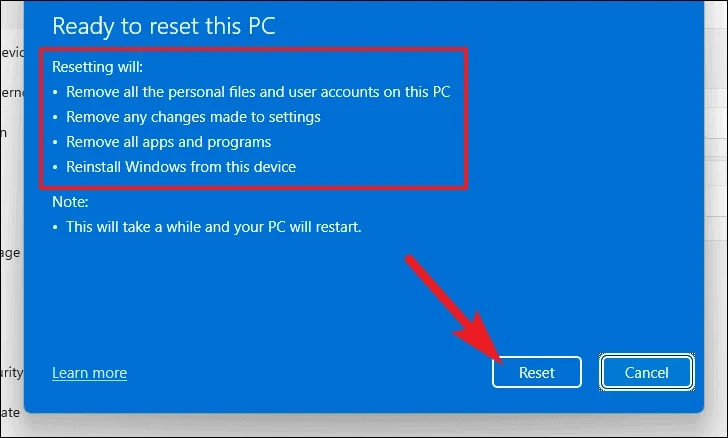
This process will reinstall Windows while preserving your personal data, potentially resolving persistent audio driver issues.


