The island in Big Walk hands you no compass and no waypoints when you start, which is exactly why so many players spend their first hours wandering. There is a map, but it stays locked until you finish a specific chain of objectives tied to the Red Tower. Once you do, you open a map room and pick up the Big Views achievement in the process.
Quick answer: Complete the five Red Tower puzzles to collect all five gourd-shaped pieces, place them at the top of the Red Tower to release a key, cut the key at every key cutter along the path, then insert it into the slot at the blue tunnel with the red staircase to open the map room.
What you need before the map unlocks
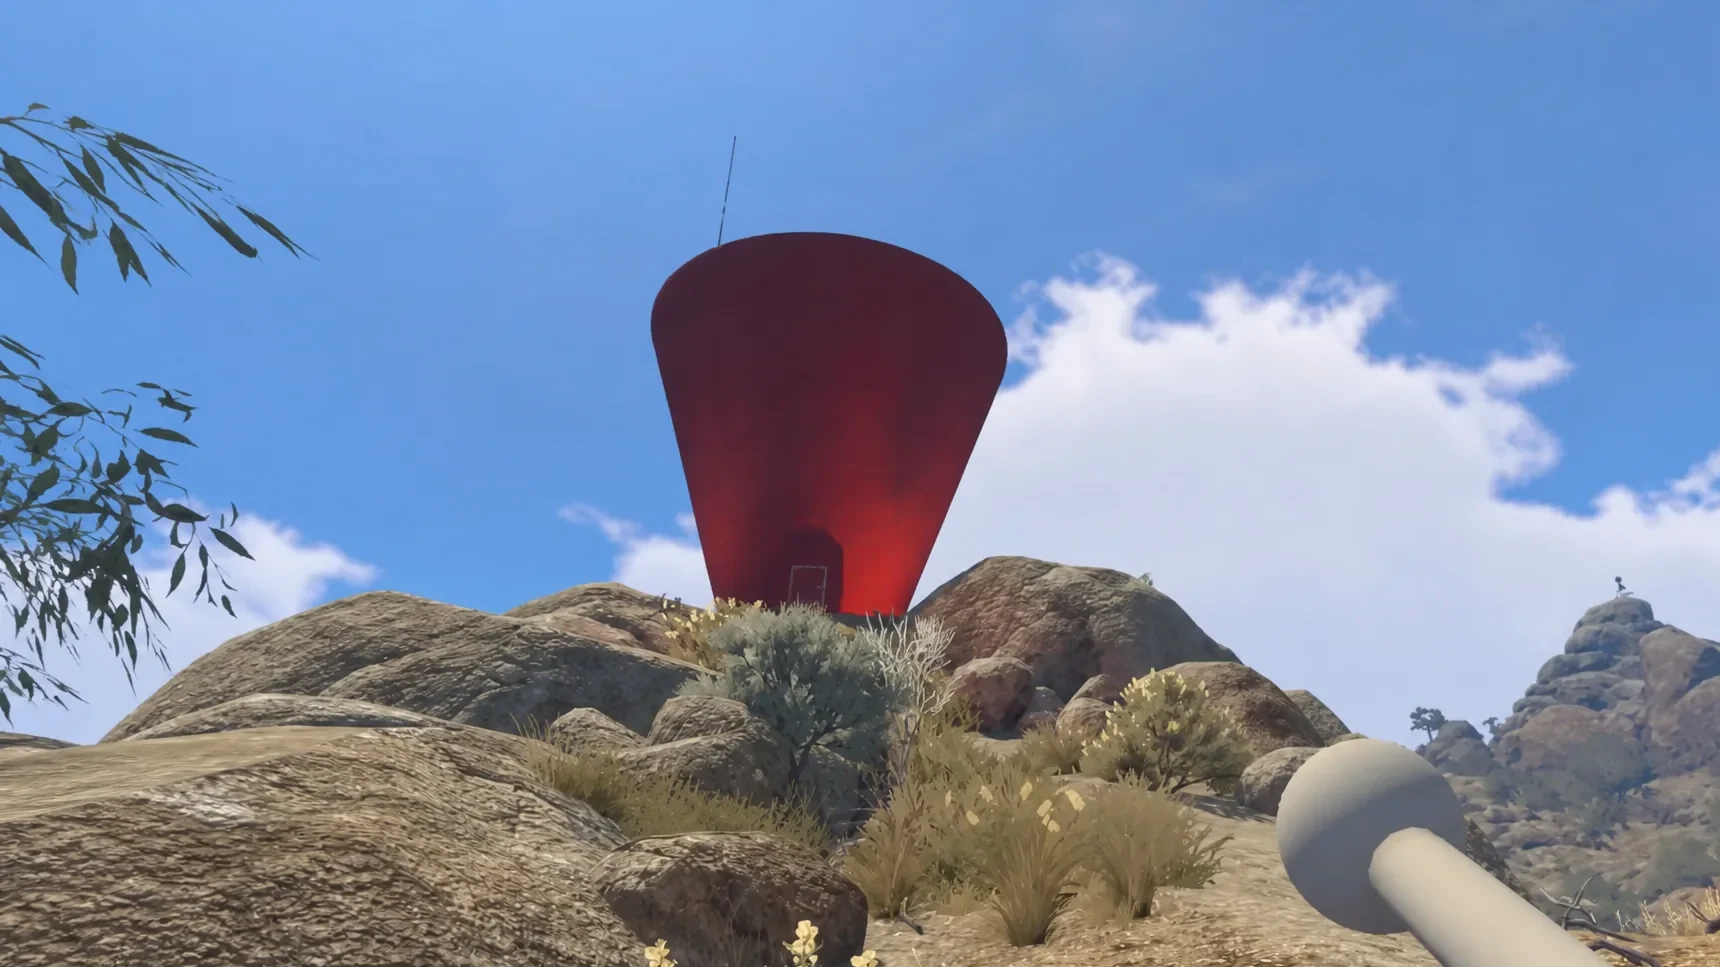
The map sits behind Red Tower progression, so you cannot grab it early. After you cross the red bridge and pass through the gym area, take the path directly opposite the gym uphill to the Red Tower, which is shaped like an upside-down cone. Climb to the top and you will find a terminal with five empty slots waiting for collectibles.
Looking toward the shoreline from the top of the tower shows you every puzzle location you need to reach. Each puzzle rewards one gourd-shaped piece, and you need all five to release the key.
The five puzzles are spread across the island and most are built around two-player coordination. Here is what each one involves.
| Puzzle | What it is |
|---|---|
| 1 | Yellow “Maze” puzzle — pass a wind-up timer through a hole and place it on the green pot before it runs down. |
| 2 | Green “Button Room” — one player inside calls out the lit button, the other outside presses it (walkie-talkie helps). |
| 3 | Train Station “Timer Cannon” — one player fires the timer from the yellow platform, the other retrieves it and drops it into the green pot in time. |
| 4 | Basketball Court — both players throw the light-up balls into the basket until every light turns green. |
| 5 | Mountain Overlook “Gesture” — one player reads gesture cards through telescopes and relays them so the other can perform the correct poses at distant platforms. |
Unlock the map room step by step
Note: The map room is not inside the Blue Tower higher up the mountain. Both buildings share the same blue color, but the map room sits in the red area and has a red staircase leading up to its doorway. If you are looking at the tower from the top, aim for the large red circle platform on the ground and follow the key cutter arrows to the tunnel on the right.
How you know it worked
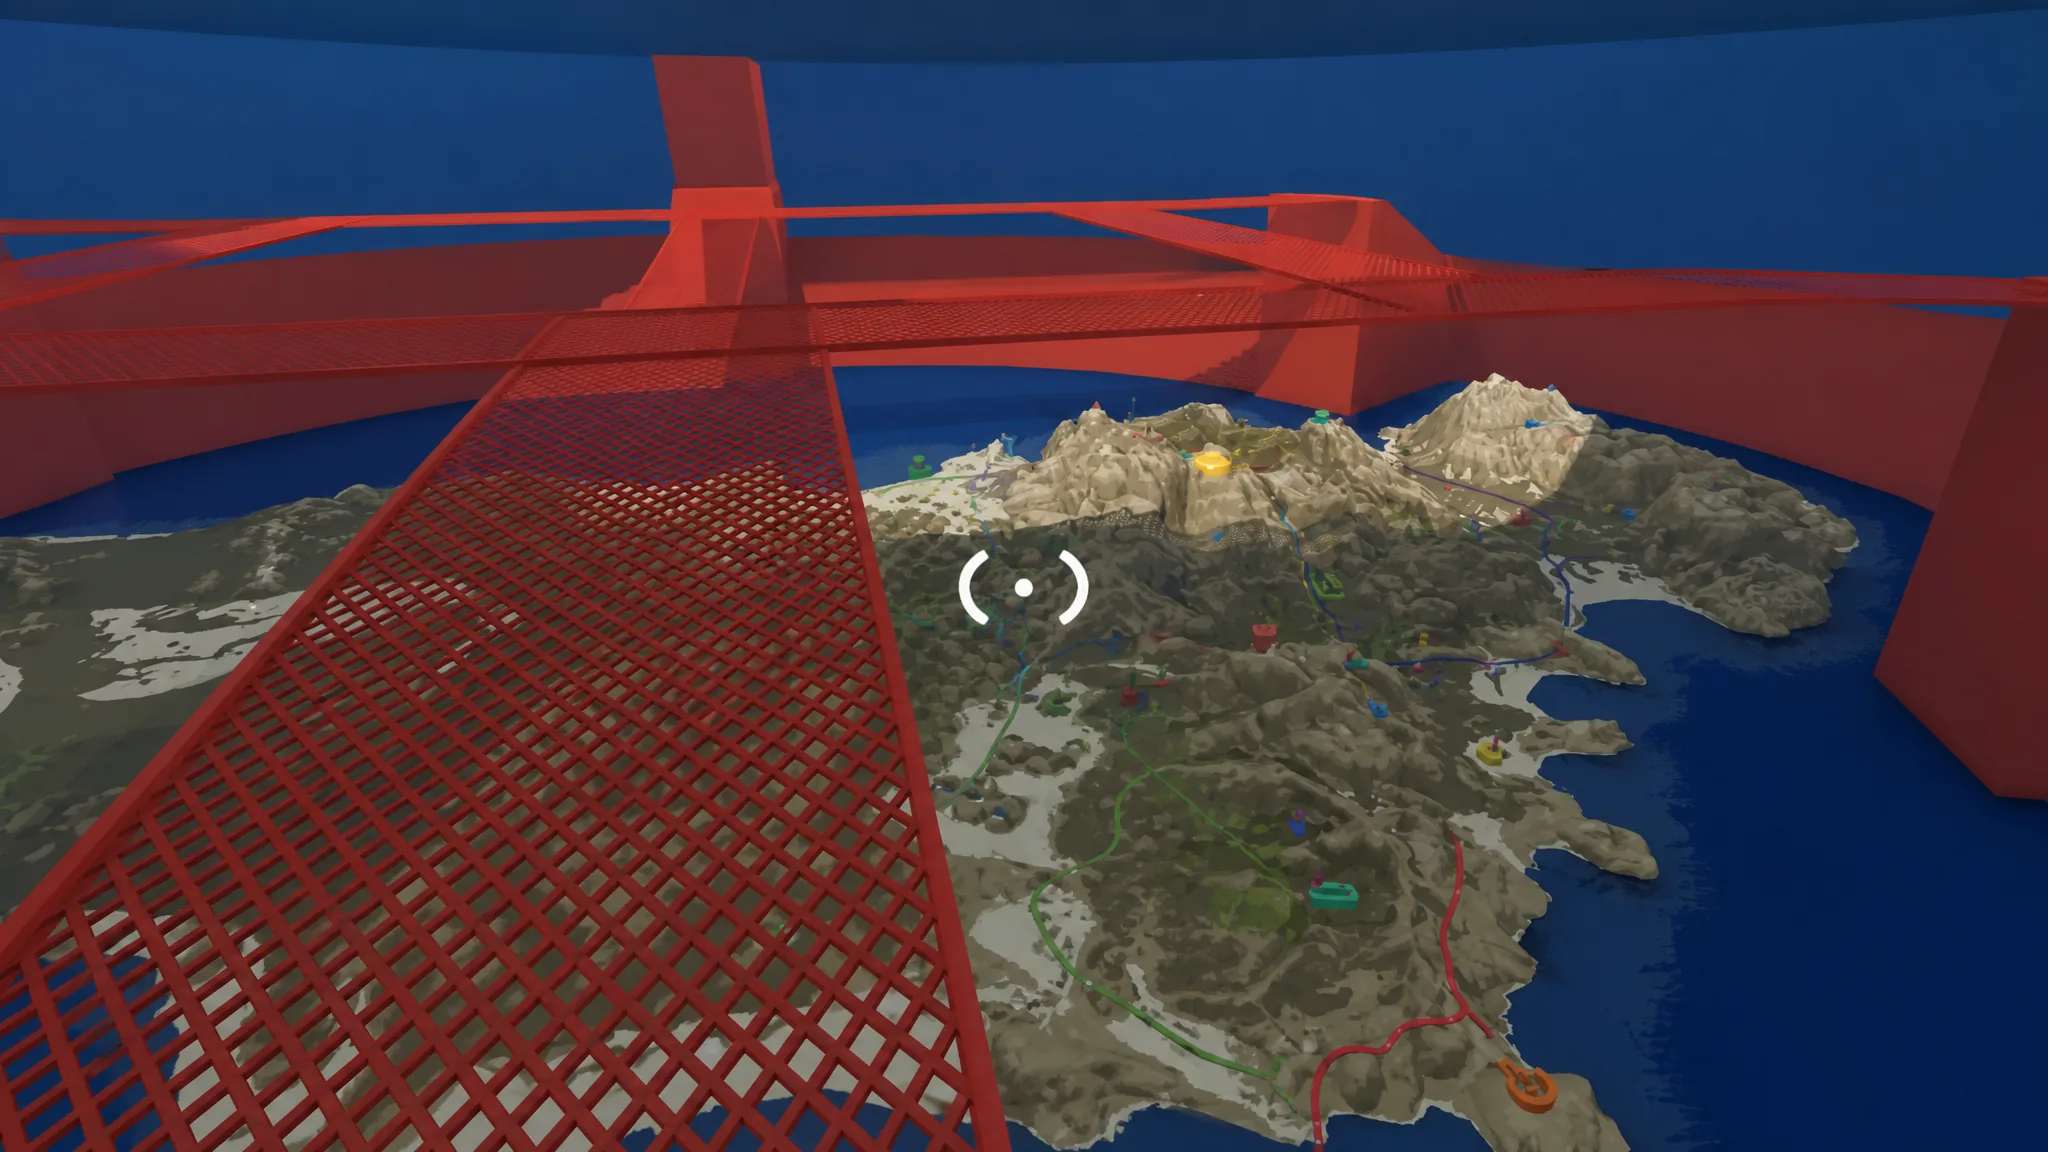
The moment the door opens and you enter the map room, the Big Views achievement unlocks. Inside you will see a full-scale diorama of the island, which confirms you completed the sequence correctly. If the door will not open, the key still needs cutting, so return to any key cutter you skipped along the path.
The two maps inside the room
Opening the room gives you access to two separate maps, and they do very different jobs. One stays fixed to the room, the other travels with you.
The large physical map
The large map fills the whole room and gives the clearest overview of the island. It also tracks your completion progress, which makes it the tool to use when you are chasing every puzzle. The states it shows work like this.
| What you see | What it means |
|---|---|
| Reward marked with a flag | The puzzle is complete. |
| Reward standing upright | The challenge still needs to be done. |
| Reward lying flat | You collected it but have not submitted it yet. |
| Landmarks and towers | Every major structure is displayed for reference. |
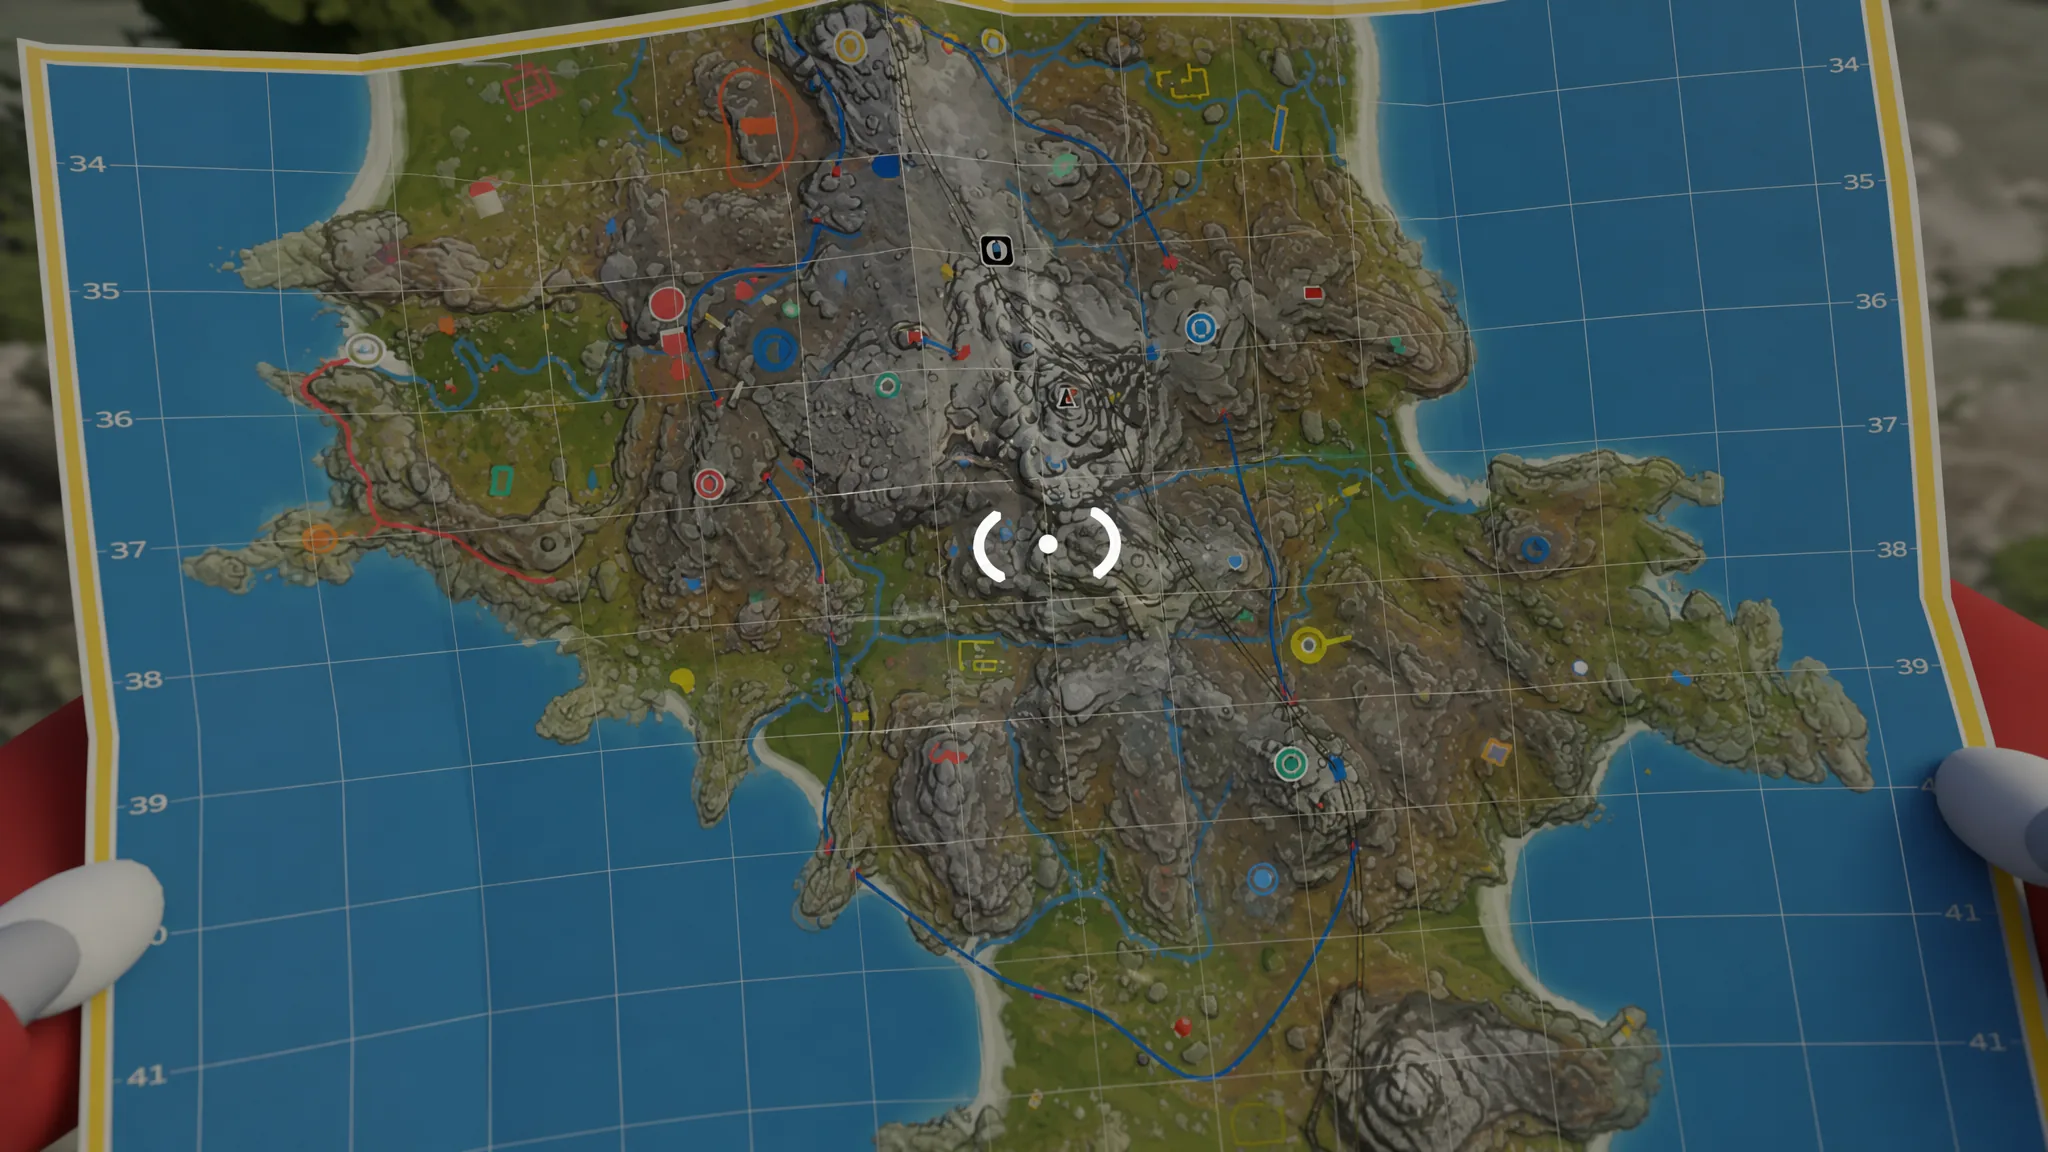
The foldable handheld map
On a bench near the entrance, on the right as you walk in, sits a table holding a foldable map, a compass, and three laser pointers. The handheld map does not track puzzle completion, but it is the one you will use most while exploring. It shows your position using coordinates, lets you zoom into different sections of the island, and helps you plan where to go next.
Coordinates appear as a four-digit sequence such as 3420, 1250. The map is divided into squares, with numbers running left to right and top to bottom. The first two digits of each pair tell you the square, and the second two tell you how far across or down the point sits inside it. The compass helps you work out which direction to head.
Tip: Challenge icons do not appear on the handheld map, but brightly colored areas usually sit near something worth reaching, so let the environment guide you.
Carrying the handheld map
The handheld map is not added permanently to your inventory. To carry it while exploring, you need either a backpack or a side satchel. Without one of those, you cannot take it with you.
Because carry space is limited, it is often smarter to leave the map stored safely and only bring it out for longer trips or when you are hunting a specific coordinate. The compass and laser pointers on the same table are worth grabbing for the same reason, since they make relaying directions to a partner much easier.
Getting around before the map
Until the Red Tower work is done, you can still navigate reliably with a few habits.
- Use the tall towers as landmarks. They are visible from long range, so keep at least one in sight while you move.
- Head toward brightly colored areas, which tend to sit near puzzles or notable locations.
- Clear one region before moving to the next, which keeps exploration organized and easier to remember.
- Play with friends and spread out. Extra players can scout paths and call out landmarks far faster than going solo.
Unlocking the map is one of the biggest early milestones in Big Walk, so if you plan to finish every puzzle or reach full completion, clearing the Red Tower and opening the map room should be one of your first priorities.