
OneDrive, integrated into Windows 11, provides seamless cloud storage and synchronization across devices. However, if you prefer using other cloud services or want to manage your files locally, you might consider disabling or removing OneDrive from your PC. This guide outlines several methods to help you disable or uninstall OneDrive according to your preferences.
Uninstall OneDrive from Windows 11
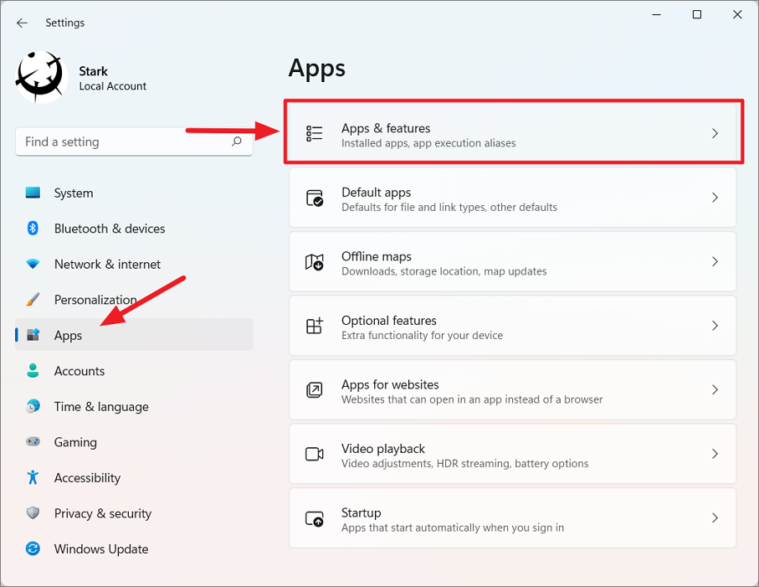
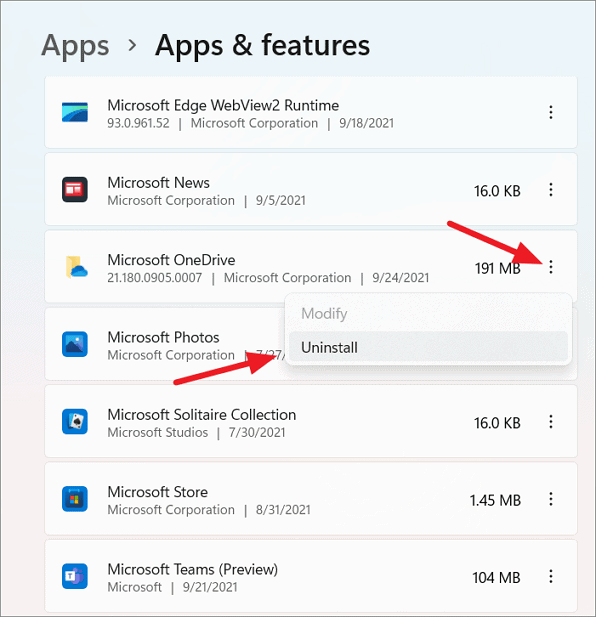
If you decide that OneDrive isn’t necessary for your workflow, you can completely remove it from your system. Here’s how to uninstall OneDrive from your Windows 11 PC.
Uninstall OneDrive via Windows Settings
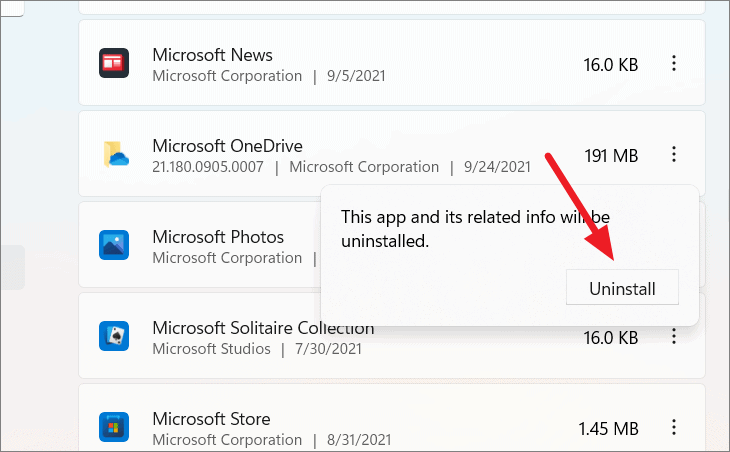
This process will completely remove OneDrive from your computer.
Uninstall OneDrive Using Command Prompt
If you prefer using Command Prompt, you can uninstall OneDrive by executing a few commands. Before proceeding, determine whether your Windows 11 is a 32-bit or 64-bit operating system.
Windows + I. Select System from the left sidebar, then scroll down and click on About.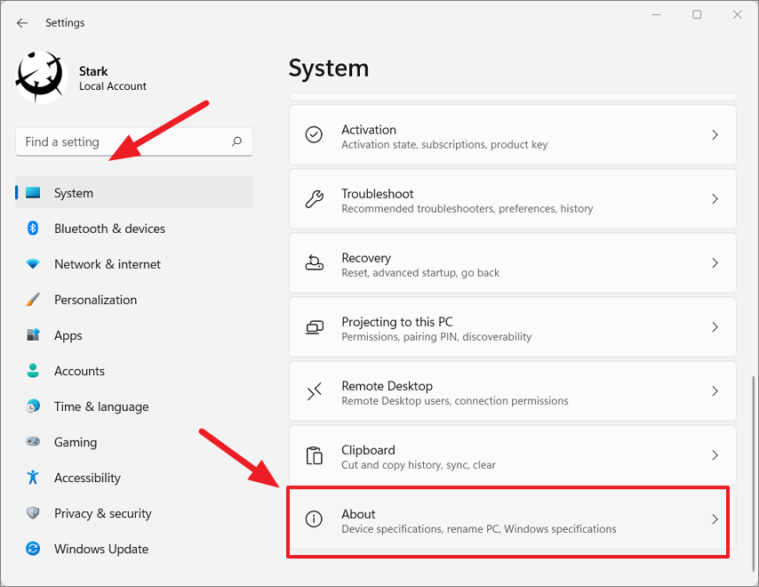


For 64-bit systems:
taskkill /f /im OneDrive.exe%SystemRoot%\SysWOW64\OneDriveSetup.exe /uninstallFor 32-bit systems:
taskkill /f /im OneDrive.exe%SystemRoot%\System32\OneDriveSetup.exe /uninstall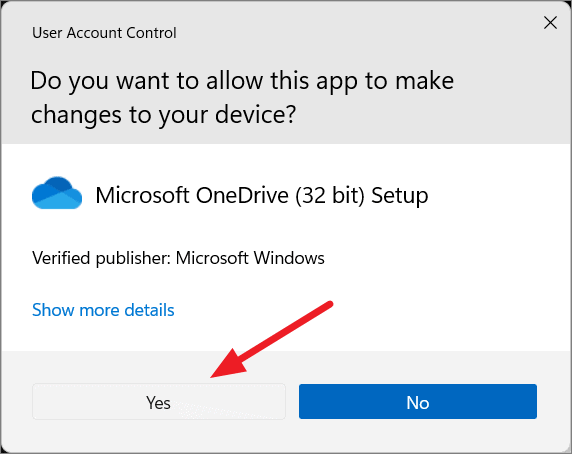
These commands will terminate any running OneDrive processes and uninstall the application from your system.
Disable OneDrive via Group Policy Editor
If you’re using Windows 11 Pro, Enterprise, or Education editions, you can disable OneDrive using the Group Policy Editor.
gpedit.msc, and select Edit group policy from the search results.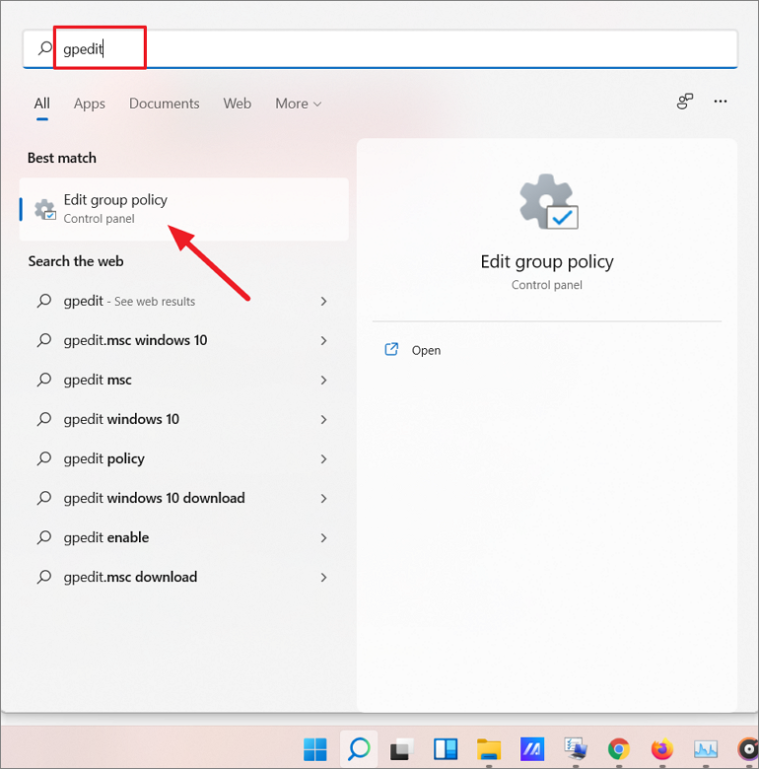
Computer Configuration > Administrative Templates > Windows Components > OneDrive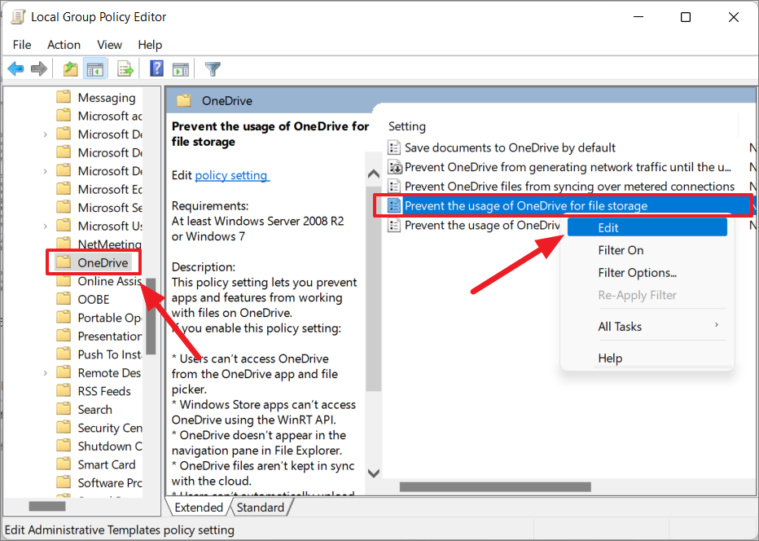
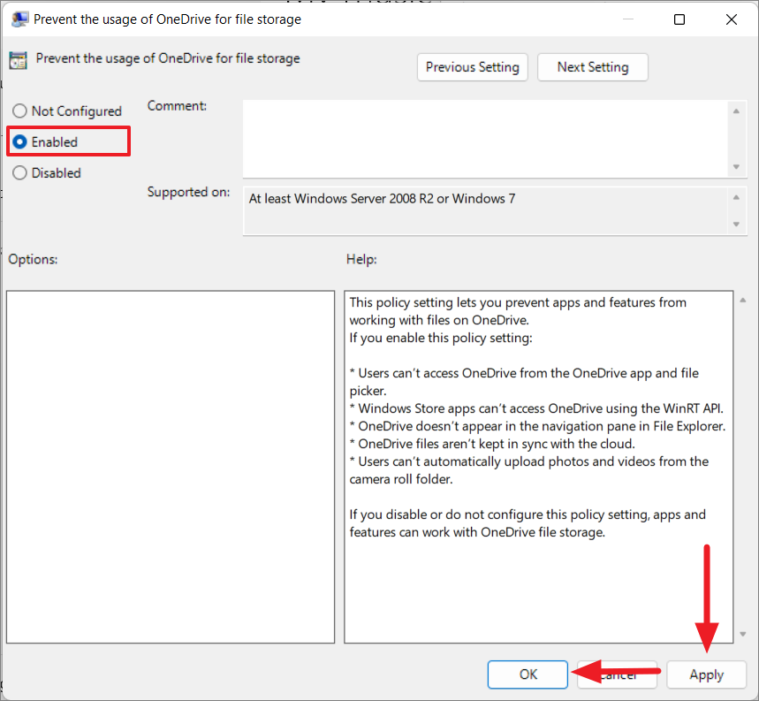
This action will disable OneDrive, preventing it from running and syncing files on your system.
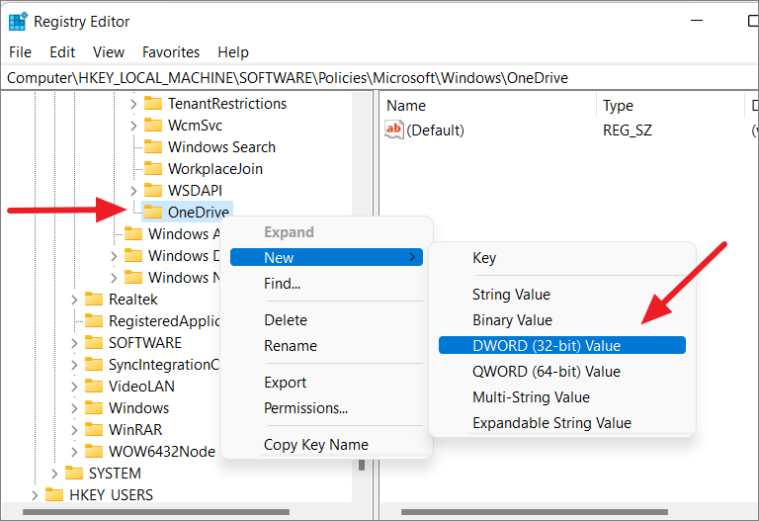
Disable OneDrive via Registry Editor
You can also disable OneDrive using the Registry Editor, which is available in all editions of Windows 11.
Windows + R to open the Run dialog box, type regedit, and press Enter to launch the Registry Editor.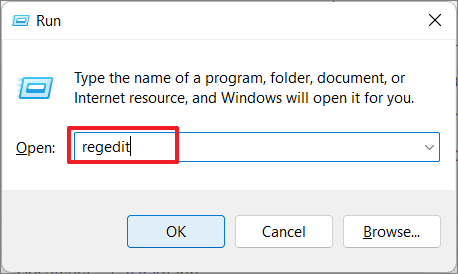
HKEY_LOCAL_MACHINE\SOFTWARE\Policies\Microsoft\Windows\OneDrive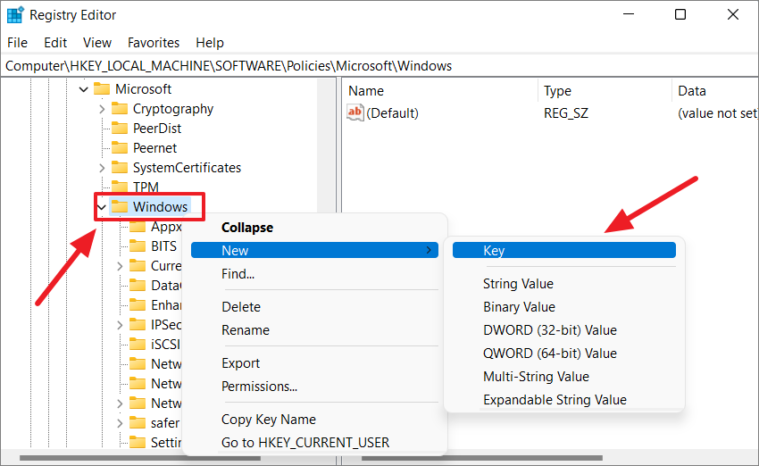
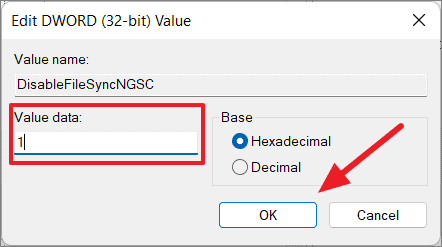
If you wish to re-enable OneDrive in the future, change the Value data of DisableFileSyncNGSC to 0 and restart your PC.
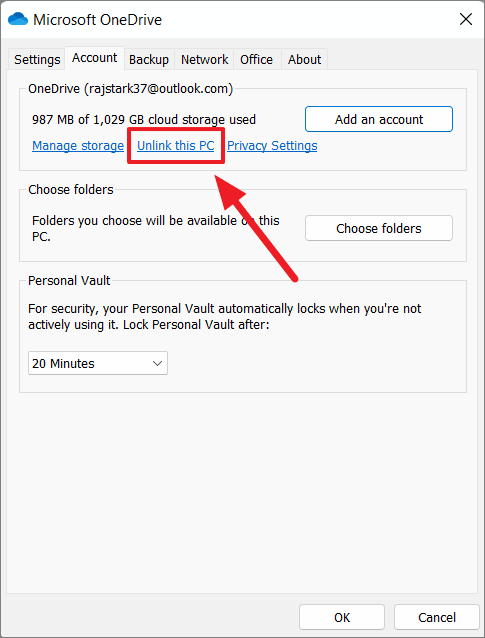
Unlink OneDrive from Your Windows 11 PC
To stop OneDrive from syncing without uninstalling it, you can unlink your PC from your OneDrive account.
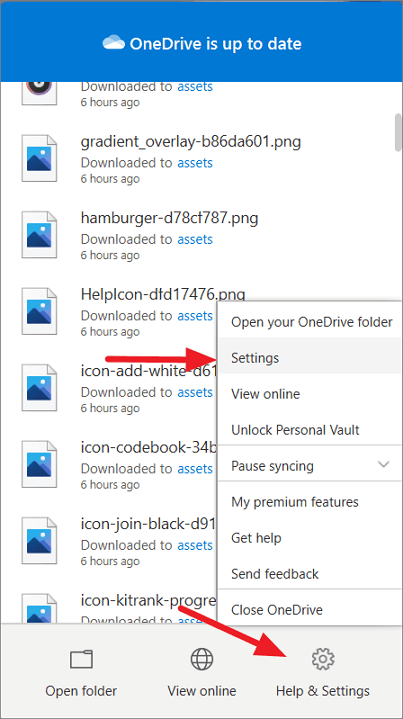
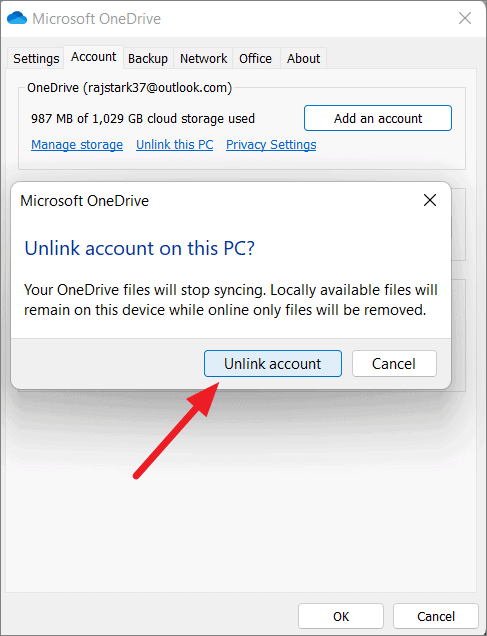
OneDrive will no longer sync files on your PC, but the application will remain installed for future use. You can sign back in at any time to resume syncing.
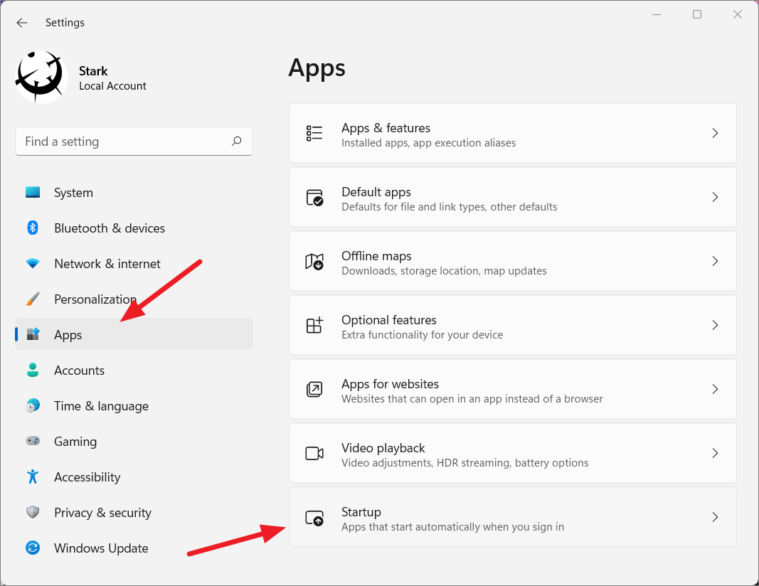
Prevent OneDrive from Starting Automatically
If you want to stop OneDrive from launching at startup without uninstalling it, you can disable its automatic startup.
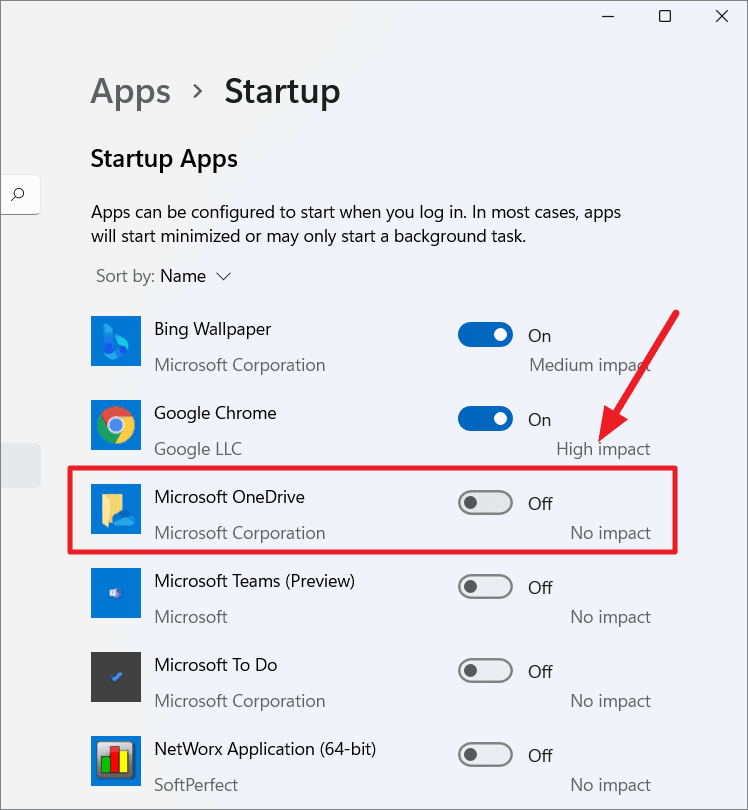
Disable OneDrive Startup via Settings
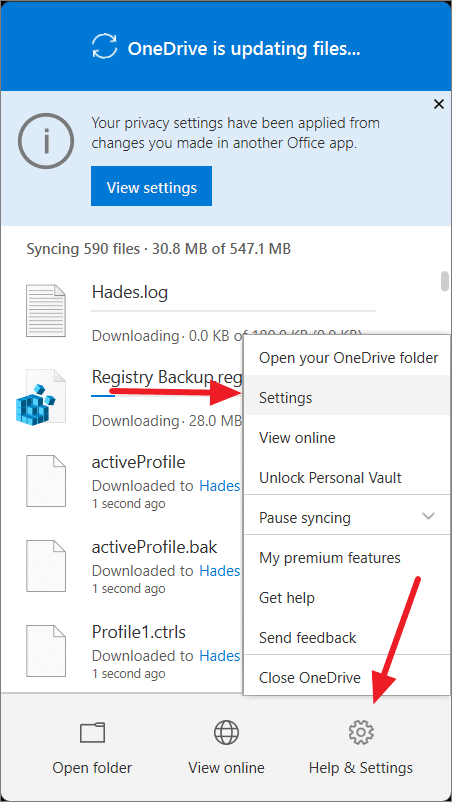
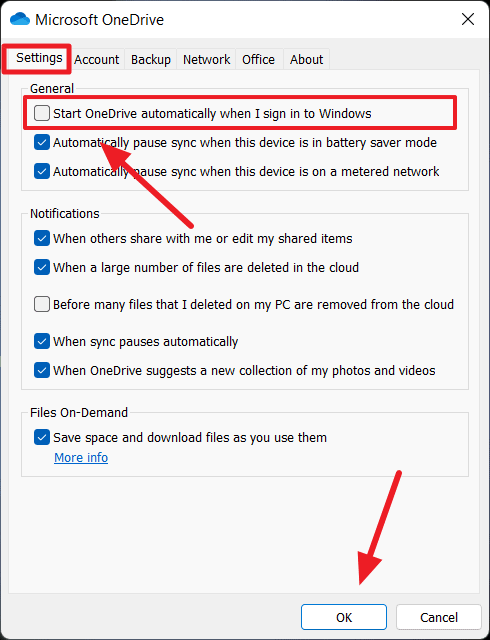
Disable OneDrive Startup Through Windows Settings
Disable OneDrive Startup Through Task Manager
Ctrl + Shift + Esc or by right-clicking the Start button and selecting Task Manager.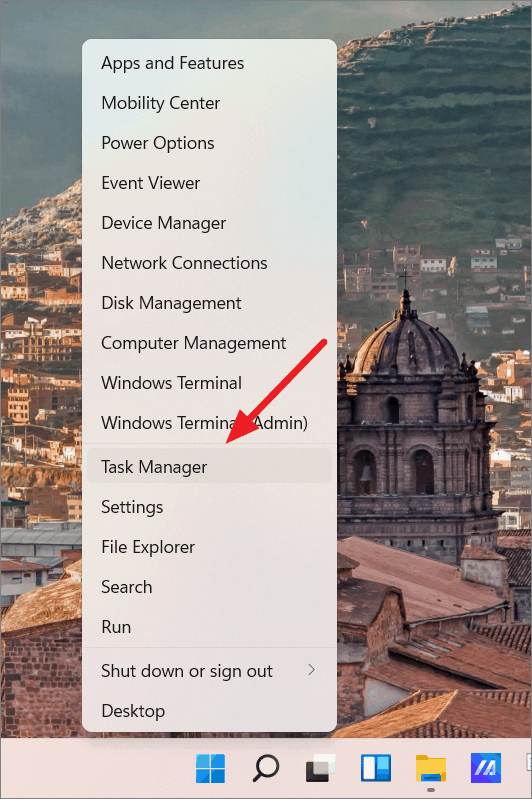
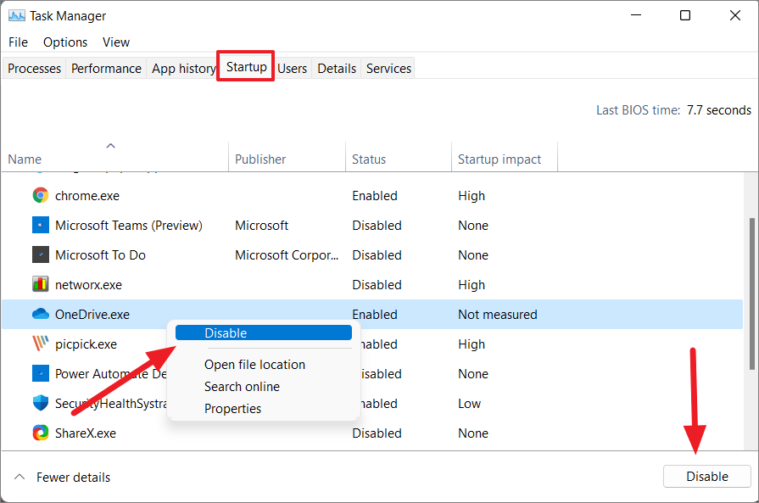
OneDrive will no longer start automatically when you sign in to Windows.
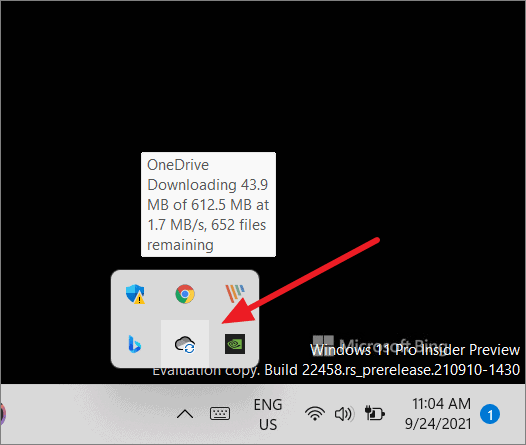
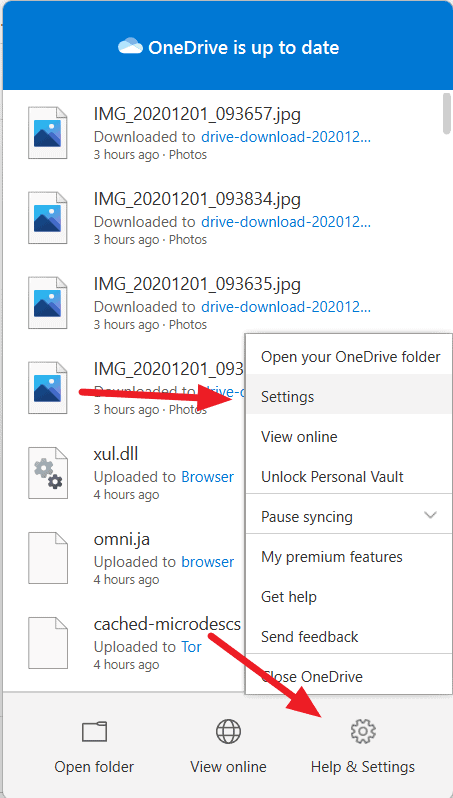
Pause OneDrive Syncing
If you want to temporarily halt OneDrive syncing, you can pause it for a specified duration.
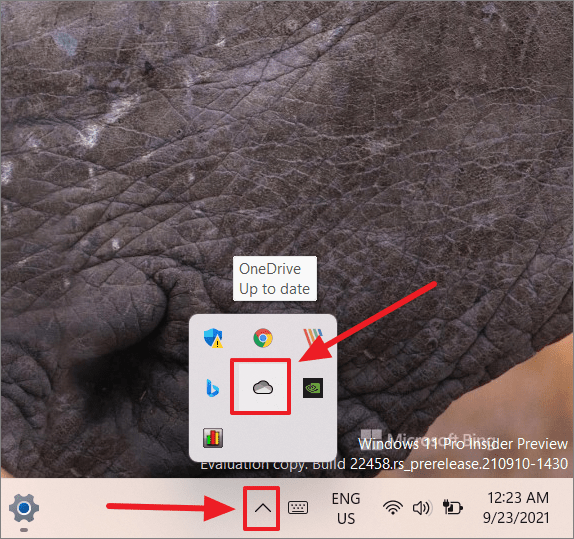
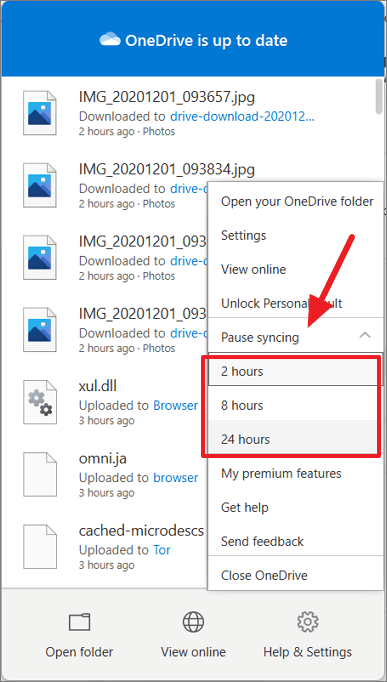
OneDrive will pause syncing for the selected time and resume automatically afterward.
Selective Sync for OneDrive Folders
If you’d like to stop syncing specific folders, you can adjust your OneDrive settings accordingly.
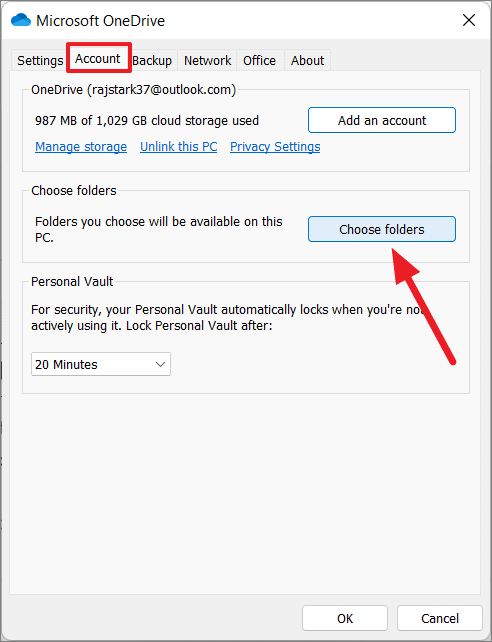
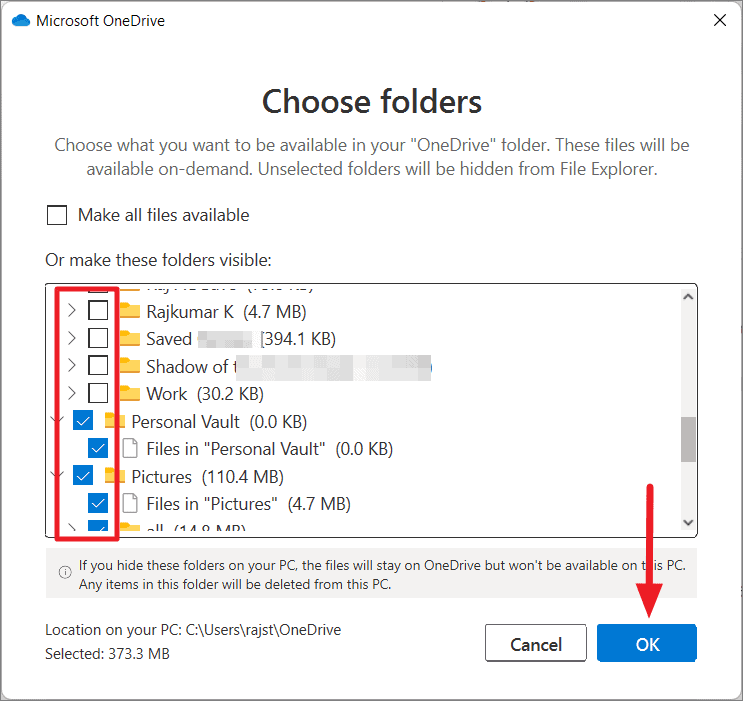
Note that some default folders like Desktop, Camera Roll, and Screenshots may not be available for deselection.
Managing OneDrive on your Windows 11 PC is straightforward with these methods. Whether you choose to temporarily pause syncing, prevent it from starting automatically, disable it, or uninstall it entirely, you can tailor OneDrive’s presence to suit your needs.


