


Coins are the currency that pays for everything practical in Mortal Shell 2 — shop stock, weapon upgrades, and Tarstone tempering at the Tarforge in Marrow Keep. Enemies drop them in small glowing pouches, but picking those up one at a time will not keep pace with what the Tarforge asks for. The fastest reliable income in the game does not come from coin pouches at all. It comes from an item you harvest and then sell.
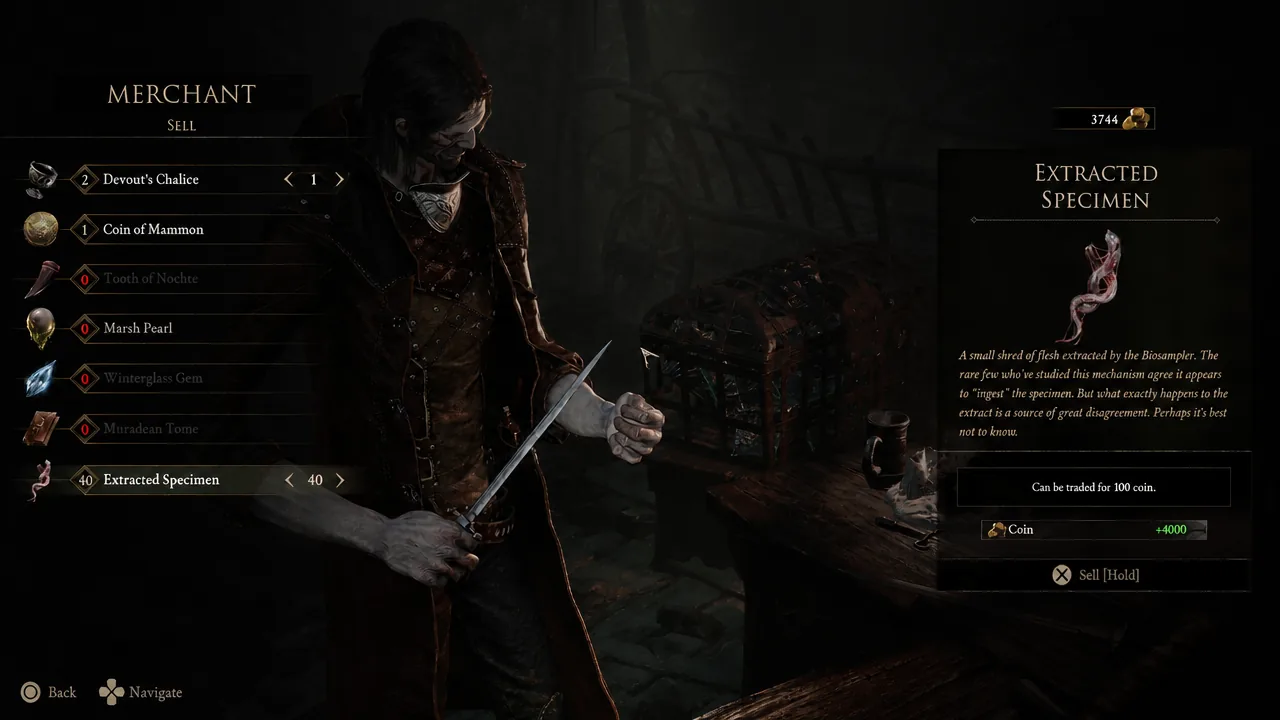
Quick answer: Equip Proxima with the Collector ability unlocked, clear the nine sheep in the pasture beside the Sunken Village Beacon in the Glutted Mire, rest at the beacon to reset them, then sell every Extracted Specimen to Merrick in Marrow Keep for 100 coins each.
Unlock Proxima’s Collector ability first
Collector is a passive on Proxima’s skill tree that gives enemies a chance to drop Extracted Specimens when they die. Those specimens exist purely to be sold, and Merrick pays a flat 100 coins for each one with no cap on how many you can stockpile.
To reach it you need Proxima’s Shell Bond at Tier 3, which means spending Glimpse on her with the Shellkeeper rather than spreading it thin across every shell you find. After that, Shell Points from leveling your Harbinger go into ranking Collector up. One useful detail: you do not need Proxima’s Biosampler to trigger it. Any weapon works, as long as you land the killing blow yourself.
Collector drop rates by rank
| Rank | Effect on enemy death |
|---|---|
| Level 1 | 20% chance to harvest an Extracted Specimen |
| Level 2 | 40% chance to harvest an Extracted Specimen |
| Level 3 | Adds a 35% chance to harvest two extra specimens instead of one |
Level 2 is where the farm starts feeling worthwhile, since roughly every other kill pays out. Level 3 is what turns it into real money, because a single kill can now hand you 300 coins of stock.
The sheep pasture route in the Glutted Mire
The best farming spot is a pen of sheep near the Sunken Village Beacon in the Glutted Mire. Nine of them are always there, they barely fight back, and they respawn with every beacon rest. Around five minutes of this loop is enough to walk away with 4,000 coins in specimens.
Note: the sheep double as an early Gloom source, but they stop being efficient for leveling somewhere around level 15. As a coin farm they never fall off, because a specimen is worth 100 coins no matter how strong you are.
Increase your coin yield with Night Mode and Justiciar’s Stone
Two things stack on top of the base farm. Night Mode raises the coin and Gloom that enemies drop in exchange for making them tankier, faster, and more aggressive. To switch it on you need the Gloombound Flame, then light the extinguished lantern on top of Marrow Keep and speak with the NPC who appears.
Night Mode is not worth it for the sheep run specifically. Sheep drop no coins at all, and their Gloom only climbs from 40 to 60. It pays off everywhere else, though, since every real enemy hands you a larger pouch on top of the specimen roll. The Blackridge Pass Beacon north of Widow’s Overlook is a good candidate, with cultists fighting a tree monster nearby and a hamlet full of zombies close by.
The other multiplier is Justiciar’s Stone, a Support Tarstone that raises what slain enemies drop. It upgrades to Level 4 and applies to normal coin drops, so it pairs best with a Night Mode enemy route rather than the pasture.
| Justiciar’s Stone level | Effect |
|---|---|
| Lv. 1 | Slain foes drop more coin |
| Lv. 2 | +2% coin from slain foes |
| Lv. 3 | +4% coin from slain foes |
| Lv. 4 | +6% coin from slain foes |
Other coin sources worth collecting
None of these replace the specimen loop, but they are free money you may already be walking past.
- Marsh Pearls sell for 2,000 coins each. You earn them from Gorf, the enormous frog in Mushroom Village, by bringing him the specific mushrooms he asks for during his questline.
- Chests hold coins alongside items, and the more valuable ones sit inside dungeons and hidden pockets of the map rather than out in the open.
- Plenty of inventory items exist only to be sold. The inventory screen lists the coin value before you commit, so check it before you hoard anything.
One setting is worth changing before any farming session. Under Game settings, turn on Auto Pick Up Gold so coin pouches go straight into your total. It removes the risk of clearing a camp and then leaving half its payout on the ground.
If specimens are not dropping at all, the cause is almost always one of two things: you are not in Proxima’s shell, or something other than you landed the final hit. Fix either and the pouches start appearing again. Given how quickly upgrade costs at the Tarforge climb, it is worth banking a run of specimens before you commit to a build rather than scraping coins together mid-upgrade.





