The Veil drops you into a dark, hostile map with very little hand-holding, and most early deaths come down to the same three things: wandering off the quest path, ignoring the sanity meter, and picking a fight with something that was never meant to be beaten at your level. The systems underneath are consistent, though, and once you know the rules, the first few hours stop being guesswork.
Quick answer: Use the main quest chain as your movement route, accept any side quests that sit along that same route, and farm only the monster spawns you already walk past. Before entering a dangerous region, carry healing items, sanity potions and free inventory slots, and save silver for weapon enchanting at the blacksmith rather than spending it on early gear.
Use the main quest as your route, not just your objective
The main quest line is built to walk you through the map in a sensible order. Following it teaches you where regions connect, which enemies live where, and how the core mechanics behave before anything punishing shows up. Glowing trail markers point the way, so you rarely need to guess at direction — you need to decide what else you do while walking it.

That is the efficient loop: layer side quests, farming and looting on top of a route you were already going to walk. Check your quest log before you set out and grab anything that overlaps with your current destination. Monster spawns along the way are worth clearing because the experience and drops cost you no extra travel time.
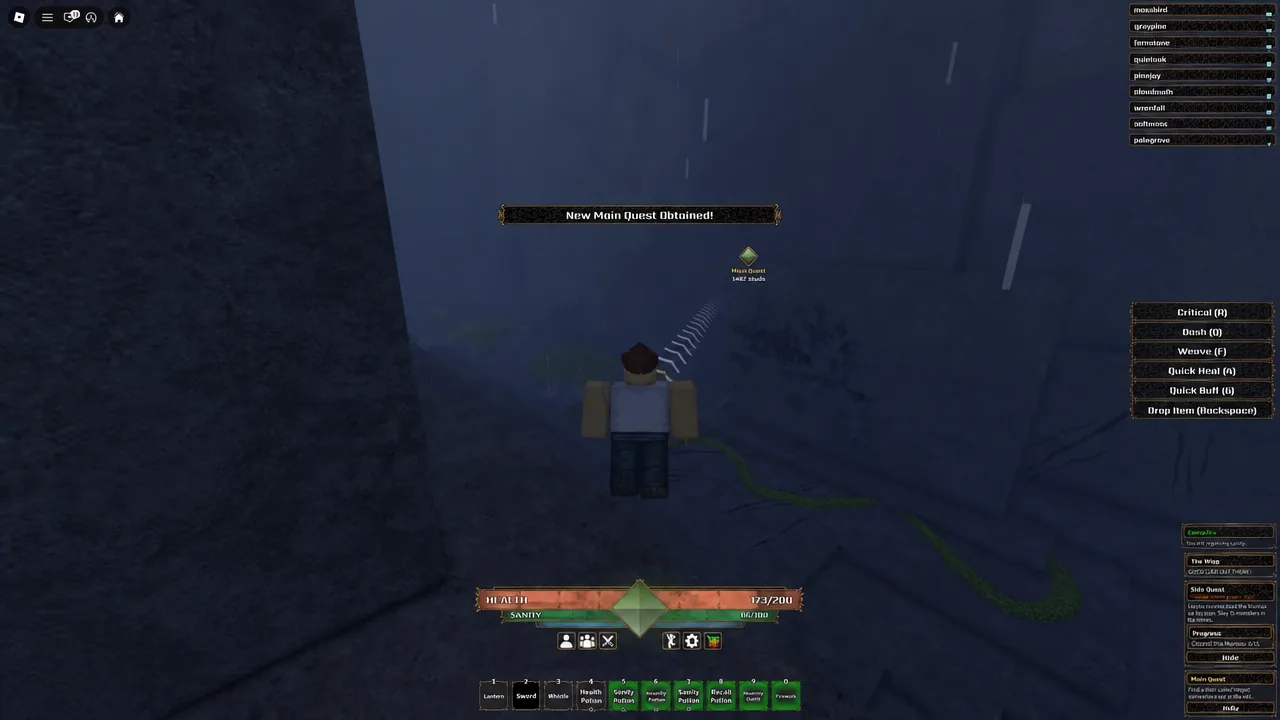
Turning quests in works the same way. Handing a completed quest to an NPC such as Vesper is a good moment to reassess — check what new objectives point in the same direction and bundle them before you leave town again.
Day and night cycle and the sanity meter
The world runs on a day and night cycle, announced on screen with a banner when it flips. Monster activity climbs sharply at night, so the same route that felt safe in daylight can turn into a running fight after dark. If you are still learning an area, do your exploring during the day and save the night for content you already know.
Sanity is the stat beginners underestimate. It drains as you spend time in dark and hostile places, and letting it bottom out is a much faster way to lose a run than raw damage. Watch the meter the same way you watch health, and carry sanity potions as a standing part of your kit rather than an emergency purchase.
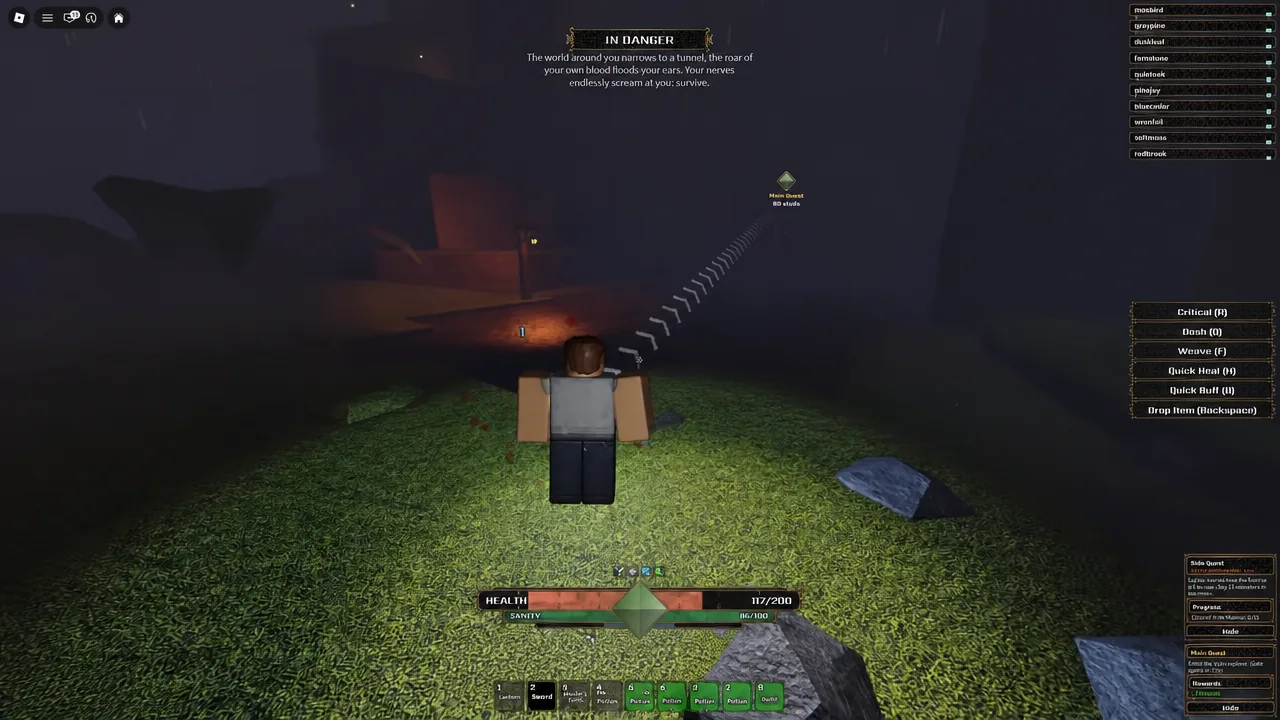
What to prepare before entering a dangerous area
Regions like The Glade punish unprepared trips. Before heading deep into one, run a short checklist so you are not forced to turn back within minutes.
- Healing items in quantity, not one or two.
- Sanity potions to cover the whole trip, not just the way in.
- Free inventory slots, so drops you actually want are not blocked by junk.
- A rough exit plan — know which direction takes you back to safety.
Note: leaving inventory space open matters more than it sounds. Deep areas are where the better weapons, accessories and materials drop, and a full bag turns a successful run into a wasted one.
Combat: dodge, reposition, and walk away from bosses
Standing still and trading hits is the losing play. Movement is the main defensive tool — dodge telegraphed swings, circle around enemies instead of backing straight up, and use terrain to break line of sight when you need a moment to heal.

Retreating is a legitimate option. If a boss is clearly overtuned for your gear, leaving and returning later with better weapons, enchants and consumables costs you far less than repeated death loops. Early on, most bosses are a “come back” problem, not a “try harder” one.
Surviving the maze
The maze is a foggy, overgrown area where visibility is short and the layout is easy to lose track of. Trying to solve it in one attempt is the wrong approach. Learn it in sections instead — push a little further each visit, note the turns that lead somewhere useful, and back out before your supplies run low.
Sanity is the real timer in there. The fog and the dead ends drain it while you wander, so treat your sanity bar as your budget for the run. When it drops low, leave and come back rather than gambling on finding the exit. The maze also holds points of interest worth returning for, including the Shimmering Sanctum, where an NPC standing by a teleport obelisk will send you to Sky Island in exchange for a gem.
Silver, gems and enchanting at the blacksmith
Silver is tight in the early game and it has a much better use than incremental gear upgrades. The blacksmith enchants weapons using gems, and a well-enchanted weapon you already own will usually outperform a slightly better base weapon you overpaid for.

Compare drops rather than equipping everything you find. When a weapon, accessory or material drops, check it against what you are running and only swap when it moves your build forward. Selective upgrading keeps your silver in reserve for enchanting and for the class unlock cost that lands later, which runs to roughly 1,000 silver paid to a class trainer.
Best races in The Veil (tier list and bonuses)
Your race supplies passive stat bonuses that should line up with the damage type you plan to use. Magic, summoner and tank builds all have clear standouts.
| Tier / Race | Bonuses |
|---|---|
| S — Whaleborn | Dusk Weaver passive stacking to 4 for a 30% damage and speed boost, Night Colora, -10% insanity |
| A — Goblin | +20% luck, +10% cast damage, +10% cooldown reduction (magic pick) |
| A — Obelites | Tank-oriented, with the Exert Energy skill |
| A — Gem Head | +10% summon damage, +15% summon life |
| A — Underling | +15% cast damage, +10% regeneration, +25% fire resistance |
| B — Mushling | +10% regeneration, +10% healing, -10% stamina regeneration, Decompose skill |
| B — Rat | 5% evasion chance |
| B — Human | +5 HP per prestige |
| C — Havling | +10% resistance and damage at night, -10% resistance and attack speed by day |
| C — Skeleton | +10% speed, +10% summon damage, -10% resistance |
For a summoner build, Gem Head is the stronger of the two summon-focused options over Skeleton. Goblin is the cleanest magic pick, Obelites covers tanking, and Whaleborn is the best all-round choice, particularly because the insanity reduction eases the sanity pressure that defines night play.
How classes work: super, ultra and the alignment gate
Classes come in two tiers. Super classes are flexible and their abilities can be mixed freely into a hybrid loadout. Ultra classes are a hard commitment — you can hold only one per character, its abilities cannot be combined with any other class, other ultra class trainers stop talking to you once you commit, and you are expected to learn the full skill set. The only way to undo it is Kharvos, an NPC who resets your ultra class through a trade.
Hybrid builds have a cost. Mixing abilities from another class into your loadout forfeits the pure class stat buff — a pure Marauder keeps its +8% speed, a pure Crusader keeps its heal and blind-resistance bonuses, and a hybrid keeps neither. Outside combat you can re-equip your ultra class or swap between super setups whenever you like, so experimenting with super combinations carries no penalty.
Unlock requirements for known classes
Most classes are gated behind alignment currency. You need 30 Sins, earned on the chaotic path by killing players, or 30 Offerings, earned through quests and good deeds such as jailing outlaws. On top of that, expect to pass a class quest and pay the trainer.
| Class | Path and requirements |
|---|---|
| Marauder | 15 Sins + 15 Offerings; timed 3-minute on-foot run to Echo Hold, no teleporting |
| Sky Sentinel | 30 Offerings; kill five Angry Nimbuses, which only spawn during rain |
| Crusader | 30 Offerings; priestly support class |
| Cultist | Sins path; the evil summoner |
| Gladiator | Sins path; warrior with a rage mode |
| Duskwing | Shinobi archetype with a grapple hook |
| Hive Disciple | Poison damage through swarms of bugs |
| Florist | Druid-style nature class |
Sky Sentinel is the summoner option on the orderly path, with an aura of guardian wisps, a stomp that heals and buffs summons, an ice dash, and a passive of +10% summon damage, +10% summon life and one extra summon in exchange for 10% resistance. Reaching its trainer means finding the Shimmering Sanctum in the maze and paying the gem NPC for the trip to Sky Island. Cultist covers the same summoner archetype on the Sins side. Berserker, GODSEEKER, FLORIST and sentinel have also been named by the developer.
To farm alignment, the Idol of Hatreds is the reliable route — it sits in a hidden spot behind a bookshelf in the Weeping Crypt’s cave, and server-hopping lets you repeat the loot. Sins can also be farmed by trading kills with a friend of a different prestige tier. Finding trainers is the common sticking point; the class trainer only appears behind the alignment requirement, the class quest and the silver payment, and the official Discord’s help channels are the practical place to ask for directions.
Early progression in The Veil rewards patience over speed. Run the main quest as your spine, stack side objectives and farming onto that same path, keep sanity potions in the bag, and bank silver for enchants and the class unlock instead of burning it on gear you will replace. Do that and the maze, the night cycle and the first real bosses stop being walls and start being scheduled work.