Factory Station is one of three subway stops you have to reroute during the ‘Power Lines’ mission in Control Resonant, and it is the one that teaches the rule every later station leans on. Three Calibration Units, three taped squares, one Tuning Device that only accepts a perfect line. Get this one right and East Park, Perimeter and the Vanished Station all make more sense.
Quick answer: Gather all three Calibration Units, put two in the squares between the benches and the remaining one in the square before the stairs, then activate the Tuning Device.
Factory Station location in Control Resonant
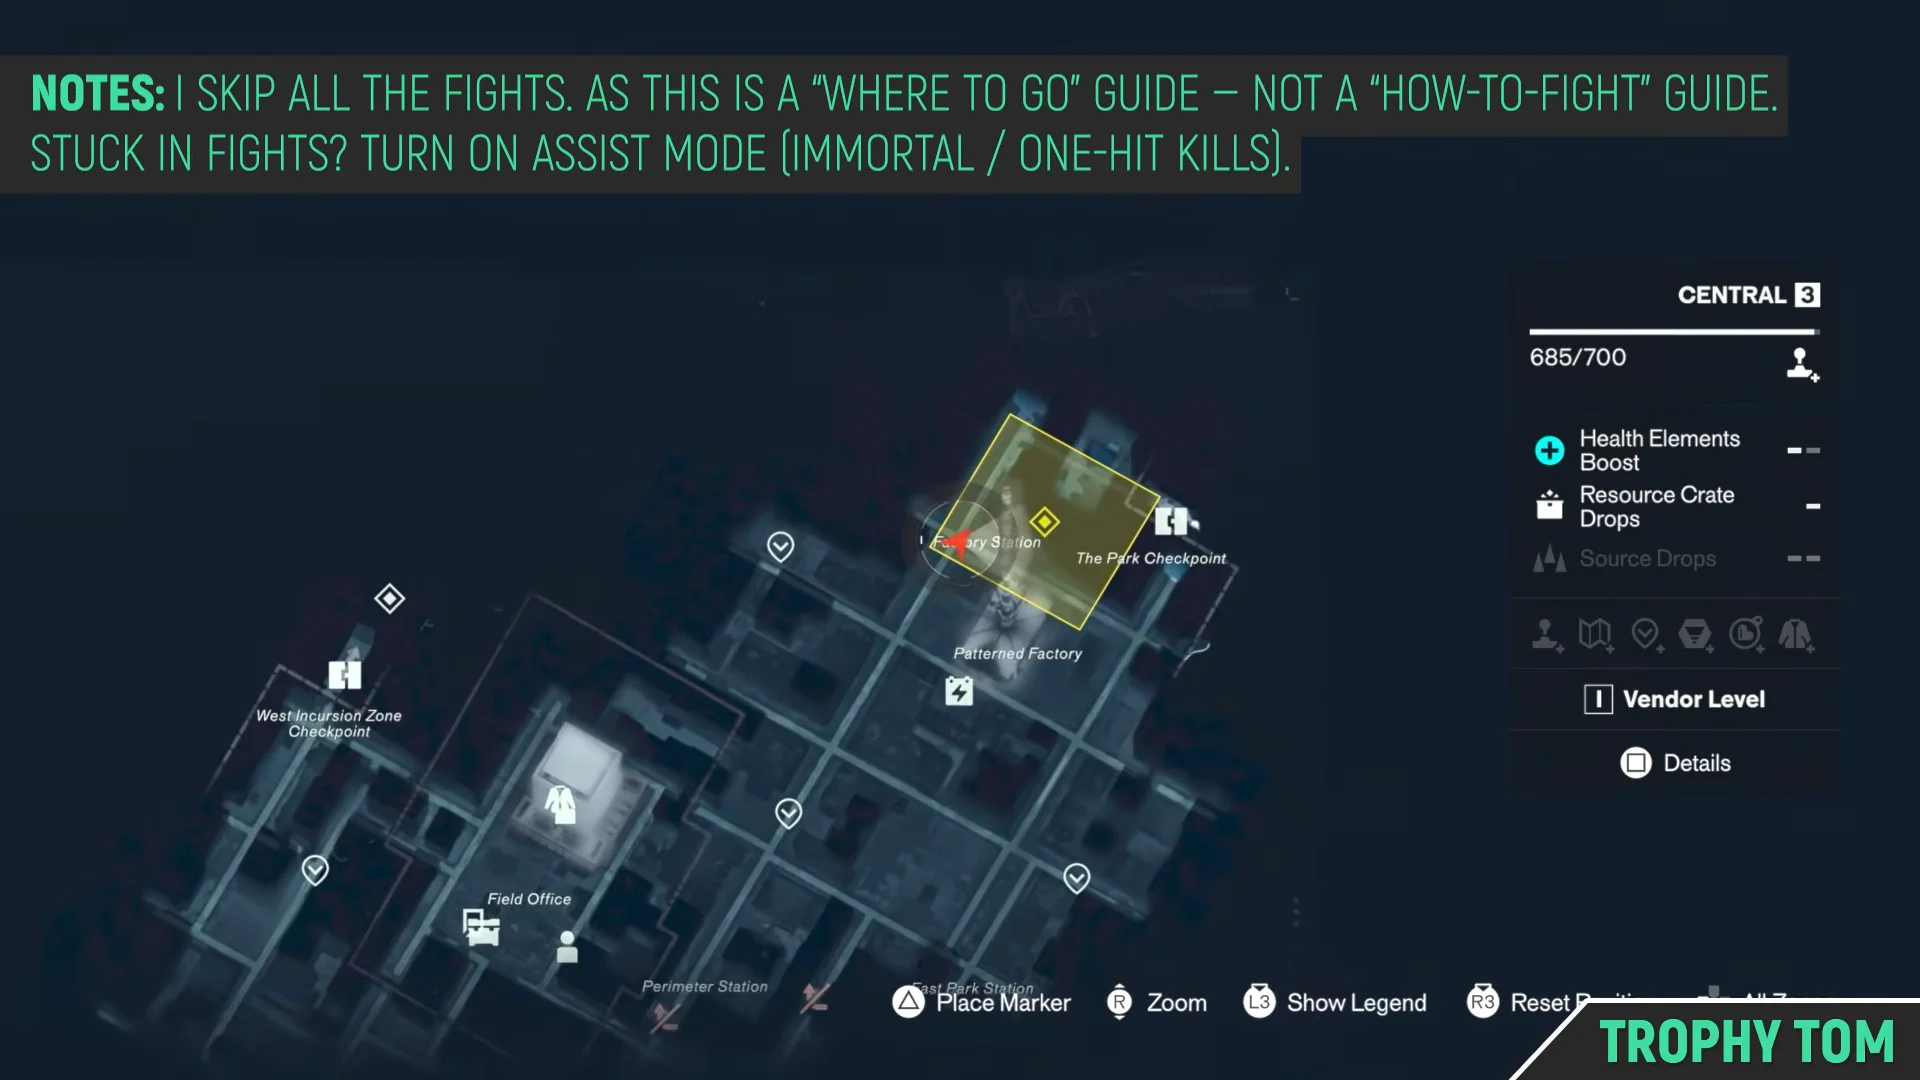
Factory Station sits just north of the Patterned Factory, in the Central District. The cleanest approach is the main road running from the Field Office toward the factory. Rather than turning in at the factory itself, keep going straight so you are tracking along its left-hand wall.
You are on the correct road if a large wall of mold is visible ahead of you in the distance. That wall ends at a crossroads, and the station entrance is tucked on the corner between the road heading right and the one running straight at the mold.
The entrance is guarded. Two waves of enemies spawn before you are allowed inside, and Factory Station mixes Mold enemies in with the Hiss. Mold enemies take heavy damage from fire, and armored Mold Scrappers need a blunt weapon or a Combat Ability to break their shell.
All three Calibration Unit locations in Factory Station
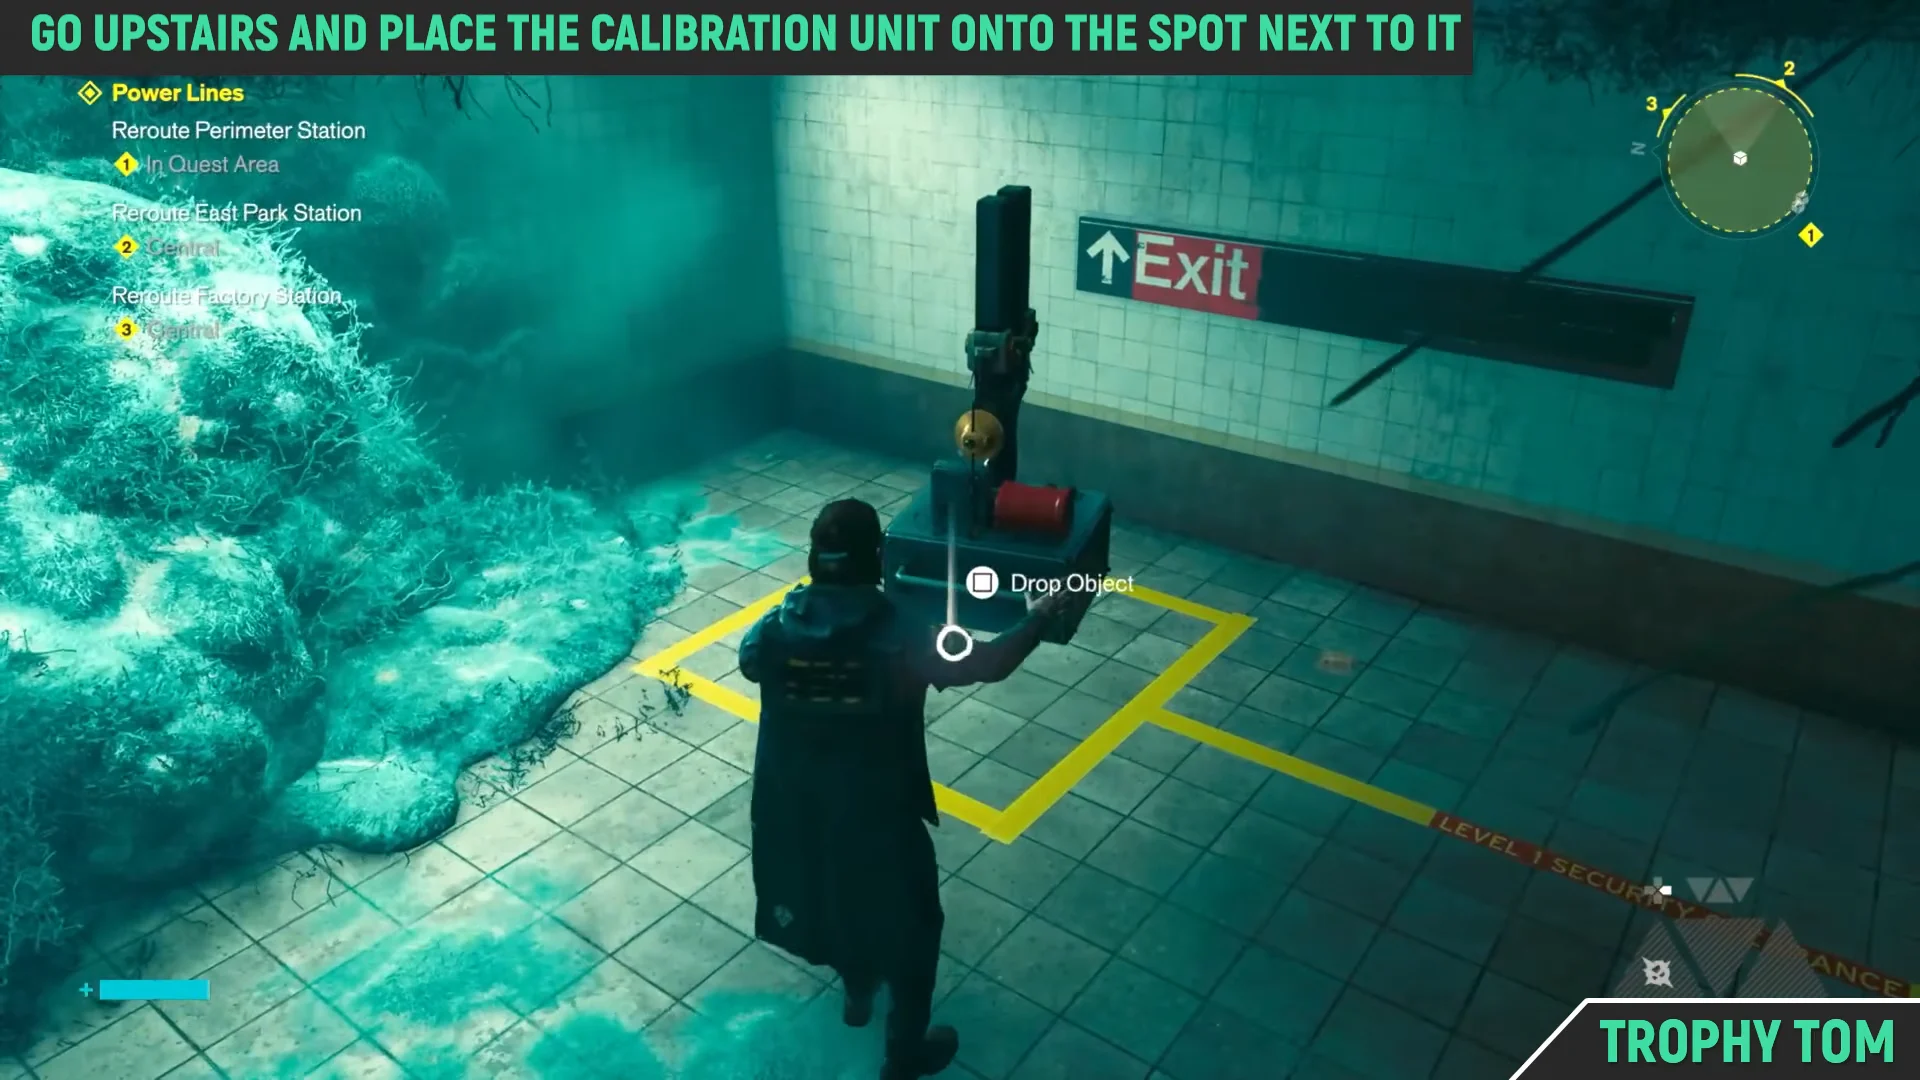
Calibration Units are the crates with large magnets mounted on top. You carry them one at a time, so expect three round trips. All three are within the station itself, spread across the concourse, the platform and the track bed.
| Unit | Area | Exact spot |
|---|---|---|
| 1 | Concourse | Small shop just past the ticket barriers near the entrance |
| 2 | Platform | On top of the train on the left as you come down the stairs |
| 3 | Track level | On the floor directly behind the stairs you used to reach the platform |
The shop unit is the easiest to miss because it sits behind the store counter rather than out in the open. Head through the turnstiles, step into the open storefront, and pick it up before you go downstairs.
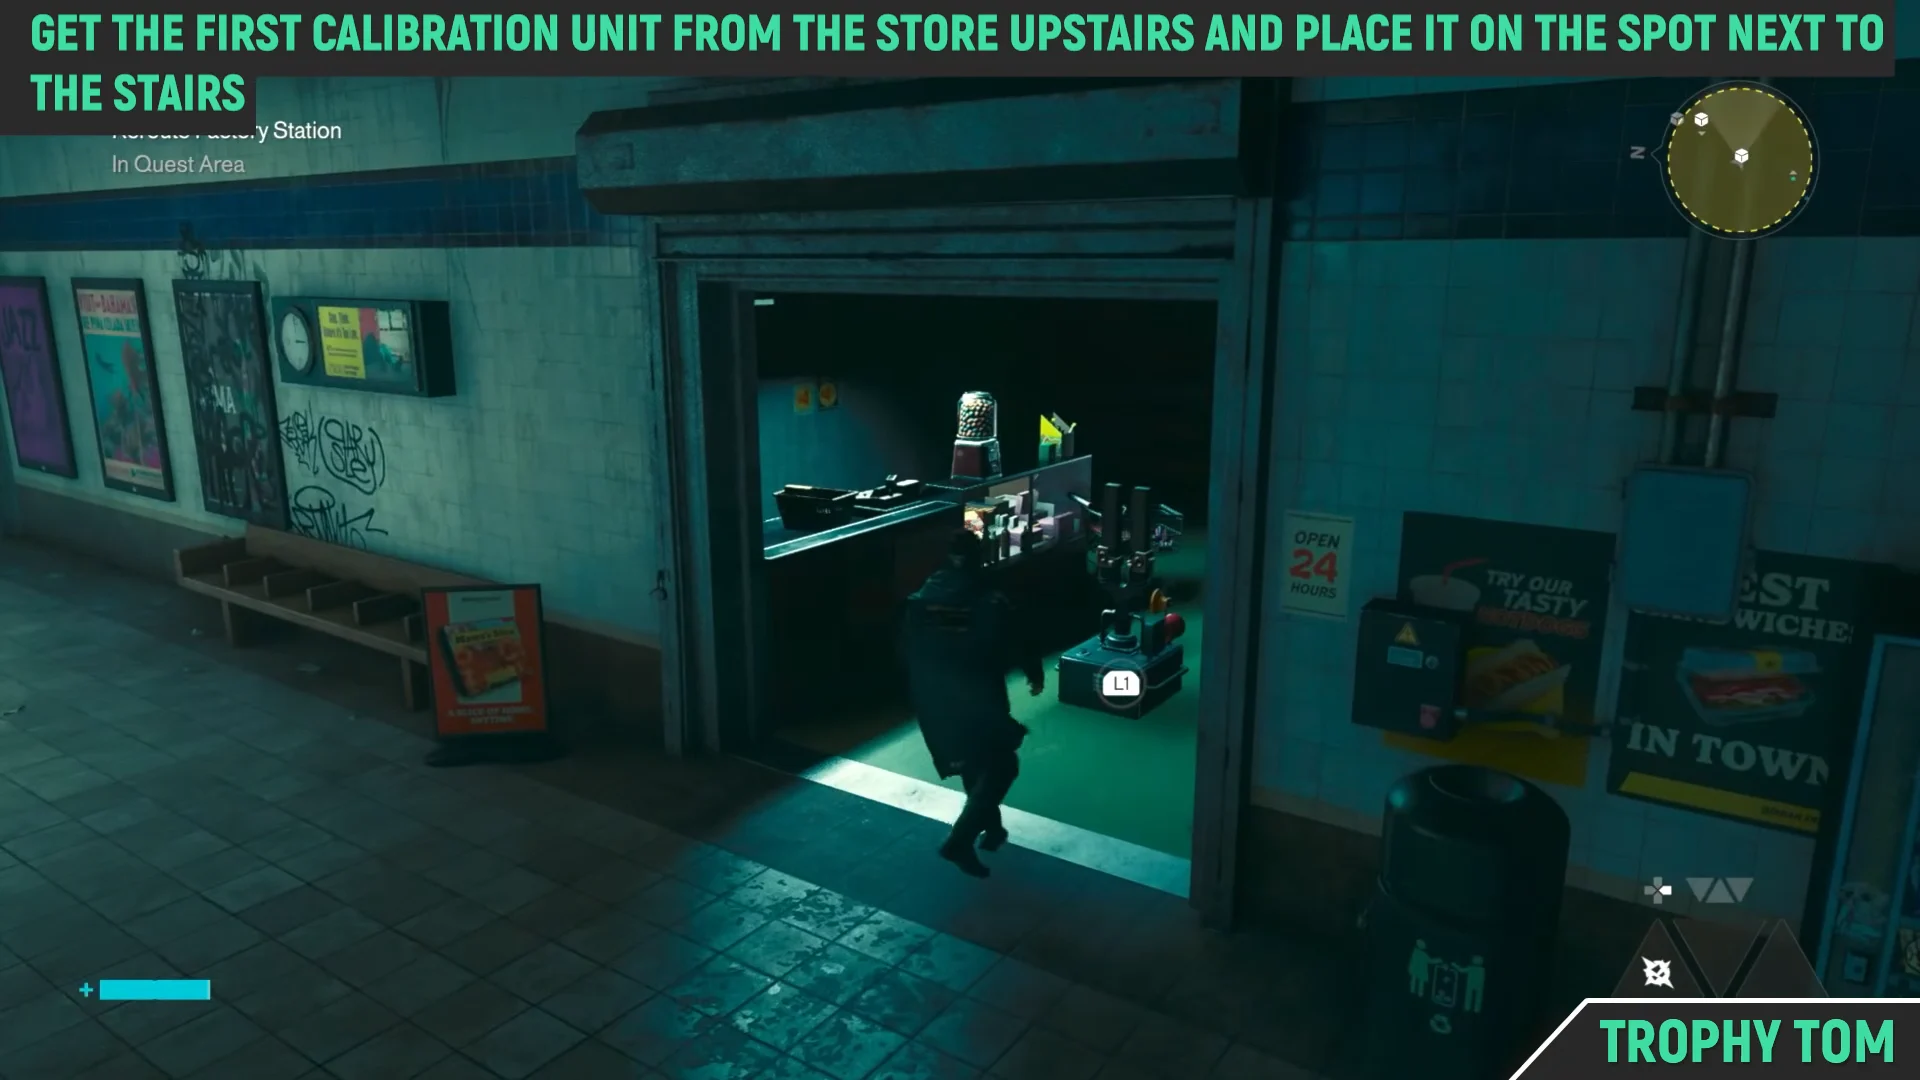
For the third unit, drop down onto the tracks from the platform edge and double back underneath the staircase you originally walked down. It is sitting on the ground in that dead space behind the stairs.
Where to place the Calibration Units at the Tuning Device
The Tuning Device only accepts one arrangement. All three units must form a straight line directly in front of the device, so that from the console’s viewpoint the three crates stack up and read as a single object through perspective. The yellow taped squares on the floor mark the valid drop points.
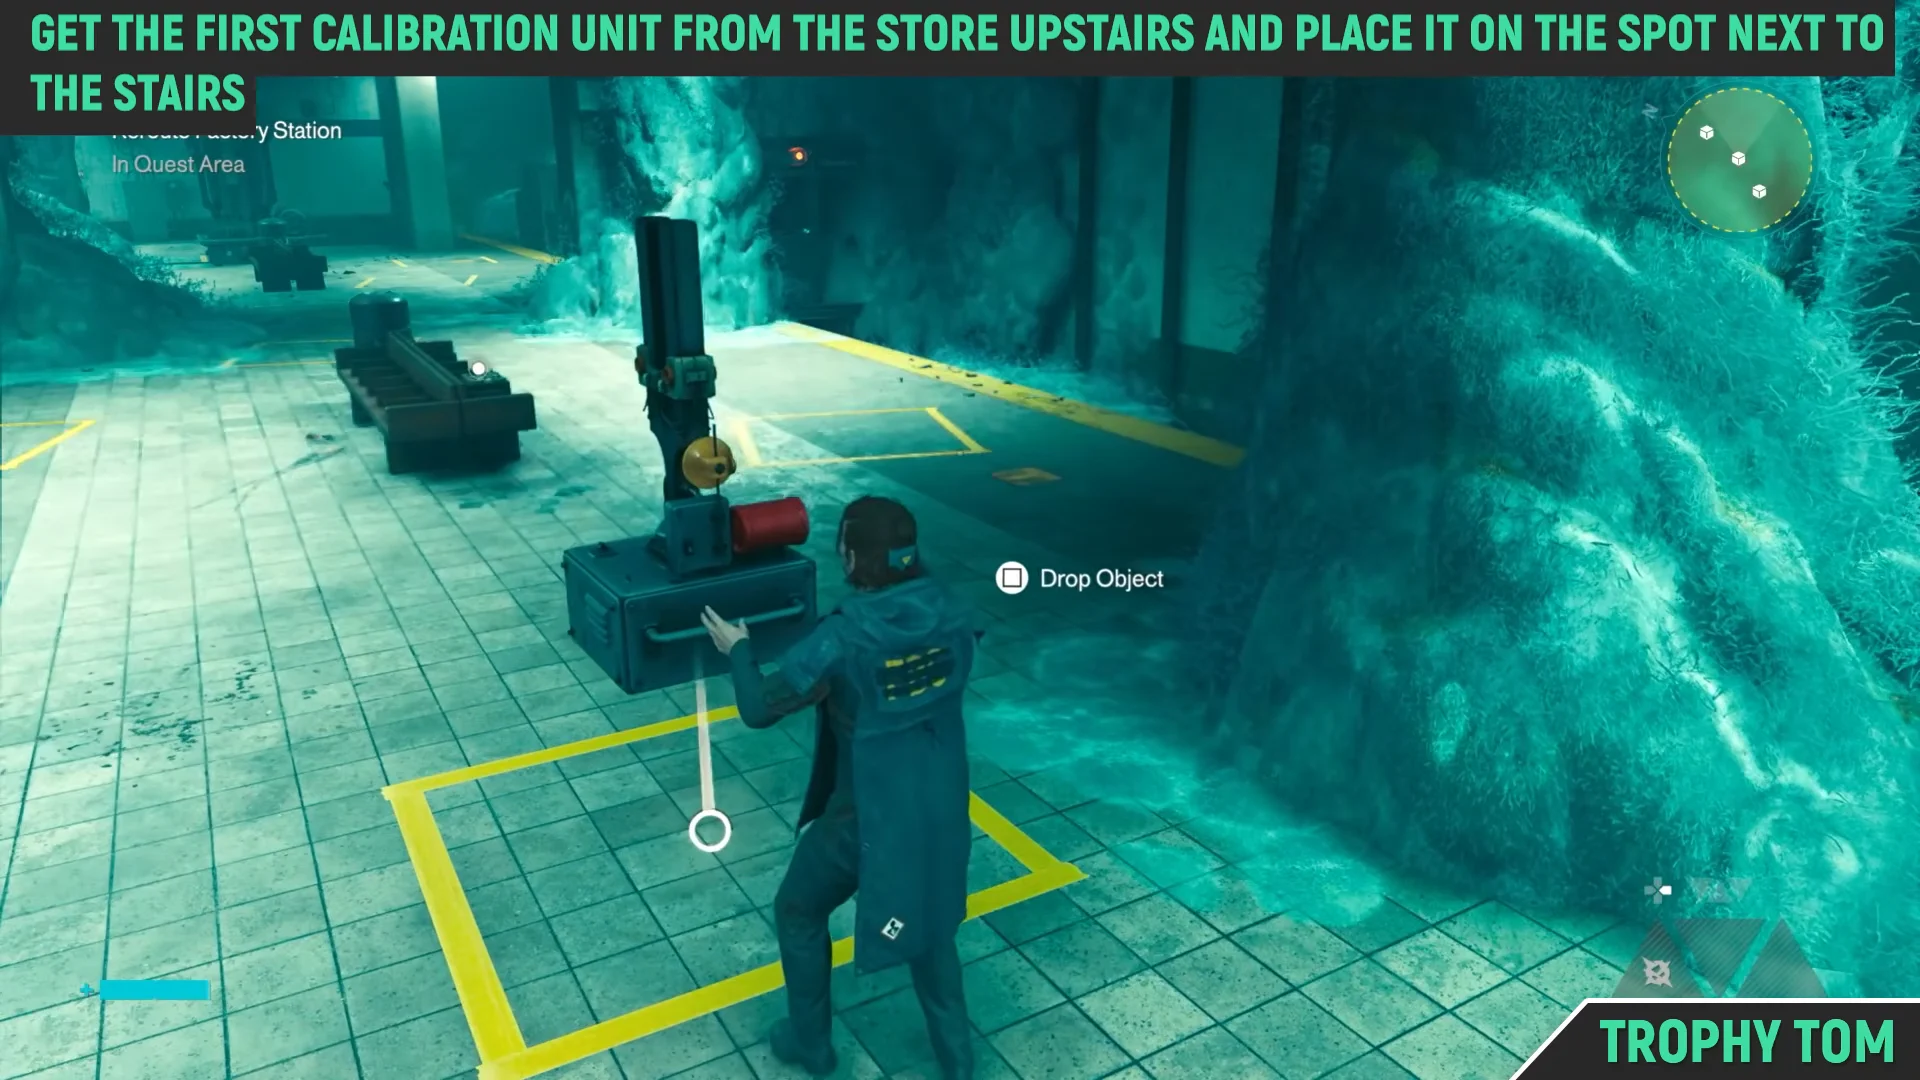
Before walking to the console, stand where the Tuning Device sits and look down the row. If the rear crates peek out from behind the front one, a unit is in the wrong square.
Activating the Tuning Device and confirming the reroute
Walk up to the central console and interact with it when the “USE THE TUNING DEVICE” prompt appears. The device itself is the check. If the alignment is correct, the Tuning Device stays put and a cutscene plays, with Dylan dropping under a burst of audio feedback while Zoe reaches him over the radio. The objective then updates to head for the surface.
If the Tuning Device swings out of position instead, the line is wrong. Interact with it a second time to reset it to its original spot, then recheck the three squares against the placements above and try again.
Before you leave the platform, speak to the person on the intercom. It is easy to walk straight out once the objective flips over.
How Factory Station fits into the Power Lines mission
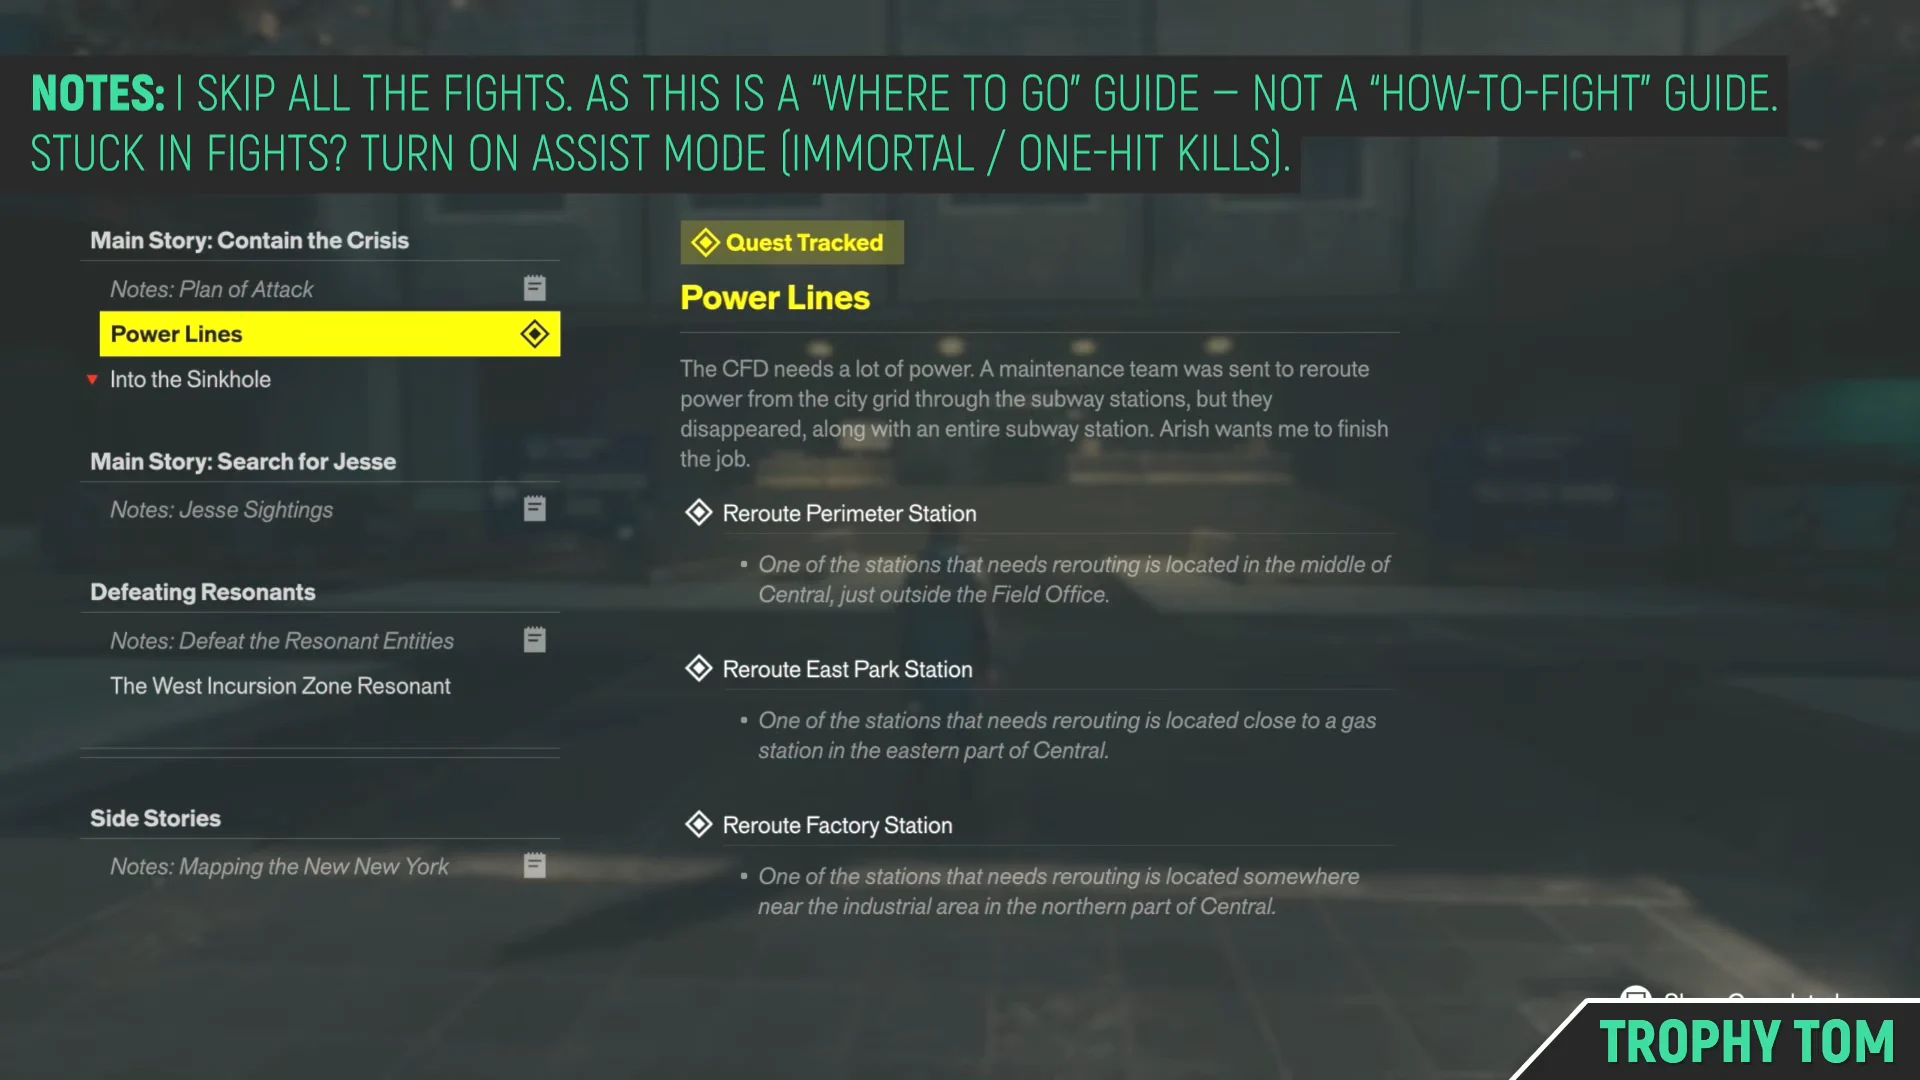
‘Power Lines’ lists three reroute objectives in the Quest Log, covering Perimeter Station, East Park Station and Factory Station. Factory Station is the teaching stop, introducing both the Calibration Units and the Tuning Device with a puzzle that has no gates, power cores or mold blobs in the way.
The other stations reuse the same core rule but add obstacles around it. East Park hides one unit behind a locked gate and buries the squares under pulsing mold you have to break. Perimeter Station, east of the Field Office near a Gravity Anomaly wall you can run up, adds a timed sprint with a Power Core to open the door protecting its third unit.
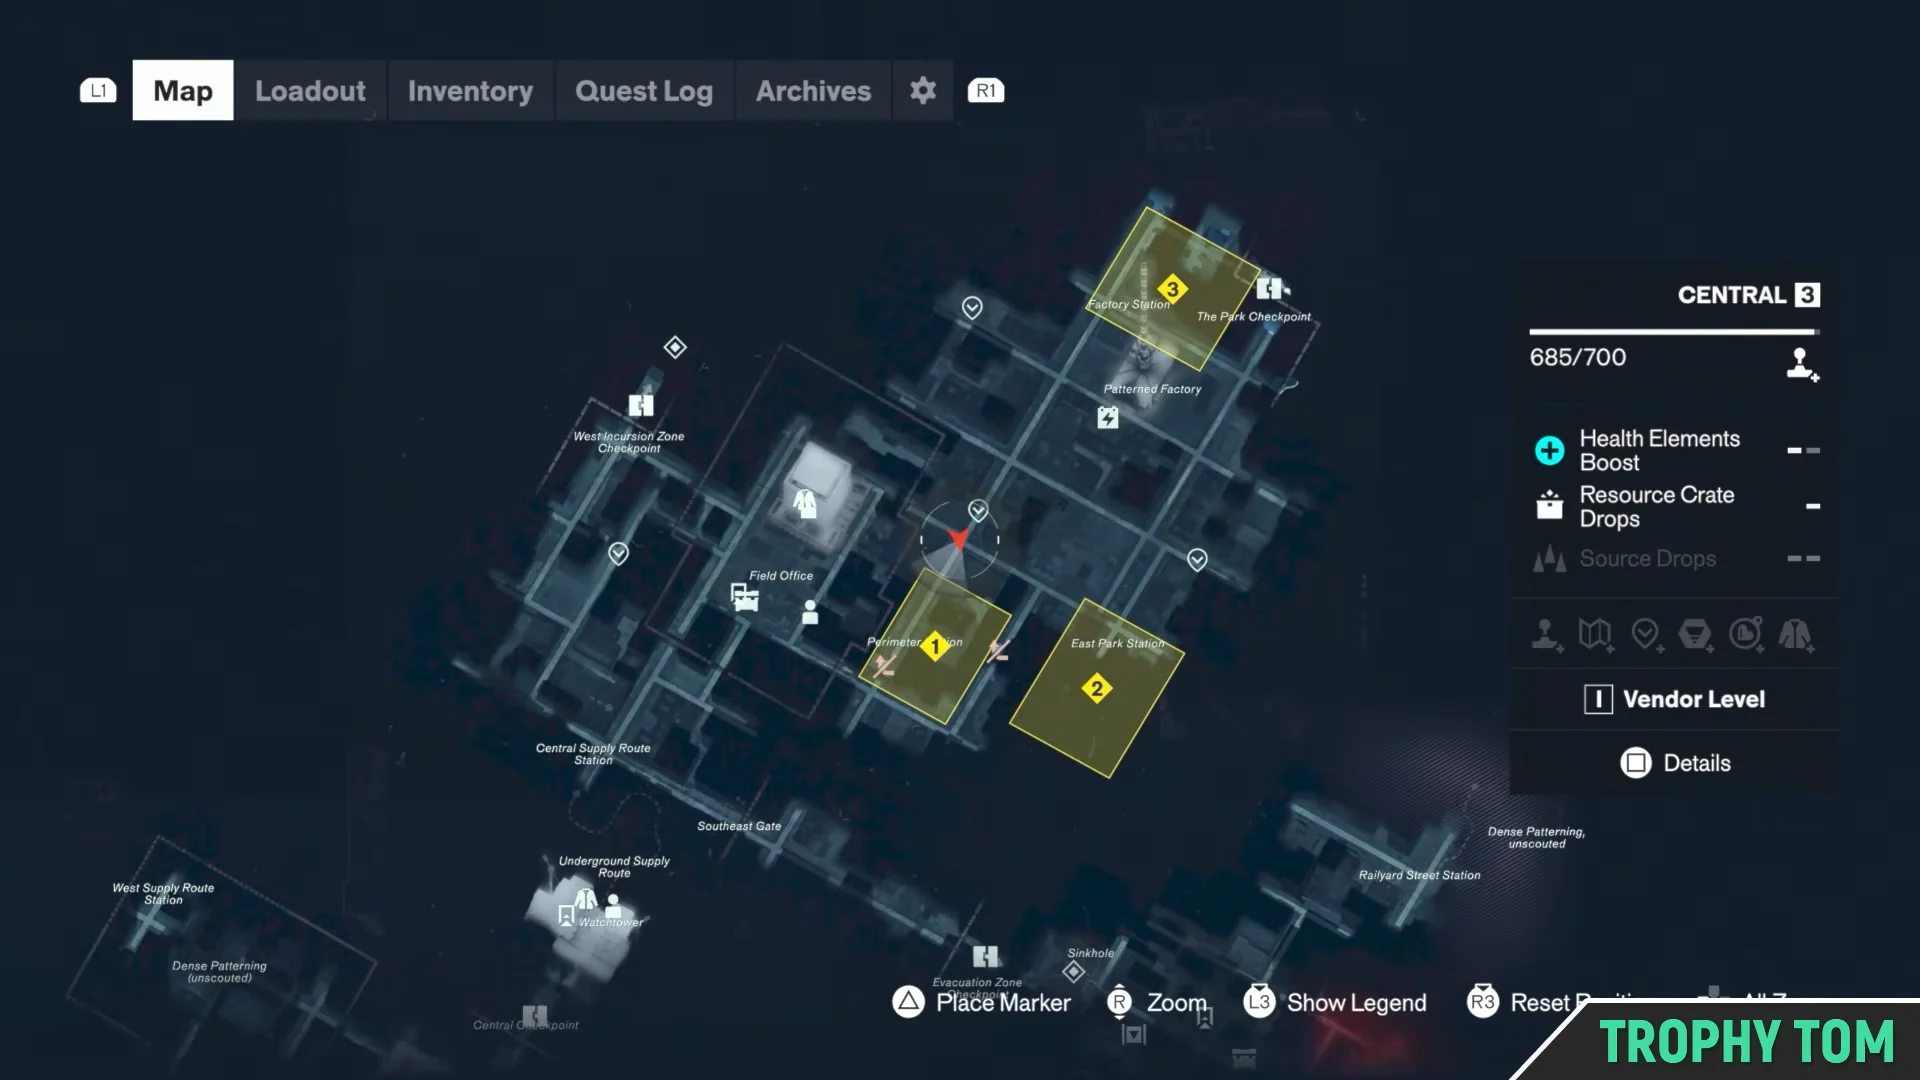
Those stations spread their squares across multiple floors rather than one flat platform, so a unit can end up at the top of a staircase or inside a shop instead of in a neat row.
Once Factory Station is rerouted and the cutscene ends, the stairs back to the street are sealed off. Go back down, take the right-hand path, and follow the newly opened tunnel along the tracks to continue the mission.