Lumi Master hands you a compass, a card, and a pile of Starlit Energy in the first ten minutes, then leaves most of the important rules unexplained. The early mistakes that cost the most are all resource mistakes: tapping Energy away one step at a time, spending good cards on common Lumi, spreading upgrade materials across a dozen creatures, and buying Lumi from the market expecting Gallery credit.
Quick answer: Let Energy build up and spend it at ×10 or higher. Rainbow traces only appear from ×10, high tiers catch several Lumi per encounter, and bosses arrive after a set number of encounters.
Compass multipliers: what each Energy tier changes
Tapping the compass in the middle of the exploration screen cycles the multiplier. Holding it opens a deeper menu. The multiplier does not just speed things up — it changes which rarities can appear and how many Lumi you meet in a single encounter. Rewards, coins, and experience scale by the same multiple, so a big spend is never worse value per Energy than a small one.
| Tier | What it changes |
|---|---|
| ×1 | Single encounter, Blue rarity possible |
| ×5 | Gold Lumi can appear |
| ×10 | Rainbow traces start appearing |
| ×20 | Two Lumi caught per encounter |
| ×50 | Five Lumi caught per encounter |
| ×1000 | Needs over 5,000 Energy banked plus a special buff |
Because bosses appear after a fixed number of encounters rather than on a timer, a high multiplier reaches them much sooner than the same Energy spent one step at a time. The multiplier state is preserved between sessions, so you do not have to reset it every time you open the game.
Energy: the cap rule and where to claim it
Once stored Energy exceeds the cap, passive recovery pauses. Holding unclaimed rewards is harmless, but if regeneration is your only reason for waiting, spend enough to get below the cap and restart the timer. Keep a reserve for a Flora House as well: about 8x to 10x of a spin’s cost lets you use the wheel when one appears.
During the early game, you must collect most Energy manually. On the home screen, an exclamation icon generally marks a payout.
| Source | Notes |
|---|---|
| Daily and chapter tasks | Clearing all dailies pays a guaranteed 100 Energy |
| Order board | Fills up and stalls if ignored |
| Launch and event rewards, often large | |
| Redemption codes | Menu → Settings → Redemption Code |
| Gallery milestones | Paid out for completing rarity bands |
| Starlit Tree | Trades away unwanted Lumi for Energy |
| Guild and friends | Weekly guild eggs, daily friend gifts |
| Luck stalls | Wager Energy for ×1 to ×2 back, no loss |
Codes expire quickly, and the Lucky Race event is unusually easy to place well in on newer servers, which makes it one of the largest Energy sources available in the first week.
Auto Advance settings worth configuring once
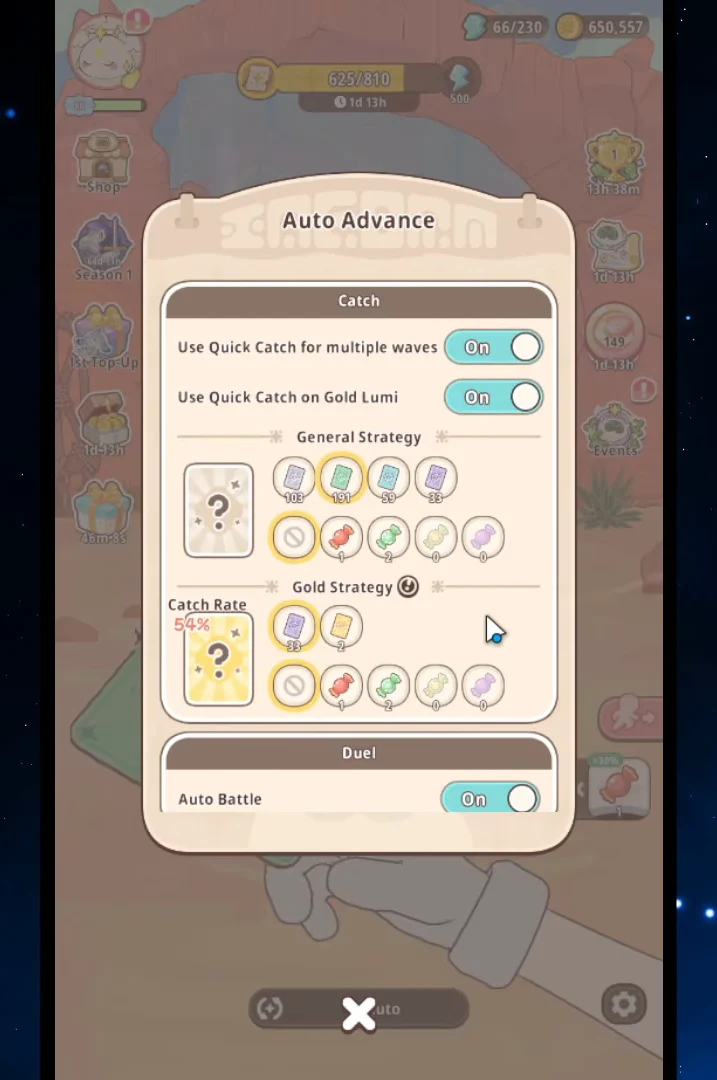
Hold the compass instead of tapping it to open the Auto Advance menu. Inside are Quick Catch toggles for multi-wave encounters and for Gold Lumi, separate card and candy presets for General Strategy and Gold Strategy, Flora’s Choice, and Auto Battle rules. Setting the Gold preset to your better card and your candy, while leaving the general preset on cheap cards, stops the game from burning good materials on Green and Blue spawns while you farm.
Catching: card grade, throw timing, and Stella Cards
To catch something, use Starlit Energy, a Starlit Compass, and a Lumi Card. Your current catch rate appears on the compass. Timing the throw correctly matters: a perfectly timed press may increase the shown Catch Rate to ×1.5, often determining whether you succeed or lose the card.
- Use ordinary cards on Green and Blue Lumi without concern. Against a Gold Lumi or a boss, however, their odds may fall into the single digits.
- Candy pushes the rate higher — save it for Gold and Rainbow targets.
- Cards are cheap. Craft them at the Basic Card Station and top up with market gold rather than rationing them.
- Candies for catch rate come from the Candy House at your base.
Do not treat Stella Cards as routine spending. They alone can convert a Rainbow Lumi into a stronger, recoloured Stella Lumi, and your supply is very limited. Save them for Rainbow rarity or higher. In a multi-Lumi encounter containing a Rainbow, the game finishes the normal catches before opening a separate screen for that Rainbow; use your strongest card, candy, and a Stella Card there if desired. An unwanted recolour can be rerolled repeatedly with the Prism Mirror.
Build one team, not five
You start with a single team slot; exploration levels 5 and 8 unlock the other two. That means three battle Lumi is the realistic early target, and spreading level-ups and ascension materials any wider is the most common way new accounts stall. Pick your starter’s line and two Lumi that cover different types, then commit.
Support effects usually beat raw damage in the first chapters. A Lumi whose kit buffs the squad — Rainbowdeer’s Call for Help being the obvious example — carries fights that a bigger attacker loses. Traits unlock at level 10 and a second skill at level 20, so a Lumi you have invested in is a different unit from a fresh copy of the same species.
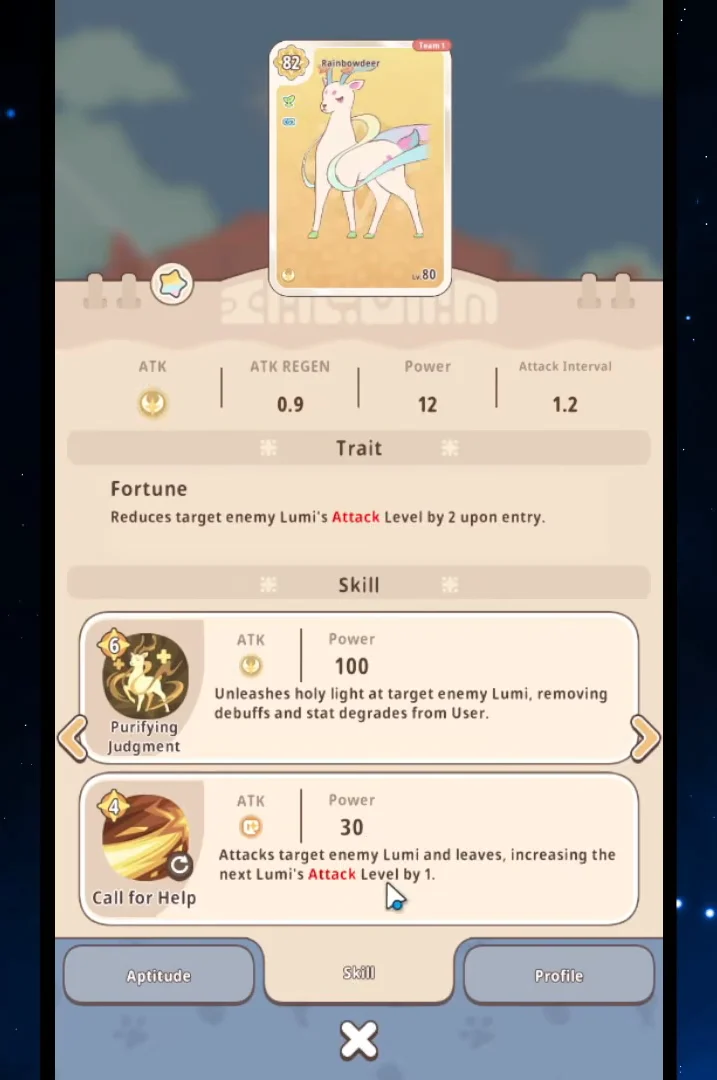
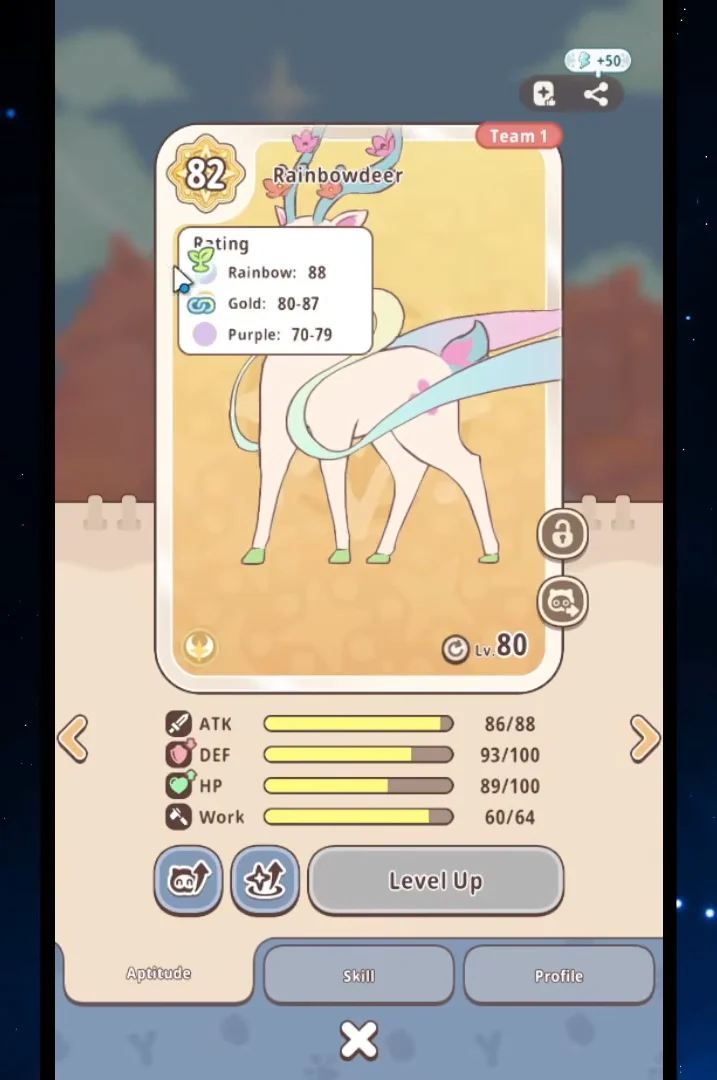
Rarity affects performance, not just appearance: Gold and Rainbow copies have higher base stats and better ratings than Purple ones, so choose the higher band when the species is the same. Ascension increases Attack, Defense, and HP while unlocking skills, using duplicates and coins in the process; inexpensive market copies are useful for that purpose. To exceed a Lumi’s level cap, you need the breakthrough item for its line, obtained by releasing spare copies.
Event-exclusive Lumi such as the Knights & Dragons line-up are priced for spenders. If you are playing for free, ignore them and put the same effort into Gold and Rainbow catches from the normal pool.
The Gallery trap: market Lumi do not register
Market purchases are excluded from the Gallery. Its progress, along with the Energy awarded at each rarity band, records only Lumi caught or hatched by you. Use market purchases as workers and breakthrough fodder, then catch unfamiliar species yourself.
Before trading anything to the Starlit Tree, check three things: whether it is already registered, whether it can still evolve into a new entry, and whether it would make a decent worker. Evolving re-rolls rarity and sometimes rolls upward, which makes evolution worthwhile even on a Lumi you only intend to register and shelve.
Rising Domain base: work speed, feeding, and prosperity
Your camp makes the materials required for training and evolution, and production continues while you are offline. Staff it before fine-tuning your battle team. During an account’s opening days, the Starter Blessing doubles both production speed and building storage, making those initial assignments the most valuable you will ever make.
- Assign Lumi with high Work aptitude, and check the work speed percentage before confirming — a figure like 111% is a real output difference.
- Where possible, match a Lumi’s job to the building for an extra bonus. Cheap market Lumi with the right job beat expensive fighters here.
- Keep food stocked in the Restaurant. Hunger drains, and a Lumi that hits zero stops working; tap a slacking worker to send it back.
- Add each decoration and facility as soon as it becomes available. They increase Prosperity, and Prosperity controls the statue upgrades that open additional land.
- Use speed-ups on lengthy upgrades; do not spend them immediately after receiving them.
Key buildings to get running early are the Observatory, the Starlit Tree, the Basic Card Station for crafting cards, the Restaurant for feeding, and the Candy House for catch-rate candies.
What to play first: main story before seasonal maps
Main story stages unlock features and account progress. Long-running seasonal maps like Greenwood do not, and they will still be there later. When you are unsure what to do next, the chapter tasks in the corner of the screen are a reliable route — they hand out Energy along the way and pay cards, ascension materials, and evolution materials for finishing a full chapter.
| Mode | Why play it |
|---|---|
| Main story and Gym battles | Steady rewards and player experience |
| Gauntlet | Win-streak ladder, unlocks around player level 30 |
| Trial Hall | Easy, Hard, Hell — move up only when comfortable |
| Tower | Push, then return after upgrades |
| Ladder and weekly tournament | Ranked play; rewards scale with rank |
| Season zones | Time-limited Lumi not found on the main route |
Every mode pays something win or lose, so open them all as they unlock. Use Quick Battle once a fight is clearly beneath your squad, and fight close rounds manually.
Battle habits and type matchups
The Lumidex records 17 types, and the type chart decides more fights than levels do. Open a Lumi’s profile and tap its type icon to see what it beats and what beats it, then check the enemy’s type before a difficult stage instead of retrying with the same squad.
- When the enemy is about to use a major skill and your shield has filled, activate it immediately. The shield nullifies that skill’s hit.
- Should the enemy put up a shield first, use your cheapest skill to remove it, then commit the expensive one.
- Swaps have a cooldown of roughly 15 seconds, and a sleeping Lumi cannot be swapped at all.
- Swapping a support back in re-triggers its entry effects, so heals and debuffs can be reused.
You can confirm the habits are paying off without doing any maths. Rainbow traces showing up on the exploration screen means your multiplier is high enough. Daily tasks all ticked off returns the 100 Energy reward. A Gallery band completing pays out on the spot. And a base with every facility staffed, fed, and producing is the difference between having levelled Lumi you can evolve and levelled Lumi you cannot.