Every ring, gem, staff, and shield in Fire Emblem: Fortune’s Weave carries weight, and that weight pulls down a unit’s attack speed — the stat that decides whether they land a follow-up hit. That tension is why so many powerful-looking accessories end up sitting in the inventory. The good ones either weigh almost nothing, come with a downside that does not apply to your unit, or deliver an effect big enough that losing a double no longer matters.
Quick answer: Accessory weight lowers attack speed, but equipping and unequipping gear mid-combat is free and costs no turn. Keep light picks like the Giant’s Ring on permanently, and swap in heavy items only when you need their effect.
How accessory weight drains attack speed
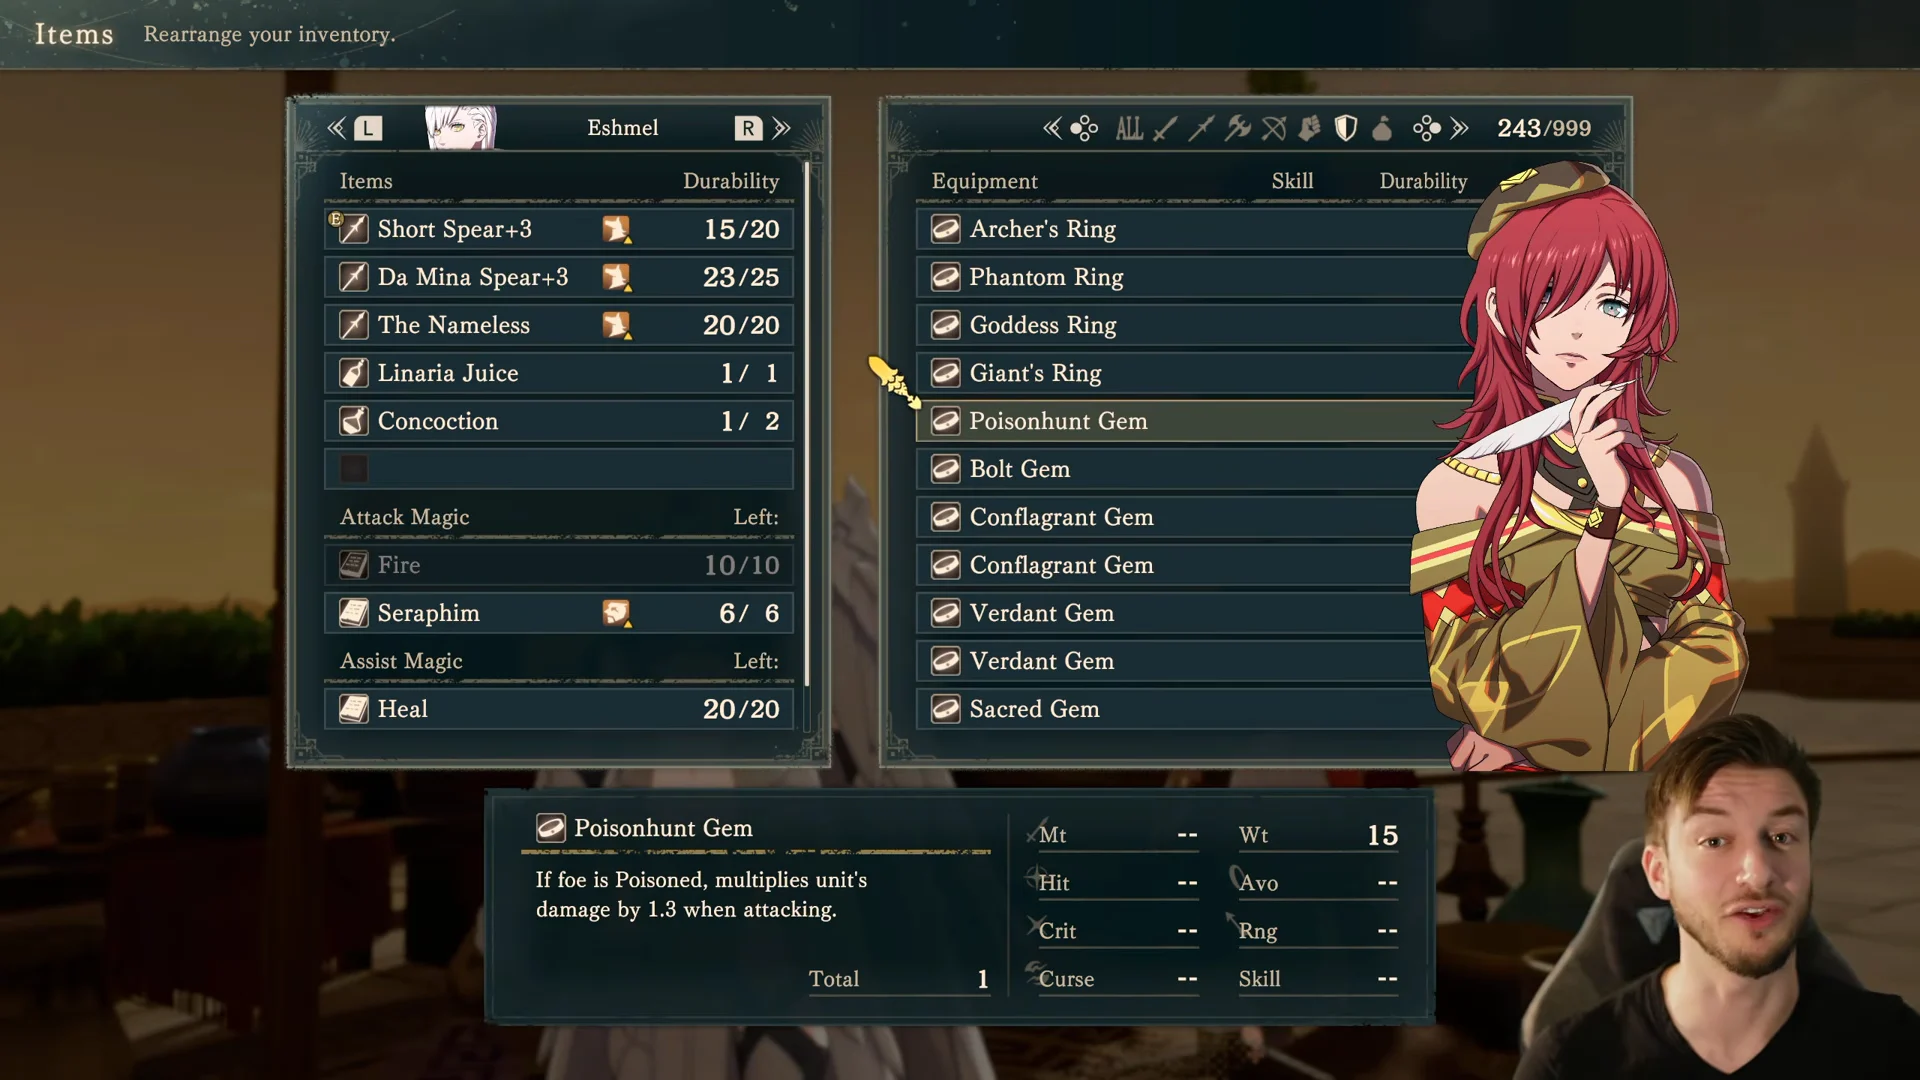
Accessories and rings carry a weight value that runs from 0 all the way up to 15. Any weight that a unit’s Build cannot absorb comes straight off their attack speed, and a unit that falls behind in attack speed stops doubling. Strength helps too, at a rate of 5 Strength to 1 Build for the purpose of canceling weight.
Combat allows weapon and accessory swaps without spending the unit’s turn. A powerful, heavy accessory with a one-use effect can be equipped for one attack, then removed; its weight matters only while equipped. Weapons kept unequipped in your inventory add no weight, so attack speed is affected only by your equipped weapon and accessory.
Esmeralda reduces the weight penalty of all her equipment by 20%, which lets her carry heavier accessories than most of the roster while still doubling.
Rings worth a permanent slot
| Ring | Effect | Weight |
|---|---|---|
| Giant’s Ring | Grants Bld +4 (Avo −20) | 0 |
| Gale Ring | Grants Spd +3 | 2 |
| Archer’s Ring | Grants Hit +5 | 3 |
The Giant’s Ring is the cleanest accessory in the game because it adds 4 Build at zero weight. Its only drawback is −20 Avoid, which is meaningless on Charioteer and Elephant Rider units since those classes cannot dodge attacks anyway. On them it reads as a free +4 Build, which is extra attack speed and extra damage with no cost at all.
The Gale Ring gives +3 Speed for 2 weight, a net gain of one point of attack speed. That makes it a fit for low-weight weapons like gauntlets, where the unit was never near the weight cap. The Archer’s Ring adds +5 Hit, and it pairs with the rewind mechanic: equip it after rewinding time and the new hit calculation uses a fresh roll, which can turn a missed attack into a landed one.
Gems for damage and self-healing
| Gem | Effect | Weight |
|---|---|---|
| Sacred Gem | On a critical, recover HP equal to 1/3 of damage dealt | 4 |
| Conflagrant Gem | +20 Hit on combat arts (30% trigger) | 5 |
| Bolt Gem | 1.5x damage on combat arts (10% trigger) | 5 |
| Victory Gem | Restores a little HP after a kill | 3 |
The Sacred Gem turns a high-critical unit into a self-sustaining frontliner. Because it heals a third of the damage dealt on every critical, it rewards units like Dietrich whose critical rate is high enough to trigger it constantly. The healing more than offsets the 4 weight once crits are landing regularly.
The two combat-art gems split by reliability. The Conflagrant Gem’s +20 Hit fires 30% of the time, which is frequent enough to shore up a shaky hit rate, while the Bolt Gem’s 1.5x damage only procs at 10%, so it reads more as an occasional bonus than a plan. The Victory Gem’s small heal-on-kill is a low-cost pickup for tanky units that clean up weakened enemies.
Poison and confusion combos with magic
Two accessory pairs chain a status effect into a damage multiplier, and both run through magic attacks. The Poisonbone Chain inflicts Poison when a magic attack lands, with a 50% trigger, and a poisoned foe then takes 1.3x damage from the Poisonhunt Gem. The catch is that the Poisonhunt Gem weighs 15, the heaviest accessory around, so it only makes sense on a unit that is already being doubled and has nothing to lose on attack speed.
The lighter version uses the Electron Agitator, which inflicts Confusion at a 20% trigger on a magic hit, feeding the Turmoil Mask’s 1.5x damage against Confused foes. The Turmoil Mask only weighs 3, so this combo is far friendlier to a mage’s attack speed. Confusion also stops the enemy from counterattacking, though they still take their normal offensive turn.
Cursed gear and the Blaze gauge
Some of the strongest accessories carry a Curse, including Lashing Rapture, Aaron’s Rod, and the Turmoil Mask. A Curse builds a unit’s Blaze and Overblaze gauges, which convert into stat bonuses. That is a drawback on most of the roster but an upside for Dietrich and Telemon, who are built to exploit those gauges.
Lashing Rapture restores HP after a kill and weighs 8 with a single Curse, and on Dietrich it feeds his Overblaze mechanic while keeping him topped up. The payoff only lands on the units that want the Curse, so treat these as targeted picks rather than general-purpose gear.
Staves for healers and mages
| Staff | Effect | Weight |
|---|---|---|
| Healing Staff | +10 HP when healing an ally with magic | 3 |
| Magic Staff | Grants Mag +3 | 3 |
| Order’s Staff | Grants Mag +1, Res +3 | 3 |
| Aaron’s Rod | Grants Mag/Dex +4 (Curse 1) | 8 |
The Healing Staff increases every magical heal by a fixed 10 HP, which combines with Sofia’s personal passive for another 10. Together, they bring her healing to roughly twice its usual strength at a cost of just 3 weight. For reliable offense, the Magic Staff provides +3 Magic for 3 weight. Aaron’s Rod gives +4 Magic and +4 Dexterity, but weighs twice as much at 8 and carries a Curse.
The Order’s Staff is a quieter pick that layers +3 Resistance onto a magic user. Stacked with a defensive shield, it builds a unit into a genuine wall against enemy mages.
Shields for tanks
The default choice looks like the Silver Shield with its +5 Defense, but the Hexlock Shield is usually the better one. It grants +1 Defense and +5 Resistance for the same 4 weight, and heavily armored units already have high natural Defense and almost no Resistance. The extra Resistance patches the exact hole those units suffer from, where a few extra points of Defense would barely be felt. The Da Mina Shield (+4 Defense, 5 weight) sits below both.
Accessories to skip
A handful of gems ask for 5 weight and give back almost nothing in return. The Scourge Gem grants a follow-up regardless of attack speed, but only at a 5% trigger, so it rarely fires when you need it. The Miracle Gem prevents all damage from an attack at just a 3% trigger, which is too unreliable to plan around. The Challenge Gem’s +3 Attack only applies when the enemy uses the same weapon type, making it too situational for a permanent slot.
Where to find accessories
Wandering Vandahl Trading Co. merchants move around the world map, and you can inspect their stock before walking over by hovering on their map pin and pressing the Left Trigger (LZ) to preview the inventory. One of these carts, found in Gaura Grassland, carries the Victory Gem. The settlement shop in Alecto stocks both the Gale Ring and the Giant’s Ring, and Anna’s Shop sells the Build Ring, which shares the Giant’s Ring’s +4 Build and −20 Avoid profile.
There is also a crafting route. Releasing a max-bond animal with Cai produces an accessory that copies that mount’s stats, which turns the stable into a steady supply of gear tuned to whatever bonuses your team needs most.