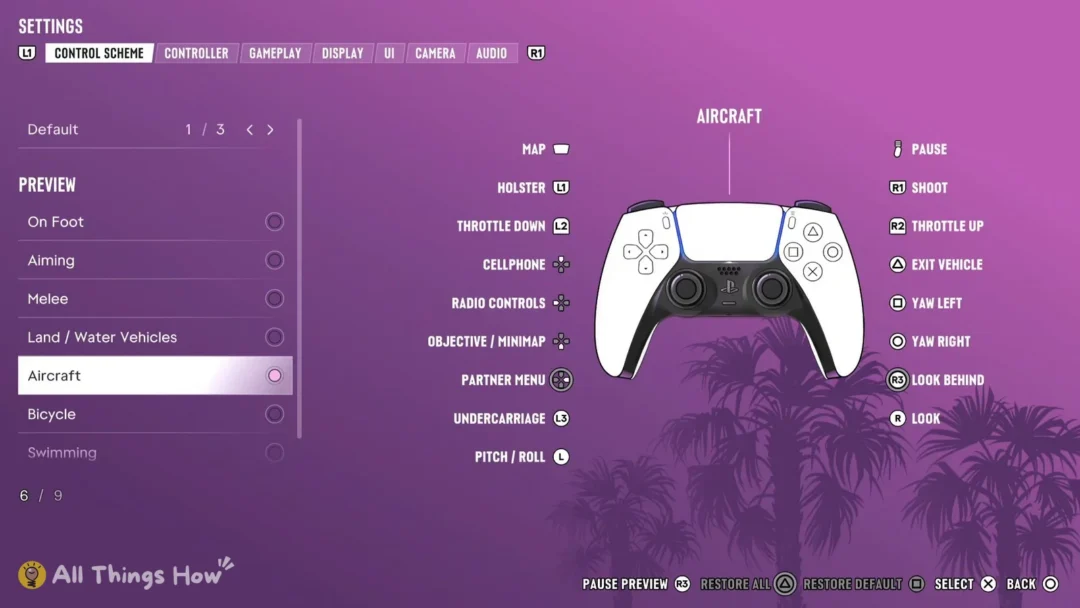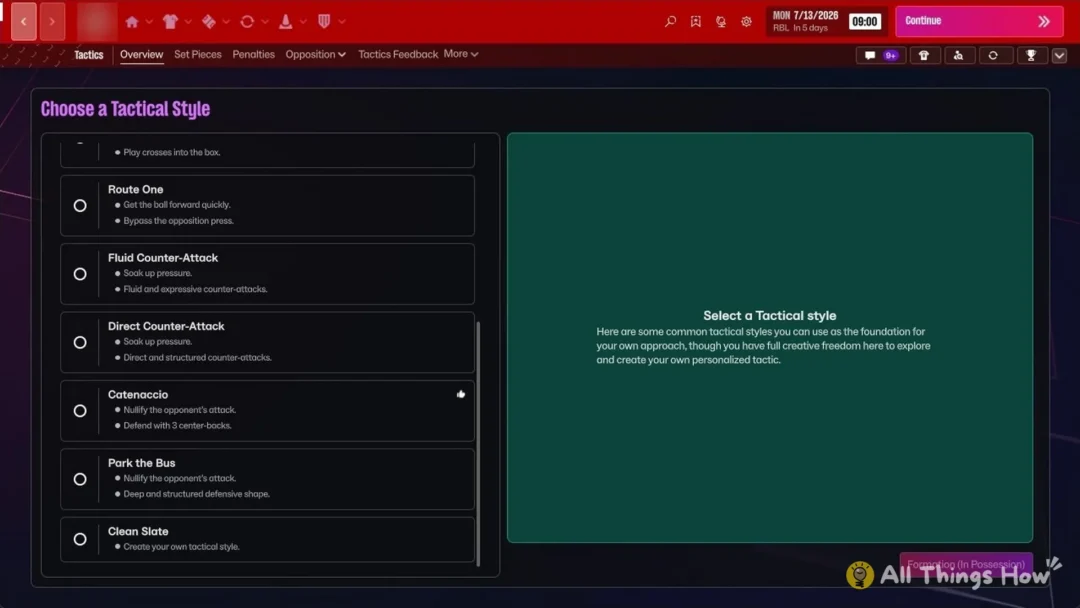
Grand Theft Auto VI on PS5 asks a few setup questions before the game starts, then puts everything else into a Settings menu with seven tabs: Control Scheme, Controller, Gameplay, Display, UI, Camera and Audio. Press L1 or R1 to move between tabs. Anything you pick during first-start setup can be changed again later in Settings, so it’s safe to go with a choice and adjust it once you’ve played a bit.
Quick answer: Set Navigation Experience to “Minimap Always On” if you want a permanent minimap, switch to the Classic control scheme to sprint on Cross, pick a Subtitles size (they start off), and turn on Audio > Mute Licensed Music if you stream.
GTA 6 PS5 settings to change first
Each of these changes something you’ll notice in the first few minutes of play, which is why they’re worth sorting out before anything else.
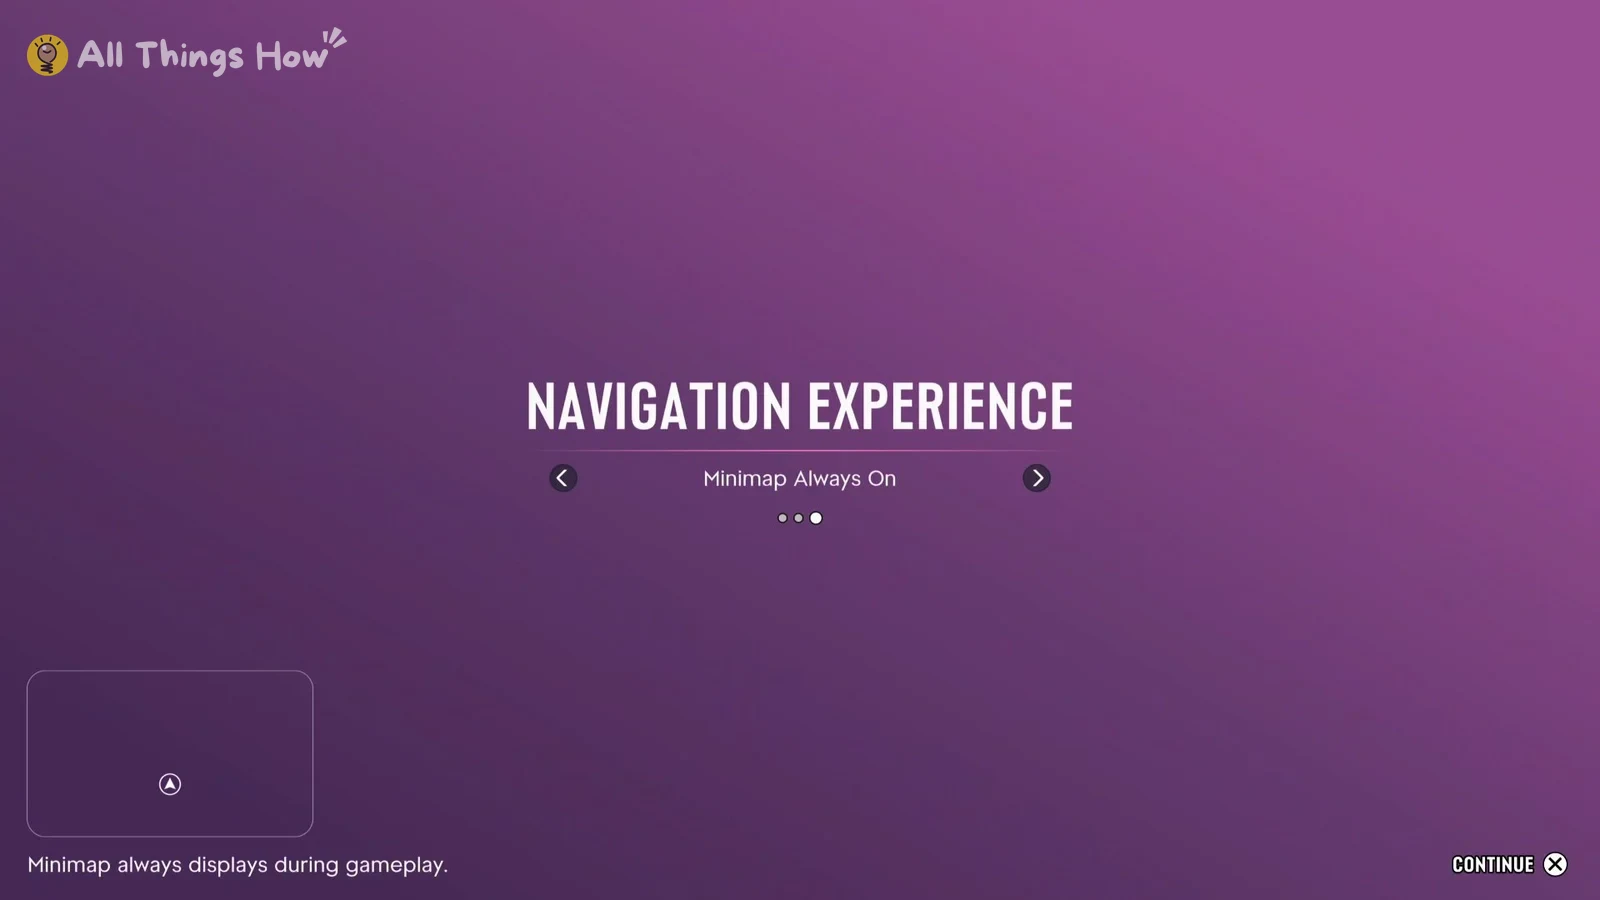
- Navigation Experience: pick “Minimap Always On” if you don’t want the minimap popping in and out. The other two choices show the minimap, or the minimap and compass, only dynamically or on demand.
- Control scheme: the default controls put run and sprint on L3. The Classic scheme moves it to Cross, which suits you if clicking the stick gets tiring.
- Subtitles: worth turning on if you play with the sound low or want to catch every line of dialogue. Size, speaker names and a background are all adjustable.
- Mute Licensed Music: in the Audio tab, this mutes any licensed music, which makes it the one to change if you stream.
GTA 6 first-start setup on PS5
The setup screens come up before the game begins, and they work through the options in a fixed order. Here’s what each one shows and what to choose.
Gameplay tab: aiming, movement and assists
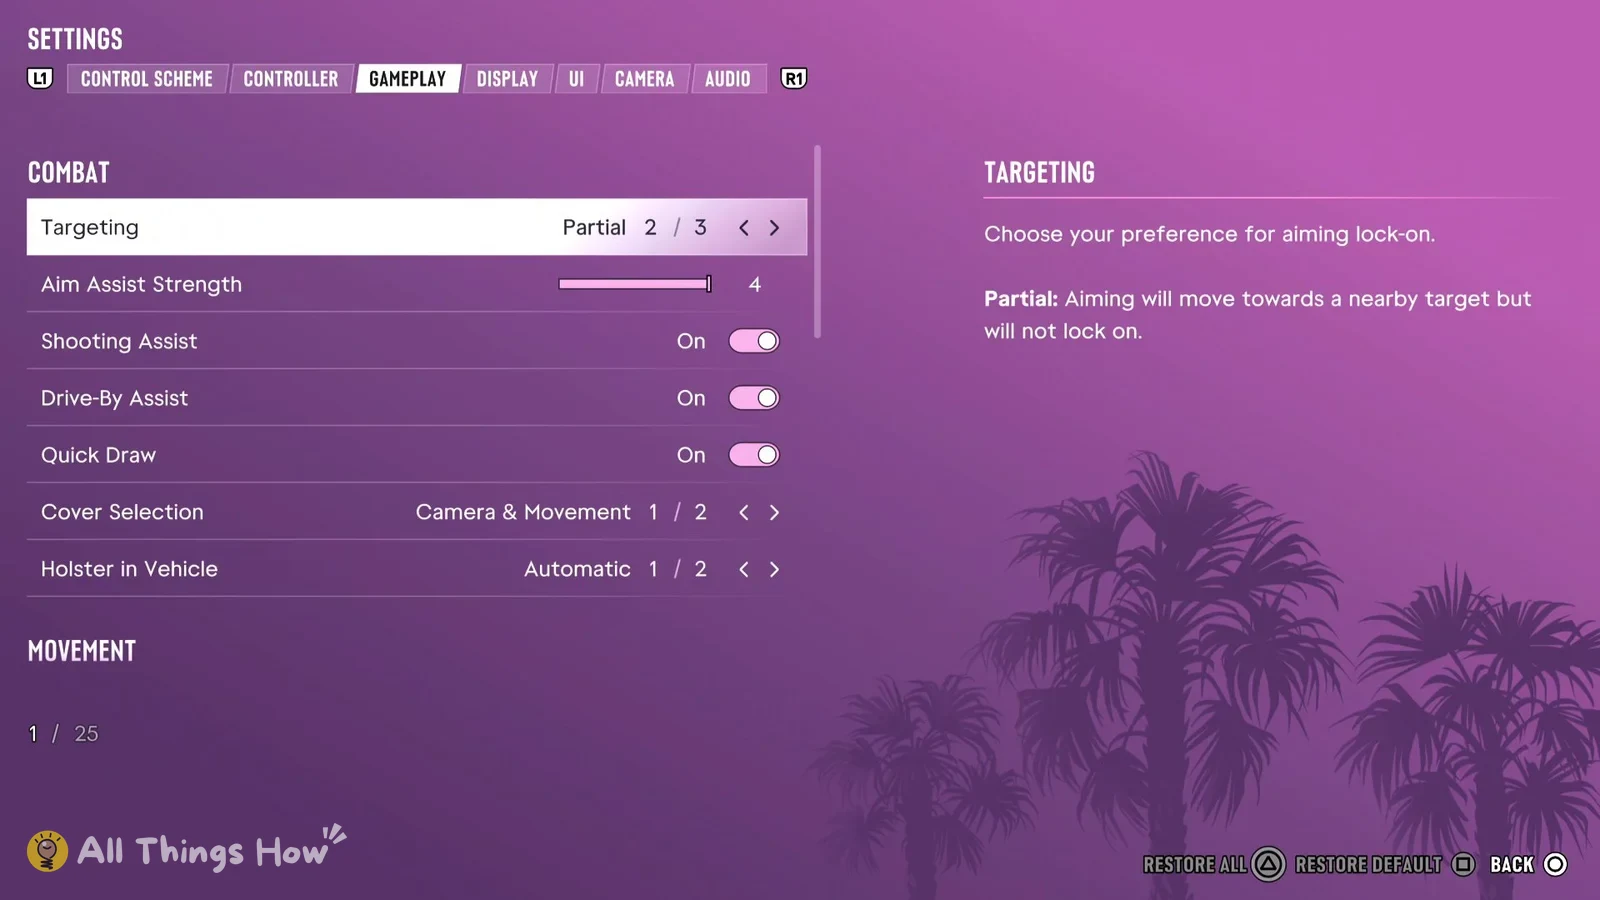
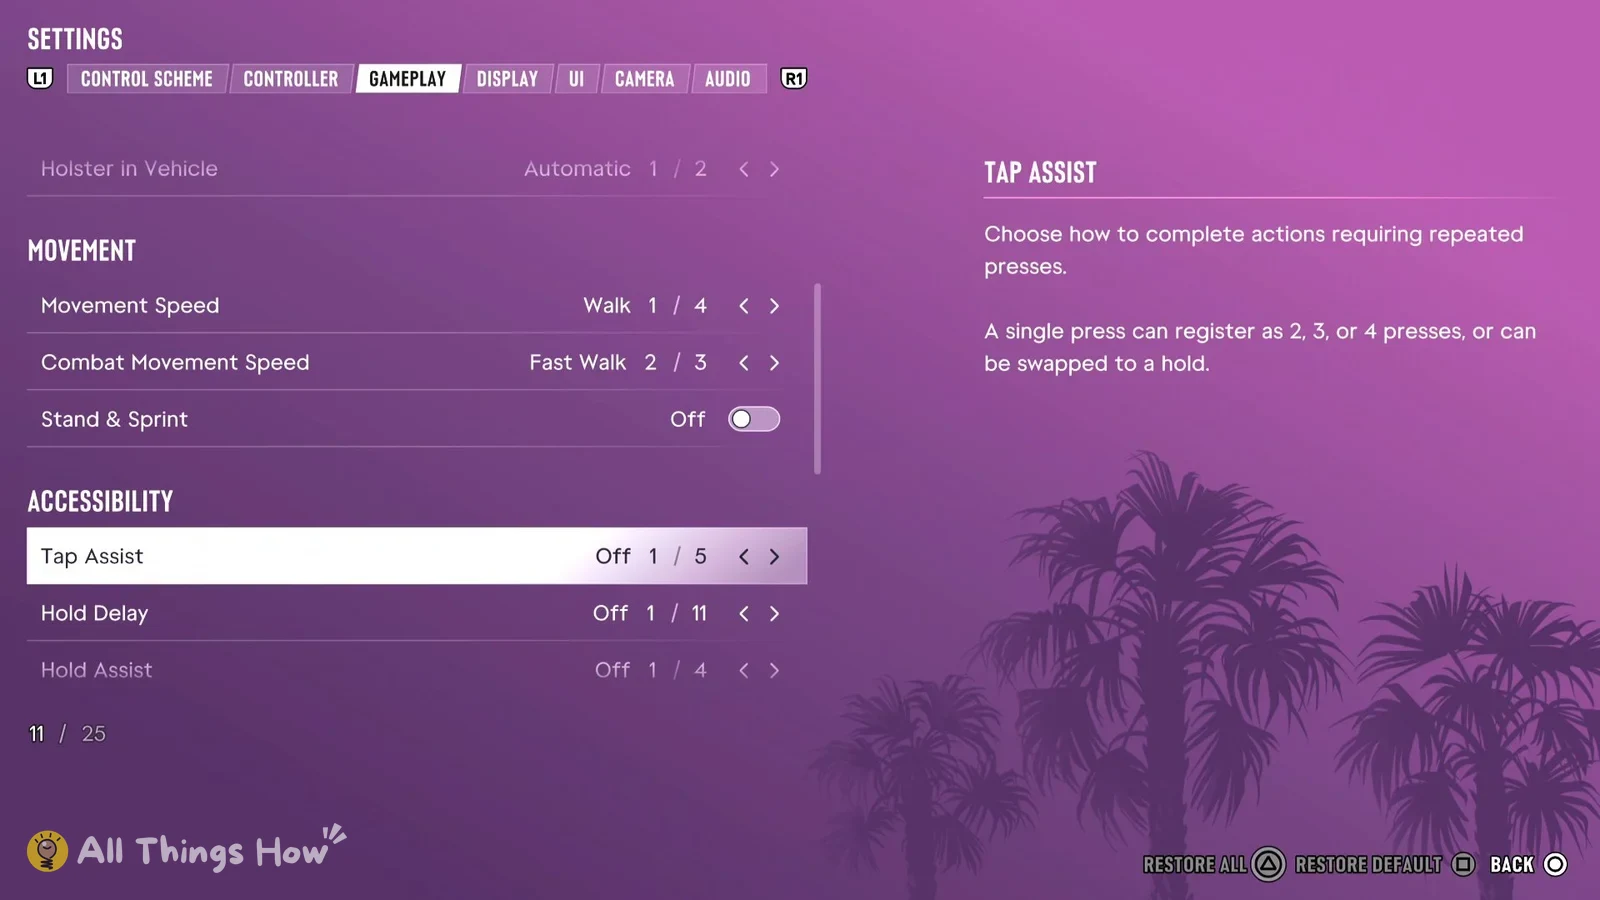
The Gameplay tab has 25 rows covering combat, movement, button behavior and a few driving options. These are the values a fresh install starts with.
| Setting | Default | Group |
|---|---|---|
| Targeting | Partial (2 of 3) | Combat |
| Aim Assist Strength | 4 | Combat |
| Shooting Assist | On | Combat |
| Drive-By Assist | On | Combat |
| Quick Draw | On | Combat |
| Cover Selection | Camera & Movement | Combat |
| Holster in Vehicle | Automatic | Combat |
| Movement Speed | Walk (1 of 4) | Movement |
| Combat Movement Speed | Fast Walk (2 of 3) | Movement |
| Stand & Sprint | Off | Movement |
| Tap Assist | Off (5 choices) | Accessibility |
| Hold Delay | Off | Accessibility |
| Hold Assist | Off | Accessibility |
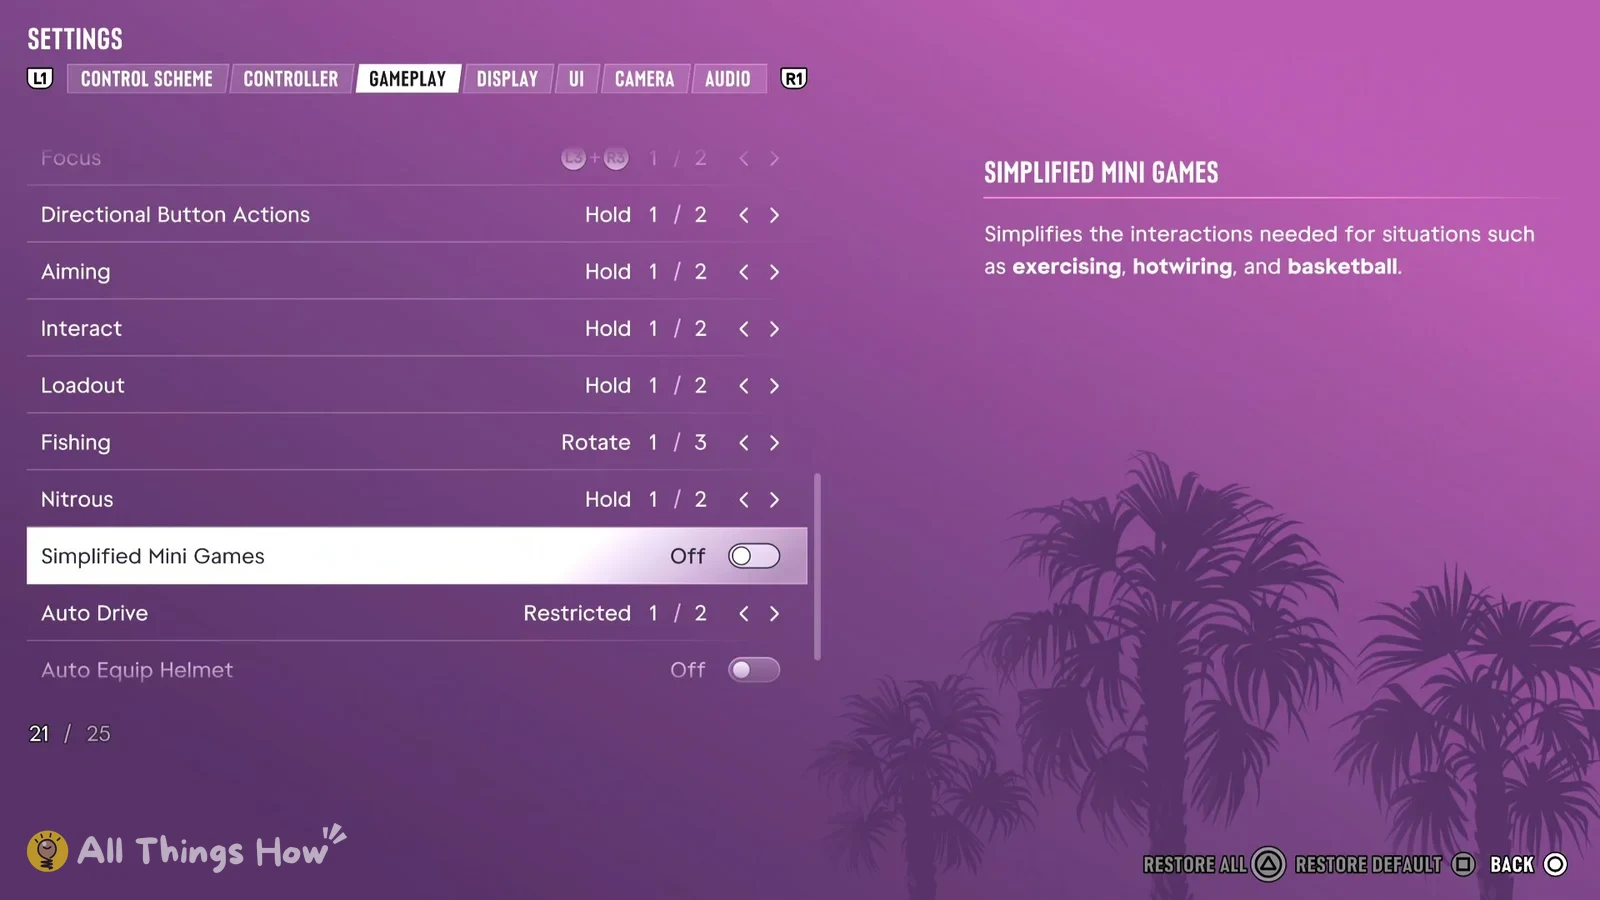
| Directional Button Actions | Hold | Hold/toggle |
| Aiming | Hold | Hold/toggle |
| Interact | Hold | Hold/toggle |
| Loadout | Hold | Hold/toggle |
| Nitrous | Hold | Hold/toggle |
| Fishing | Rotate (1 of 3) | Hold/toggle |
| Simplified Mini Games | Off | Other |
| Auto Drive | Restricted (1 of 2) | Other |
| Auto Equip Helmet | Off | Other |
Targeting is set to Partial, which the game describes as “Partial: Aiming will move towards a nearby target but will not lock on”. Leave it there if you like a light nudge toward enemies, or try the other choices if you want more or less help. Aim Assist Strength sits at 4 and can be dialed in either direction.
Movement Speed defaults to Walk, the first of four choices, and Combat Movement Speed to Fast Walk, the second of three. Change these if your character feels slow to get going when you push the stick.
Tap Assist is the one to look at if repeated button presses are hard on your hands. It has five choices, and the game explains that “a single press can register as 2, 3, or 4 presses, or can be swapped to a hold”. Hold Delay and Hold Assist sit next to it, both off. Aiming, Interact, Loadout, Nitrous and Directional Button Actions all default to Hold, so check those rows if you’d rather not keep a button held down.
Simplified Mini Games is off by default. Turning it on “simplifies the interactions needed for situations such as exercising, hotwiring, and basketball”, so it’s a good pick if those button prompts frustrate you.
UI tab: minimap, subtitles and reticle
The UI tab is the longest in the menu at 70 rows. Near the top are Language (English by default, with 12 choices), UI Text Size, Color Adjustments (off), Map Blip Size, Minimap Blip Size and In-World Marker Size.
Subtitles & Captions
After choosing a subtitle size during setup, Subtitles here reads Mission Only, the second of three choices. Change it here if you want subtitles outside missions too. The same group has Closed Captions, Size, Speaker Names and Background, and Background starts off, so switch it on if white text is getting lost against bright scenes.
Navigation
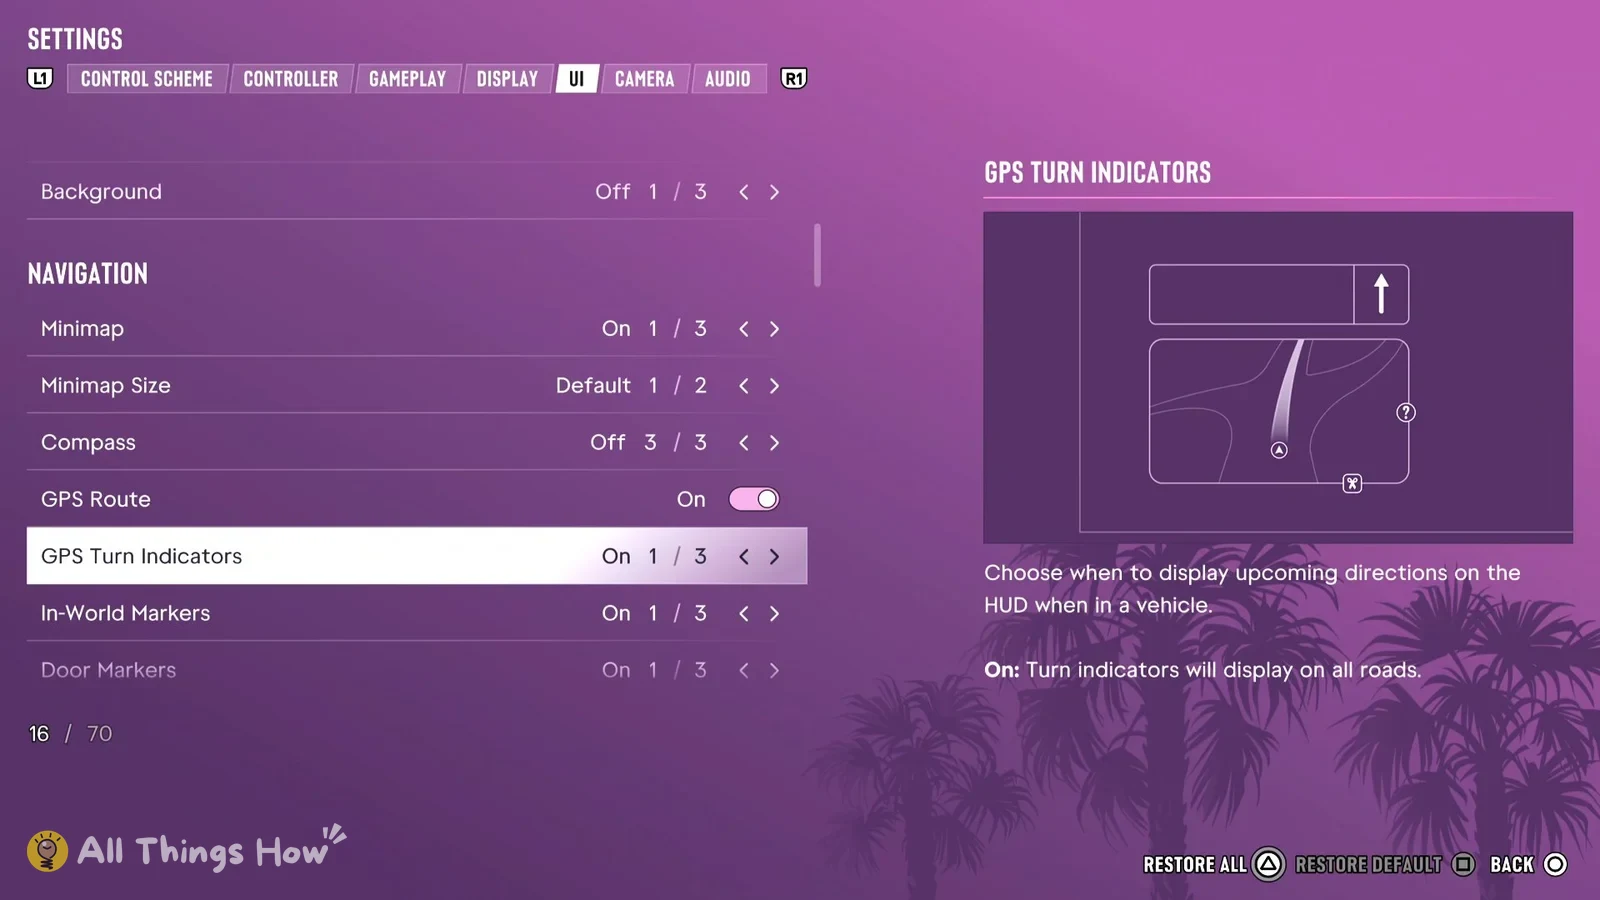
This is where you change the minimap and compass after setup. With Minimap Always On picked during setup, this group shows Minimap On (1 of 3), Minimap Size Default and Compass Off (3 of 3). GPS Route, GPS Turn Indicators, In-World Markers and Door Markers are all on. GPS Turn Indicators is described as “Turn indicators will display on all roads”, so turn it off if you’d rather have a cleaner view while driving.
Reticle
The Reticle group has Persistent Center Dot, Reticle Hit Markers, Reticle Size, Reticle Shape (Complex by default), Aiming Reticle Visibility and Projectile Arc. Persistent Center Dot is worth switching on if you get queasy playing, since the game notes it “may aid with motion sickness”.
HUD elements
The rest of the tab lets you show or hide individual parts of the screen: Threat Indicators, Damage Region Highlights, Help Text, Ticker Feed, Money, Wanted Stars, Heat Indicators, Challenges notifications, Mini Game UI, Activity Timers & Stats and Units of Measurement. Mini Game UI covers the “instructional prompts… such as hotwiring, lockpicking, and cloning keys”.
Audio tab: Mute Licensed Music and volume
The Audio tab has 15 rows. Mute Licensed Music is off by default, and the game describes it as “Mutes any licensed music. Captions will still display for music when turned on and licensed music is muted.” Turn it on before you go live on a stream if you want the licensed tracks out of your stream.
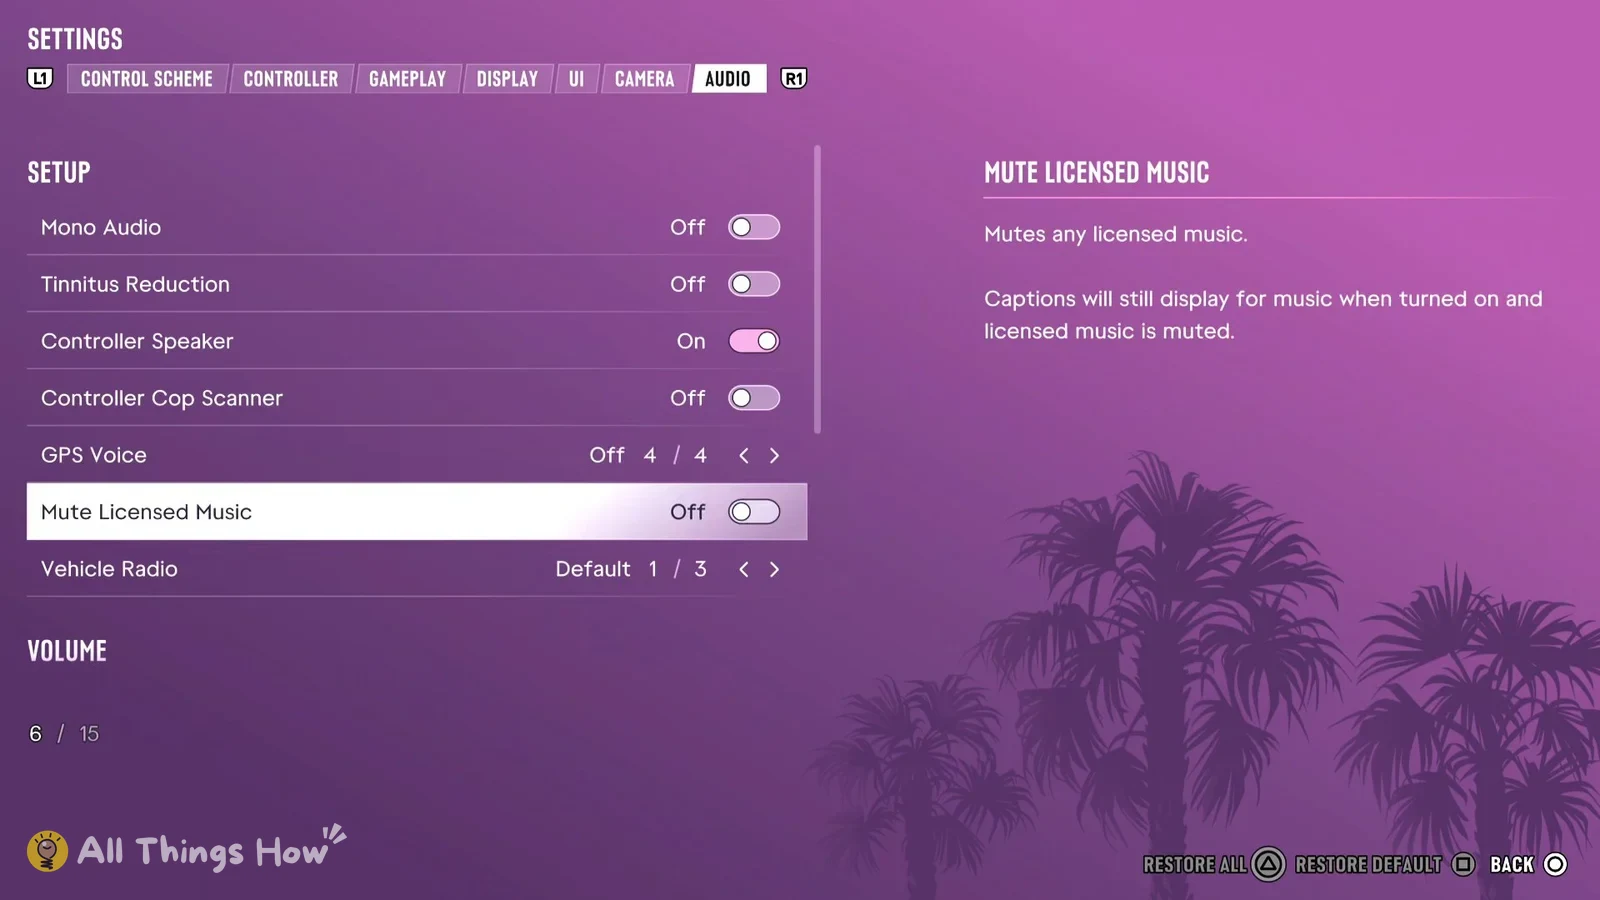
- Mono Audio: Off
- Tinnitus Reduction: Off
- Controller Speaker: On
- Controller Cop Scanner: Off
- GPS Voice: Off (4 of 4)
- Vehicle Radio: Default
GPS Voice is off out of the box. Below these rows are the volume sliders: Master Volume (set to 10), Dialogue, Music and Media.
Display, Camera and Controller tabs
HDR starts on in the Display tab, alongside HDR Calibration and Safe Zone. The two Visual Effects sliders, Player Status Effects Intensity and Hit Effects Intensity, both begin at 5; lower them if effects during fights or when you’re hurt feel like too much. If the picture looks too dark or washed out, the HDR Calibration row in this tab is where to redo it.
The Camera tab covers Height (On Foot), set to Medium, Horizontal and Vertical Follow Speed, both at 10, and Height (All Vehicles), also Medium.
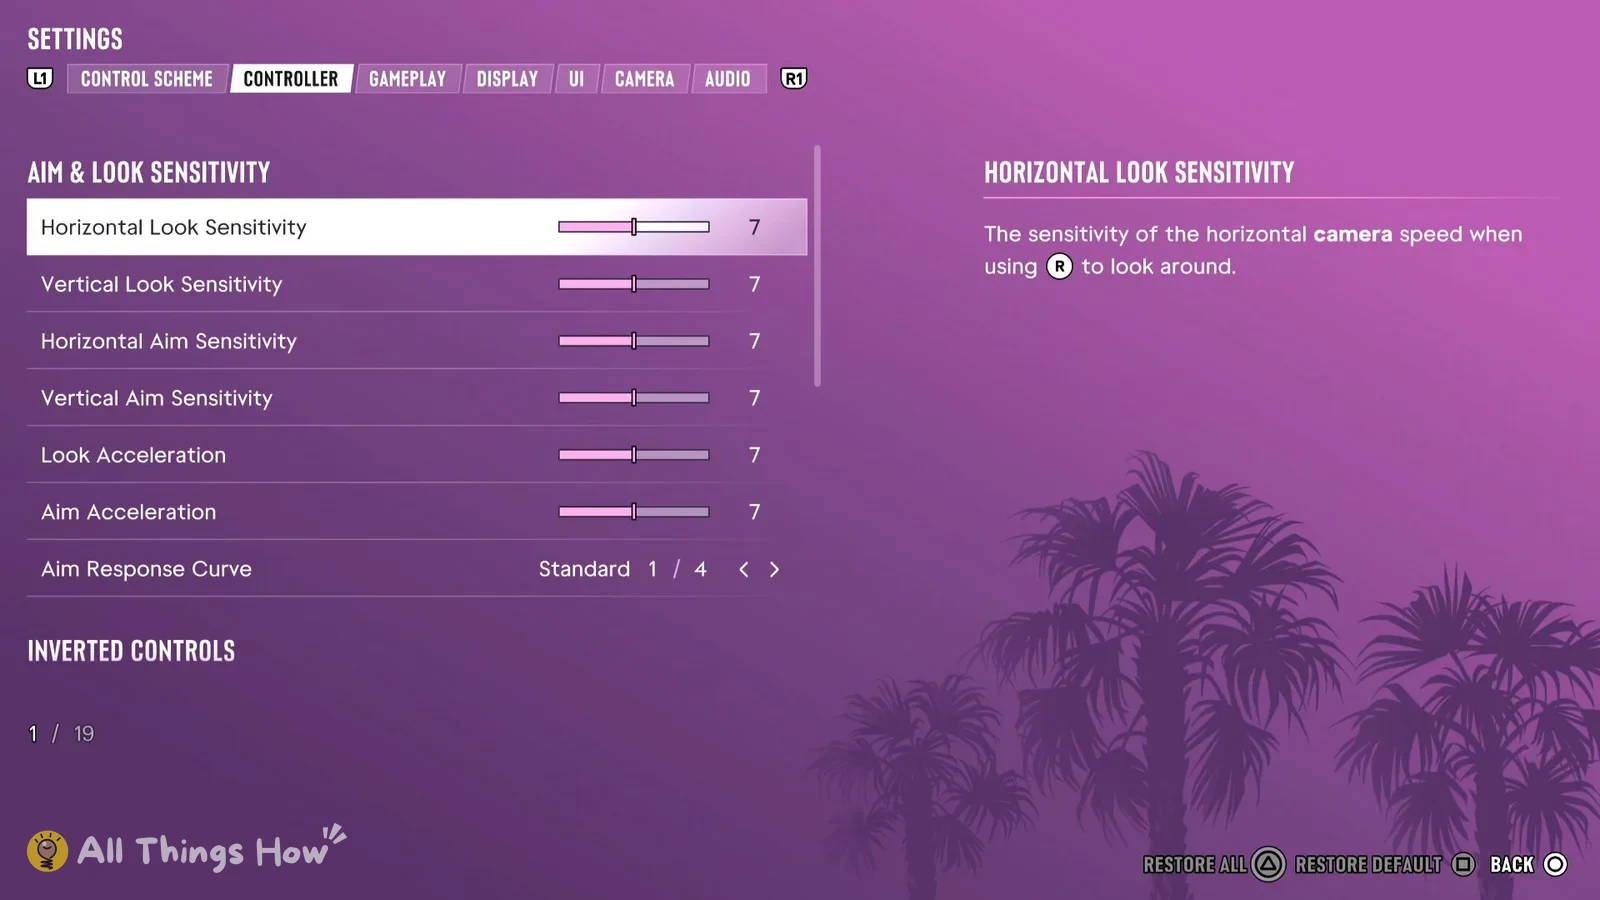
The Controller tab has 19 rows. Look and aim sensitivity start at 7 and Aim Response Curve at Standard, and there are rows for inverted controls, Vibration & Haptics Strength, stick deadzones, Adaptive Triggers Resistance and Vibration, and Adaptive Speed Limiter. Touch Pad Button is set to Map, so pressing the touch pad opens the map. If the DualSense triggers feel too stiff during long sessions, the Adaptive Triggers Resistance row is where you turn that down.