Hold down the Backspace key and it should erase text continuously until you let go. When that stops working and each press removes just a single character, editing slows to a crawl. The same thing can happen to the arrow keys and the spacebar, and the cause is almost always a software setting rather than a broken keyboard.
Quick answer: Open Settings, go to Accessibility > Keyboard, and turn off Filter Keys. Hold Backspace again — it should now delete letters continuously.
Why Backspace only deletes one letter at a time
The repeated keystroke you expect when holding a key is controlled by Windows accessibility settings and your keyboard driver. When something blocks that repeat behavior, holding Backspace registers as a single press. These are the common triggers.
| Cause | What it does |
|---|---|
| Filter Keys enabled | Tells Windows to ignore brief or repeated keystrokes, so holding a key no longer repeats. |
| Outdated or corrupt keyboard driver | Breaks normal key behavior, including continuous deletion. |
| Repeat delay / repeat rate set too slow | Adds a long pause before repeats begin, making the key feel unresponsive. |
| Physical fault or debris | Dirt under the keycap, a worn switch, or a damaged ribbon cable stops the key registering. |
Before changing any settings, make sure the keyboard is clean and every key moves freely. A sticky or jammed Backspace key can produce the same symptom.
Turn off Filter Keys (and Sticky Keys)
Filter Keys is a Microsoft accessibility feature that makes the keyboard ignore quick or repeated strokes. It is the single most common reason Backspace stops deleting continuously, so check it first.
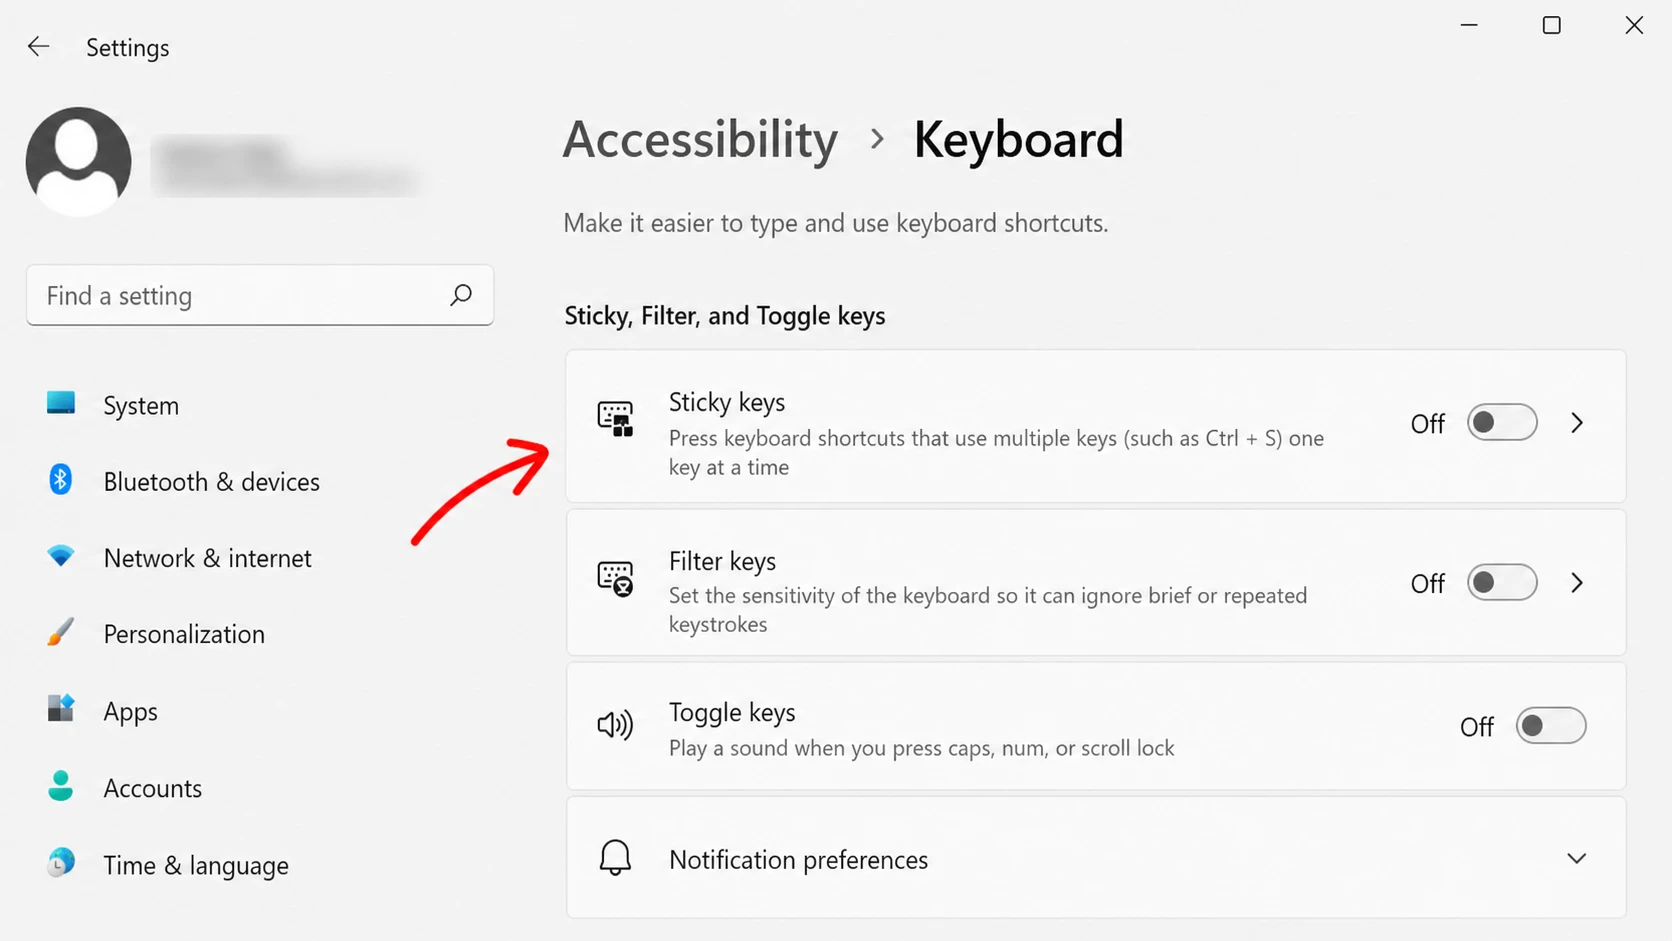
You can also disable Sticky Keys with a keyboard shortcut. Press the Shift key five times in a row, and at the final press a beep confirms the feature has turned off and its taskbar icon disappears.
Now hold Backspace in any text field. If it deletes letters one after another until you release the key, the problem is solved.
Run the Keyboard troubleshooter
If switching off Filter Keys did not help, let Windows scan for software faults. The built-in Keyboard troubleshooter checks for misconfigured settings and applies fixes automatically.

Confirm the keyboard itself works
To rule out hardware, connect a second keyboard and try holding Backspace on it. If the spare keyboard repeats correctly, the original is likely at fault. When you do not have a spare on hand, free keyboard tester tools can show whether each key registers as expected.
Note: if no input registers at all when you press Backspace, dust or dirt under the key is a likely cause. Clean the key and test again.
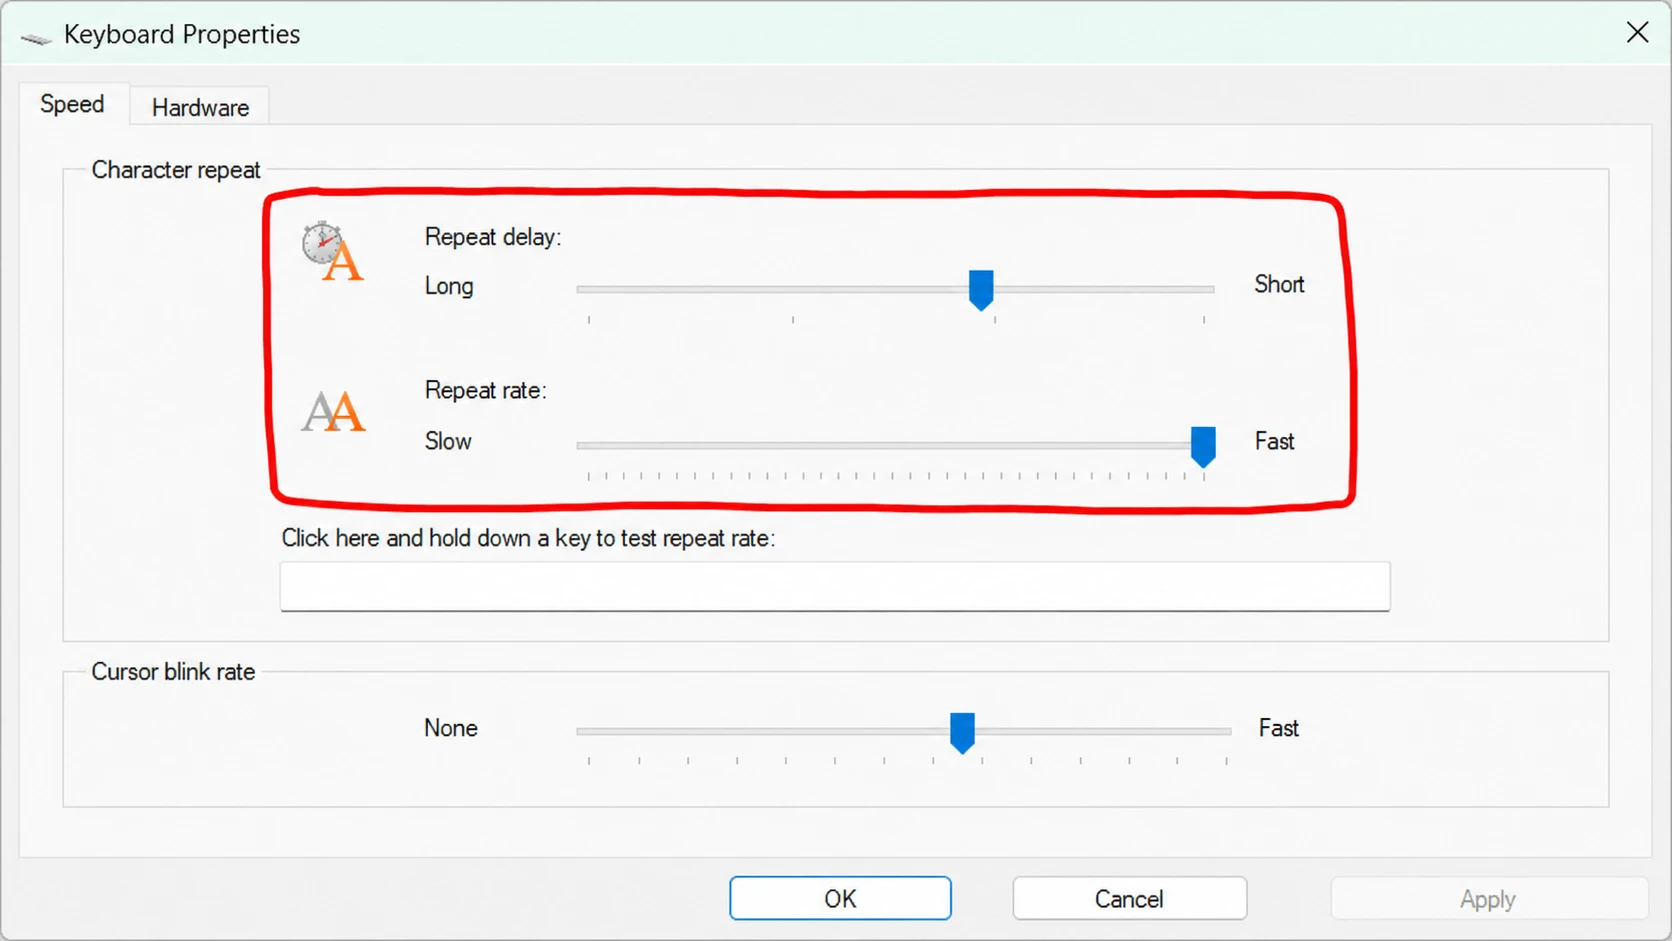
Adjust the Repeat Delay and Repeat Rate
These two settings control how long Windows waits before a held key starts repeating, and how fast it repeats after that. If the delay is set too high, holding Backspace can feel like it only deletes once.
Update or reinstall the keyboard driver
A corrupt or outdated keyboard driver can break continuous deletion even when every setting is correct. Updating the driver installs a fresh, working copy.
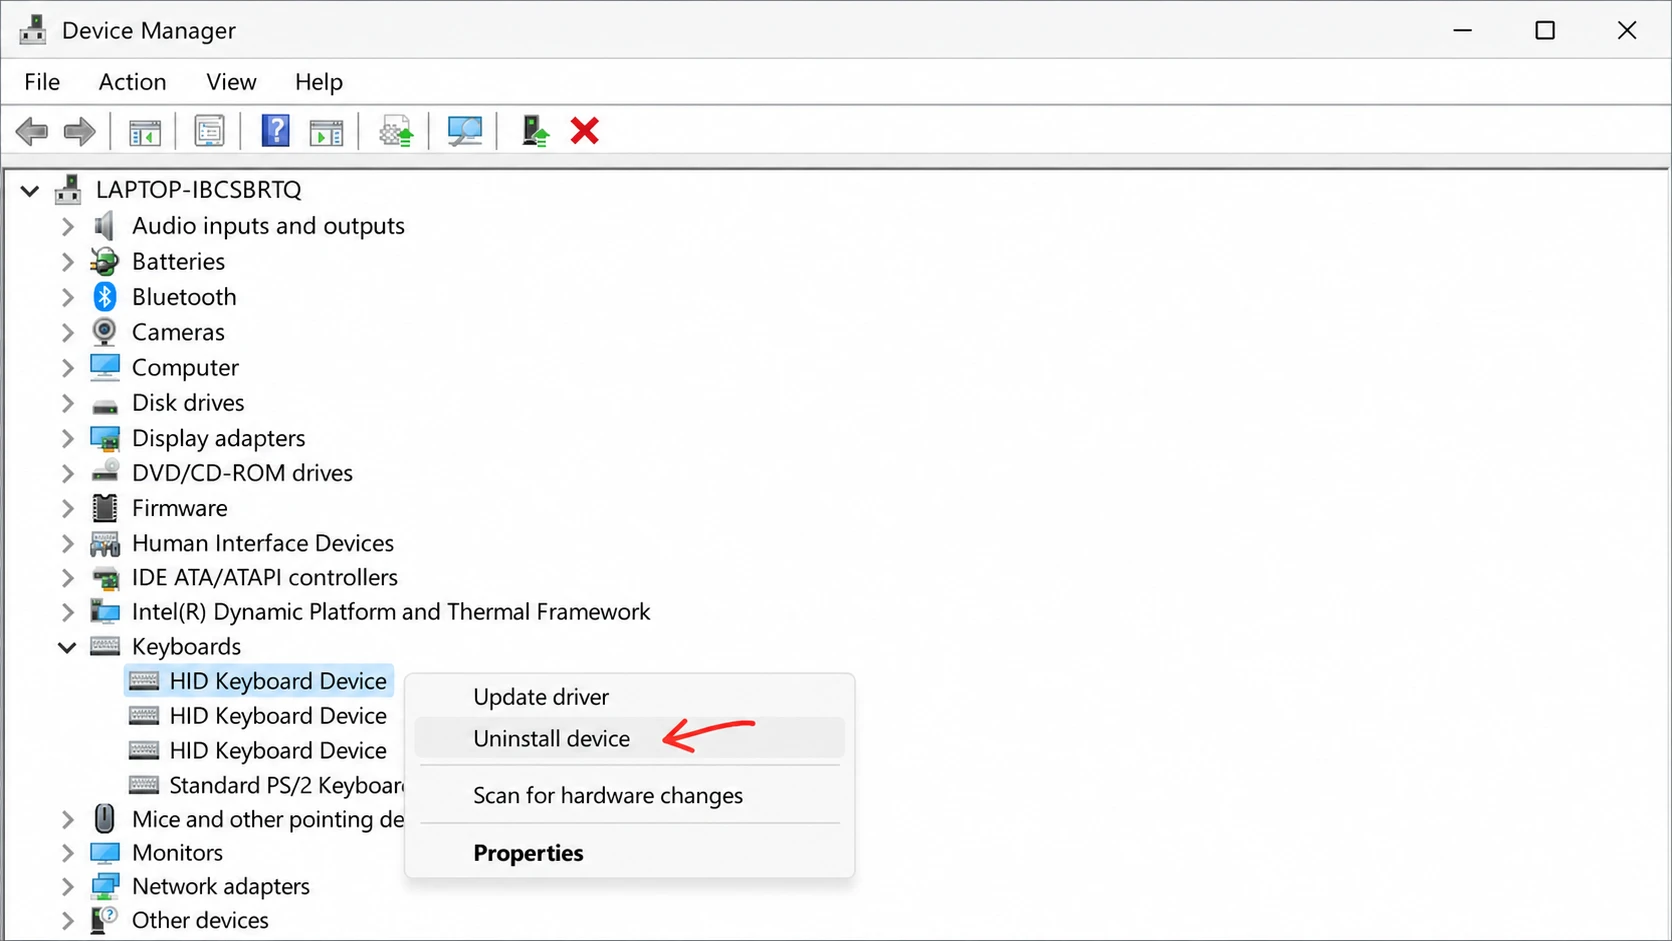
You can also grab the latest driver directly from your keyboard manufacturer’s website, or check Windows Update’s optional updates section for a newer version.
For most people, switching off Filter Keys restores normal Backspace behavior right away. If you have worked through the troubleshooter, the repeat settings, and a driver reinstall and a spare keyboard still fails the same way, the original keyboard is probably faulty and worth replacing.