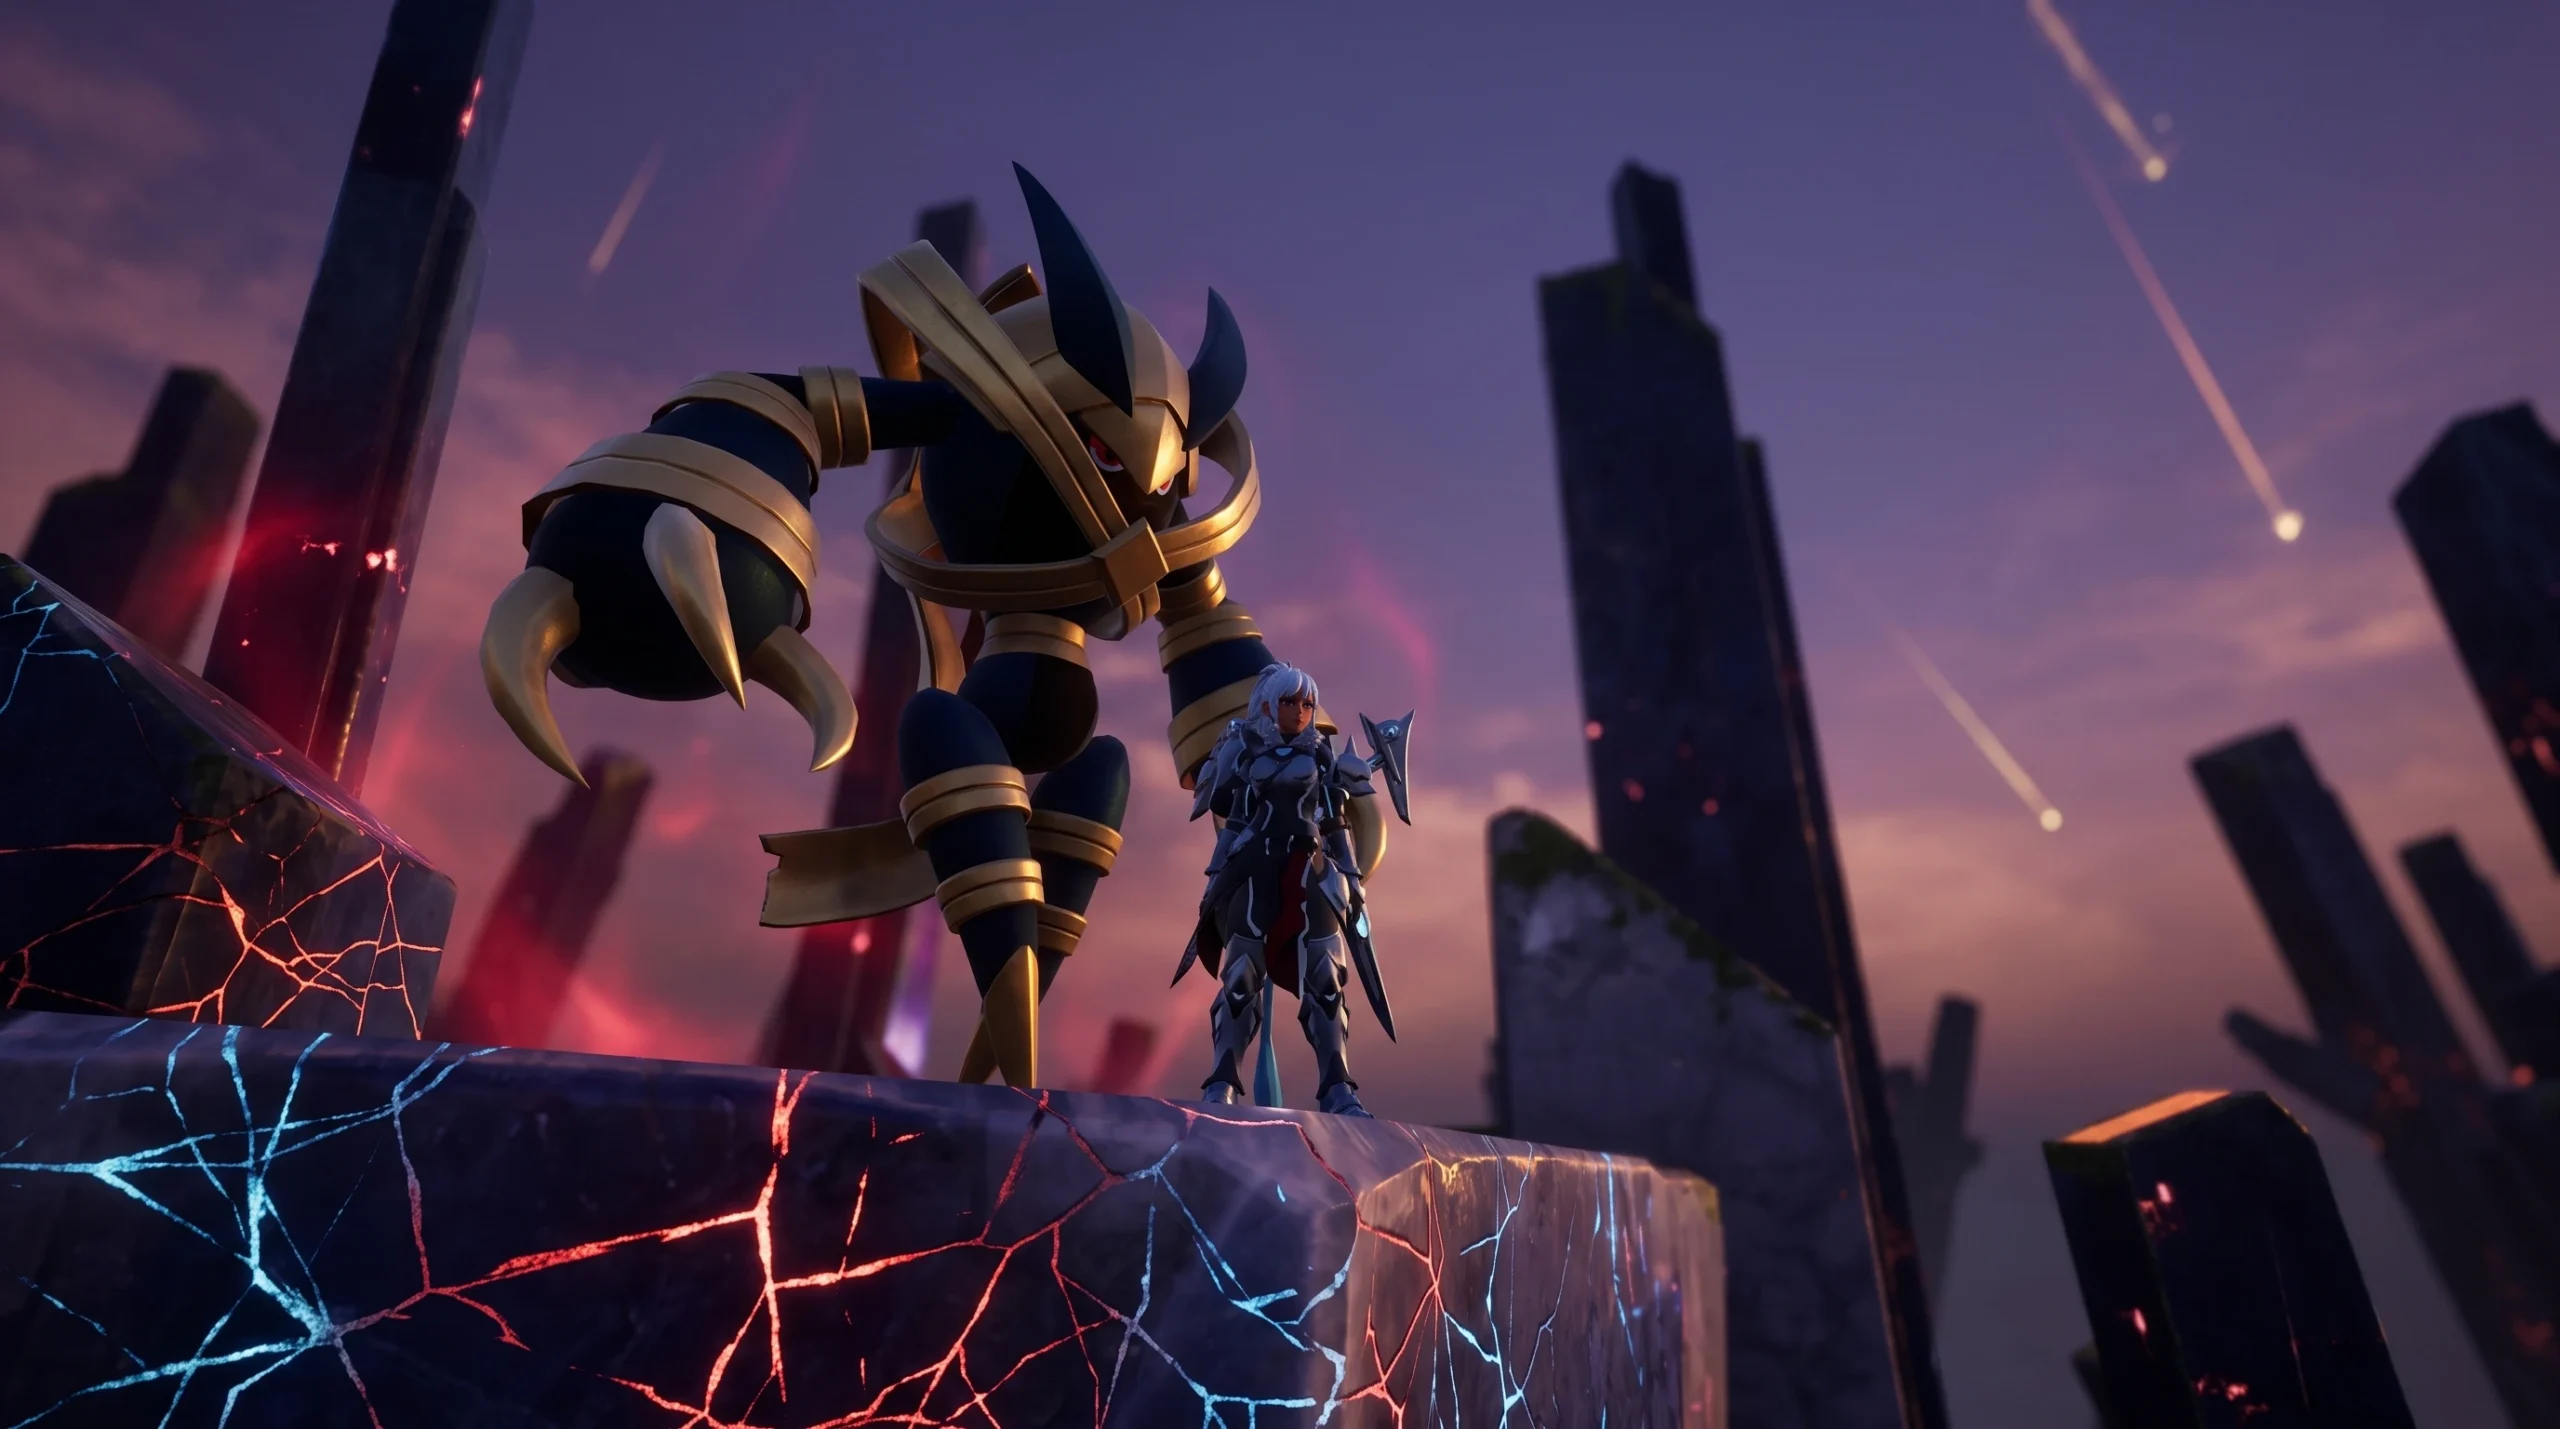
The “Team Mummy” build turns Gildra, a Dark/Ground Pal from Palworld’s 1.0 update, into a fire-slinging tank that simply refuses to stay dead. Instead of leaning on Gildra’s native Dark and Ground moves, the build loads it with fire active skills, wraps the whole party in fire-damage accessories, and abuses the Resurrection partner skill so a downed Gildra pops back up at full health mid-fight. The payoff is a team that grinds through a hard mode boss with almost 500,000 HP.
Quick answer: Run two Lv.80 Gildra with Resurrection Lv.5, equip them with fire active skills, stack four Epic fire-damage accessories plus Mammorest Curry (+25% Attack) and Heat-Resistant Ancient Armor, then swap between both Gildra so one heals while the other keeps casting until the boss dies.
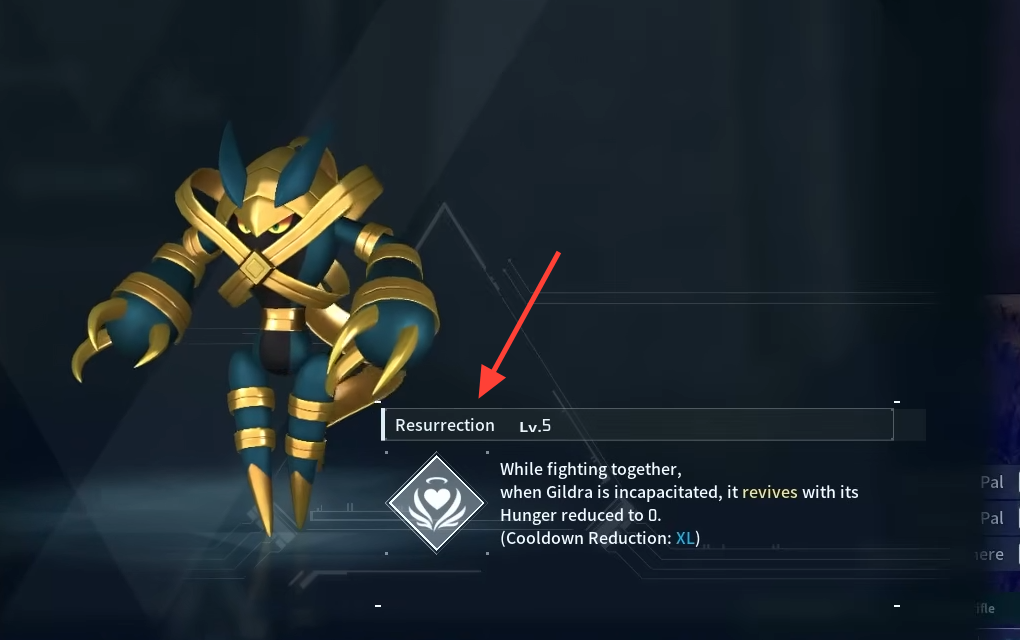
Why Resurrection is the core of the Team Mummy build
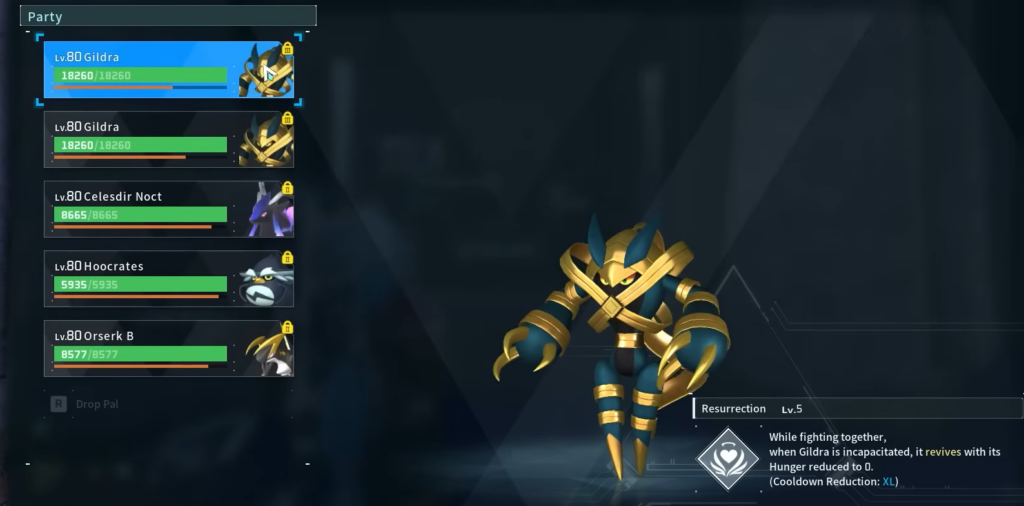
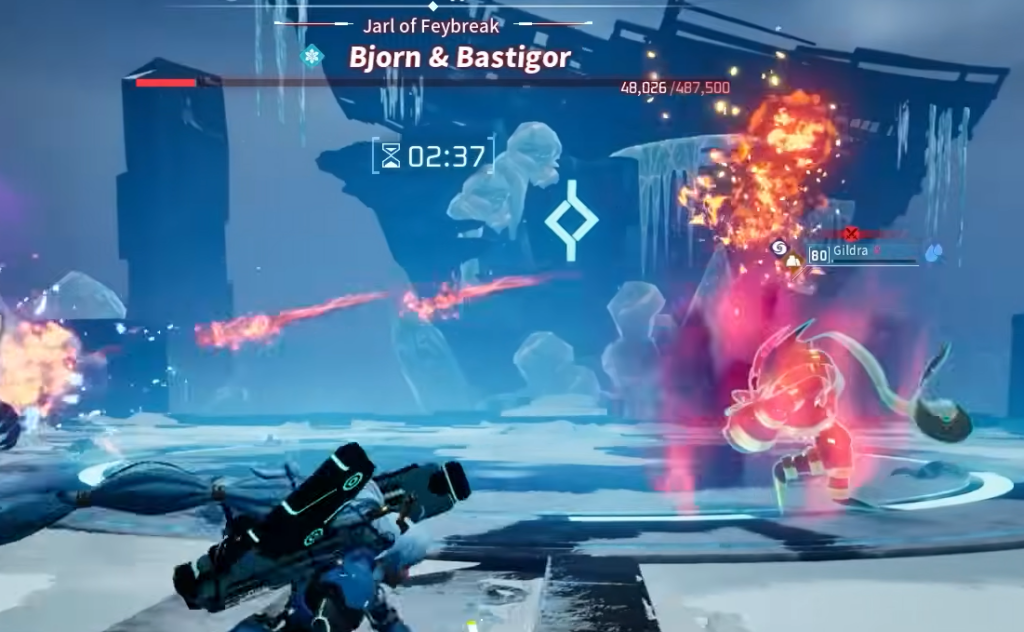
Gildra’s partner skill, Resurrection, is the engine that makes everything else possible. At Lv.5, when Gildra is incapacitated it revives with its Hunger reduced to 0, and the cooldown reduction is rated XL. In practice that means a Gildra that hits 0 HP wraps itself in a fiery cocoon and comes back at full HP, then automatically re-eats its buff food. During the fight the on-screen prompt confirms this with a line reading “Gildra ate Mammorest Curry,” so the +25% Attack buff refreshes on revival instead of disappearing.
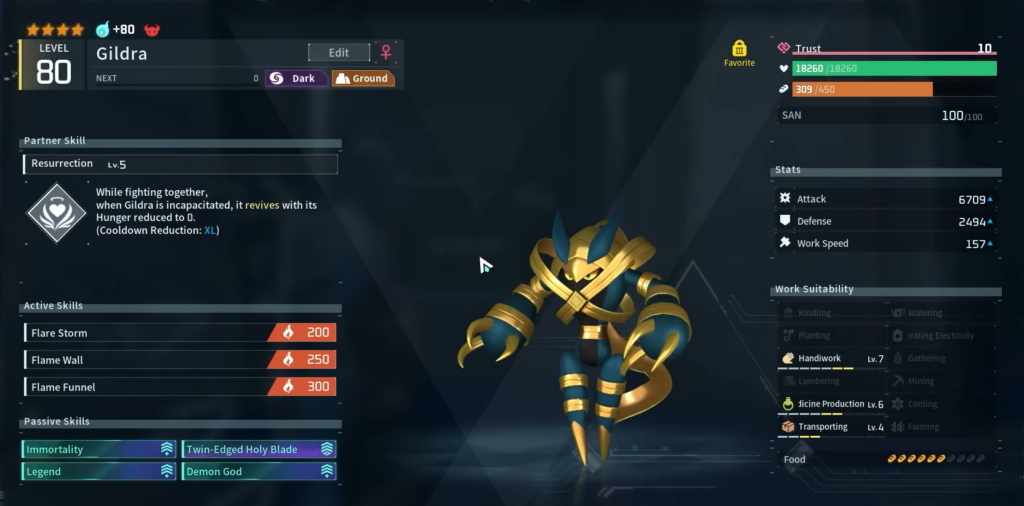
Because two Gildra sit in the party, you never wait out a downed Pal. When the first drops, you swap to the second and keep attacking while the first one heals passively in reserve. Each Lv.80 Gildra in this setup carries 18,260 HP, giving the rotation plenty of margin against a heavy-hitting boss.
Gildra stats, active skills, and passives
Gildra is a Dark/Ground Pal, but this build deliberately ignores its default Sand Twister and Dark Whisp toolkit. Every equipped active skill is Fire, which is what lets the fire-boosting accessories do real work. The tuned Gildra runs an Attack of 6,709, Defense of 2,494, and Work Speed of 157.
| Active skill | Type | Power |
|---|---|---|
| Flare Storm | Fire | 200 |
| Flame Wall | Fire | 250 |
| Flame Funnel | Fire | 300 |
The passive lineup is built for raw damage and survivability. Immortality and Legend keep Gildra durable, while Twin-Edged Holy Blade trades defense for offense (Attack +50.0%, Defense -30.0%). Demon God rounds out the set. The Defense drop is acceptable here precisely because Resurrection undoes any death it might cause.
| Passive skill | Effect |
|---|---|
| Immortality | Durability passive |
| Legend | Durability passive |
| Twin-Edged Holy Blade | Attack +50.0%, Defense -30.0% |
| Demon God | Attack passive |
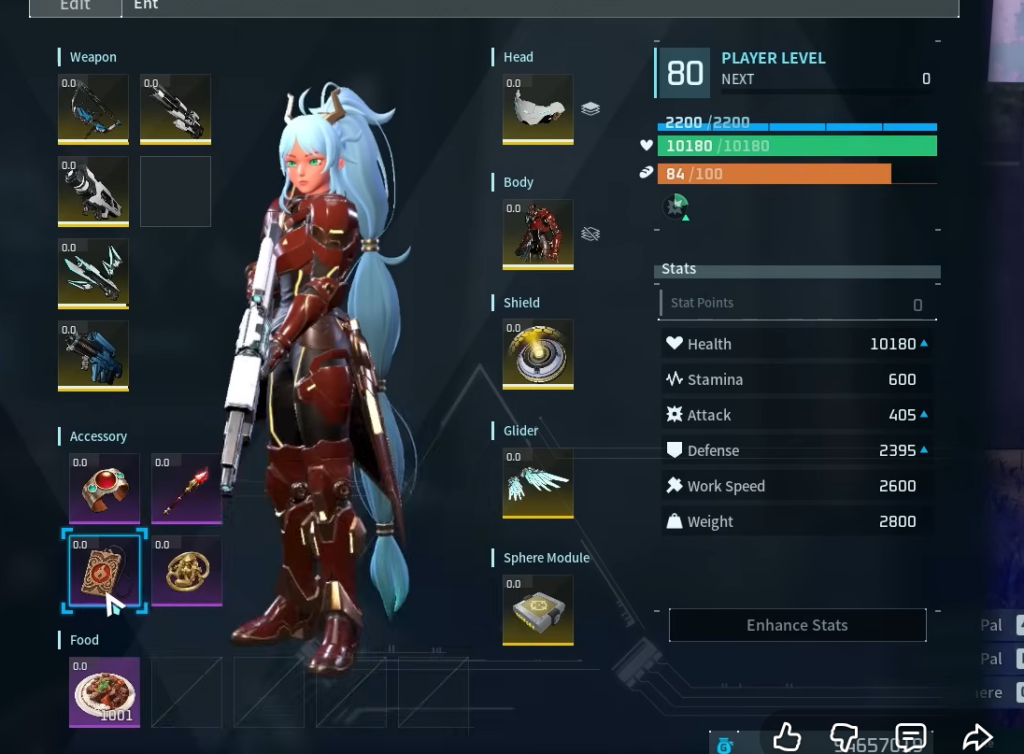
Accessories, food, and armor for maximum fire damage
All four accessory slots point at the same goal, which is more Attack and more Fire damage on the Pal fighting alongside you. Three of them stack Pal Fire Damage Enhancement Lv. 4, so the fire active skills scale hard. The fourth doubles up on Attack for both you and Gildra.
| Accessory (Epic) | Key bonuses |
|---|---|
| Flame Emperor’s Baton | Pal Attack Up Lv. 4, Pal Fire Damage Enhancement Lv. 4 |
| Faleris Ring | Ice Damage Reduction Lv. 4, Pal Fire Damage Enhancement Lv. 4 |
| Blazamut’s Talisman | Pal Defense Up Lv. 4, Pal Fire Damage Enhancement Lv. 4 |
| Dogen Emblem | Attack Up Lv. 4, Pal Attack Up Lv. 4 |
Before the fight, feed each Gildra Mammorest Curry (Epic), which boosts Attack by 25%. On the player side, equip Heat-Resistant Ancient Armor (Legendary) to keep your own character standing while Gildra does the damage.
The rest of the Team Mummy party
Beyond the two Gildra, the party carries three support Pals whose partner skills feed the fire loop. None of these effects stack with a duplicate, so each one is unique in the lineup.
| Pal (Lv.80) | Partner skill | Effect |
|---|---|---|
| Celesdir Noct | Blessing of Chaos Lv.5 | +80% Attack while the active Pal slowly loses Health |
| Hoocrates | Dark Knowledge Lv.5 | +30% Attack to Dark Pals |
| Orserk B | Ferocious Thunder Dragon Lv.5 | Bullet hits grant +5% Attack and Defense for 5s, stacking up to 30 times |
Note: Blessing of Chaos drains the fighting Pal’s Health for its big Attack boost, which is another reason Resurrection matters. The self-inflicted damage is far less of a problem when Gildra can revive at full HP.
Clearing hard mode Bjorn and Bastigor
The target here is Bjorn & Bastigor, the Jarl of Feybreak, sitting at 487,500 HP with waves of Feybreak Berserkers and Feybreak Warriors backing them up. The build handles it in a repeatable rhythm.
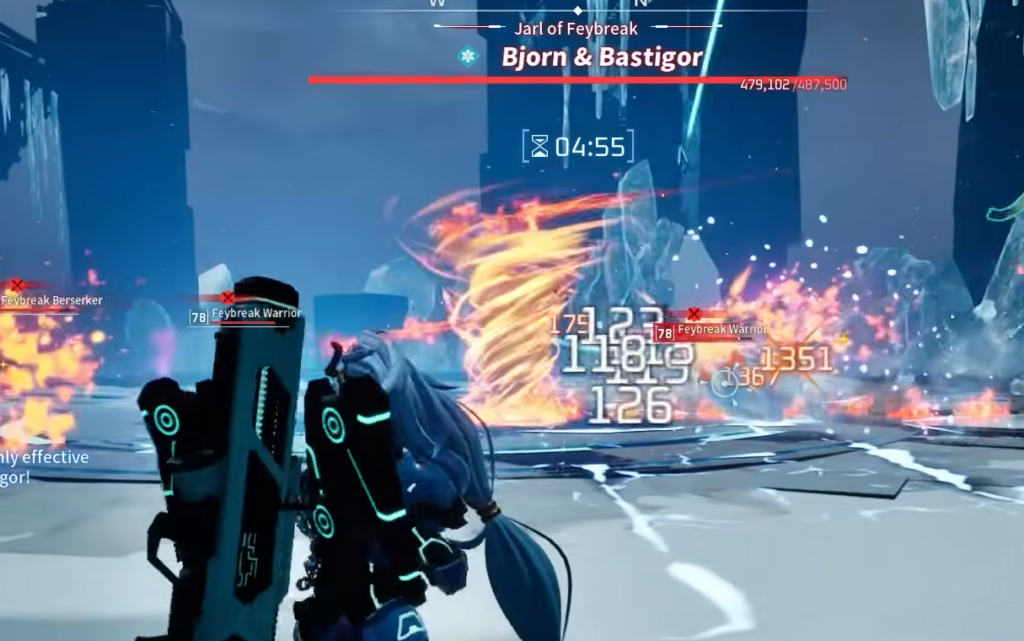
You know it worked when the screen displays “BOSS ELIMINATED.” In this run the kill lands at roughly the four-and-a-half-minute mark, with the first Resurrection triggering around 0 HP partway through and a Gildra swap following shortly after.
Mummy Rush, Gildra’s exclusive skill
If you’d rather lean into Gildra’s Dark identity for a follow-up fight, its exclusive skill is Mummy Rush, a Dark move with 500 Power and a 24-second cooldown. Gildra extends the bandage-like organs on its hands to deliver a rapid series of attacks. It’s a strong option when you swap accessories and party members to prep for the next hard mode encounter, though the fire loadout is what carries this specific Bjorn & Bastigor kill.