Windows 11 installation and many core security features require both Secure Boot and a Trusted Platform Module (TPM) version 2.0. Lacking proper configuration or running outdated firmware leaves systems exposed to boot-level malware and can block critical OS upgrades. Reviewing your PC’s TPM and Secure Boot status is the first step to addressing compatibility gaps and known vulnerabilities such as the BlackLotus bootkit exploit.
Check TPM 2.0 and Secure Boot Status in Windows
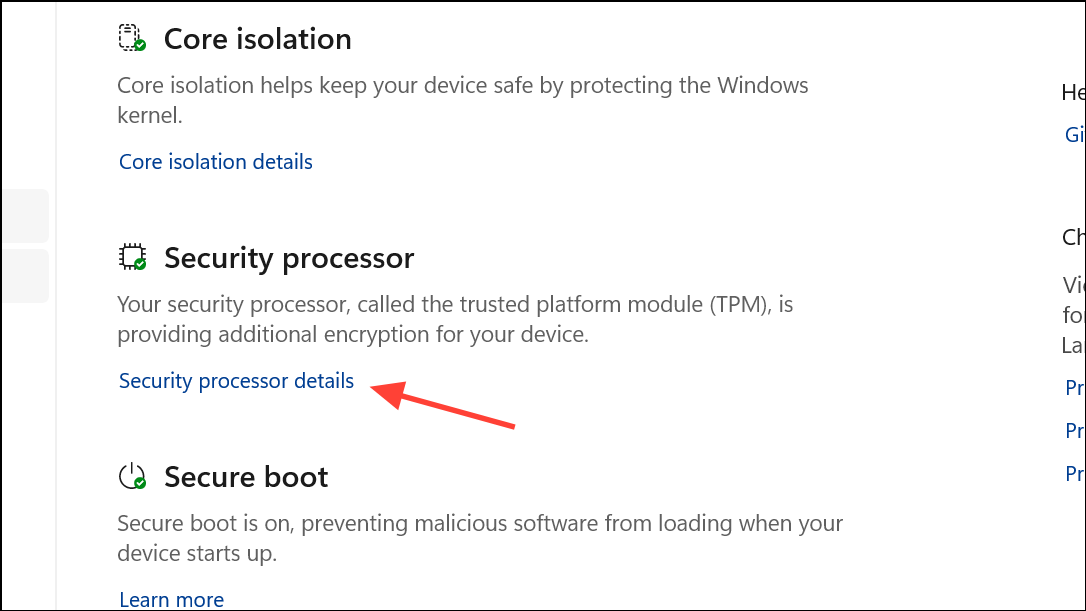
Start > Settings > Update & Security > Windows Security > Device Security. This section displays your device’s hardware security configuration, including TPM and Secure Boot status.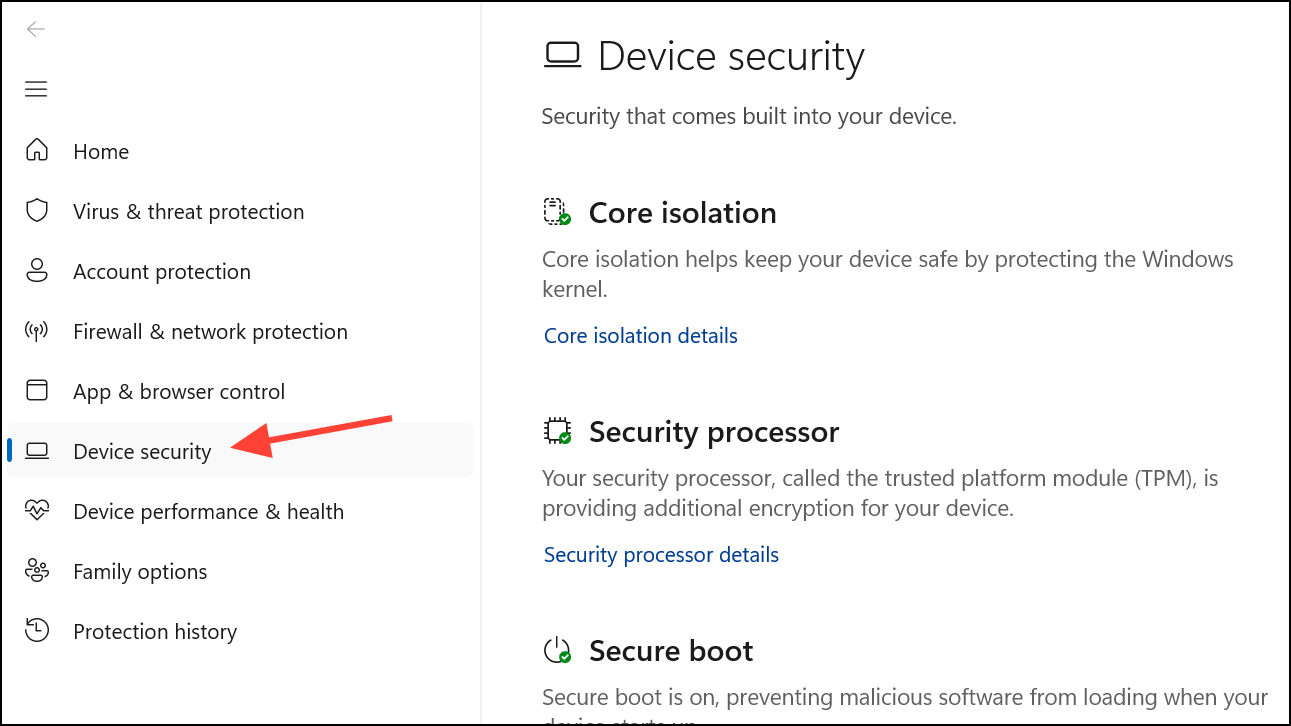
Windows Key + R, typing msinfo32, and pressing Enter. Look for “Secure Boot State” in the summary. If it reads “On,” Secure Boot is active. If it says “Off” or “Unsupported,” further action is needed.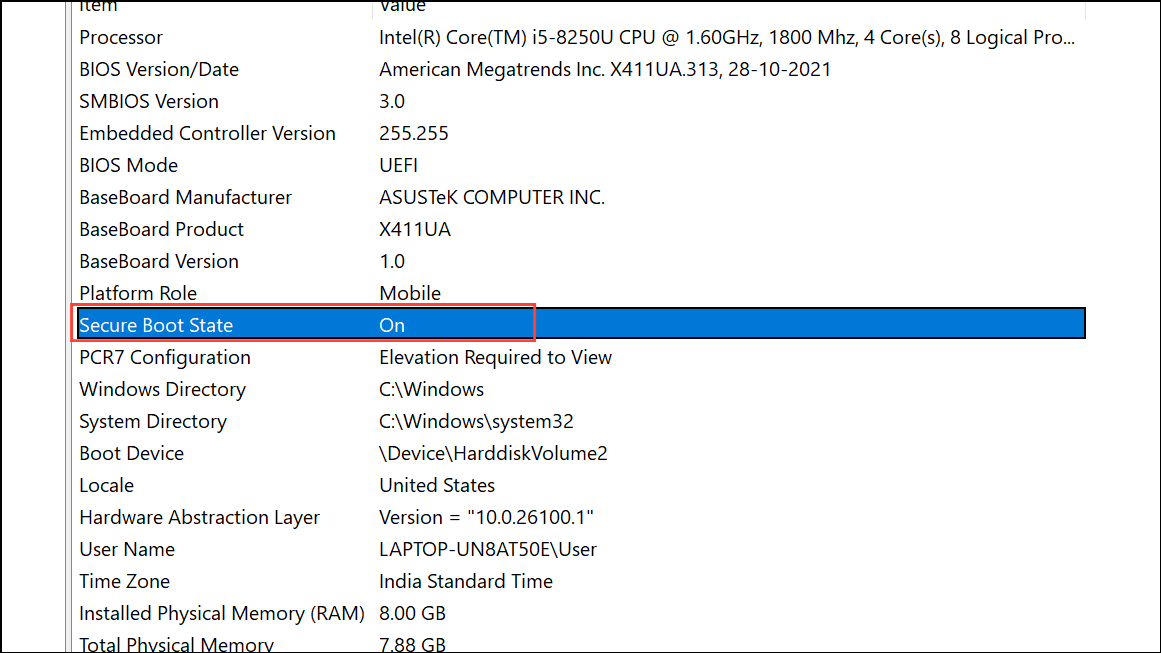
Windows Key + R, type tpm.msc, and press Enter. Review the “Specification Version” and “Status” under “TPM Manufacturer Information.” If you see “Compatible TPM cannot be found,” the TPM may be disabled or missing.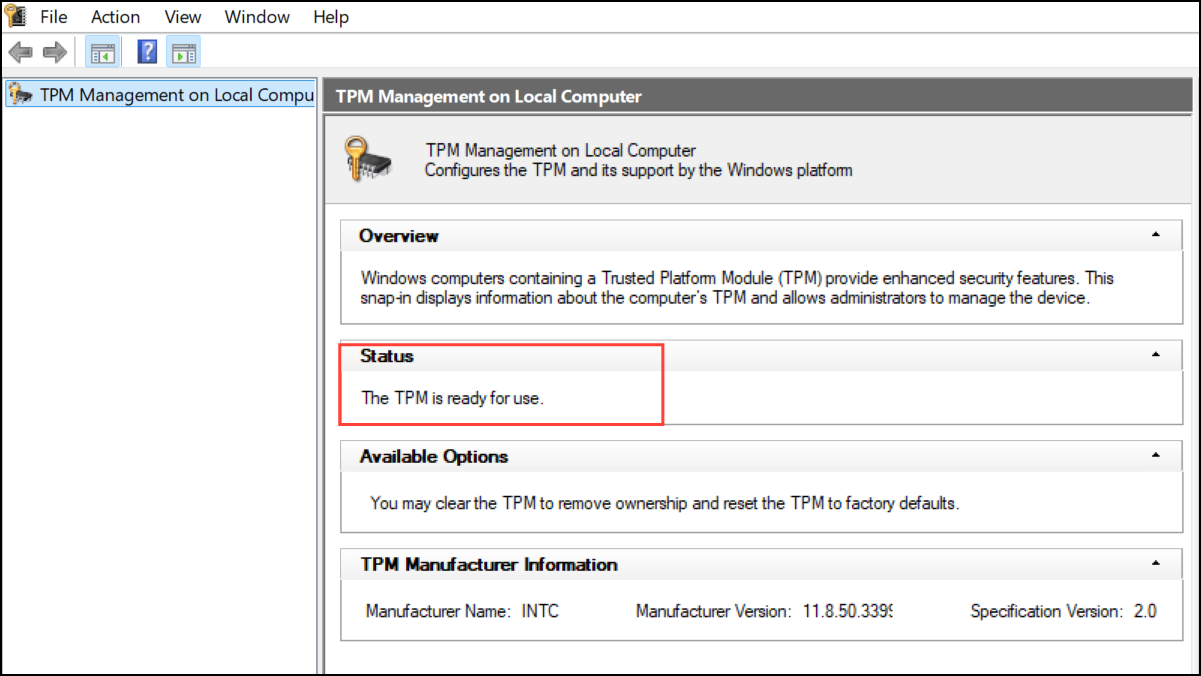
Enable or Troubleshoot TPM 2.0 in UEFI/BIOS
Most modern PCs ship with TPM 2.0 support, but it may be disabled by default—especially on custom builds or after BIOS updates. Enabling TPM is necessary to activate security features such as BitLocker, Windows Hello, and to comply with Windows 11 requirements.
F2, DEL, or a manufacturer-specific key as soon as the PC starts (watch for on-screen prompts).tpm.msc or the Windows Security app to confirm TPM 2.0 is now active.Enable or Troubleshoot Secure Boot
Secure Boot restricts the system to loading only trusted operating systems and prevents rootkits or unauthorized bootloaders from taking control before Windows loads. Secure Boot requires the system to use UEFI firmware and a GPT-formatted system disk.
Disk Management, right-click the system disk, and select “Properties” > “Volumes” to view the partition style. If it reads “MBR,” you must convert it to GPT before Secure Boot will function.mbr2gpt.exe tool from an elevated Command Prompt. Always back up your data before making partition changes.Addressing Known Vulnerabilities and Update Issues
Recent threats such as the BlackLotus UEFI bootkit exploit have prompted Microsoft to release new boot manager certificates and revocation lists. However, some TPM 2.0 systems, especially those running older Windows Server editions or with outdated firmware, may block critical mitigations or fail to update the Secure Boot database correctly.
Common TPM and Secure Boot Troubleshooting Tips
- Always update your system BIOS/UEFI before troubleshooting TPM or Secure Boot issues. Many detection problems are resolved by firmware updates.
- If TPM disappears after a BIOS update, try toggling the TPM setting off and on again, or clear the TPM from within the BIOS or Windows Security app.
- For systems reporting “No TPM detected” despite BIOS settings, disconnect unnecessary USB hubs or devices, as hardware conflicts can interfere with TPM initialization.
- When Secure Boot is enabled but Windows reports it as unsupported, double-check that your disk uses GPT and that CSM (Compatibility Support Module) is disabled in BIOS.
- After enabling TPM or Secure Boot, always save changes and fully reboot the system for the settings to take effect.
- Back up recovery keys for BitLocker before making changes to TPM or Secure Boot, as clearing TPM or changing boot configurations can trigger recovery prompts.
Verifying and configuring TPM 2.0 and Secure Boot ensures your PC meets Windows 11 security requirements and is protected from emerging boot-level threats. Regularly check for firmware updates and review your security status after major system changes or updates.