Resolve issues preventing Hyper-V from functioning on Windows 11 Home by enabling virtualization features and applying key system modifications.
Resolve issues preventing Hyper-V from functioning on Windows 11 Home by enabling virtualization features and applying key system modifications.
by Pallav Pathak
Windows 11 Home does not officially support Hyper-V, Microsoft’s built-in virtualization platform. This limitation means Hyper-V features are not available by default, and attempts to use them can result in errors or missing functionality. However, users who need to run virtual machines on Windows 11 Home can enable similar virtualization features through workarounds. These steps allow for running virtual machines using Windows’ built-in tools, even on editions where Hyper-V is not natively available.
Restart your computer and enter the BIOS or UEFI firmware settings. This typically involves pressing a key such as F2, Del, or Esc immediately after powering on your PC. The exact key varies by manufacturer and is usually displayed briefly on the boot screen.
Locate the virtualization setting in your BIOS/UEFI menu. It may be labeled as “Intel Virtualization Technology,” “VT-x,” “AMD-V,” or simply “Virtualization.” Use the arrow keys to navigate, and enable this setting if it is currently disabled.
Save your changes and exit the BIOS/UEFI. Your PC will restart with virtualization support enabled, allowing Windows to utilize virtual machine features.
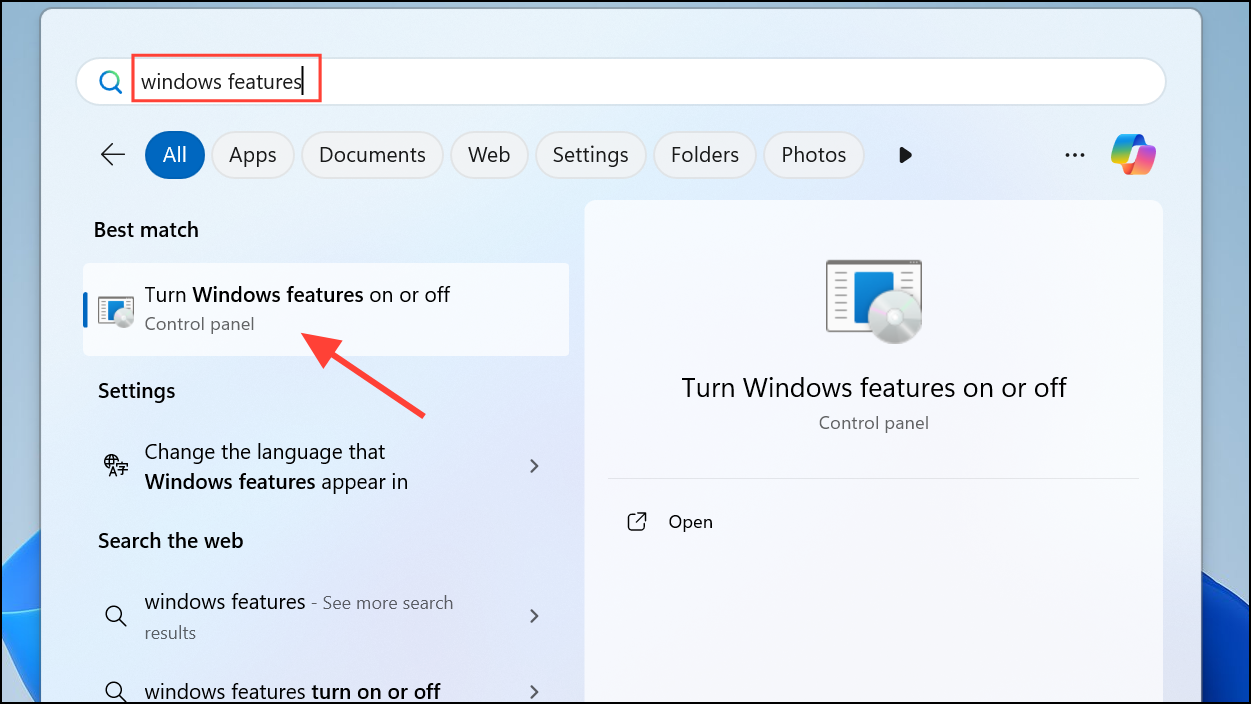
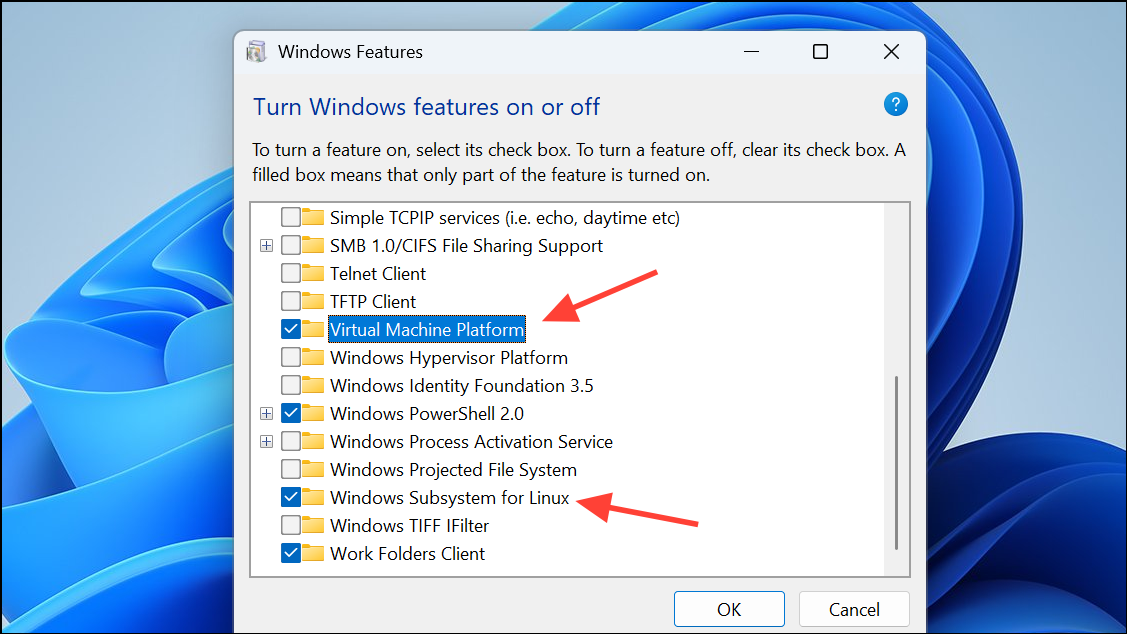
Install Windows Subsystem for Linux and Virtual Machine Platform
In the Windows Features dialog, scroll down and check the boxes for Virtual Machine Platform and Windows Subsystem for Linux. These components provide a lightweight virtualization environment, even on Windows 11 Home.
Click OK to apply changes and restart your computer when prompted. This step activates the necessary platform for running certain virtual machines and containers.
If you require full-featured virtual machines and Hyper-V remains unavailable, consider installing a third-party virtualization tool such as VirtualBox or VMware Workstation Player. These applications are compatible with Windows 11 Home and do not require Hyper-V support.
Download the installer from the official website of your chosen virtualization tool. Run the installer and follow on-screen instructions to complete the setup.
Launch the virtualization software and create a new virtual machine. You can allocate resources, select an operating system ISO, and configure network settings within the program’s interface.
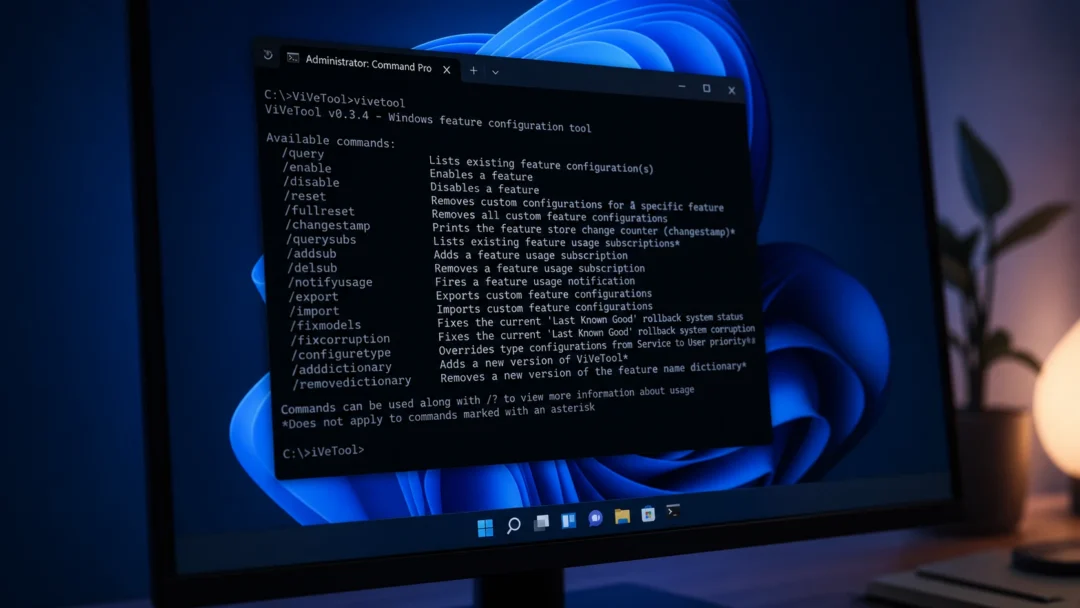
Attempt Hyper-V Activation via Command Line (Advanced Users)
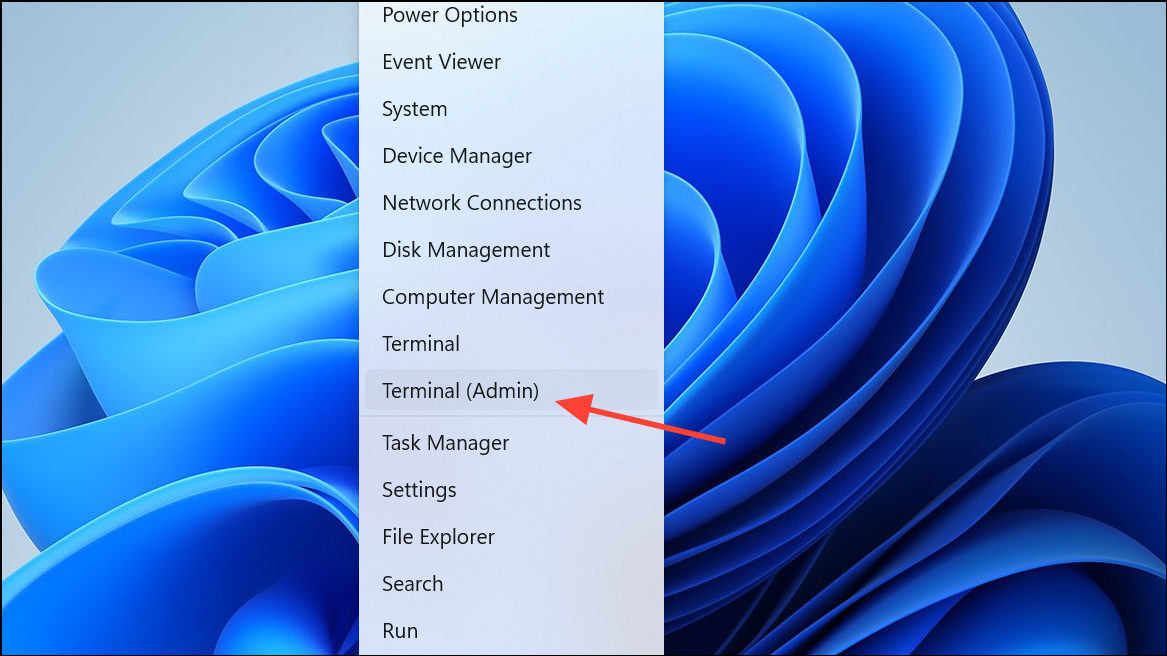
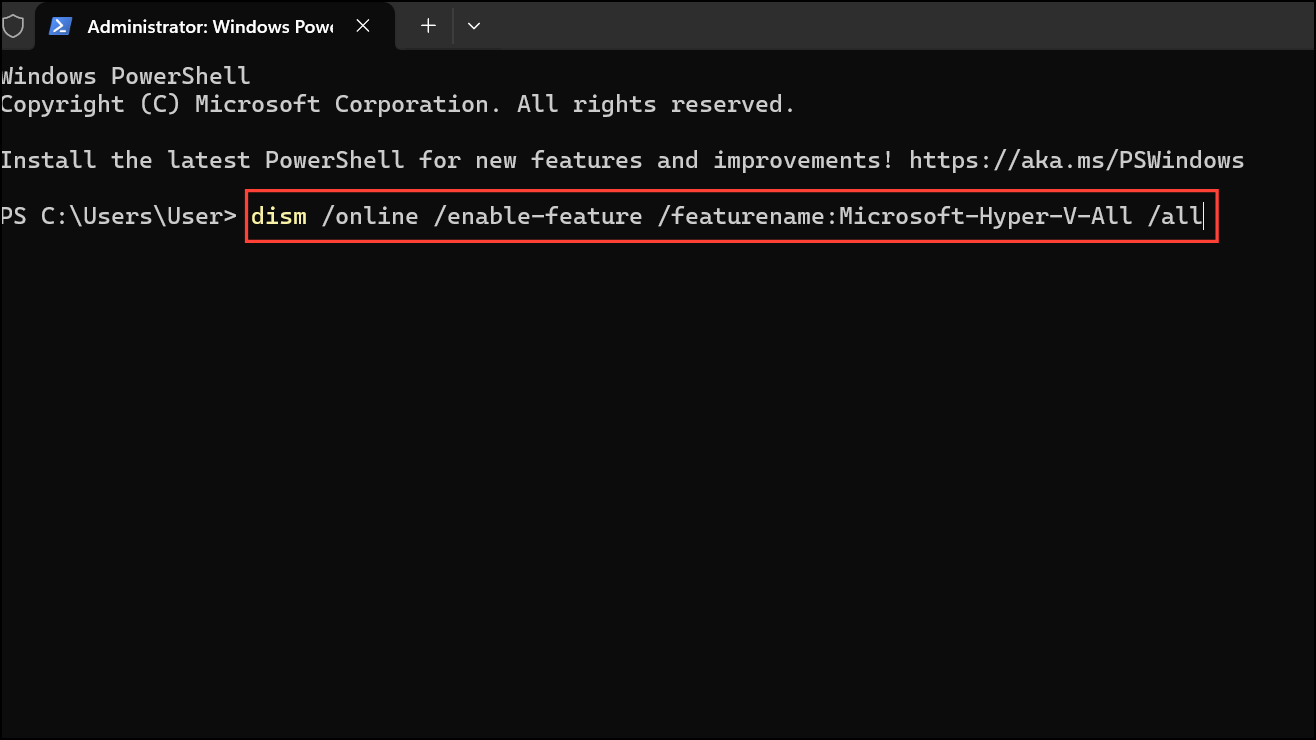
Some advanced users attempt to force-enable Hyper-V on Windows 11 Home using command-line utilities. Open Command Prompt as Administrator by right-clicking the Start button and selecting Windows Terminal (Admin) or Command Prompt (Admin).
Wait for the command to complete. If the process reports that the feature is not supported on your edition of Windows, you will not be able to use Hyper-V natively. In that case, revert to using third-party tools or the Virtual Machine Platform as described above.
Enabling virtualization support on Windows 11 Home often requires using alternative tools or enabling related features, since Hyper-V is not officially included. These steps let you run virtual machines and related workloads even if the standard Hyper-V interface is missing.