Creating partitions on your Windows 11 hard drive allows you to organize files better, install multiple operating systems, or separate system files from personal data. Windows 11 provides several built-in tools to quickly create partitions, including the Settings app, Disk Management, Command Prompt, PowerShell, and even during Windows installation. Here’s a detailed breakdown of each method, starting with the most straightforward approach.
Method 1: Creating a Partition Using Windows 11 Settings App
The Settings app in Windows 11 offers a simple, graphical way to create a new partition without needing technical commands or third-party software.
Windows key + I. Navigate to System > Storage, then click on Advanced storage settings and select Disks & volumes.

Once completed, your new partition will appear in File Explorer, ready for use.
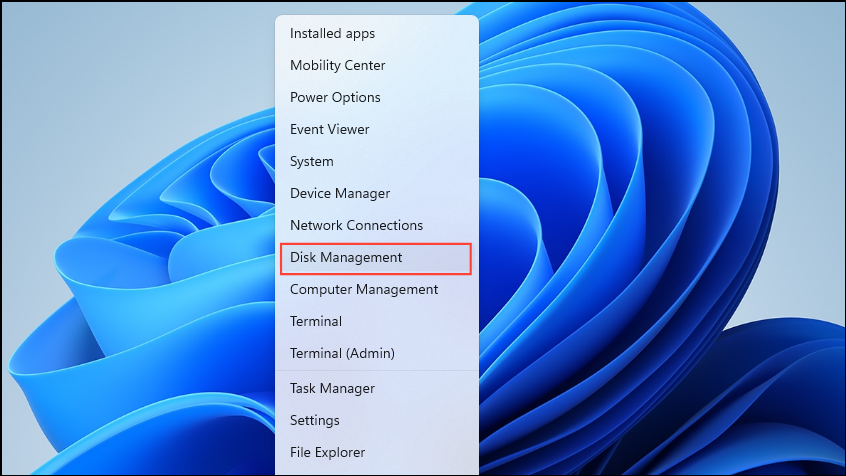
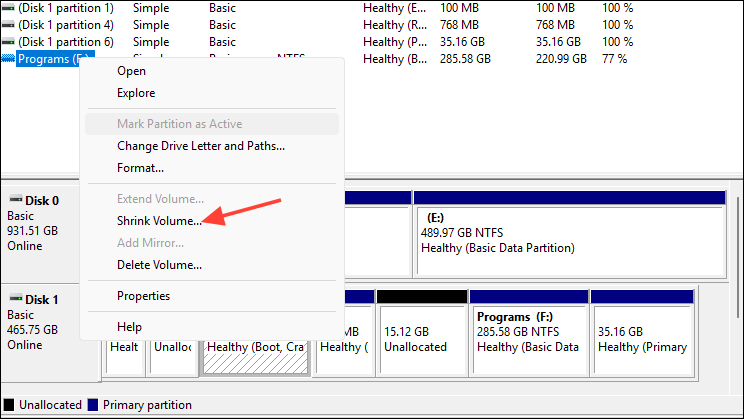
Method 2: Creating a Partition Using Disk Management
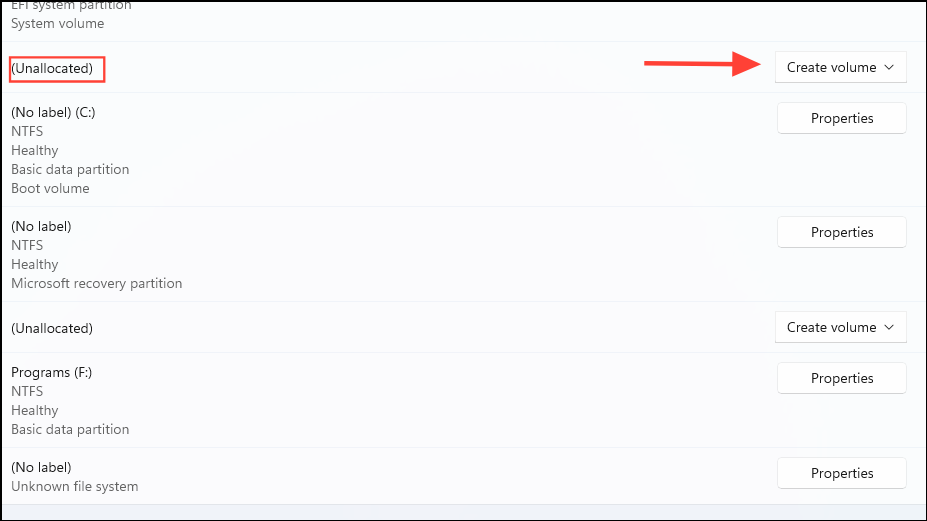
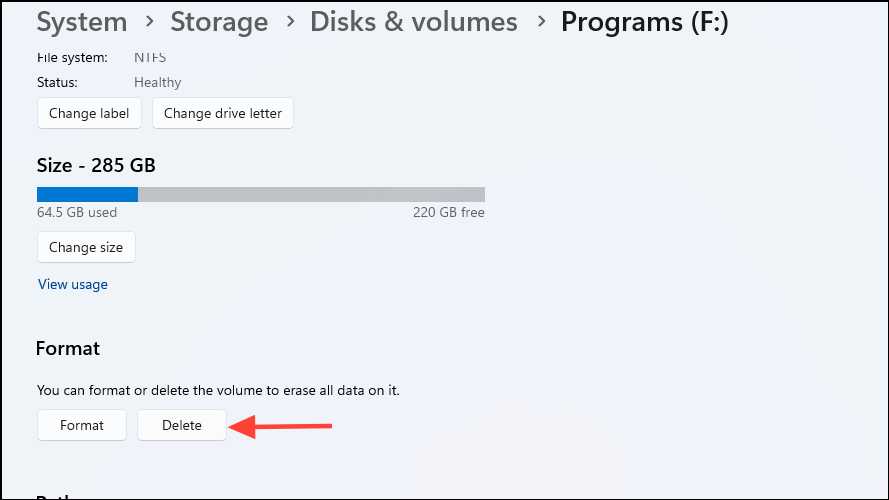
Disk Management is another user-friendly built-in utility that provides more detailed control over your partitions.
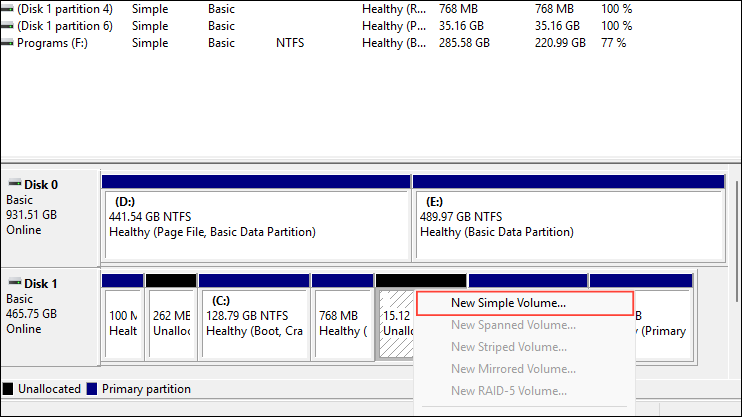
Your new partition will immediately be ready to use from File Explorer.
Method 3: Creating a Partition Using Command Prompt (Diskpart)
For advanced users, the diskpart command-line utility provides precise control over disk management tasks.
diskpart and pressing Enter. Next, type list disk to display available disks and identify the disk number.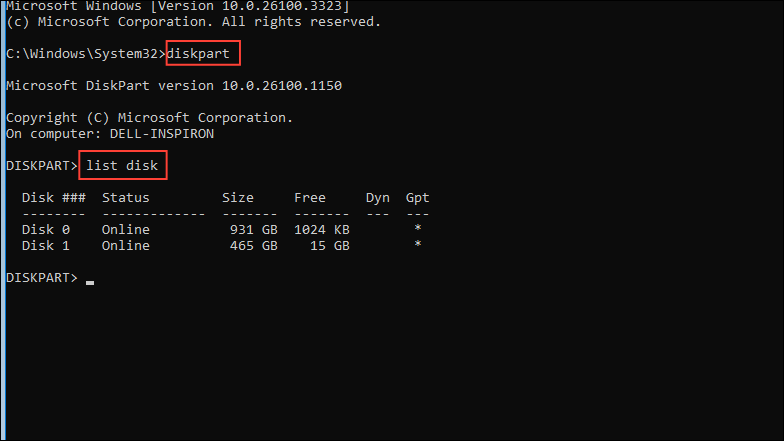
select disk X, replacing “X” with the correct disk number. Create a new partition by typing create partition primary size=50000 (replace “50000” with your desired partition size in MB). Format the partition quickly by typing format fs=ntfs quick, then assign a drive letter using assign letter=E (replace “E” with your chosen letter).After these commands, your new partition will be formatted and ready to use.
Method 4: Creating a Partition Using PowerShell
PowerShell provides another command-line method, ideal for scripting or automation tasks.
Get-Disk to list available disks and identify the disk number. If necessary, clear existing partitions with caution using Clear-Disk -Number X -RemoveData (replace “X” with the correct disk number). Confirm this action carefully, as it permanently deletes data.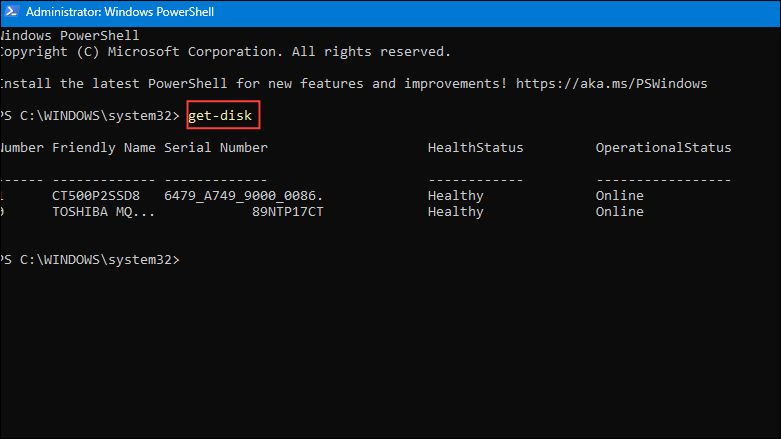
New-Partition -DiskNumber X -UseMaximumSize | Format-Volume -FileSystem NTFS -NewFileSystemLabel "MyPartition", replacing “X” and “MyPartition” accordingly.Get-Partition -DiskNumber X | Set-Partition -NewDriveLetter F, substituting the correct disk number and desired drive letter.Once done, your partition is ready for immediate use.
Method 5: Creating a Partition During Windows 11 Installation
You can also create partitions when installing Windows 11, useful if you’re setting up a fresh system.
After installation, newly created partitions will be ready for use immediately.
Partitioning your Windows 11 drive helps keep your system organized and can improve overall efficiency—just follow the method that best suits your needs and expertise.