Artifacts are wearable passive items in Survive Zombie Arena that stay active for the whole match. They raise stats like damage and max HP, fire off automatic attacks at nearby zombies, and increase the Credits and resources you collect. You can wear three at once, so the combination you pick matters as much as any single piece.
Quick answer: Buy Artifact Crates from the Artifacts Shop for 100,000 Credits each (or 500,000 for five), unlock all three loadout slots for 20,000 Credits total, then equip your three artifacts from the Loadout menu’s Artifacts tab.
How to buy and open Artifact Crates
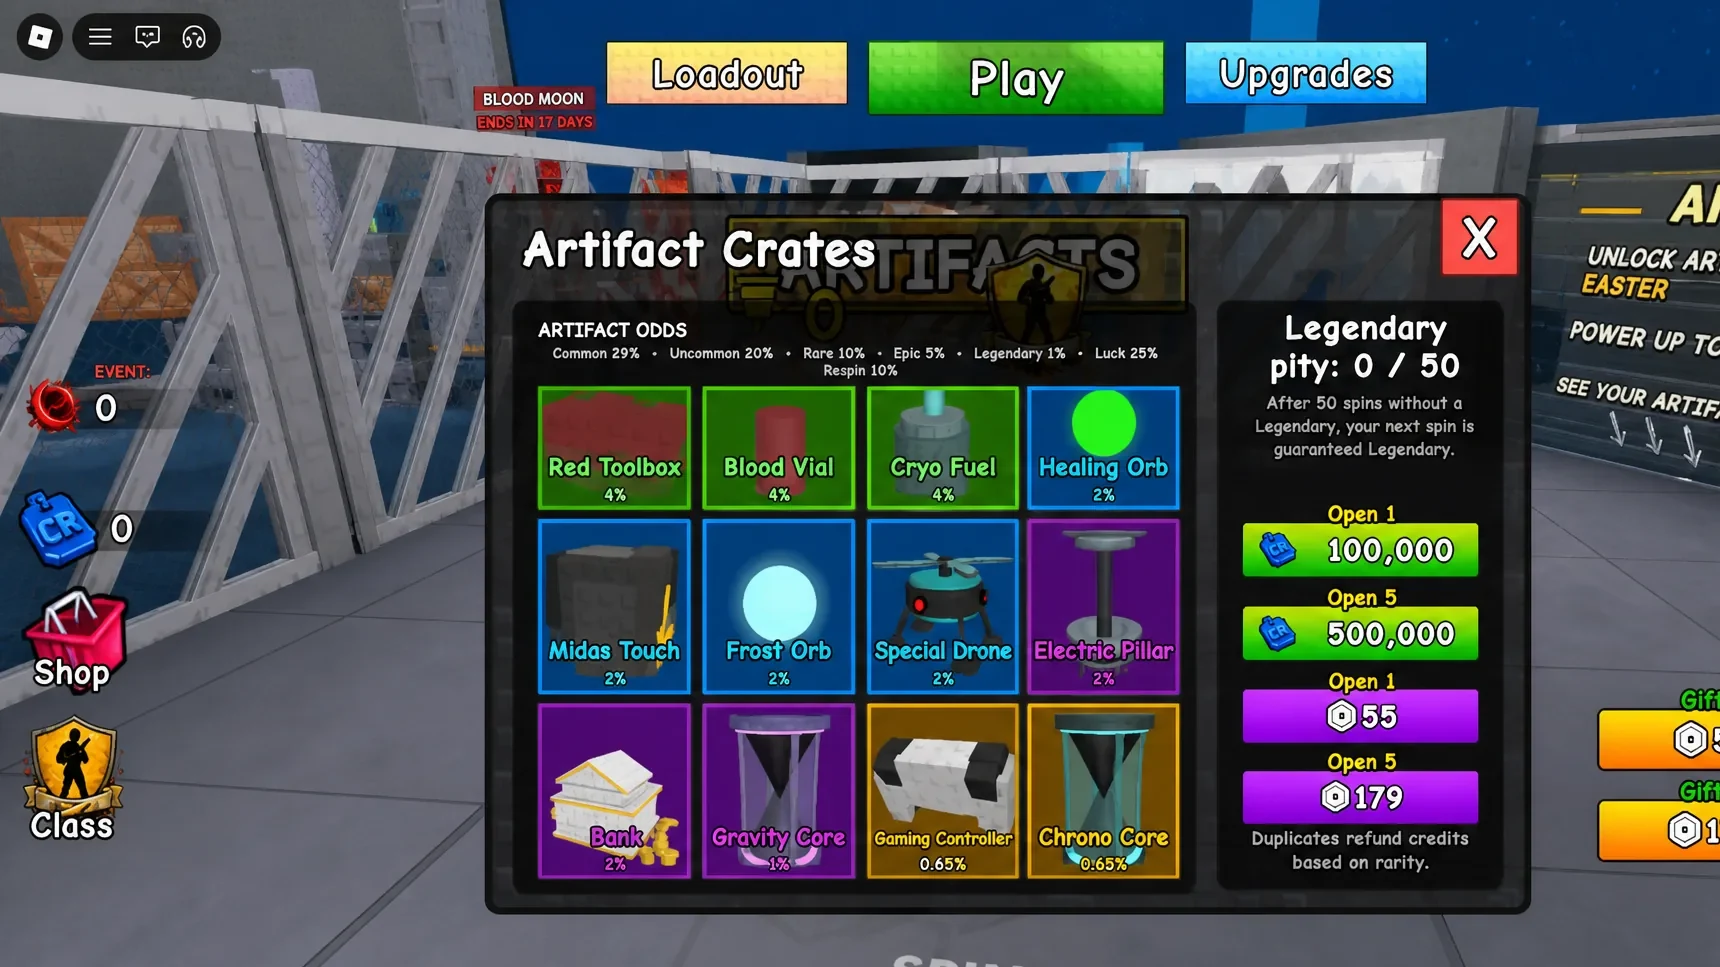
Artifacts only come from Artifact Crates, and there is a single vendor for them next to the Upgrade Shop.
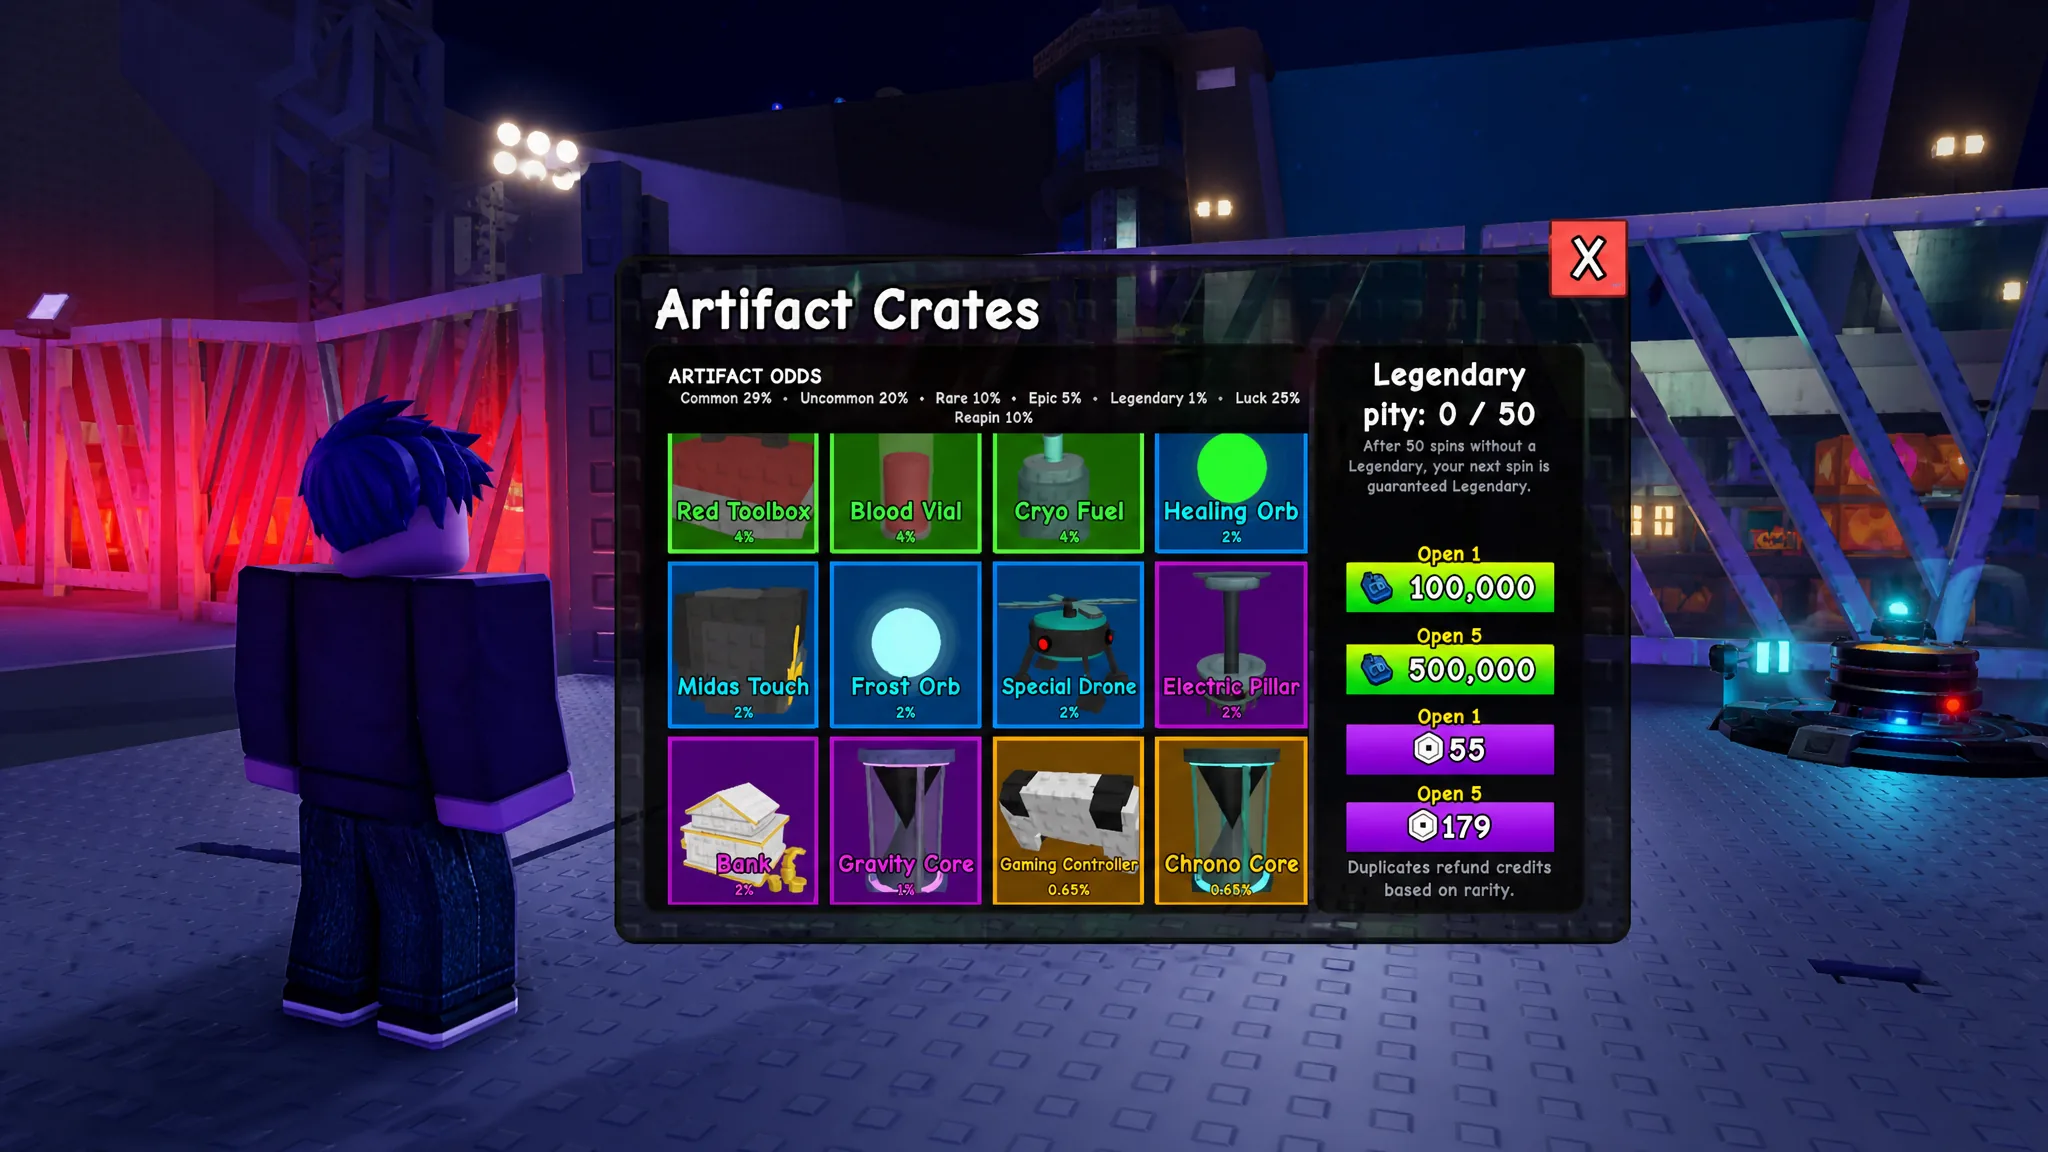
E to open the Artifact Crates menu.One crate costs 100,000 Credits or 99 Robux. Opening five costs 500,000 Credits or 379 Robux. The Credits price scales exactly, so bundling only saves money on the Robux side.
Rarity tiers and the 50-spin Legendary pity
Every crate rolls one of five rarities. The higher tiers hold the build-defining effects, and Legendary is the tier most players are chasing.
| Rarity | Tier drop rate |
|---|---|
| Common | 45% |
| Uncommon | 30% |
| Rare | 15% |
| Epic | 8% |
| Legendary | 2% |
Each tier’s rate is split across the artifacts inside it, so landing one specific Legendary is roughly a 1% chance per crate. The pity system offsets that risk. If you open 50 crates without a Legendary, the next spin is guaranteed to be Legendary. Every crate you open moves that counter, so stopping in the low 40s is the one genuinely wasteful thing you can do.
Unlock all three artifact slots first
You start with one artifact slot for free. The second slot costs 5,000 Credits and the third costs 15,000 Credits, both bought outright with no other requirement. That is 20,000 Credits total, a rounding error next to a single crate’s 100,000, so buy both before you spend anything on crates. Running one artifact when you could run three throws away most of your passive power every match.
How to equip artifacts
Every artifact and what it does
There are 20 artifacts in total. Even Commons and Uncommons carry real weight. An 8% damage bump or a flat 15% HP increase is strong on a low-level character, and the auto-attacking pieces keep working while you reposition.
| Artifact | Rarity | Effect |
|---|---|---|
| Attack Orb | Common | +8% weapon and gun damage |
| Combat Helmet | Common | +15% max HP |
| Lucky Coin | Common | 20% chance to earn event currency twice |
| Recycler | Common | 20% chance for extra Credits on every kill |
| Thorns | Common | Zombies that attack you take 150% of the damage back |
| Sword | Common | Hovering blade sweeps around you, dealing 30 damage every 4 seconds |
| Energy Drink | Uncommon | +10% movement speed and fire rate |
| Iron Dagger | Uncommon | Throws a dagger at nearby zombies every 4 seconds |
| Red Toolbox | Uncommon | +25% HP, damage, and healing for all deployed gears |
| Blood Vial | Uncommon | Heals 5 HP after every 5 kills |
| Cryo Fuel | Uncommon | Guns have a 10% chance to slow zombies by 35% |
| Healing Orb | Rare | Restores 10 HP to you and nearby teammates every 8 seconds |
| Midas Touch | Rare | 15% chance for kills to grant double minerals |
| Frost Orb | Rare | Frost pulse every 6 seconds, slowing zombies by 40% |
| Special Drone | Rare | Summons a quad-gun drone that shoots nearby zombies for 15 damage per bolt |
| Bank | Epic | +10% of Credits earned, paid at run’s end; leaving early forfeits it |
| Gravity Core | Epic | Hurls a singularity every 10 seconds that drags zombies together |
| Electric Pillar | Epic | Effect not officially revealed yet |
| Gaming Controller | Legendary | +15% damage, +10% HP and speed, +10% critical hit chance (2x) |
| Chrono Core | Legendary | Traps the nearest zombie cluster in a stasis field for 4 seconds every 12 seconds |
Note: Electric Pillar is an Epic whose effect has not been detailed by the developers, and it currently sits outside the normal pull pool.
Best artifact builds for farming, damage, and survival
Because you wear three at once, an artifact set is a build rather than a stack of upgrades. These three loadouts cover the situations most players run into.
| Build | Artifacts | Purpose |
|---|---|---|
| Credit farming | Recycler, Bank, Midas Touch | Three separate income levers on one run |
| Damage | Gaming Controller, Attack Orb, Special Drone | Higher DPS whether you are aiming or not |
| Survival | Combat Helmet, Blood Vial, Healing Orb | Bigger HP pool plus steady healing |
The farming trio is where most players should live while building a collection. Recycler pays out during the run, Midas Touch doubles mineral drops, and Bank adds a flat percentage at the end, none of which overlap. Bank only pays if you finish the run, so bailing on a wave you could have cleared deletes the bonus you were building all match.
Switch to the damage set once you have the Gaming Controller. It combines a broad stat boost, a straight weapon damage increase, and a drone that chips at everything nearby. The survival set is the one for harder difficulties or when you keep dying mid-run, pairing extra max HP with kill-triggered heals and passive regeneration that also covers teammates.
Tip: If you are spending Robux, always use Open 5. Five rolls for 379 Robux beats buying single crates, and every crate counts the same toward pity.
What to prioritize as a new player
Order of operations is simple. Buy the second and third slots right away, then equip your best three artifacts, Commons and Uncommons included. From there, build toward the Credit farming set, since it funds every crate you open next. Once Credits stop being the bottleneck, specialize into damage to clear waves faster or survival to stop dying before a run pays out. Switching between saved sets costs nothing, so tailor the loadout to each session.