When working with Windows 11, understanding the file system you’re using is crucial for optimizing performance and ensuring compatibility. FAT32 and NTFS are two primary file systems that serve different purposes. While FAT32 has been a long-standing standard, it comes with limitations that might prompt you to consider converting to NTFS.
Why Convert to NTFS File System
FAT32 (File Allocation Table 32) and NTFS (New Technology File System) cater to different storage needs. FAT32 supports volumes up to 2TB with a maximum individual file size of 4GB. It lacks advanced features like file compression, encryption, and detailed security permissions. Additionally, it doesn’t support journaling, which can aid in crash recovery.
NTFS addresses many of these limitations. It supports much larger volumes and file sizes—up to 16 exabytes. With NTFS, you gain access to file compression, encryption, and advanced security settings. The journaling feature in NTFS keeps track of changes, making it more resilient to crashes or unexpected power losses. This makes NTFS more suitable for modern Windows environments, whereas FAT32 is often reserved for removable storage devices due to its simplicity.
Check the File System
Before proceeding with any conversion, it’s important to know which file system your drive is currently using.

Convert FAT32 to NTFS Without Losing Data in Windows 11
If you’ve decided to upgrade from FAT32 to NTFS without losing your existing data, there are reliable methods to accomplish this. Before starting, ensure there’s adequate free space on your drive to accommodate the conversion process.
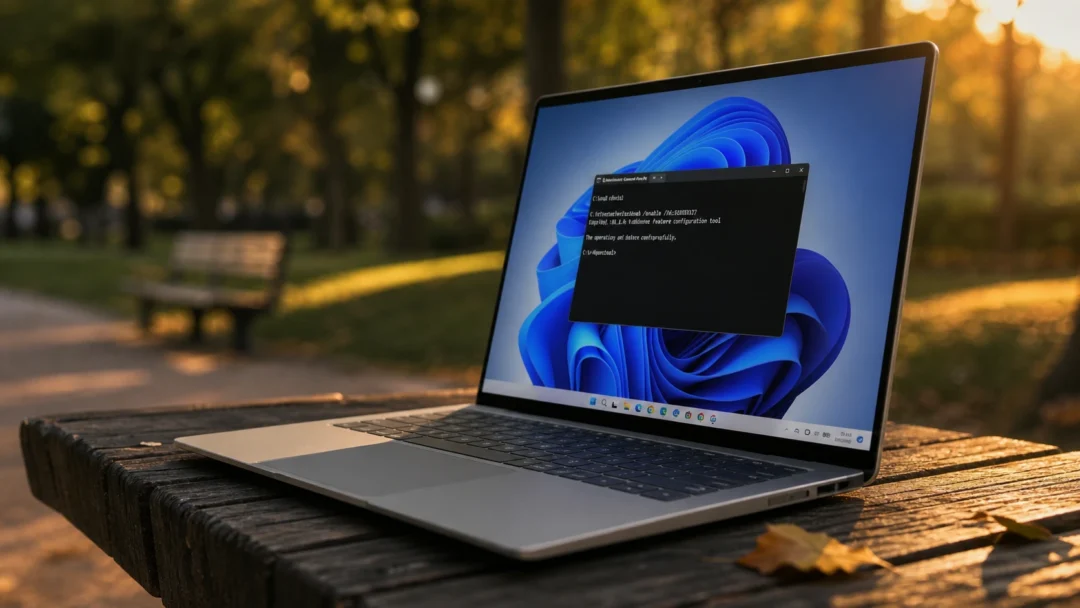
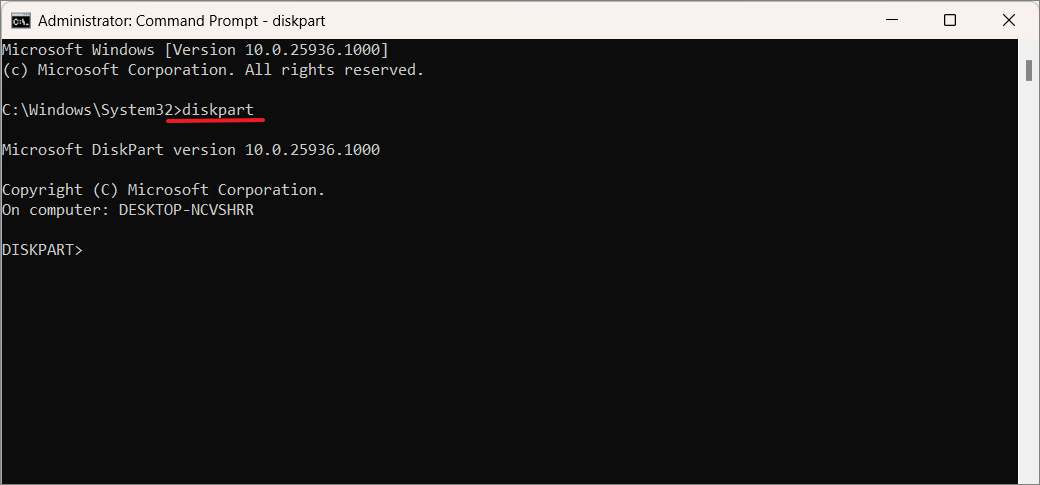
Convert FAT32 to NTFS Using Command Prompt
The Command Prompt provides a straightforward way to convert your file system without third-party software.
Start button, type cmd, and select ‘Run as administrator’ from the options.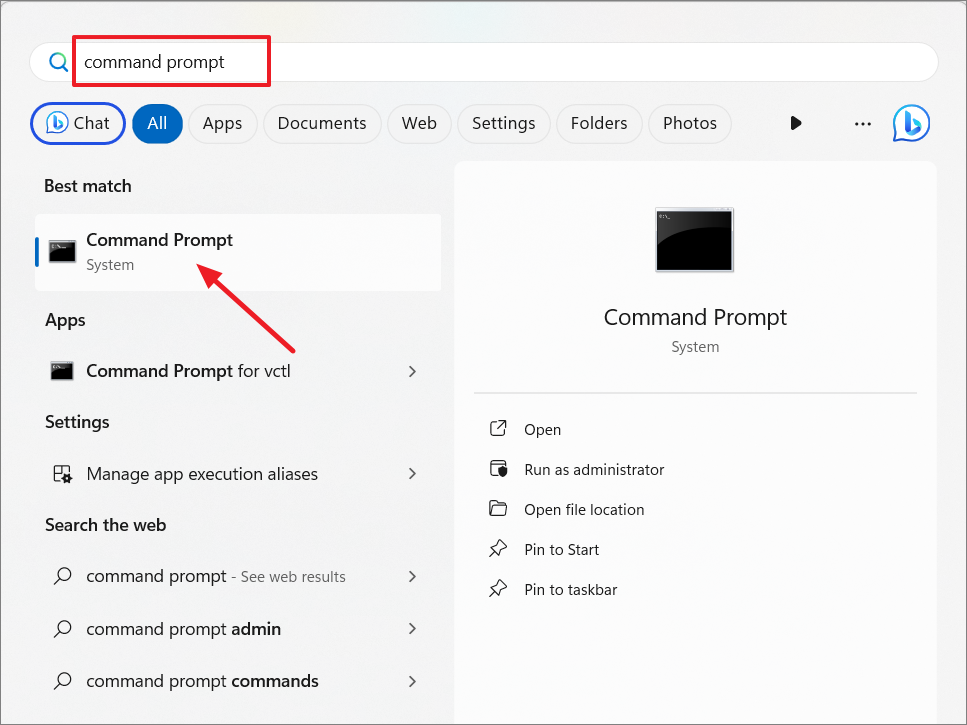
convert DriveLetter: /fs:ntfsReplace DriveLetter with the actual letter of the drive you want to convert.
For example:
convert L: /fs:ntfs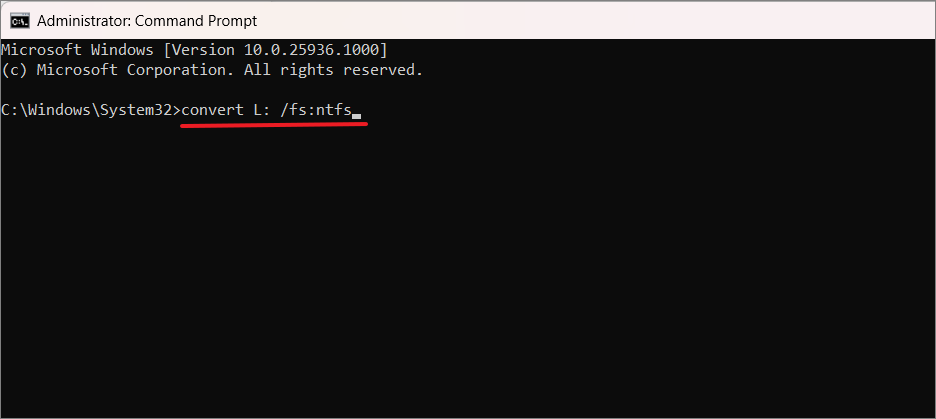
Y and press Enter to proceed.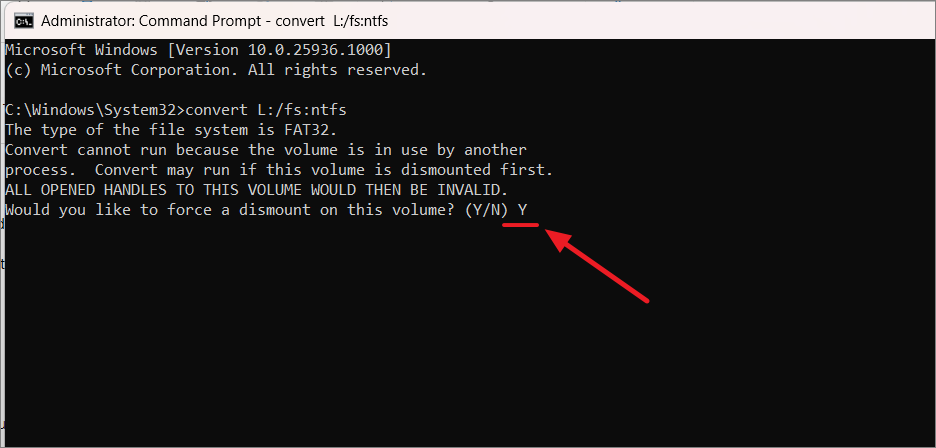
The conversion process will begin. Duration may vary based on drive size and system performance. Upon completion, you’ll see a ‘Conversion complete’ message.
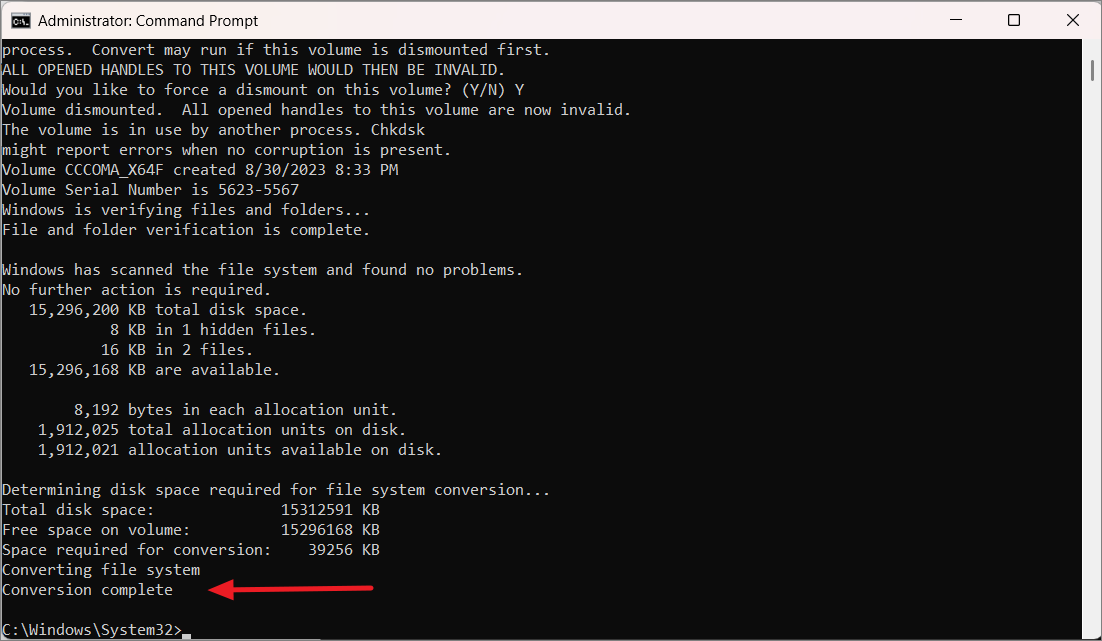
If required, restart your computer to finalize the conversion.
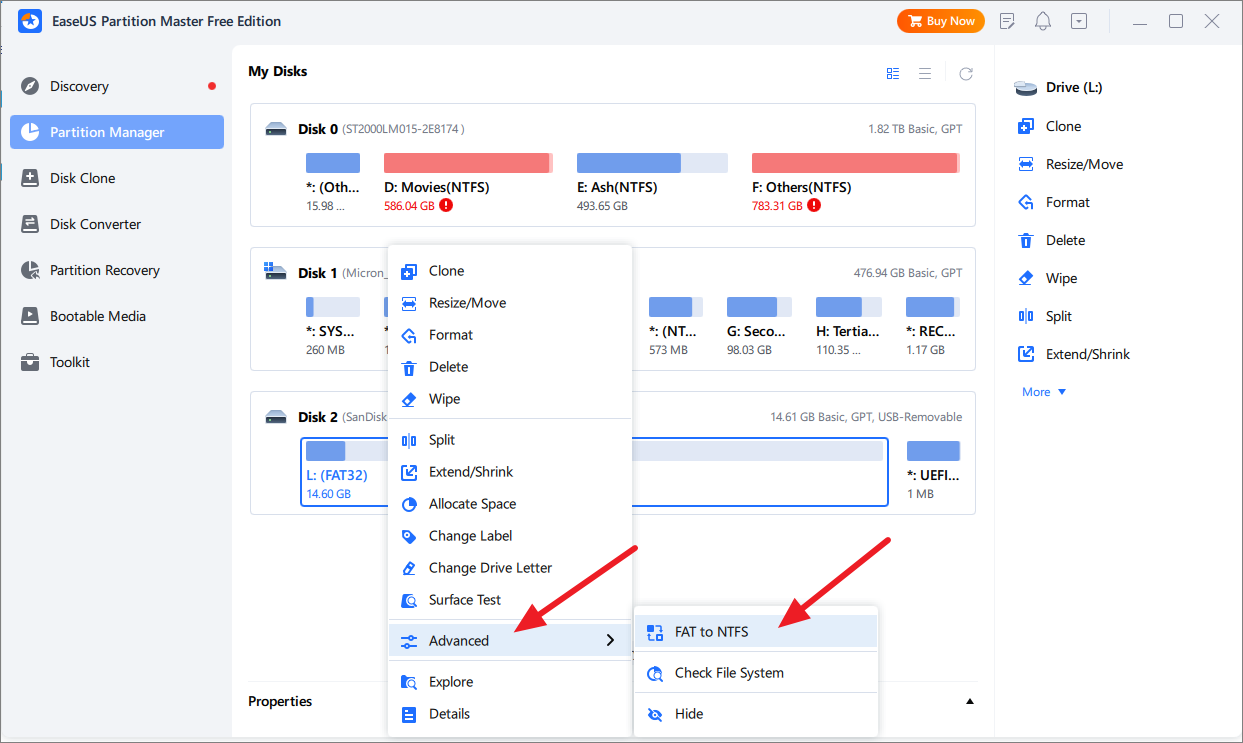
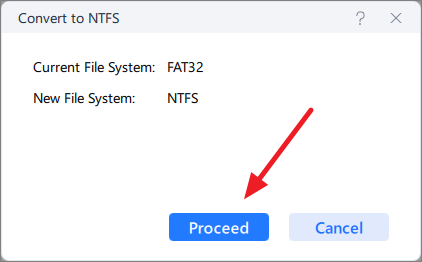
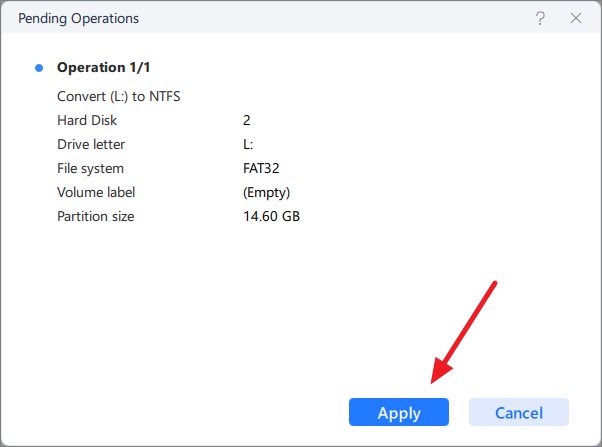
Use Third-Party Utilities to Convert FAT32 to NTFS
For those who prefer graphical interfaces or additional features, third-party utilities like EaseUS Partition Master offer user-friendly solutions.
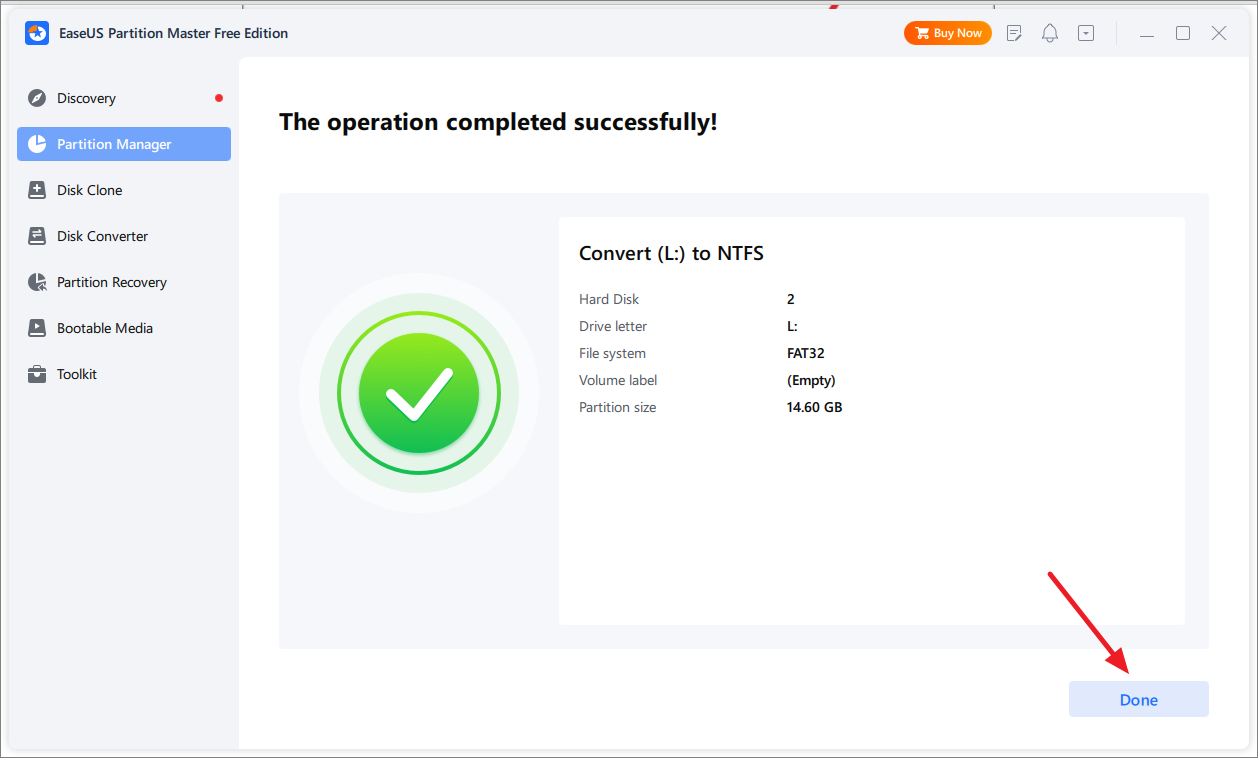
A system restart may be necessary to apply all changes effectively.
Convert FAT32 to NTFS with Data Loss on Windows 11
In some cases, formatting your drive to convert from FAT32 to NTFS might be preferable, especially if you want a clean slate. This method will erase all data on the drive, so ensure you’ve backed up any important files beforehand.
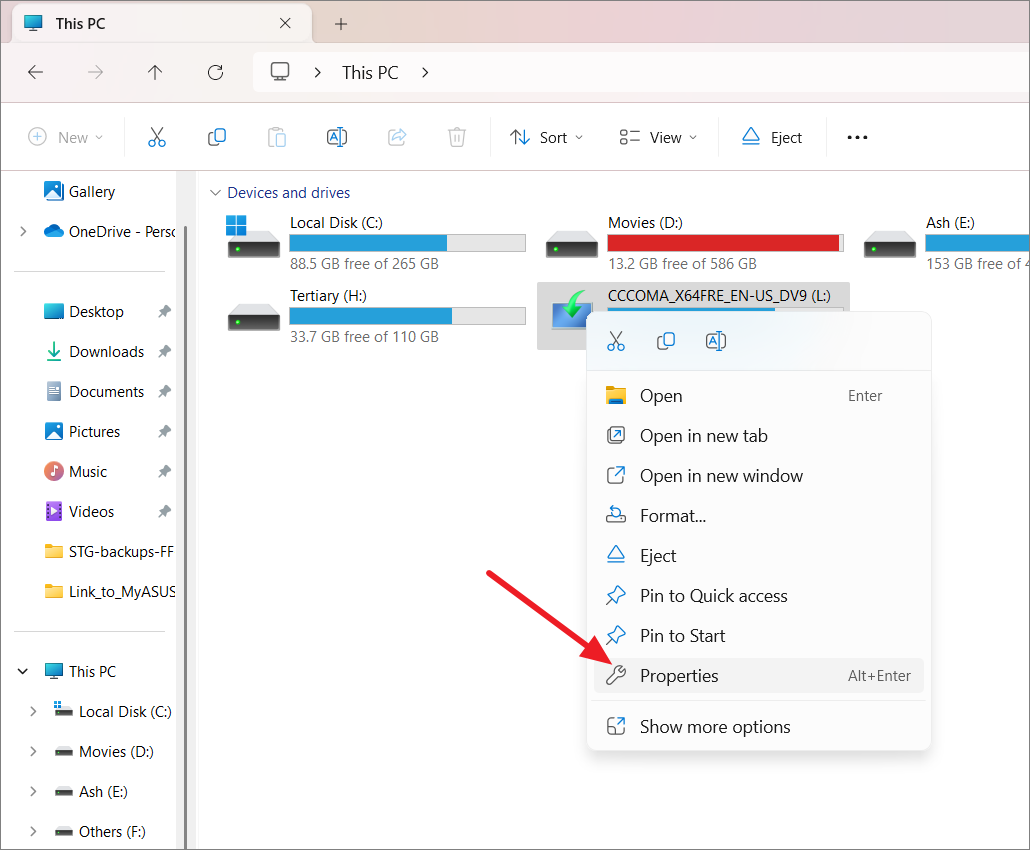
Convert FAT32 to NTFS Using Windows File Explorer
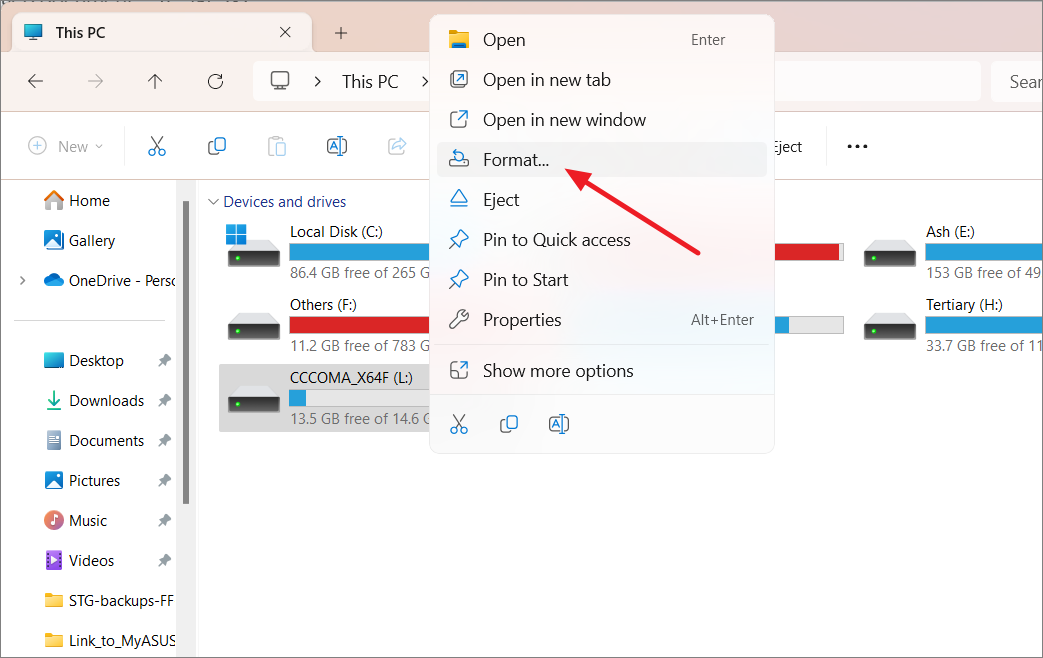
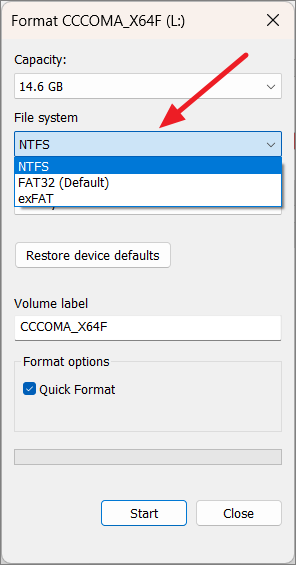
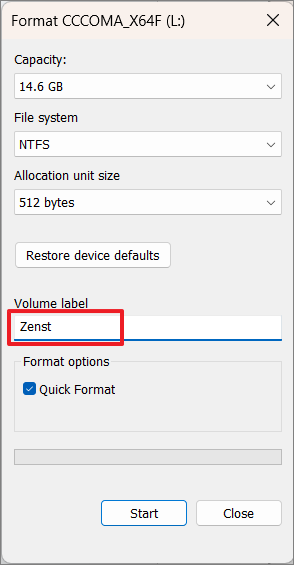
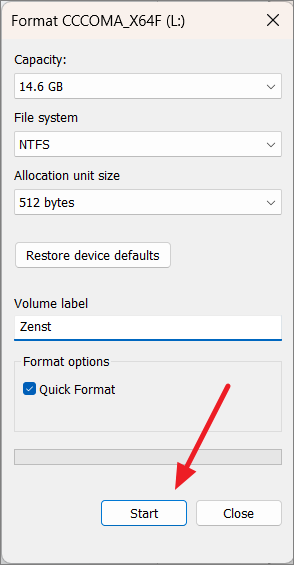

Once the format is complete, your drive will now use the NTFS file system and be ready for use.
Convert FAT32 to NTFS Using Disk Management
The Disk Management tool offers another method to format your drive to NTFS.
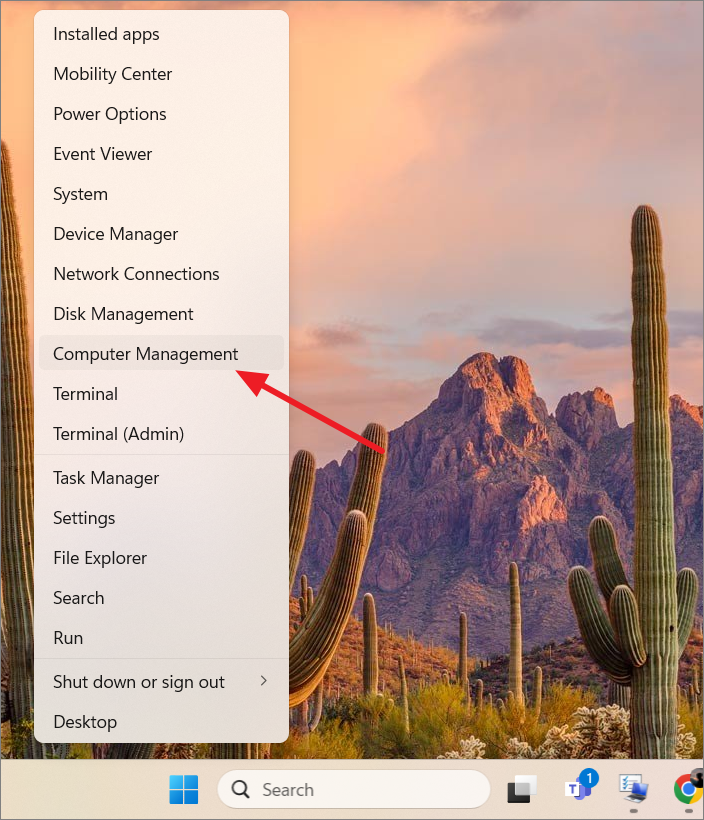
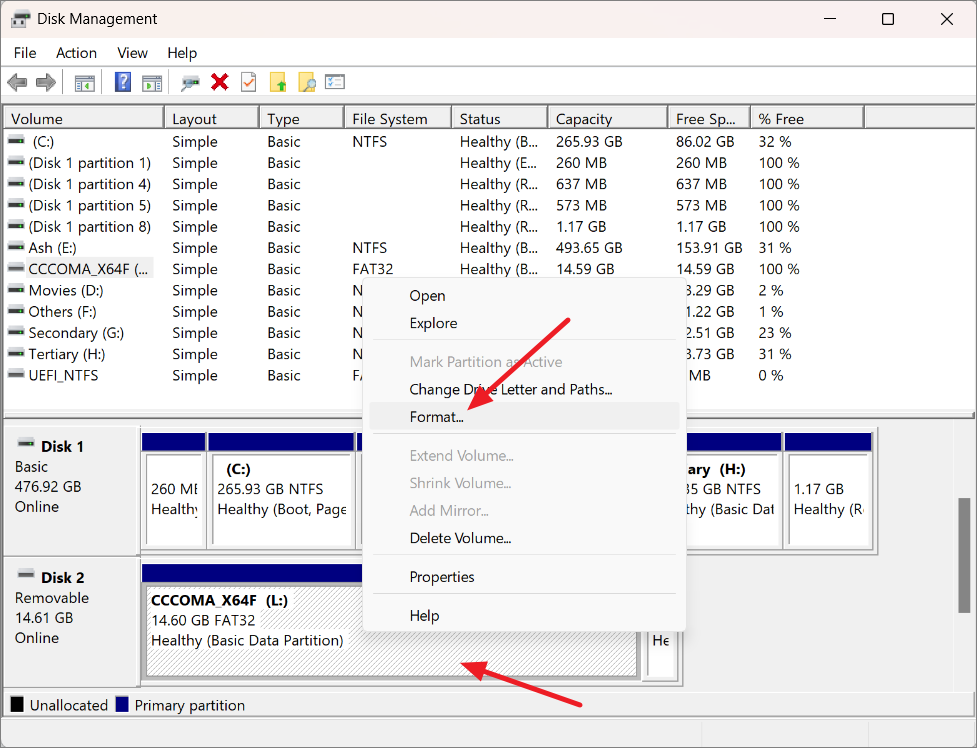
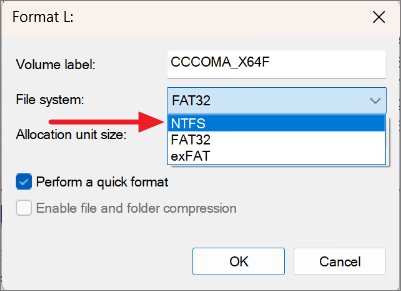
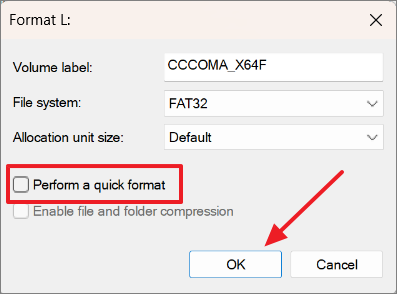
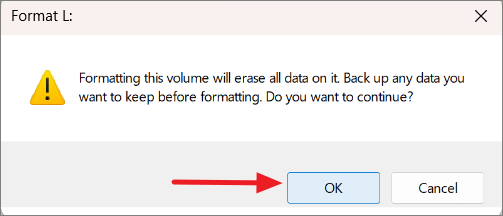
Once formatting is complete, your drive will be set up with the NTFS file system.
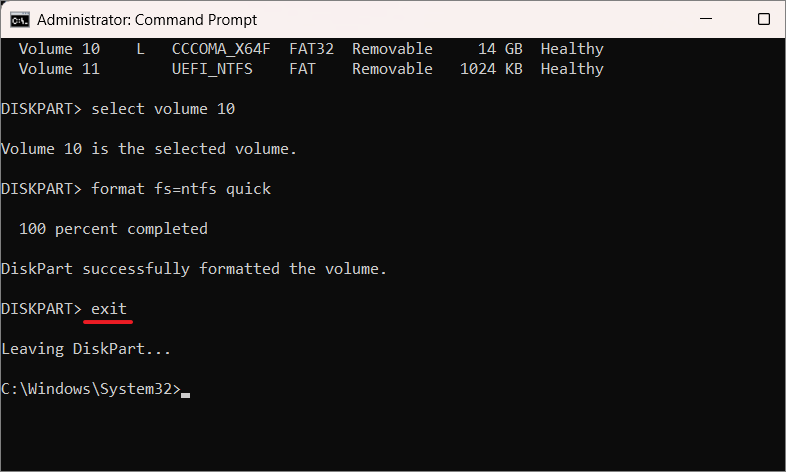
Convert FAT32 to NTFS with Data Loss Using the Command Prompt
Formatting via Command Prompt is another method to convert your drive, which also results in data loss.
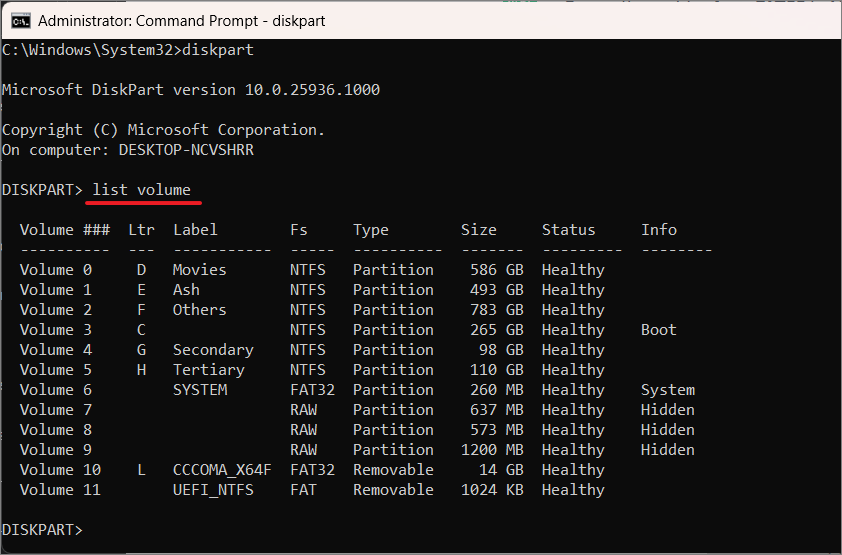
select volume #, replacing # with the appropriate volume number.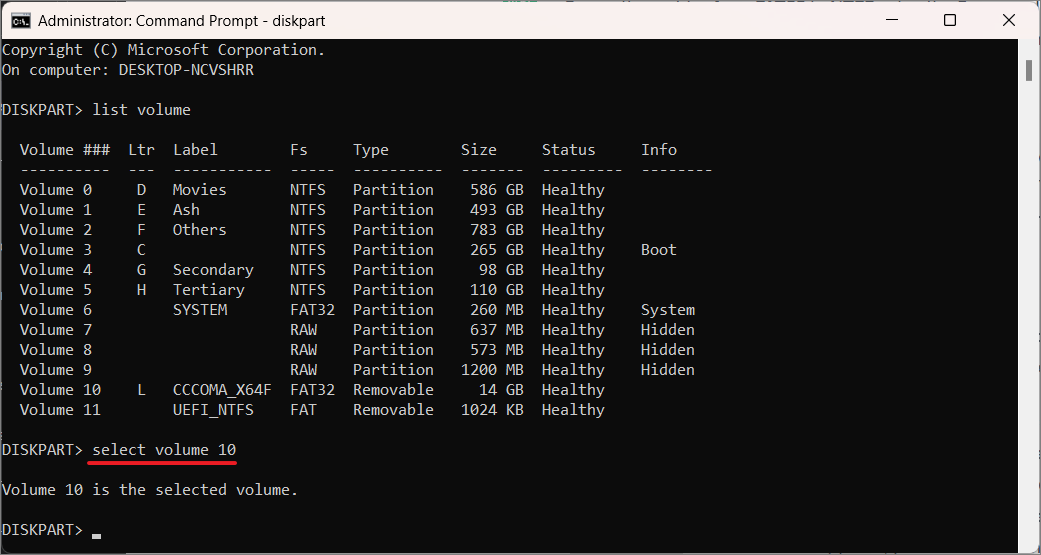
format fs=ntfs quick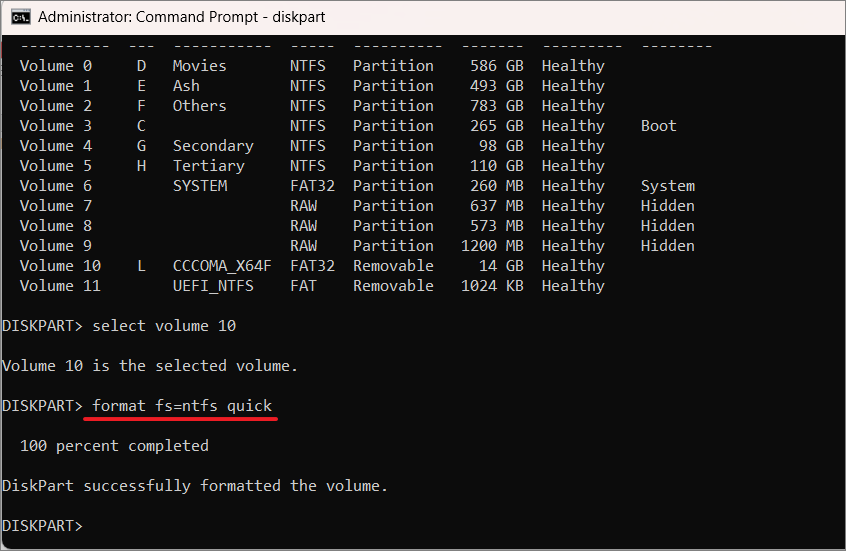
By following these methods, you can effectively convert your FAT32 drives to NTFS in Windows 11, choosing between preserving your data or starting fresh, depending on your needs.