Bing Search is deeply integrated into the Windows 11 Search menu, often displaying web results alongside local files and applications. For users who prefer a streamlined search experience without web integration, disabling Bing Search can declutter the Search menu. Although Windows 11 doesn’t provide a straightforward setting to turn off Bing Search, it can be achieved by modifying the Registry Editor. Here’s a step-by-step guide to help you disable Bing Search in Windows 11.
Disable Bing Search using the Registry Editor
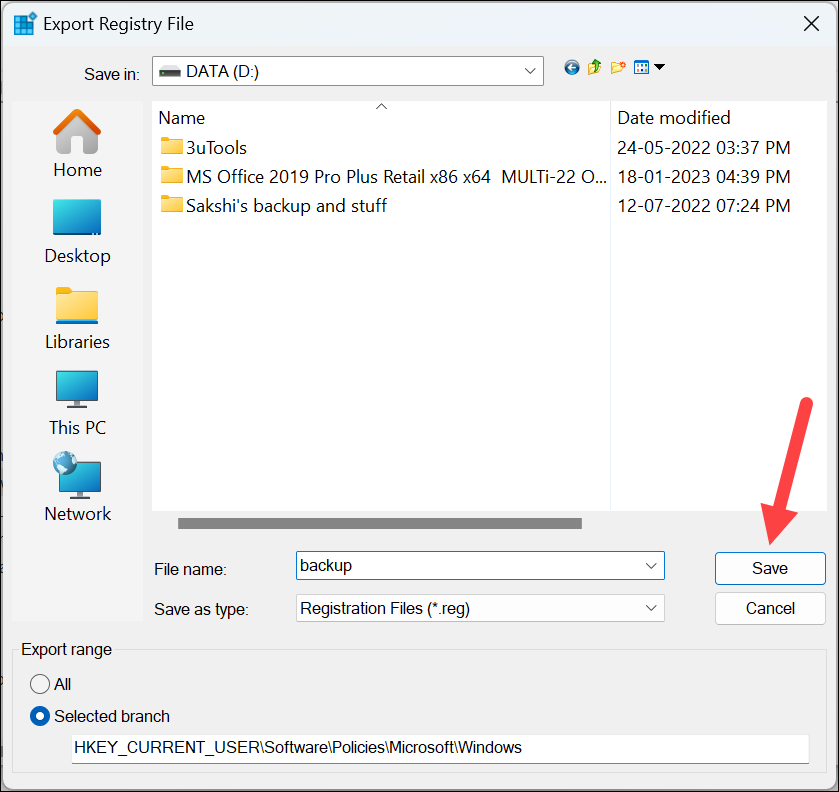
Before proceeding, it’s important to note that editing the Registry requires caution. Incorrect changes can lead to system instability. It is advisable to follow these instructions carefully and consider backing up the Registry before making any modifications.
Registry Editor in the search bar. Click on the first result to launch the Registry Editor. If a User Account Control (UAC) prompt appears, click Yes to continue.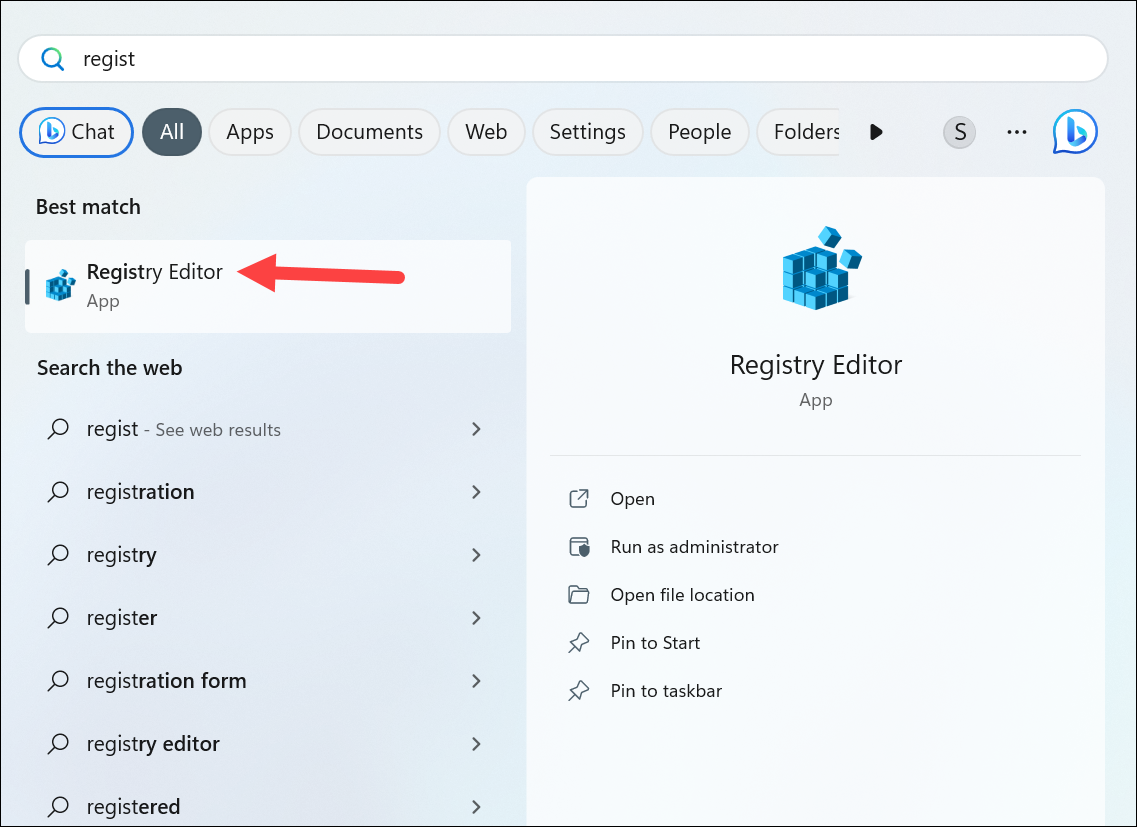

HKEY_CURRENT_USER\SOFTWARE\Policies\Microsoft\Windows\Explorer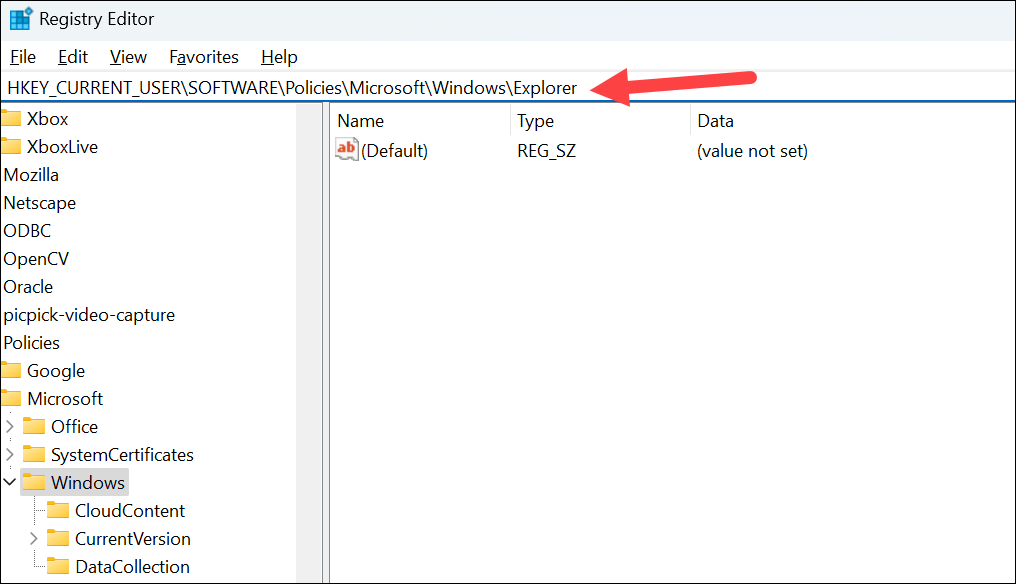
If the Explorer key does not exist, you will need to create it.
Windows key in the left pane. Right-click on Windows, hover over New, and select Key from the submenu.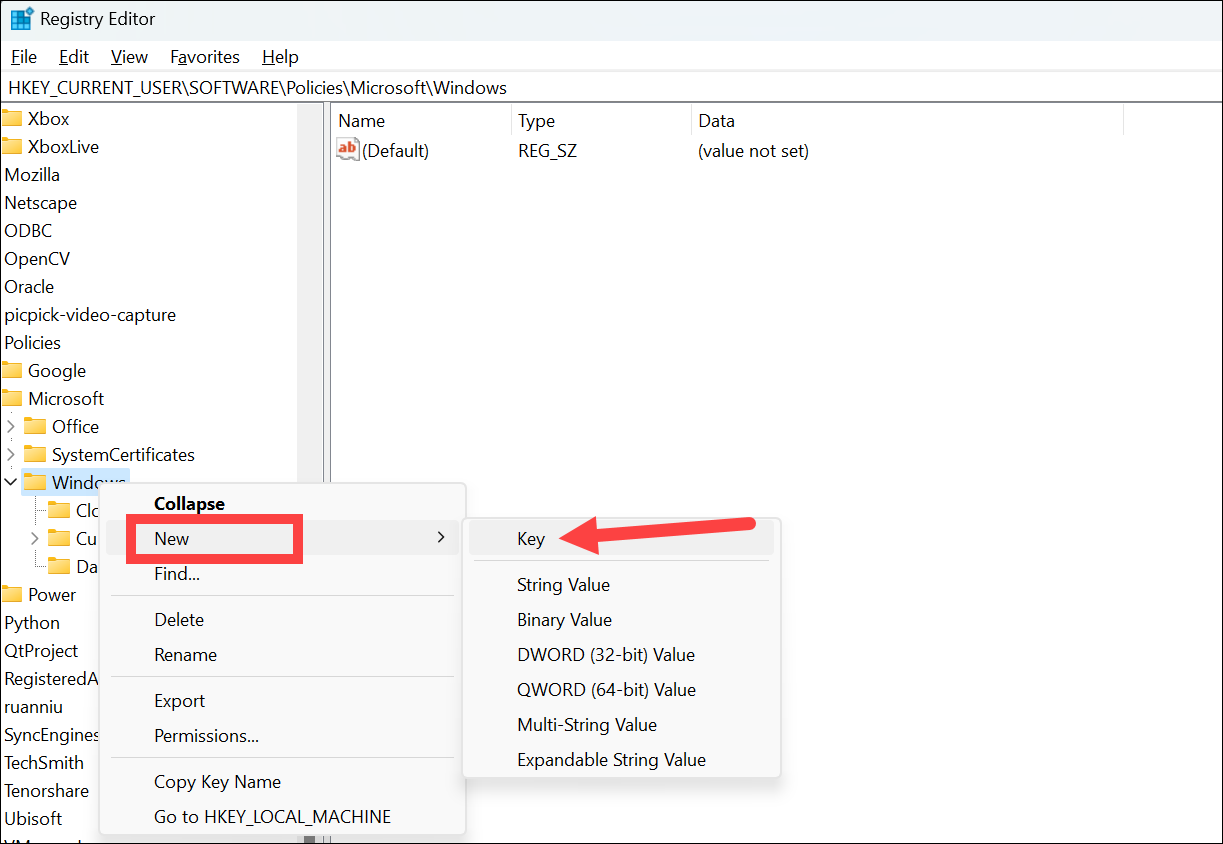


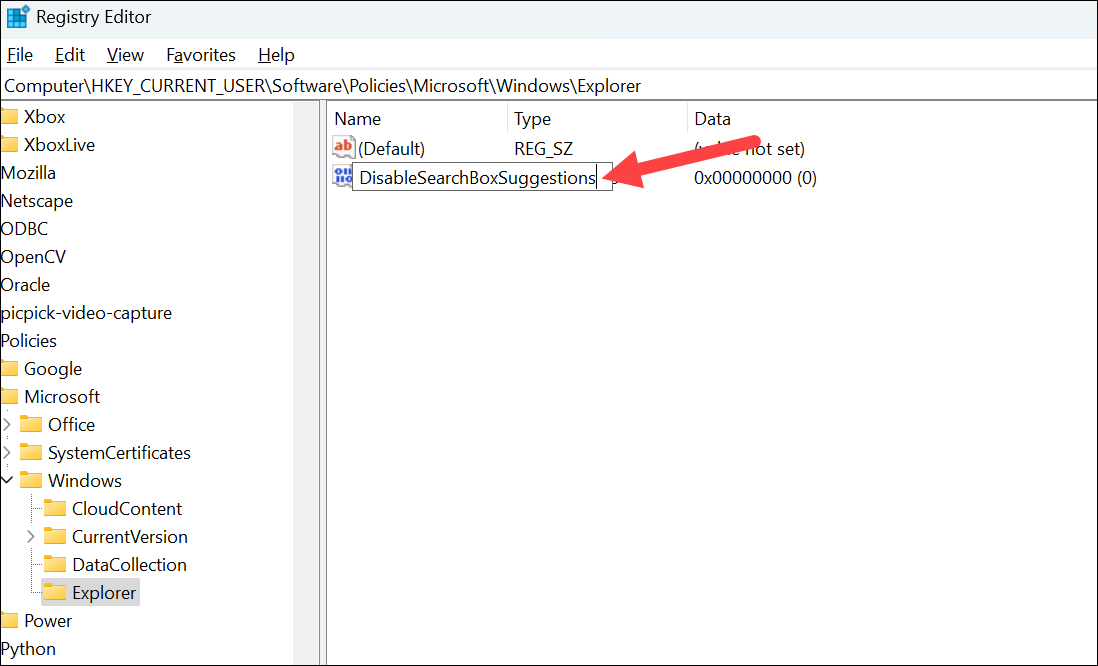
DisableSearchBoxSuggestions to open the value editor. In the Value data field, enter 1 and click OK.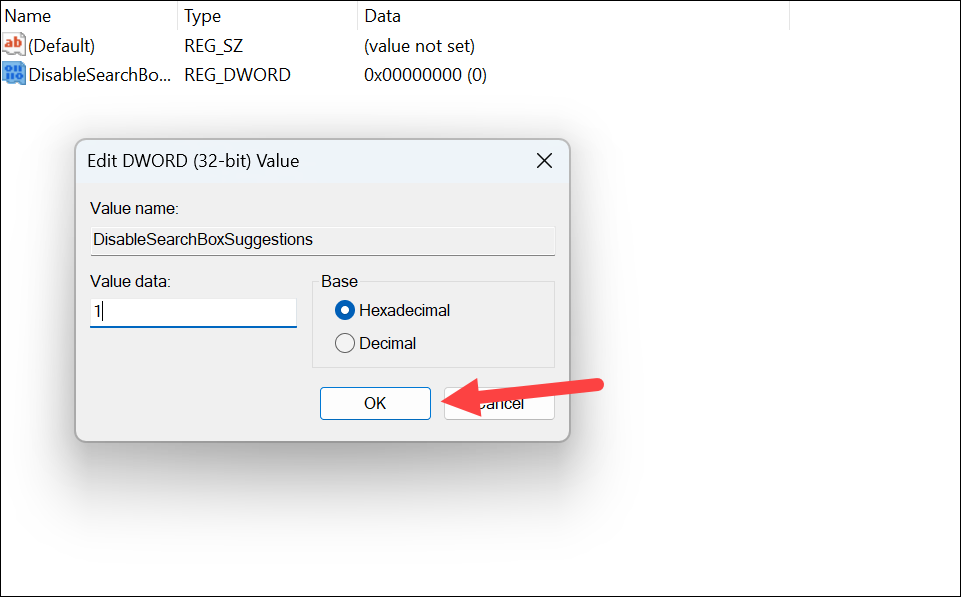
Once your system restarts, Bing Search will be disabled in the Windows 11 Search menu. You will now see search results only from your local files and applications, providing a cleaner and more focused search experience.
If you wish to re-enable Bing Search in the future, repeat the steps above and change the DisableSearchBoxSuggestions value data back to 0 or delete the DWORD entirely.